Ticket Procedural Checklists
Ticket checklists are a great way to track progress in completing ads and editorials. Both ticket types have 5 categories but each category is different depending on the type of ticket.
The link to open the checklist is found on the ticket just below the Change Status / Add Notes drop down menu, labeled Procedural Checklist.

Ad Ticket Checklist
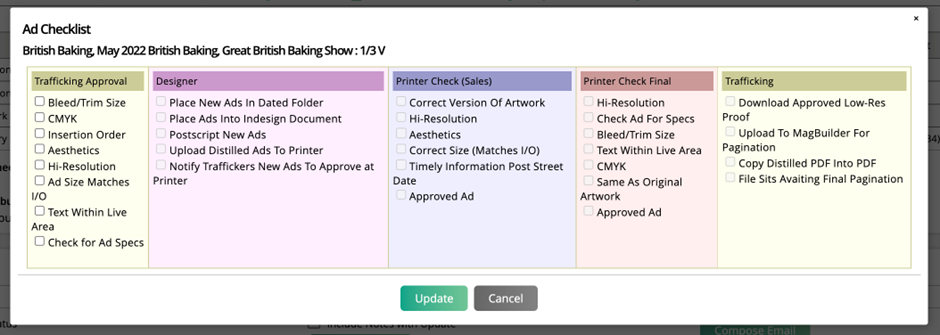
The categories for the ad ticket checklist include Trafficking Approval, Designer, Printer Check (Sales), Printer Check Final, and Trafficking. Each category has it’s own mini checklist to go through. The Procedural Checklist link opens up the Ad Checklist window and displays those five categories and their checklists.
The items within a category can be checked out of order. However, all of the items in one category of the list will need to be completed before you can move on to the next section.
Editorial Ticket Checklist
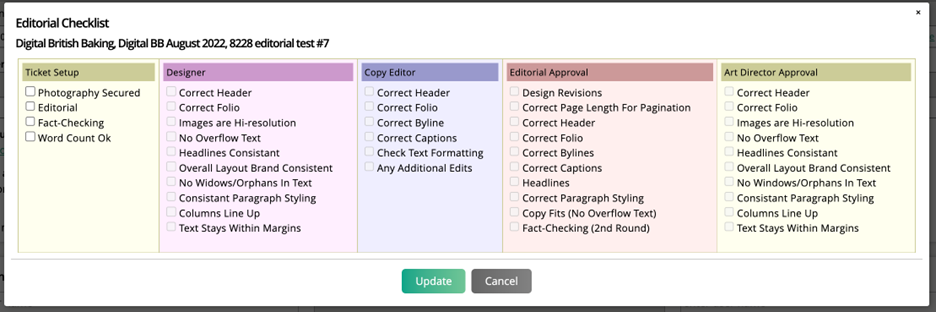
The categories for the editorial ticket checklist include Ticket Setup, Designer, Copy Editor, Editorial Approval, and Art Director Approval. Similar to the ad checklist these categories have their own mini checklist to go through. The Procedural Checklist link opens up the Editorial Checklist window and displays those five categories and their checklists.
The items within a category can be checked out of order. However, all of the items in one category of the list will need to be completed before you can move on to the next section.
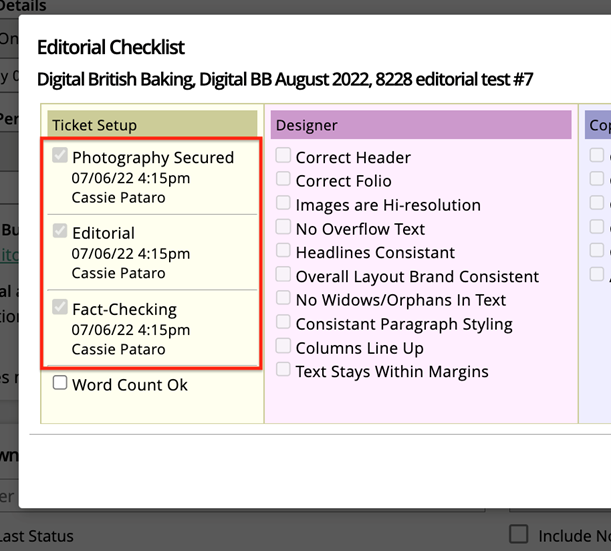
Once a task on the checklist is completed and checked off, it will keep track of who completed it and the time and date of completion.
Added 7/8/2022
Restricting Ticket Statuses Based on the Procedural Checklist
When editing Status Definition Permissions for ad and editorial tickets, you can implement a checklist restriction for the status. The basic concept is that this feature would only allow a user to change a ticket’s status once certain things have been done. For example, not allowing users to mark a ticket as Ad Approved until it has gone through the Printer Check (Sales) procedural checklist.
To set this up, navigate to Settings > Tickets > Status Definitions and choose either Ad Tickets or Editorial Tickets. The checklist settings can be found when editing a ticket status’s permissions. Click the permission icon for a status to view its checklist.
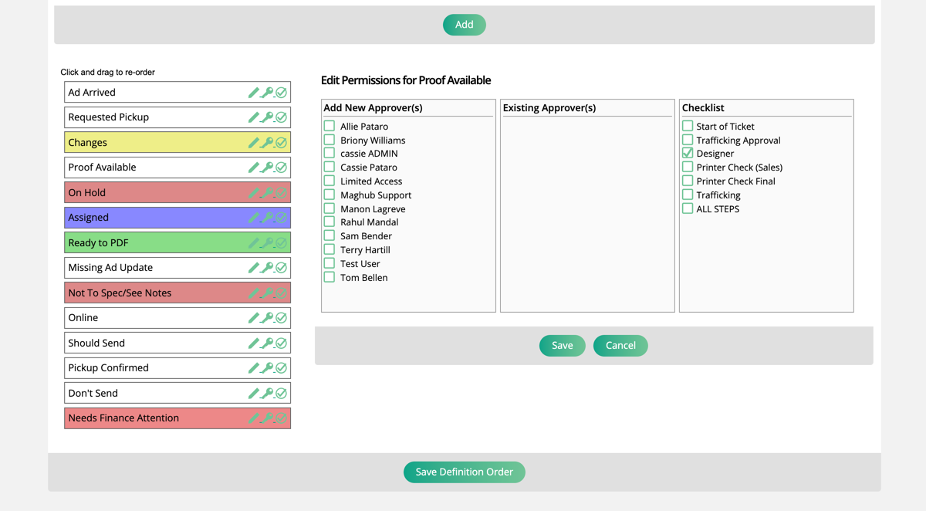
There are a few options to choose from, including each section of the Procedural Checklist – this list will be different depending on whether you are viewing Ad or Editorial ticket statuses – as well as ‘Start of Ticket’ and ‘All Steps’.
When you select one of the checklist options, such as ‘Designer’ for Ad Tickets, then that status will not be available in the ticket’s Change Status dropdown until the Designer section of the Procedural Checklist has been completed.
The status will only show up after the Designer section has been completed, and not after the next section of the checklist has been completed, which gives users a limited window of time to change the ticket to that status.
Note
The checklist restriction goes into effect once at least one item on the ticket’s procedural checklist is marked as completed. If there are no items on the procedural checklist checked off, then you will be able to see and select all statuses.
Start of Ticket means the status is only available before the first section of the Procedural Checklist has been completed.
All Steps means the status can be used at any time until the ticket is marked complete.
New 4/28/2023