AdCellerant Setup
You must have an active AdCellerant account and both the Digital Media and AdCellerant Modules enabled within Ad Orbit to connect the systems. You will have to reach out to your CSM to get the necessary email and password to complete the process; you will also need your AdCellerant Hierarchy ID.
Once you have the modules enabled, go to Settings > Integrations > AdCellerant > Setup. Enter in the provided email address and code from your CSM and your hierarchy ID.
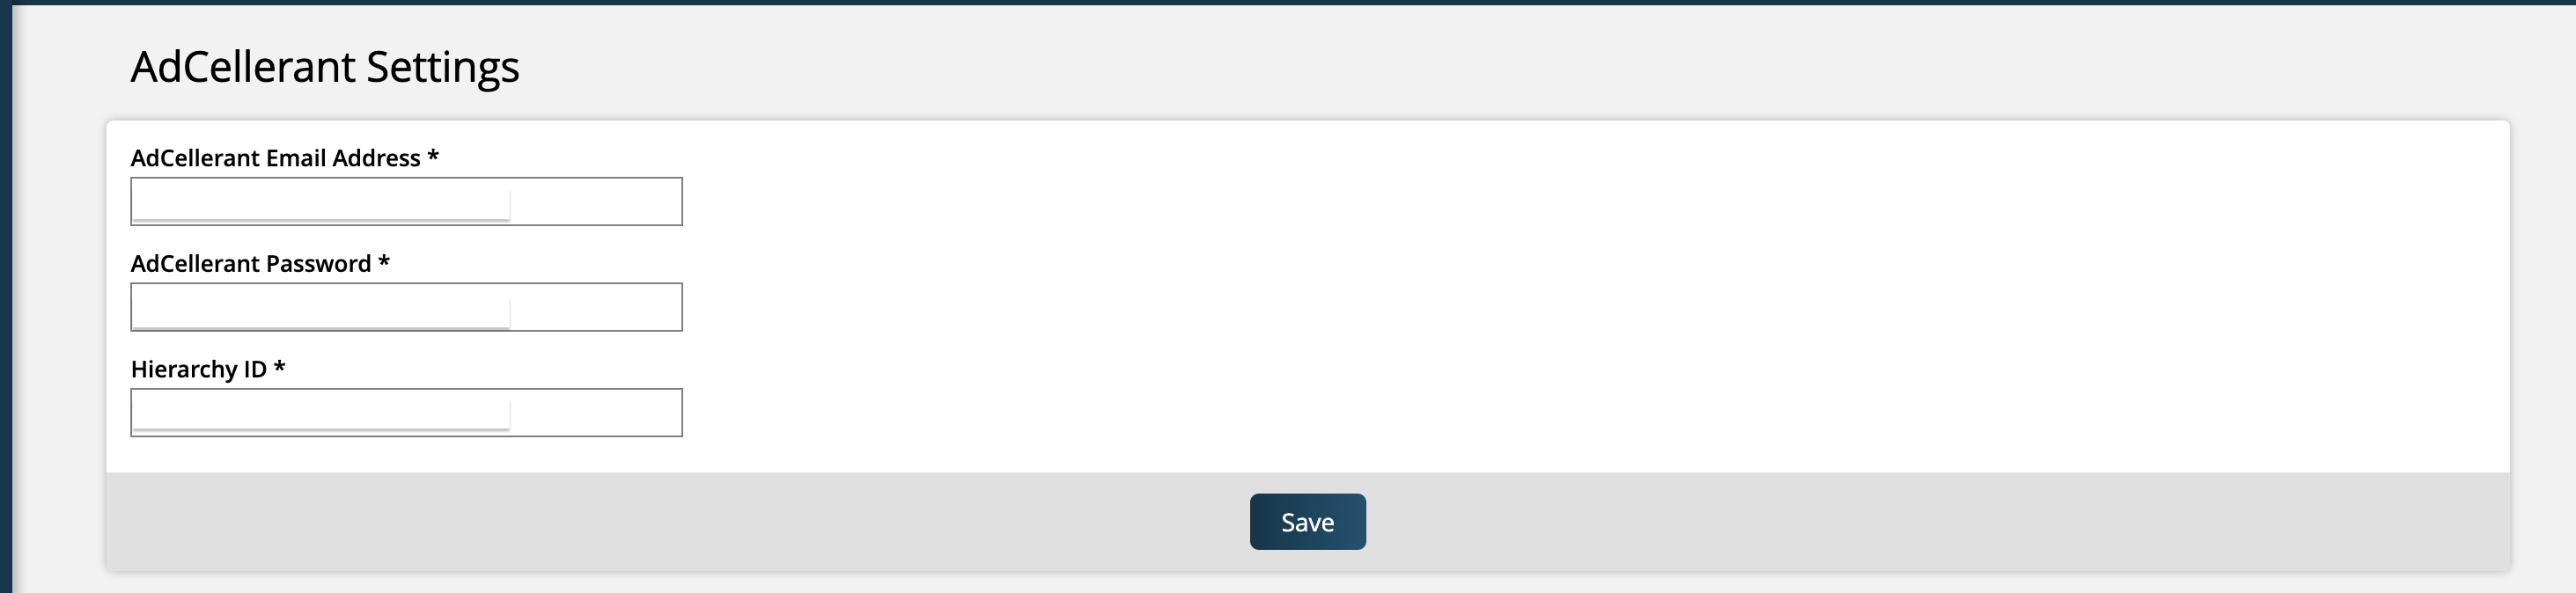
Once this information is entered, click save to finish connecting the systems.
Next steps:
Make sure you have at least one Digital Media product to start mapping AdCellerant items to your Ad Orbit proposals and orders.
Determine how you want to map your Ad Orbit products to your AdCellerant products. Continue reading through this document to learn about the two mapping options.
Digital Media Product Setup
Prior to pulling AdCellerant items into Ad Orbit, you'll need to make sure you have your digital media products set up. Ad Orbit's Targeted Display and Impression digital media product types are used for connecting Ad Orbit products to AdCellerant products.
Ad Orbit Impression products map to AdCellerant's Display, Video, and Geofencing products.
Ad Orbit Targeted Display products map to the other AdCellerant products, including SEM, SEO, Social Media, Email, Streaming Audio, Custom, and Specialized.
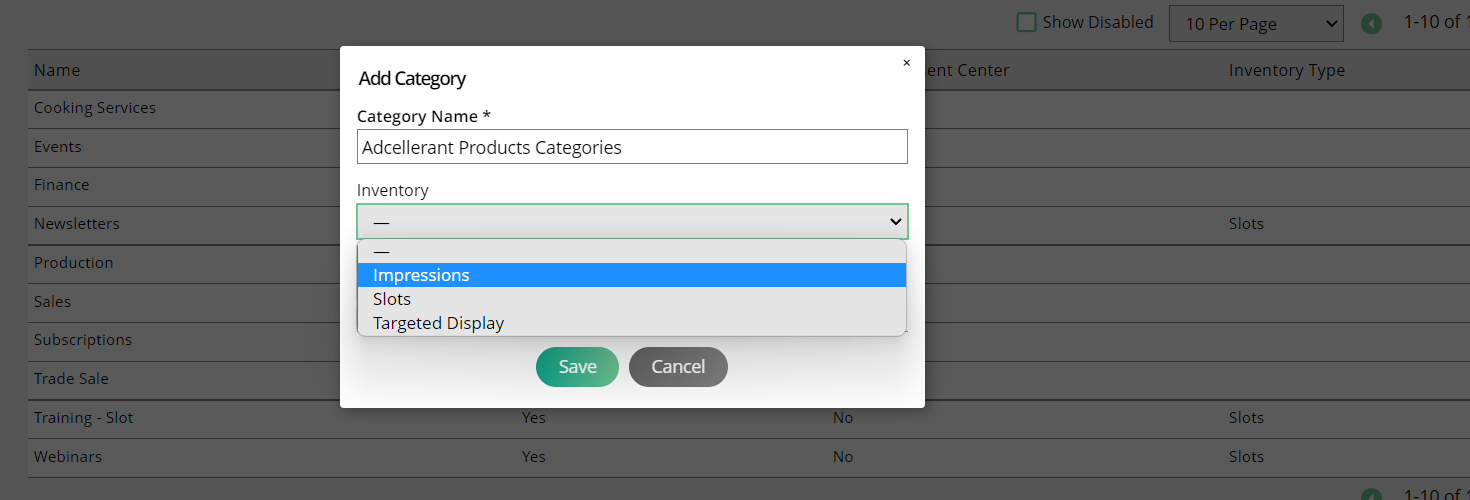
Start by creating at least one product category under Settings > Products > Product Categories. AdCellerant products map to either Targeted Display or Impression products. We recommend creating one of each category to start the process. You can also add more later if needed.
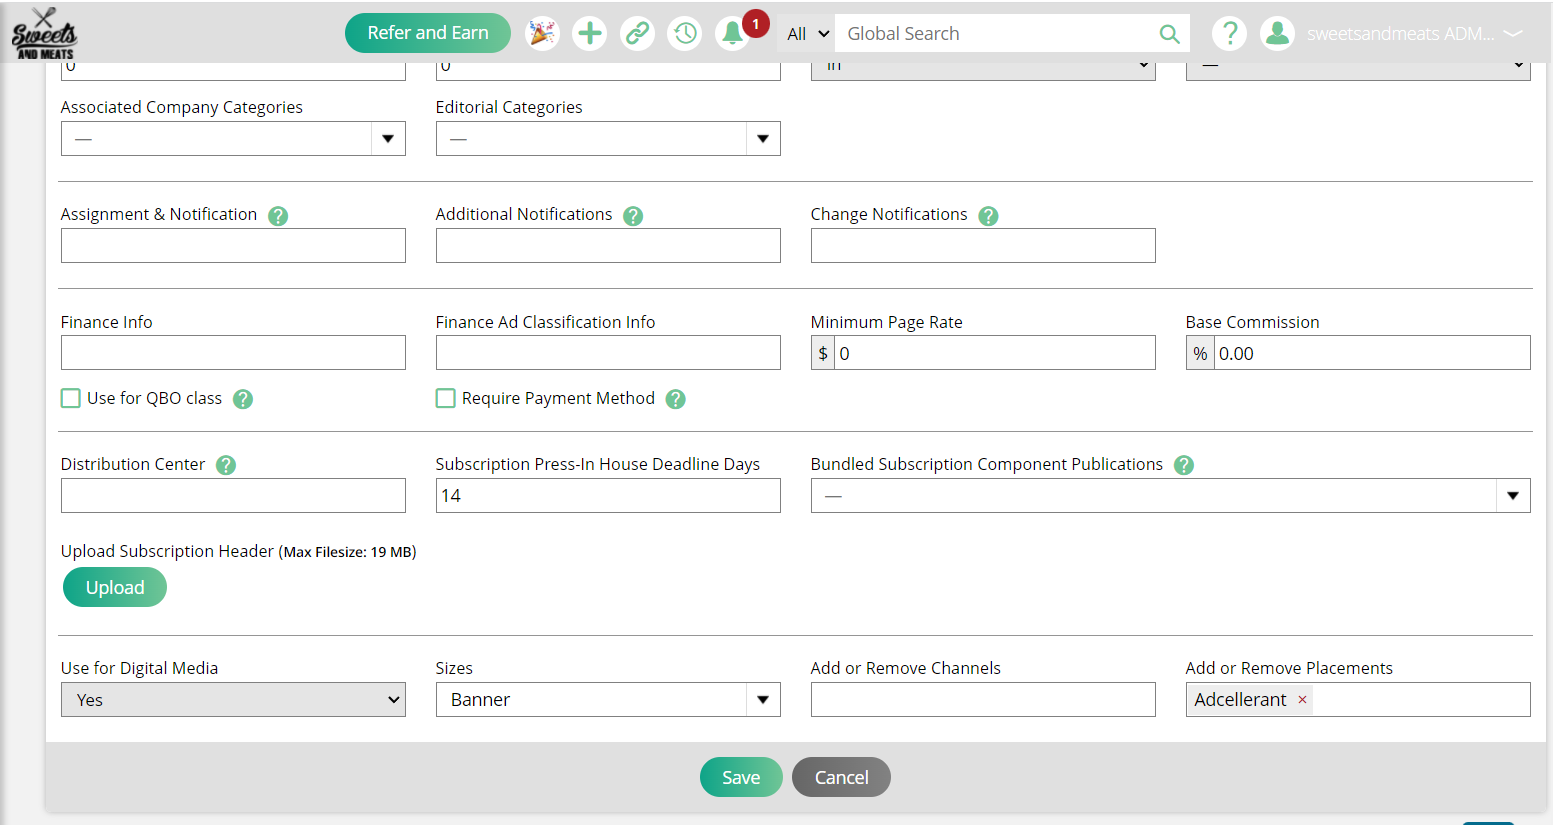
All Targeted Display and Impression products require at least one placement and ad size. Placements are useful to convey to the customer what they are receiving and for filtering in reports; the ad size(s) are needed to get the correct creative from the advertisers. You can set up both under Settings > Products > Rate Cards & Ad Sizes.
You must have a digital media publication in place. Start by creating a new publication and setting it to the type of digital media. Now you can associate the sizes and placements to the publication.
The last part is creating your products. We recommend starting with a few products and expanding out as needed. You will need to map a line item from AdCellerant to a product in the system. The product setup will determine what the customer sees on the template and invoice, how you find products in sales and production reports, and where exactly the revenue goes.
Important
You MUST set the product to user defined pricing. Otherwise, you won't see the product when mapping with AdCellerant.
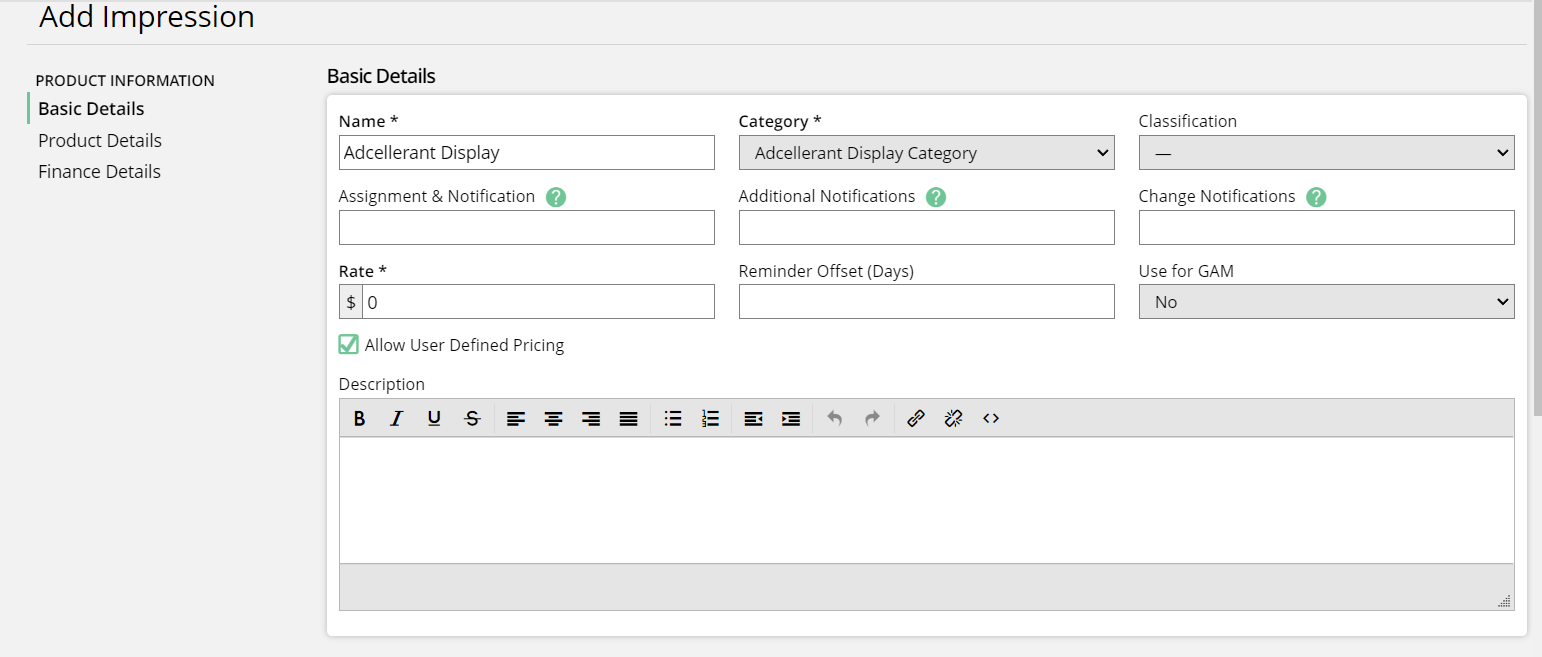
When creating your products for AdCellerant, make sure to think about how you want users to find these line items for order entry and reporting. You may want to create two categories for AdCellerant products so they don't get mixed up with your own brands, e.g., AdCellerant Display and AdCellerant Other.
If you want even more granular reporting and goals, you could also set up an AdCellerant category for each type of these products and create more products in your site, e.g., Geofencing, SEM, Social, etc.
Determine your Product Mapping
There are two options on how to map your AdCellerant products to Ad Orbit products. There is an AdCellerant Product Mapper that can be used to map products on a global level. Products mapped this way will always be brought in from AdCellerant into the system as the mapped product. If you don’t wish to set a global mapping, you can also map items on an ad-hoc basis when creating orders. The first method – using the global mapper – allows the system administrators to have more control over how products are brought into the system. The second option – ad-hoc basis mapping – allows each rep on each order to select how the products will be mapped. Below, we will go through both.
The global AdCellerant product mapper allows a user (typically a system administrator), to set AdCellerant mappings on the product level.
To map your products to your AdCellerant products using the global mapper, go to Settings > Intergrations > AdCellerant > Product Mapping.
You must have the User Permission ‘AdCellerant Product Mapping’ to access this page.
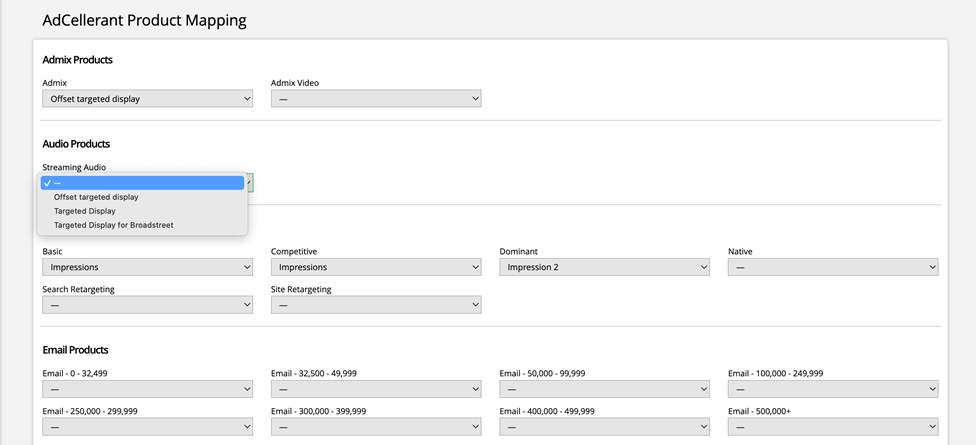
On the AdCellerant Product Mapping page, you will see a single-select dropdown for each AdCellerant product. The AdCellerant products are separated into groups to make finding the products you need easier.
For each AdCellerant product that you wish to be able to sync with the system, use the dropdowns to choose from your Targeted Display or Impression products. Either Targeted Display products or Impression products will show up in the dropdown, depending on what type of AdCellerant product it is.
Once you are finished mapping, click Save at the bottom of the page.
Important
If even one AdCellerant item is mapped from this page, the mapping on an ad-hoc basis can no longer be used. Additionally, only mapped items can be imported from AdCellerant on your orders and proposals. Any AdCellerant products that are not mapped cannot be brought into the system.
When using the global AdCellerant Product Mapper, you can also view and edit the mappings from a specific Targeted Display or Impression product.
To do this, navigate to either Settings > Products > Targeted Display Products or Settings > Products > Impression Products depending on which type of item you wish to edit.
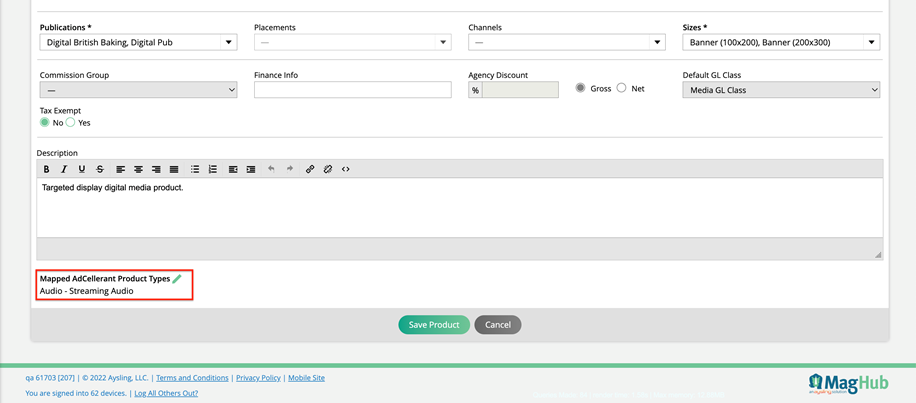
Edit a product. On the edit page, you will see the field ‘Mapped AdCellerant Product Types’, and underneath it will list any and all AdCellerant products that your Targeted Display or Impression product is mapped to through the global mapper.
If you have the permission to use the mapper, you will also see an edit icon here, which will redirect you to the AdCellerant Product Mapping page, where you can change the mappings for the product if you wish.
Updated 8/22/2025