Saving, Sharing, and Scheduling Reports
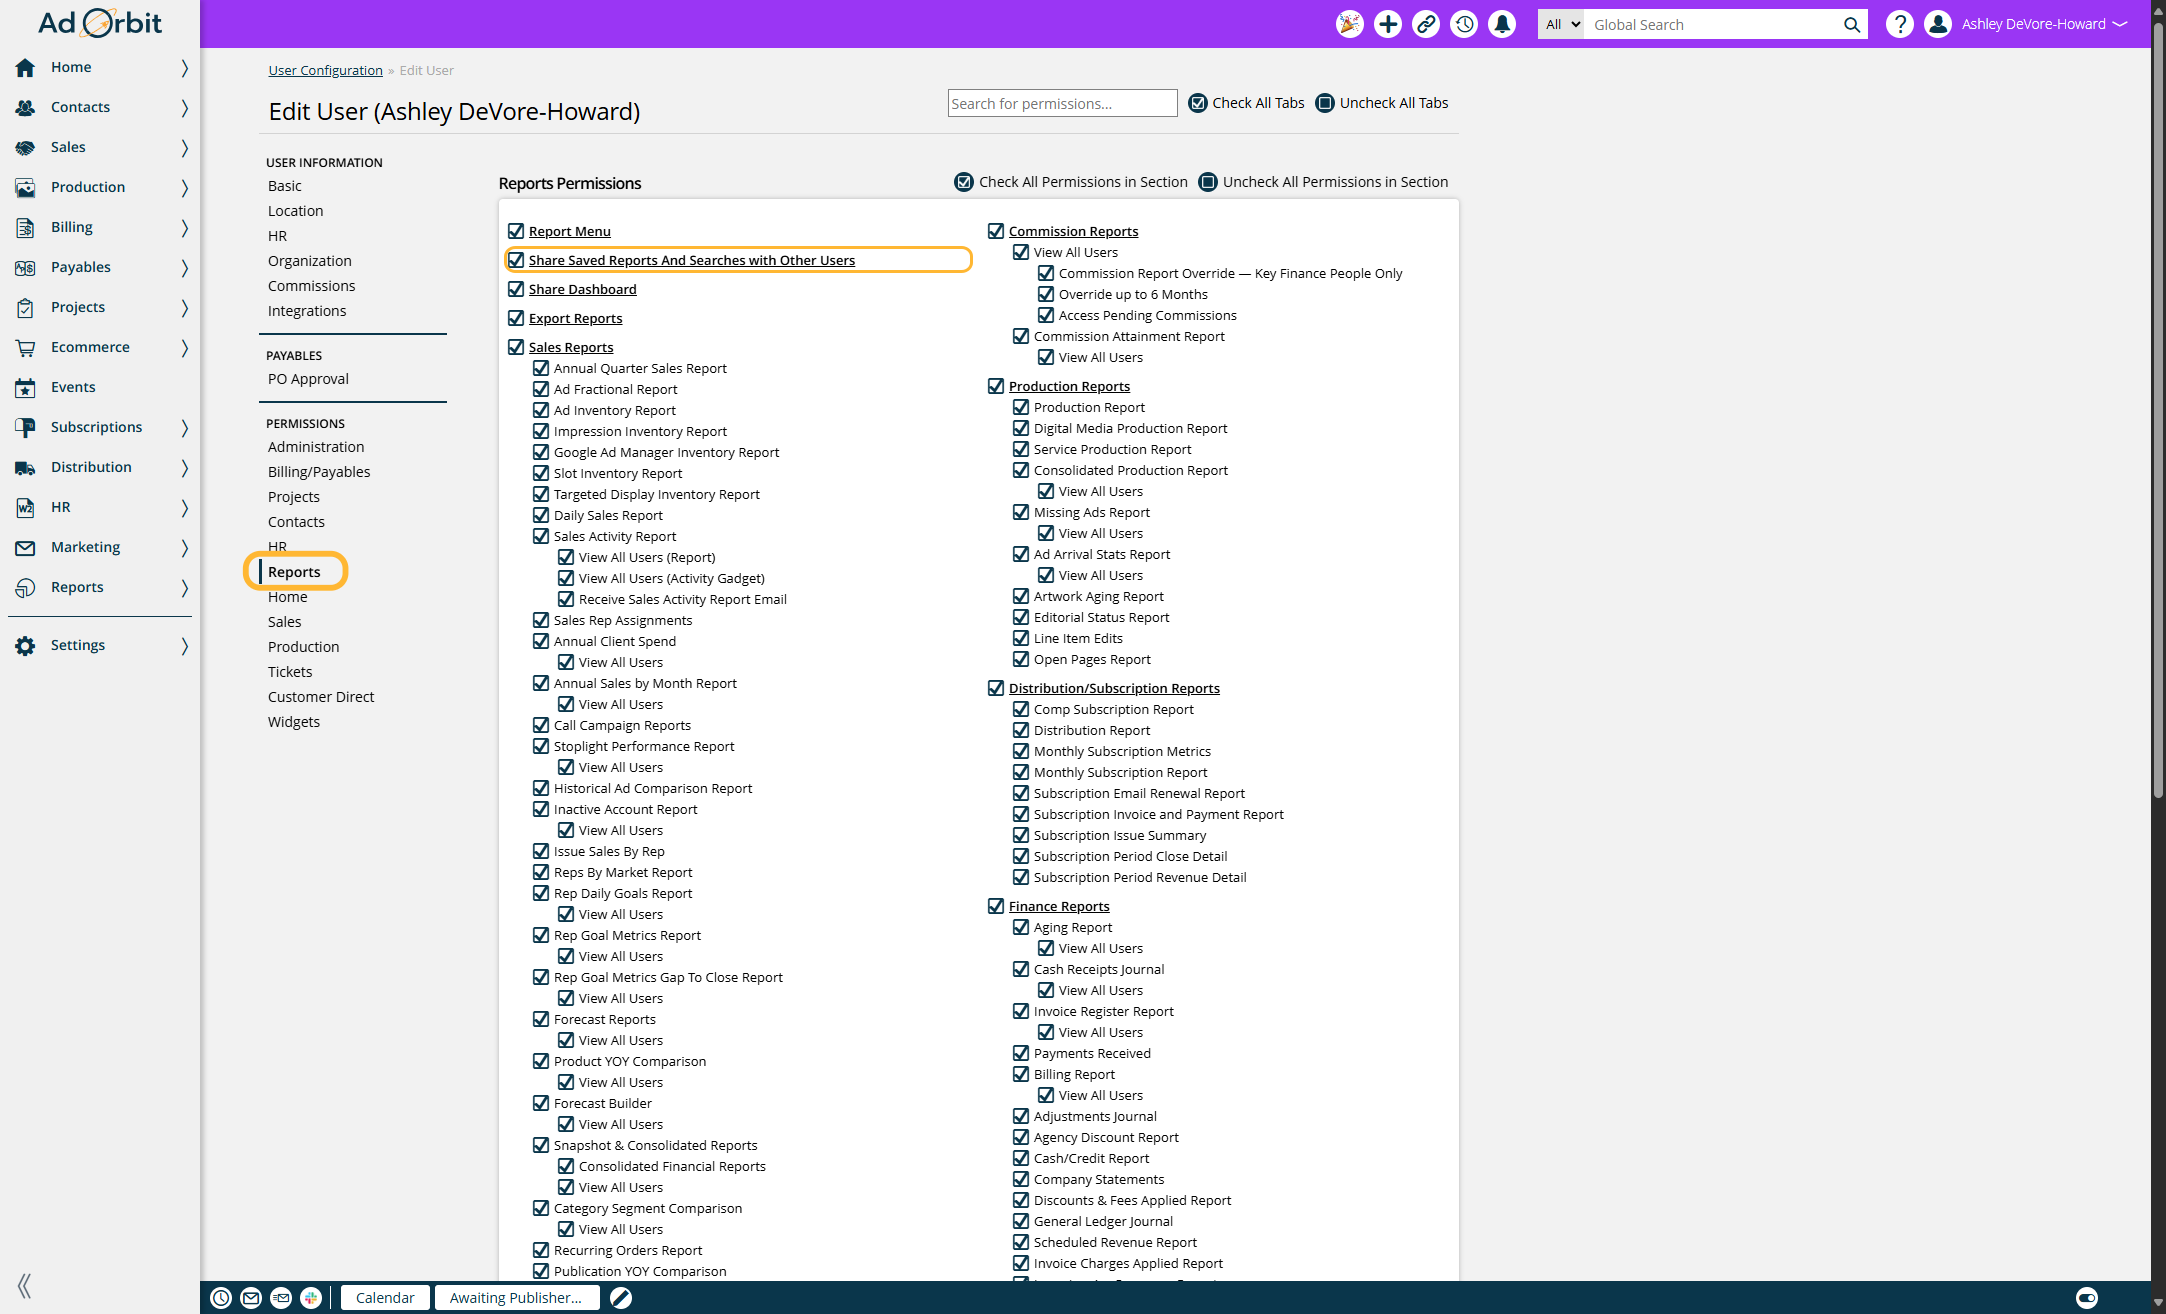
Users can easily share a saved search or report with others within the system. Once shared, the saved search will appear in the recipient's list of saved reports and searches. However, the user must have the necessary permission to share a saved search. These permissions can be granted in the Reports tab on the User Permissions page.
To share a saved search, you need the User Permission 'Share Saved Reports and Searches with Other Users', which can be granted on the Reports tab on the User Permissions page.
Saving a Report or Search
Before sharing a saved search or report, the user must first save it. Once the search or report is saved, the user can then share it by clicking on the share icon.
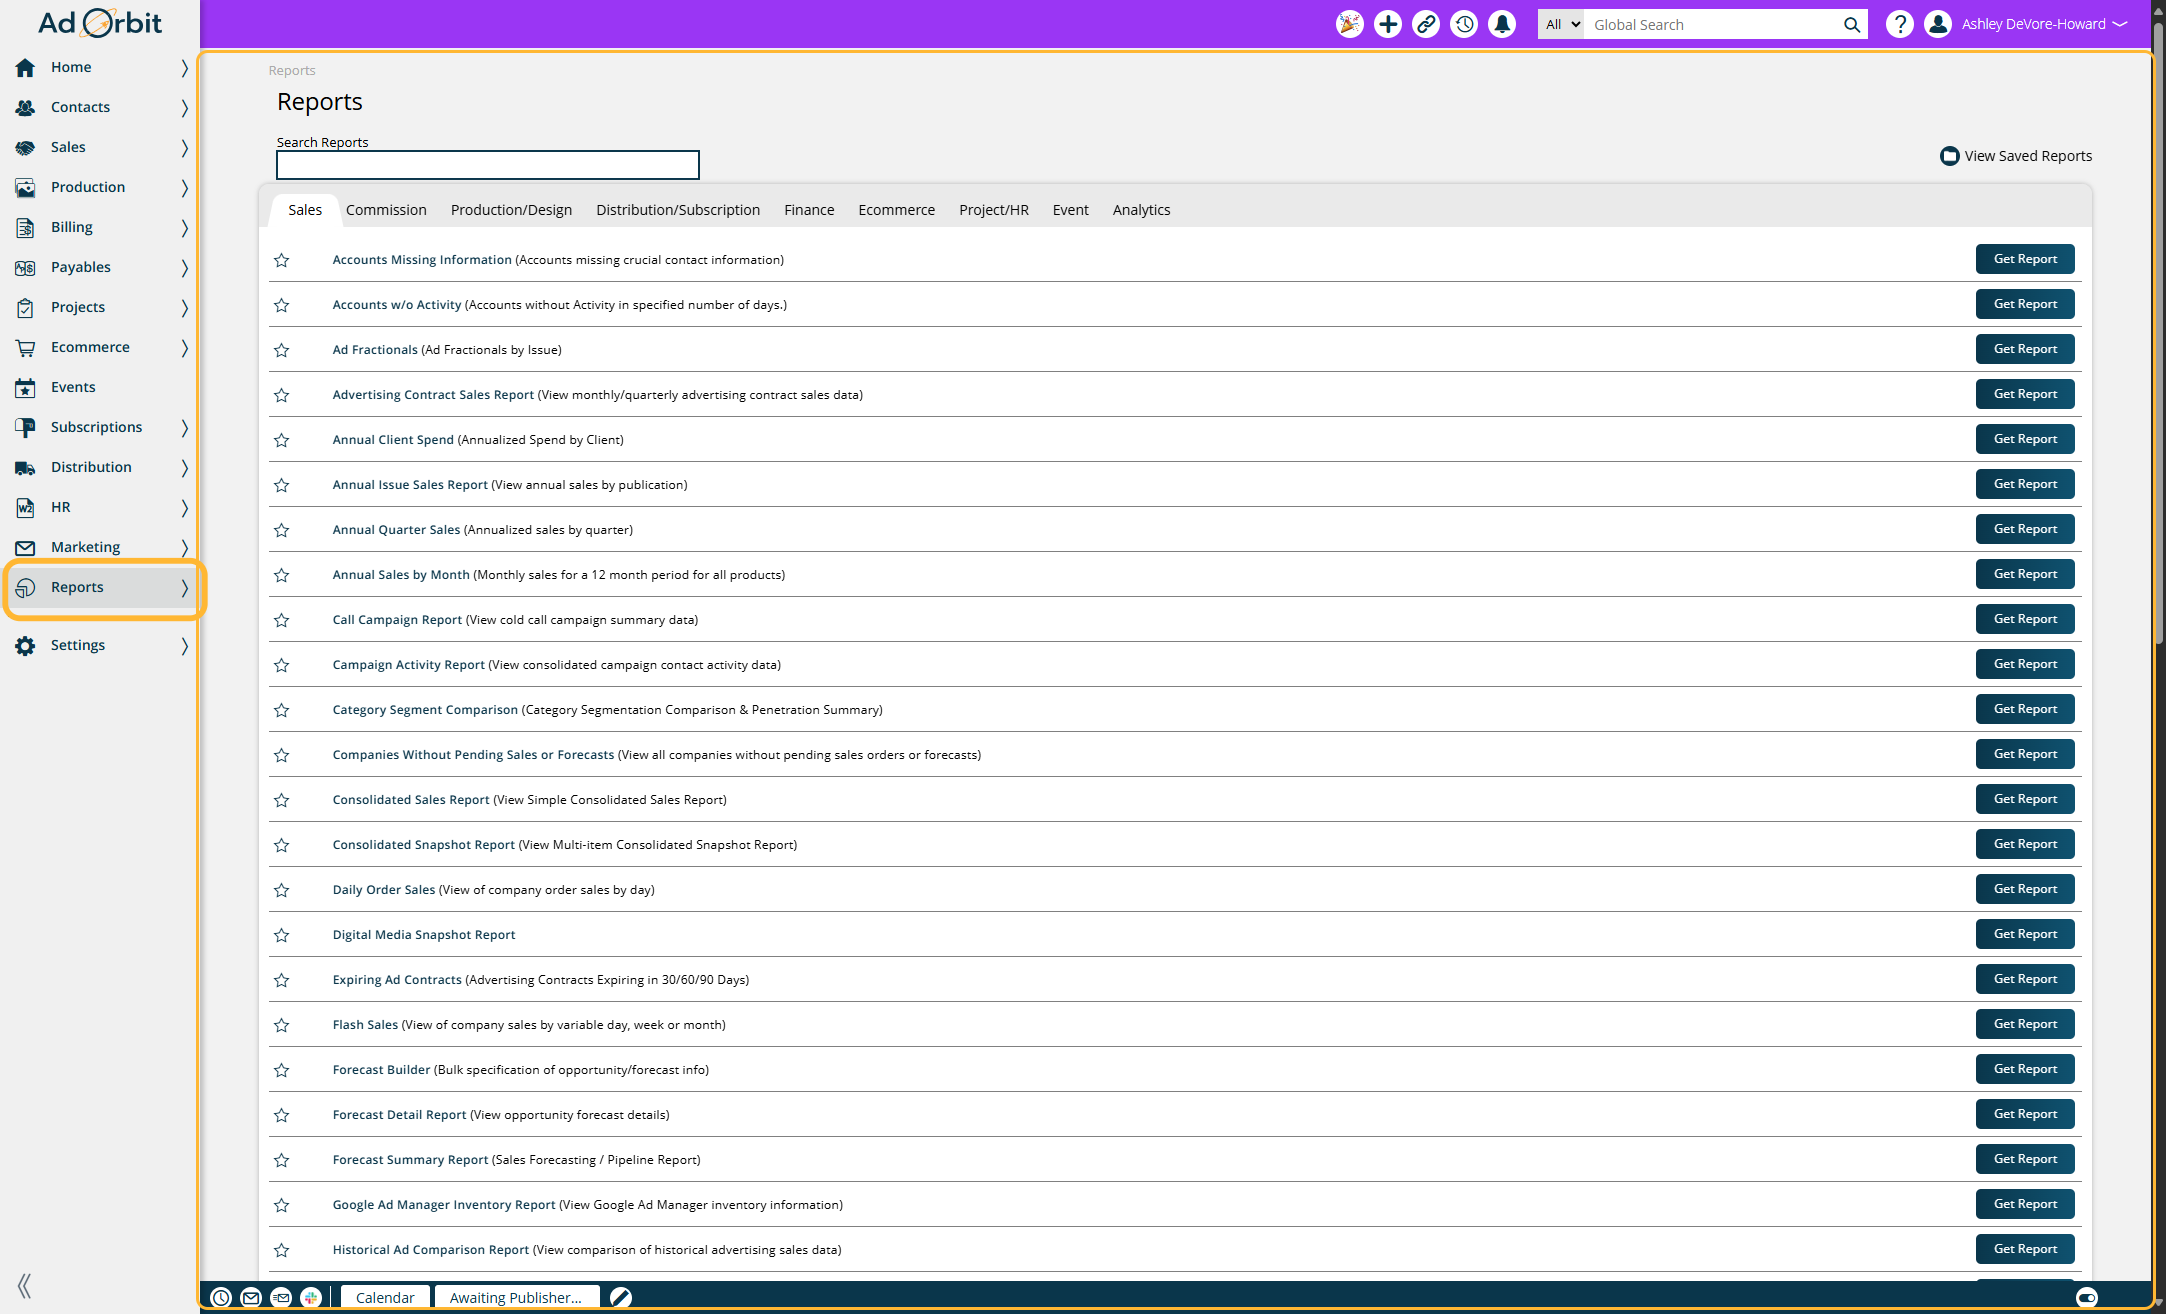
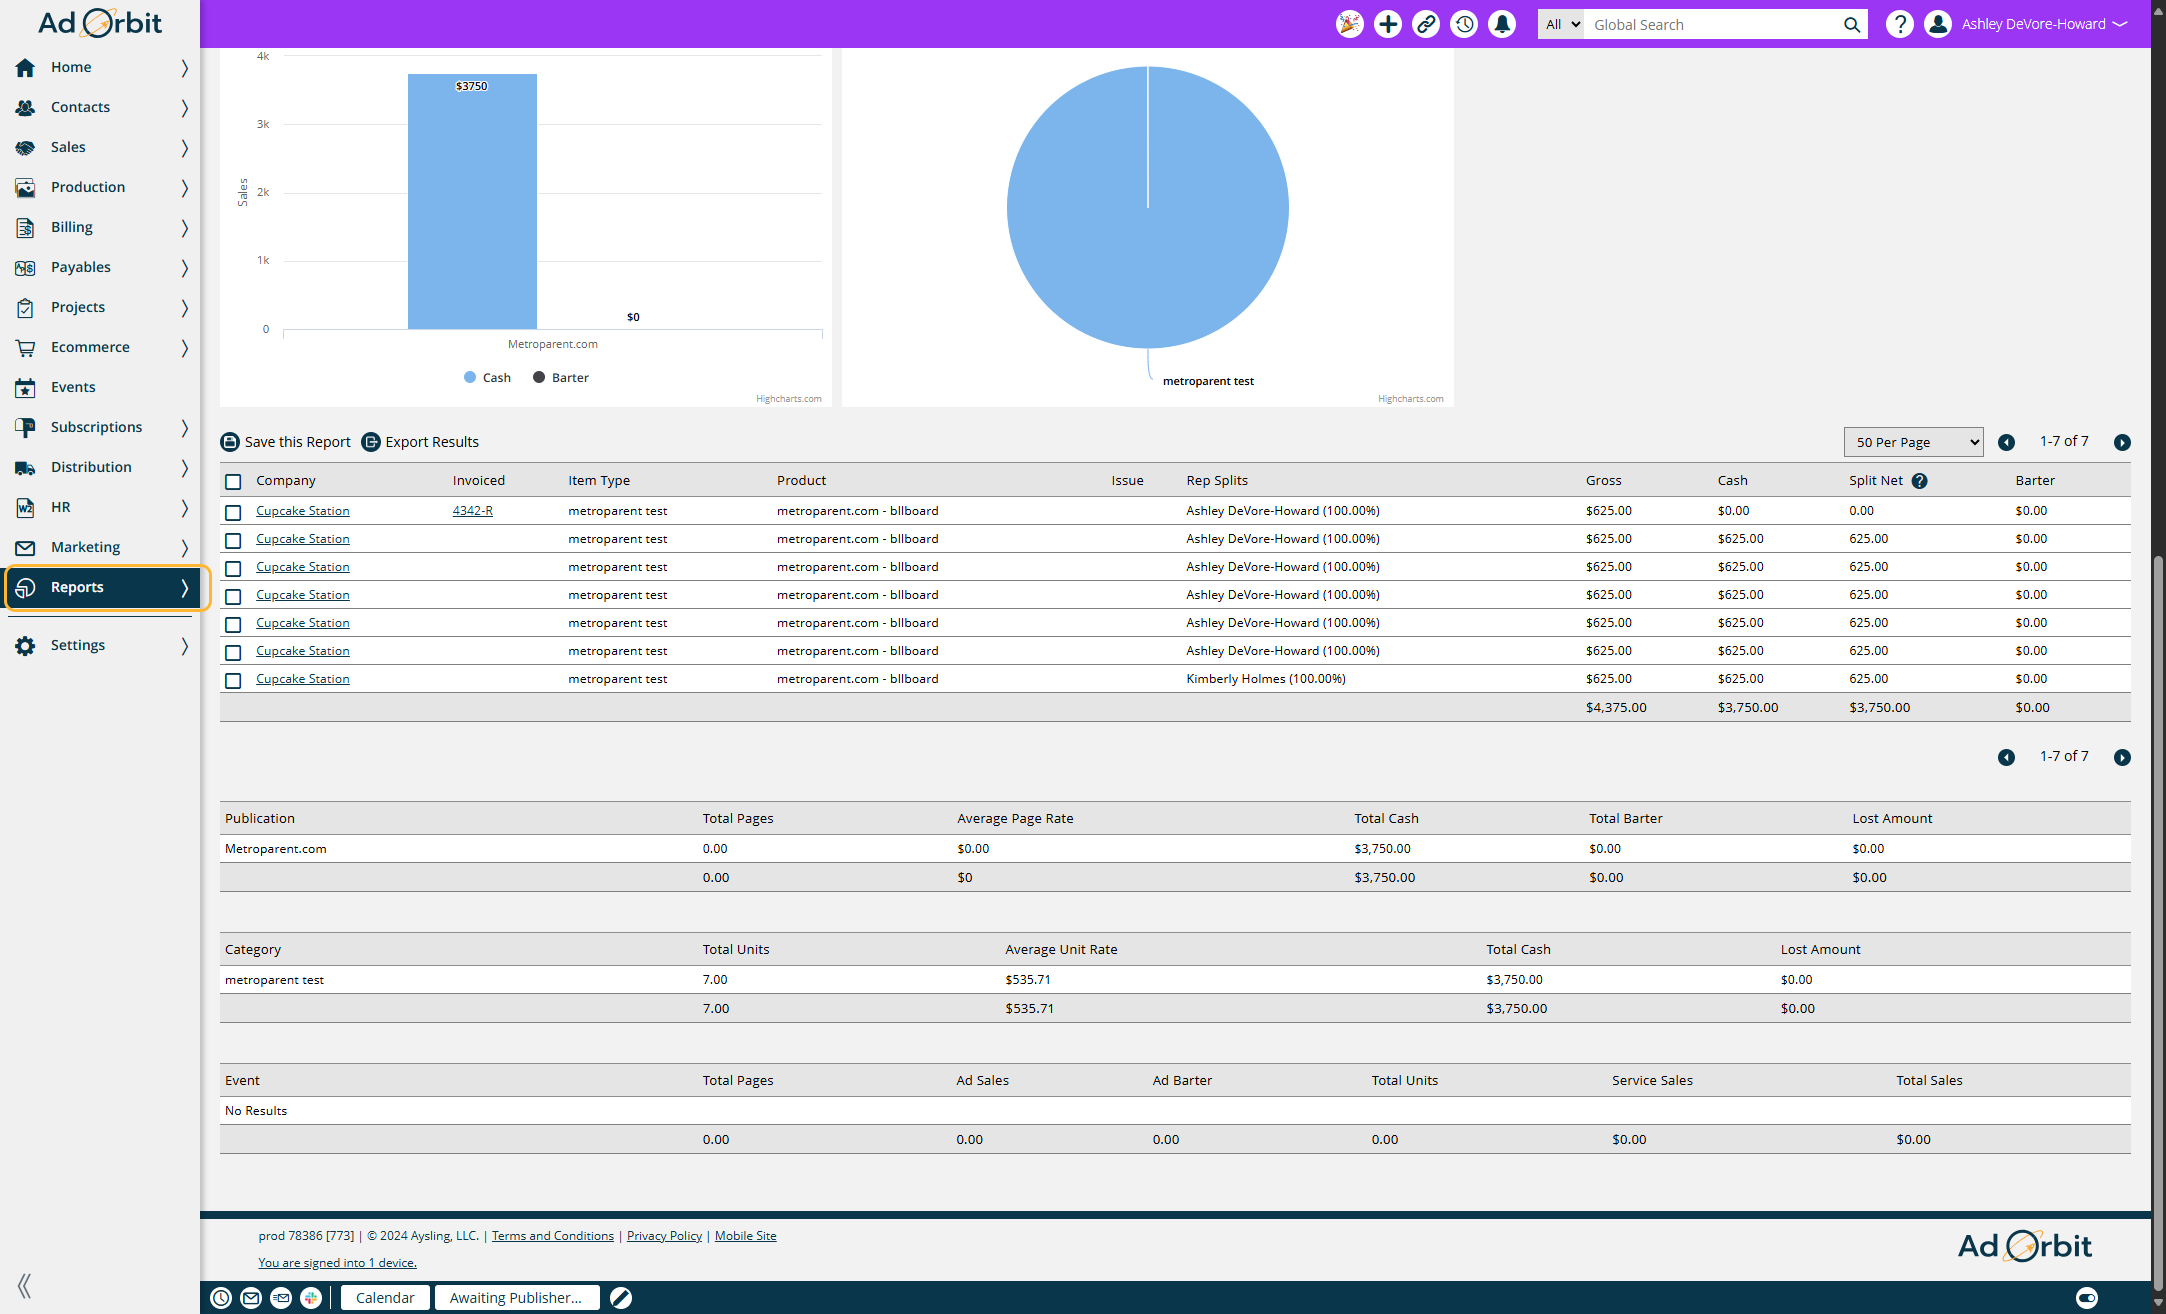
Click on reports and then select the report you want to save.
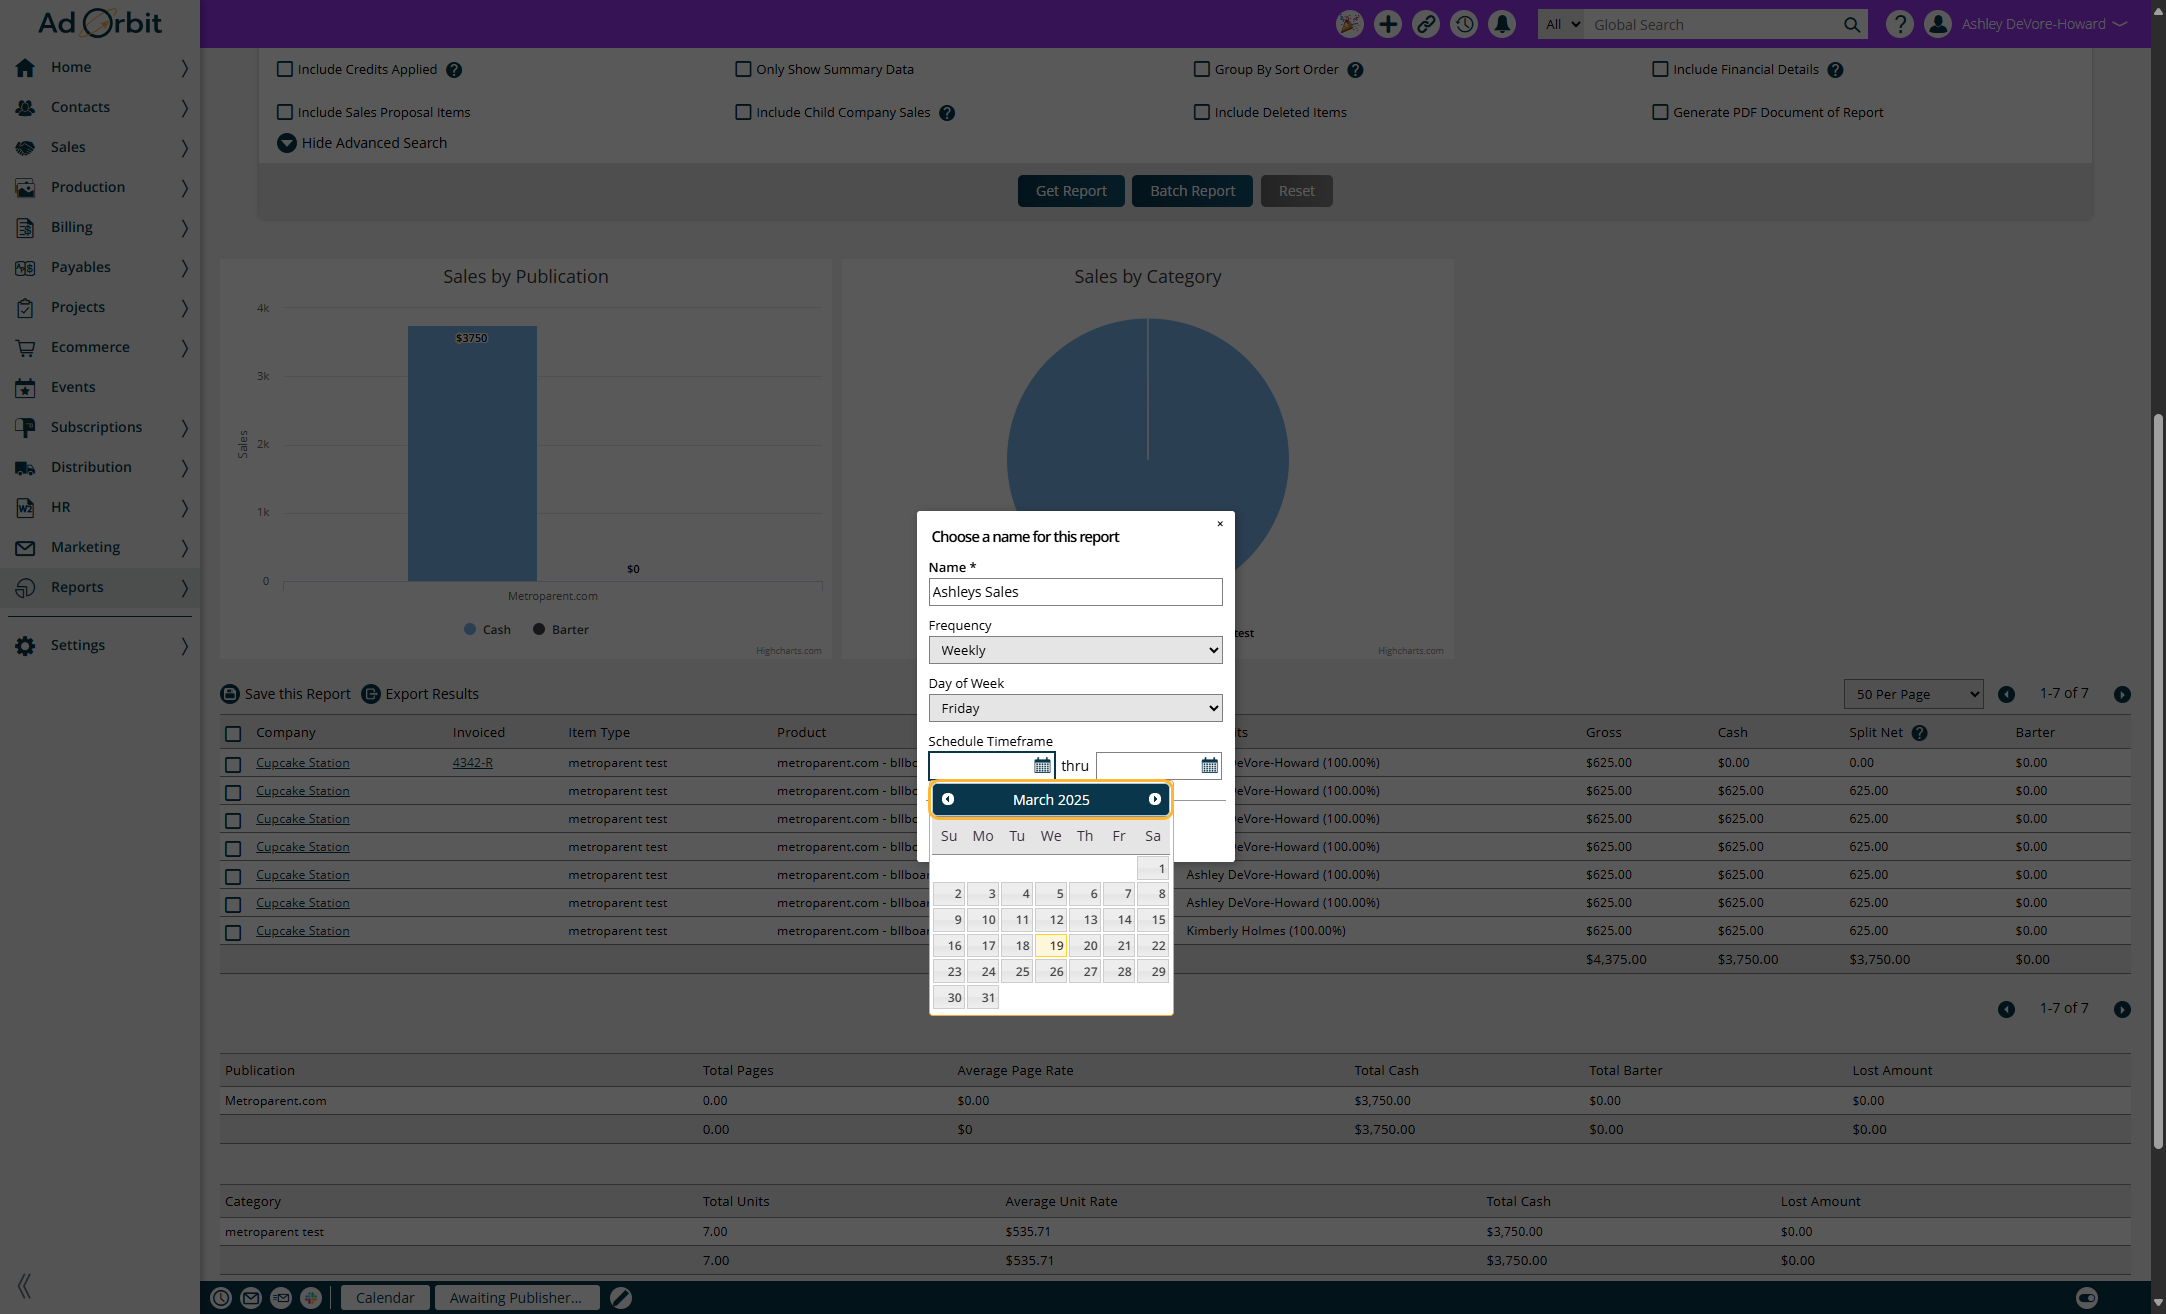
Once you have the report with all the filters filled you can now save the report.
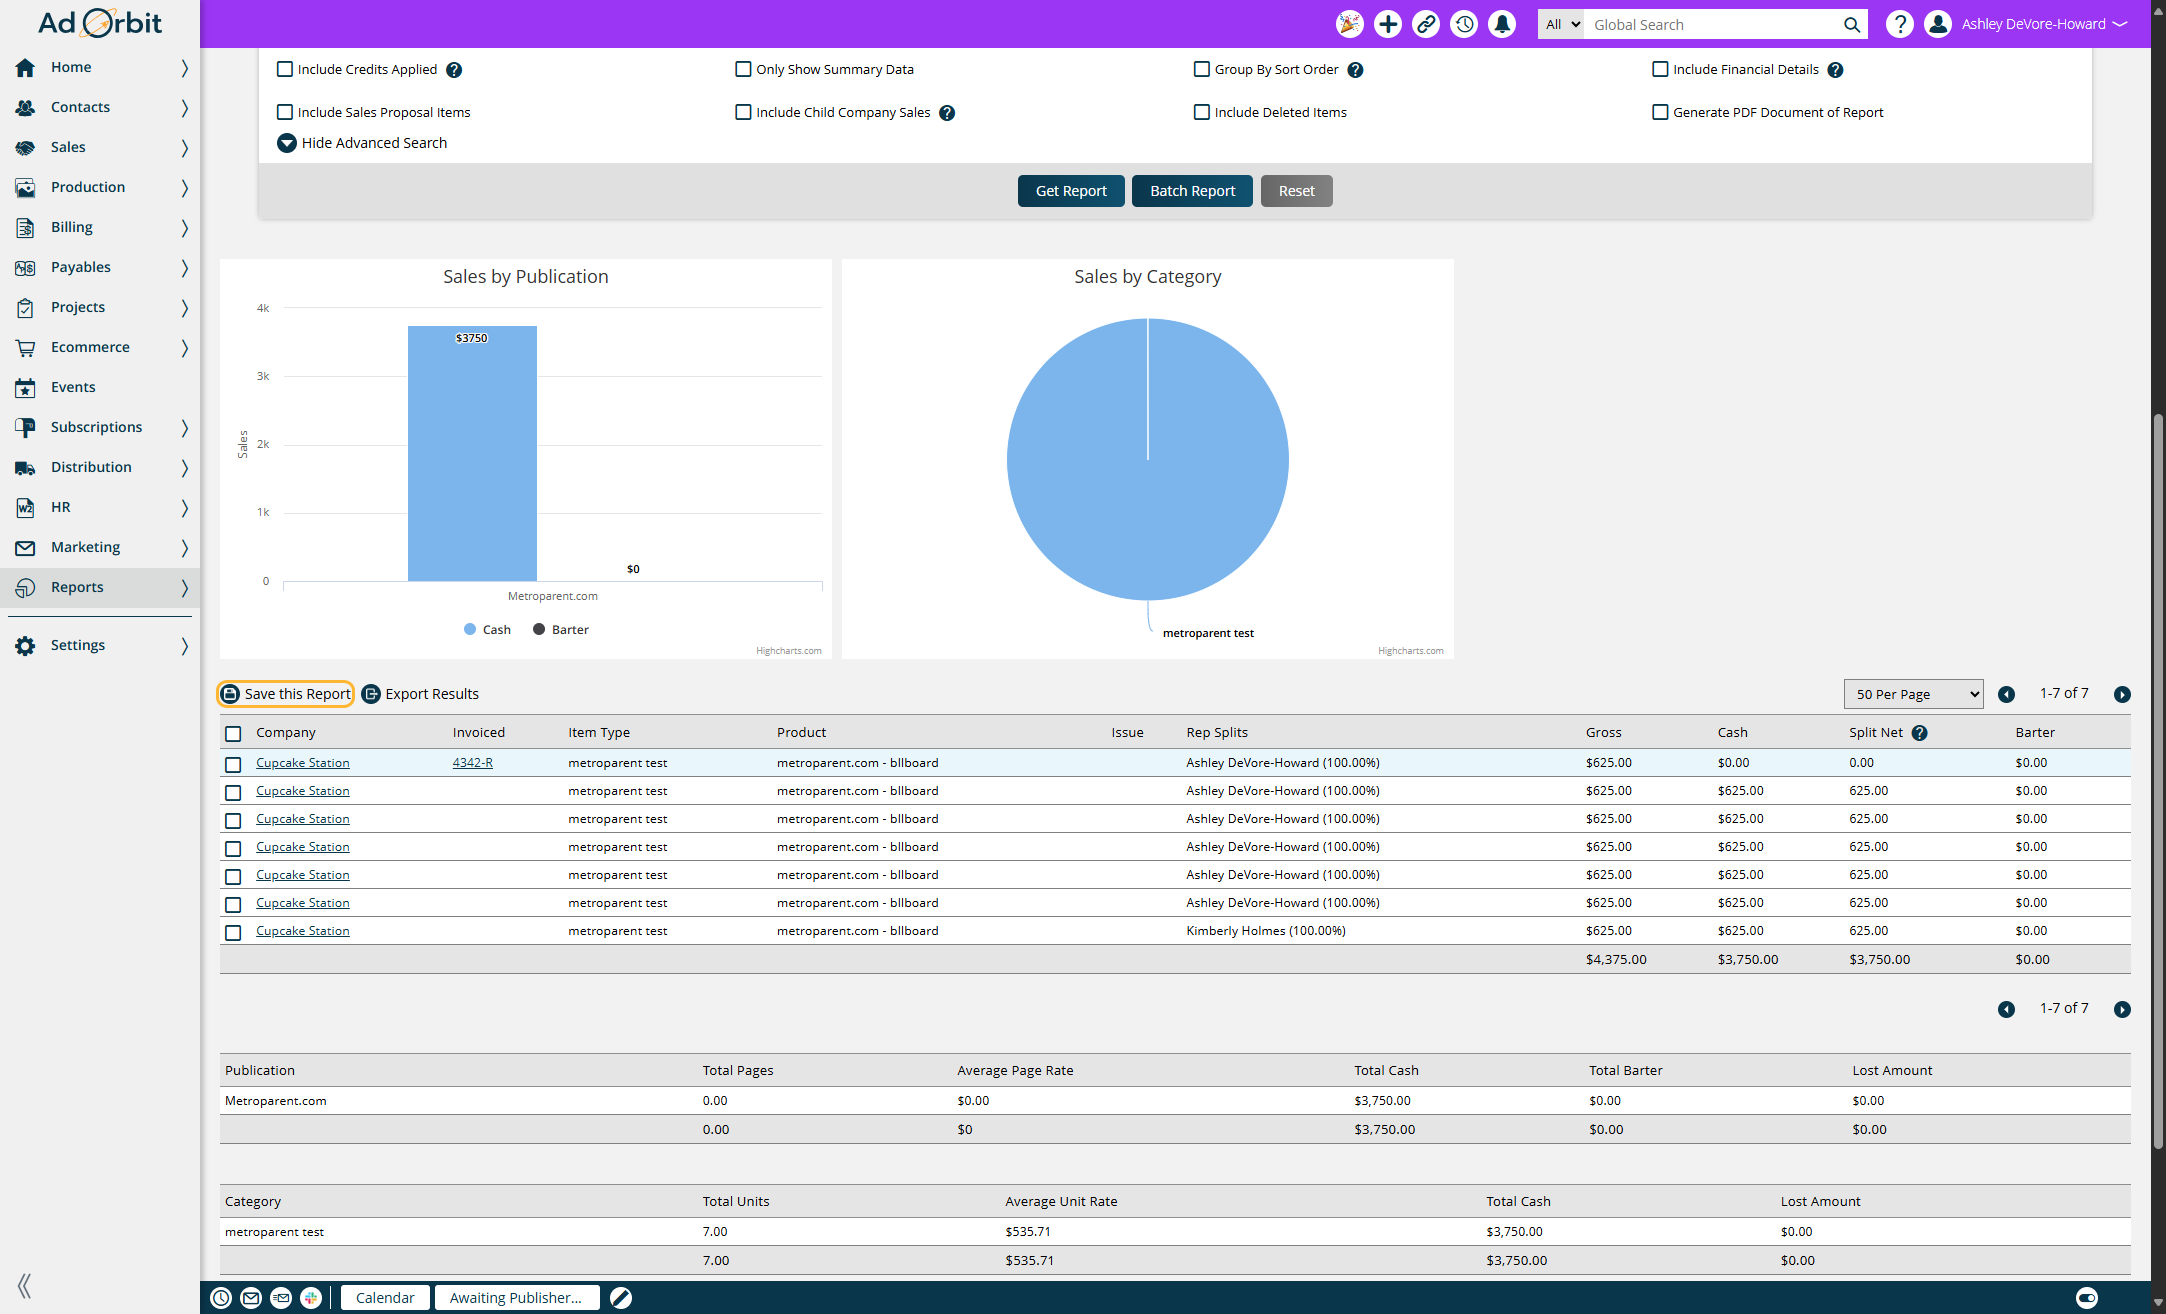
To know if the report can be saved once you click Get Report you will see the Save This Report action. If you do not see this button it is either because you do not have the correct permission or the report can't be saved.
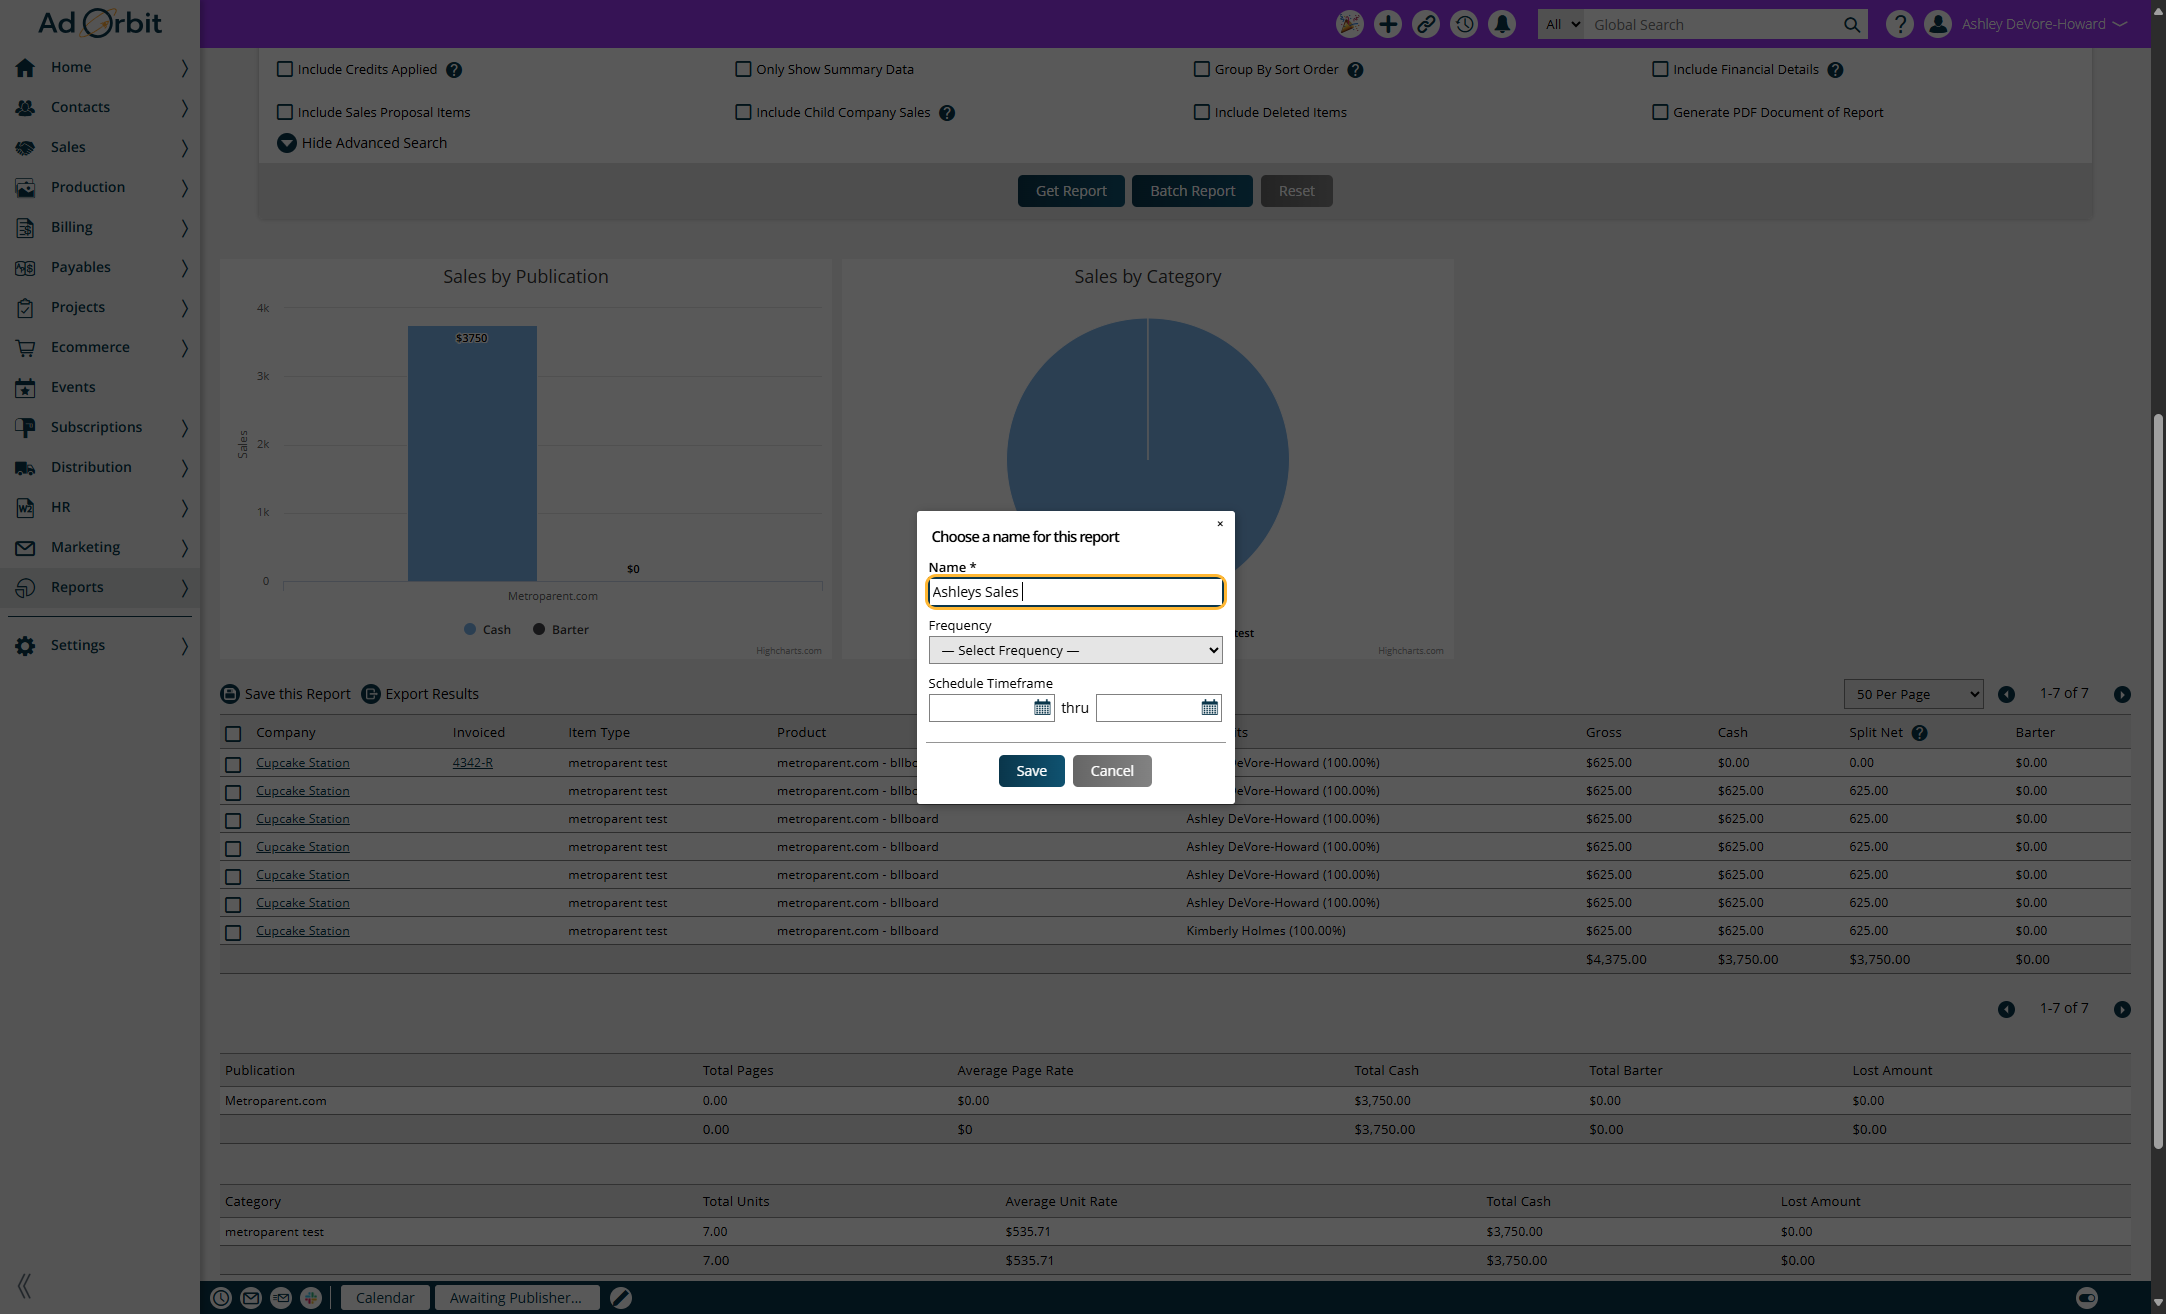
You can either just name the report and save it here or you can also schedule it, if scheduling is available for that report.
When saving the Consolidated Sales or Consolidated Snapshot reports, there is an additional option called 'Include Current Columns'. When checked, any user who is viewing the saved report will see all of the columns that were present on the report when it was saved. This can be especially helpful when sharing a report with another user. When the user is viewing your shared report, they'll see all of the columns you selected when saving the report, even if those columns are different than their normal report display fields.
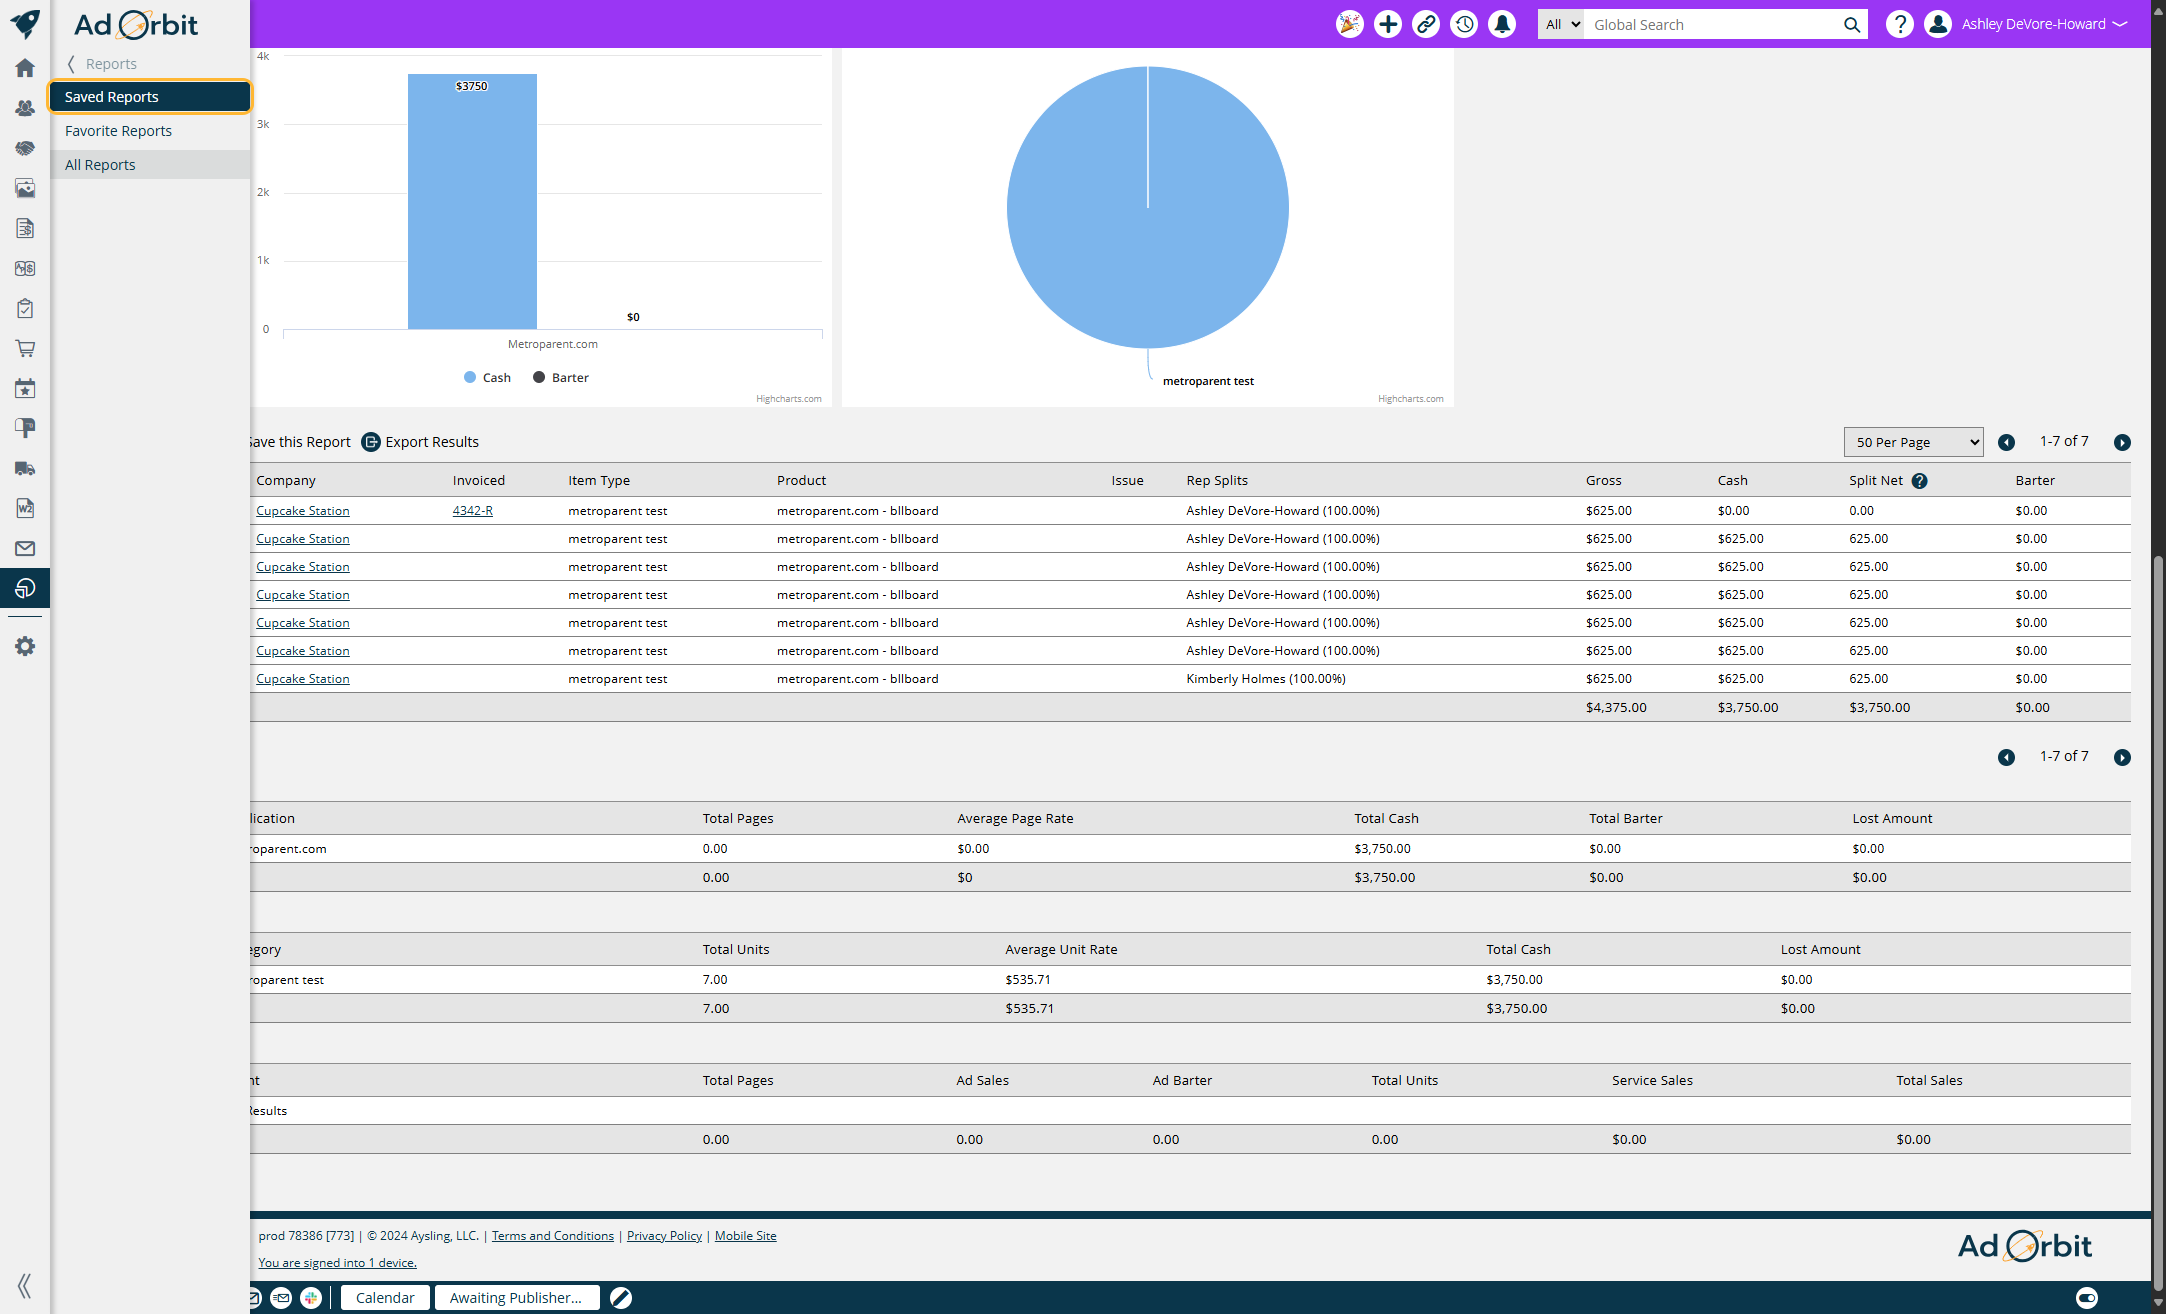
To view all of your saved reports, go to Reports > Saved Reports. In this popup, you'll see the name of the saved report, the name you gave the report when you saved it, if the report was shared by anyone, whether columns were included when it was saved, and if it is scheduled.
Setting up a Scheduled Report
To schedule a report, you must first save the report. Once saved, you will be prompted to choose a schedule for the report. You can schedule reports to run at the following intervals:
Daily: The report will return results for the previous day.
Weekly: The report will return results for the previous week. You will need to choose the day of the week to receive the report. For example, if you select Wednesday, the report will cover data from the previous Wednesday through Tuesday.
Monthly: The report will provide data for the previous month, sent on the first day of the current month.
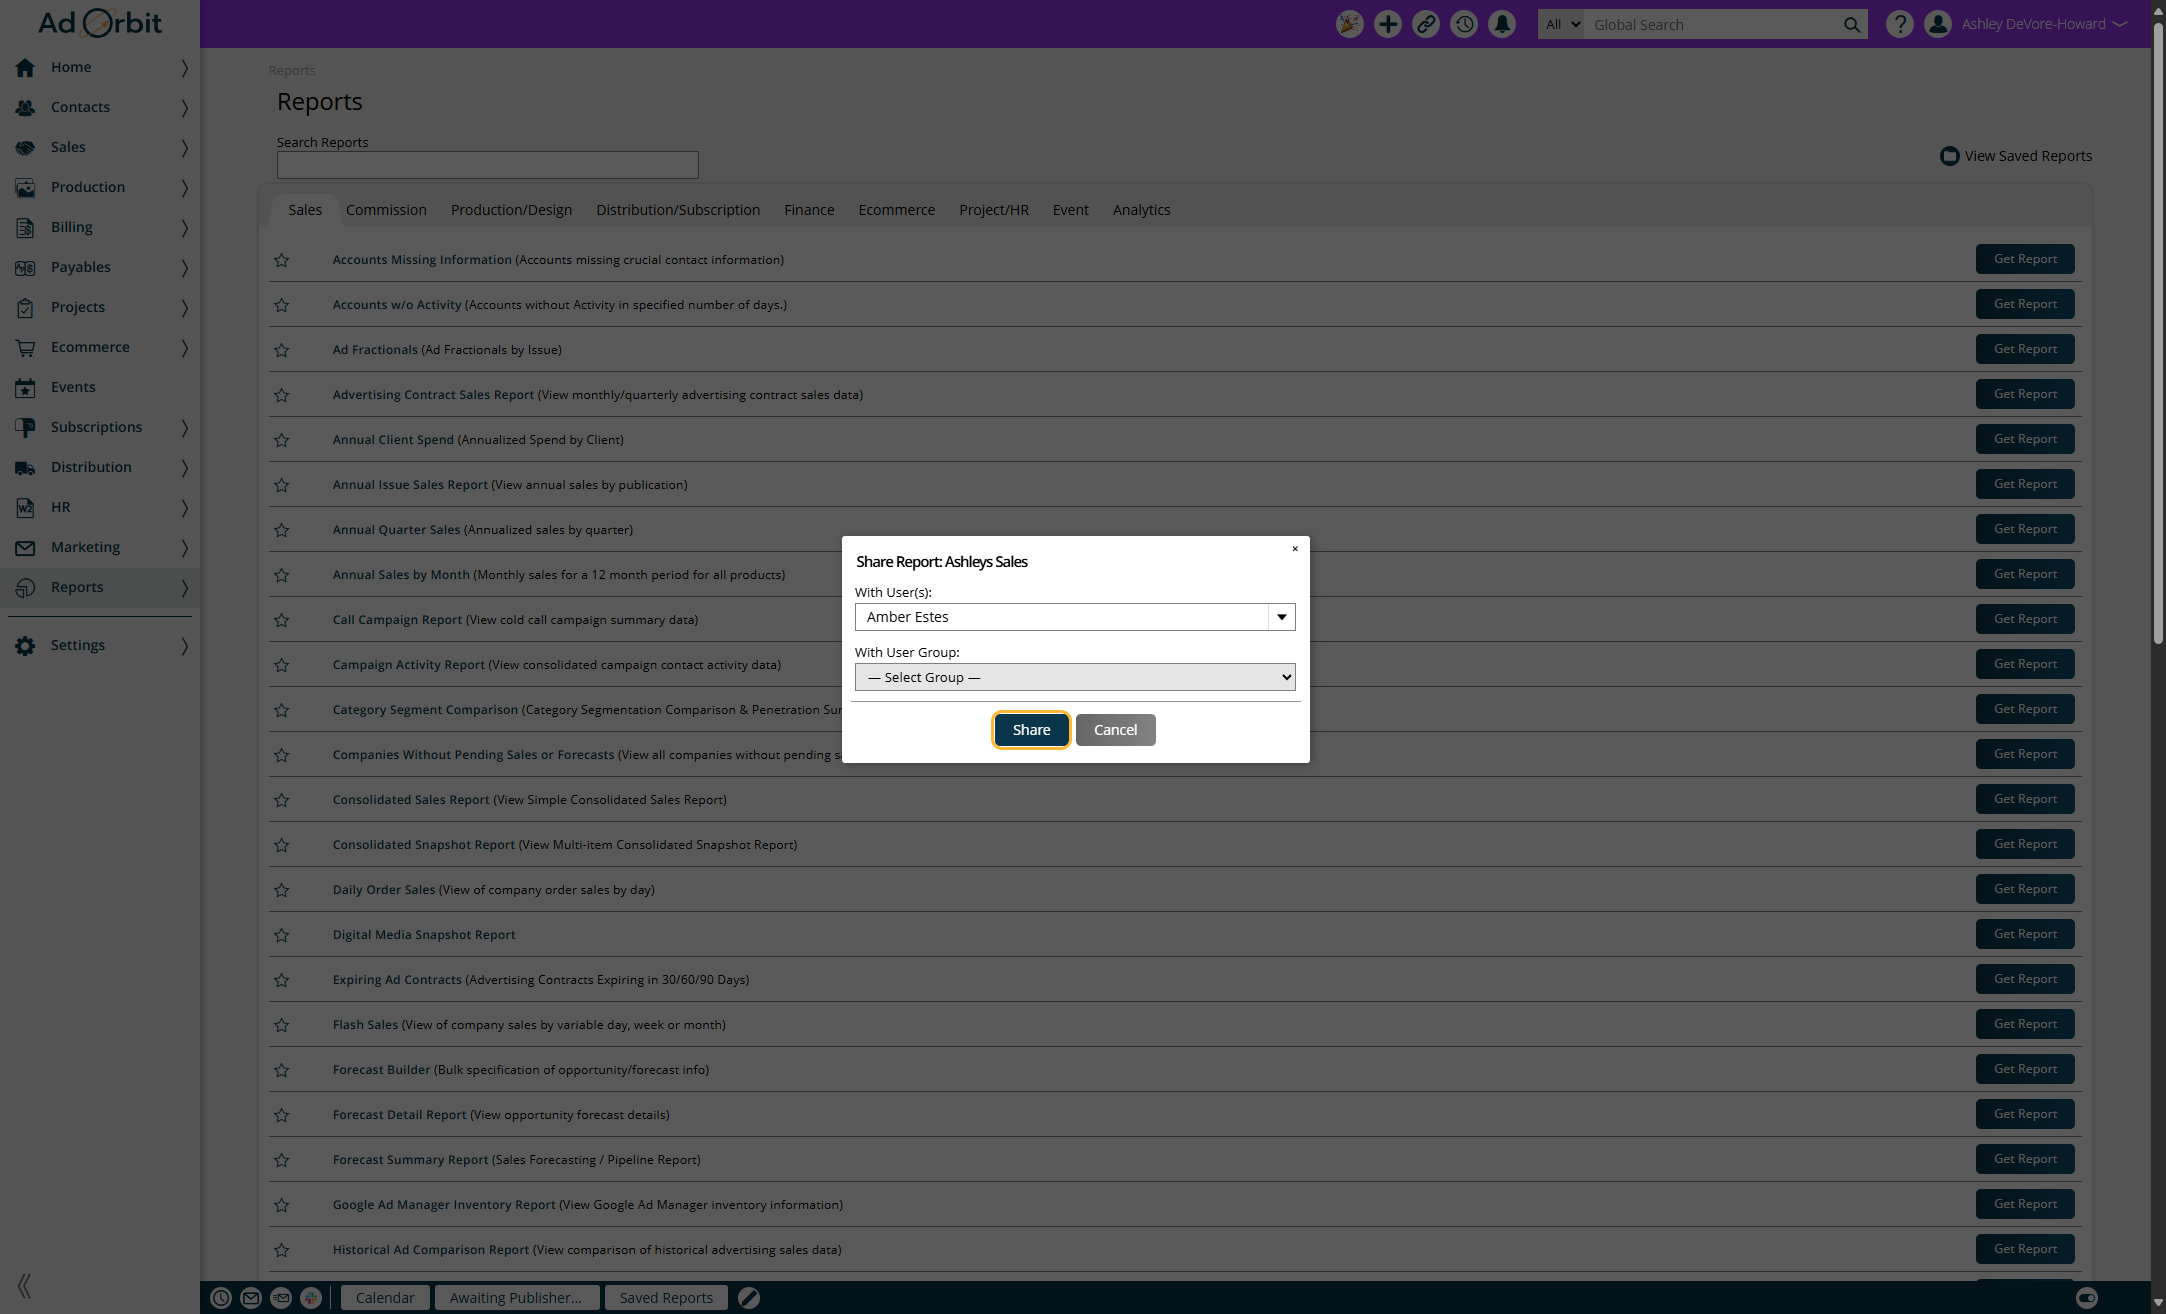
Sharing your Saved Report
Click on Reports
Click on Saved Reports
Click on the ellipses icon and then share.
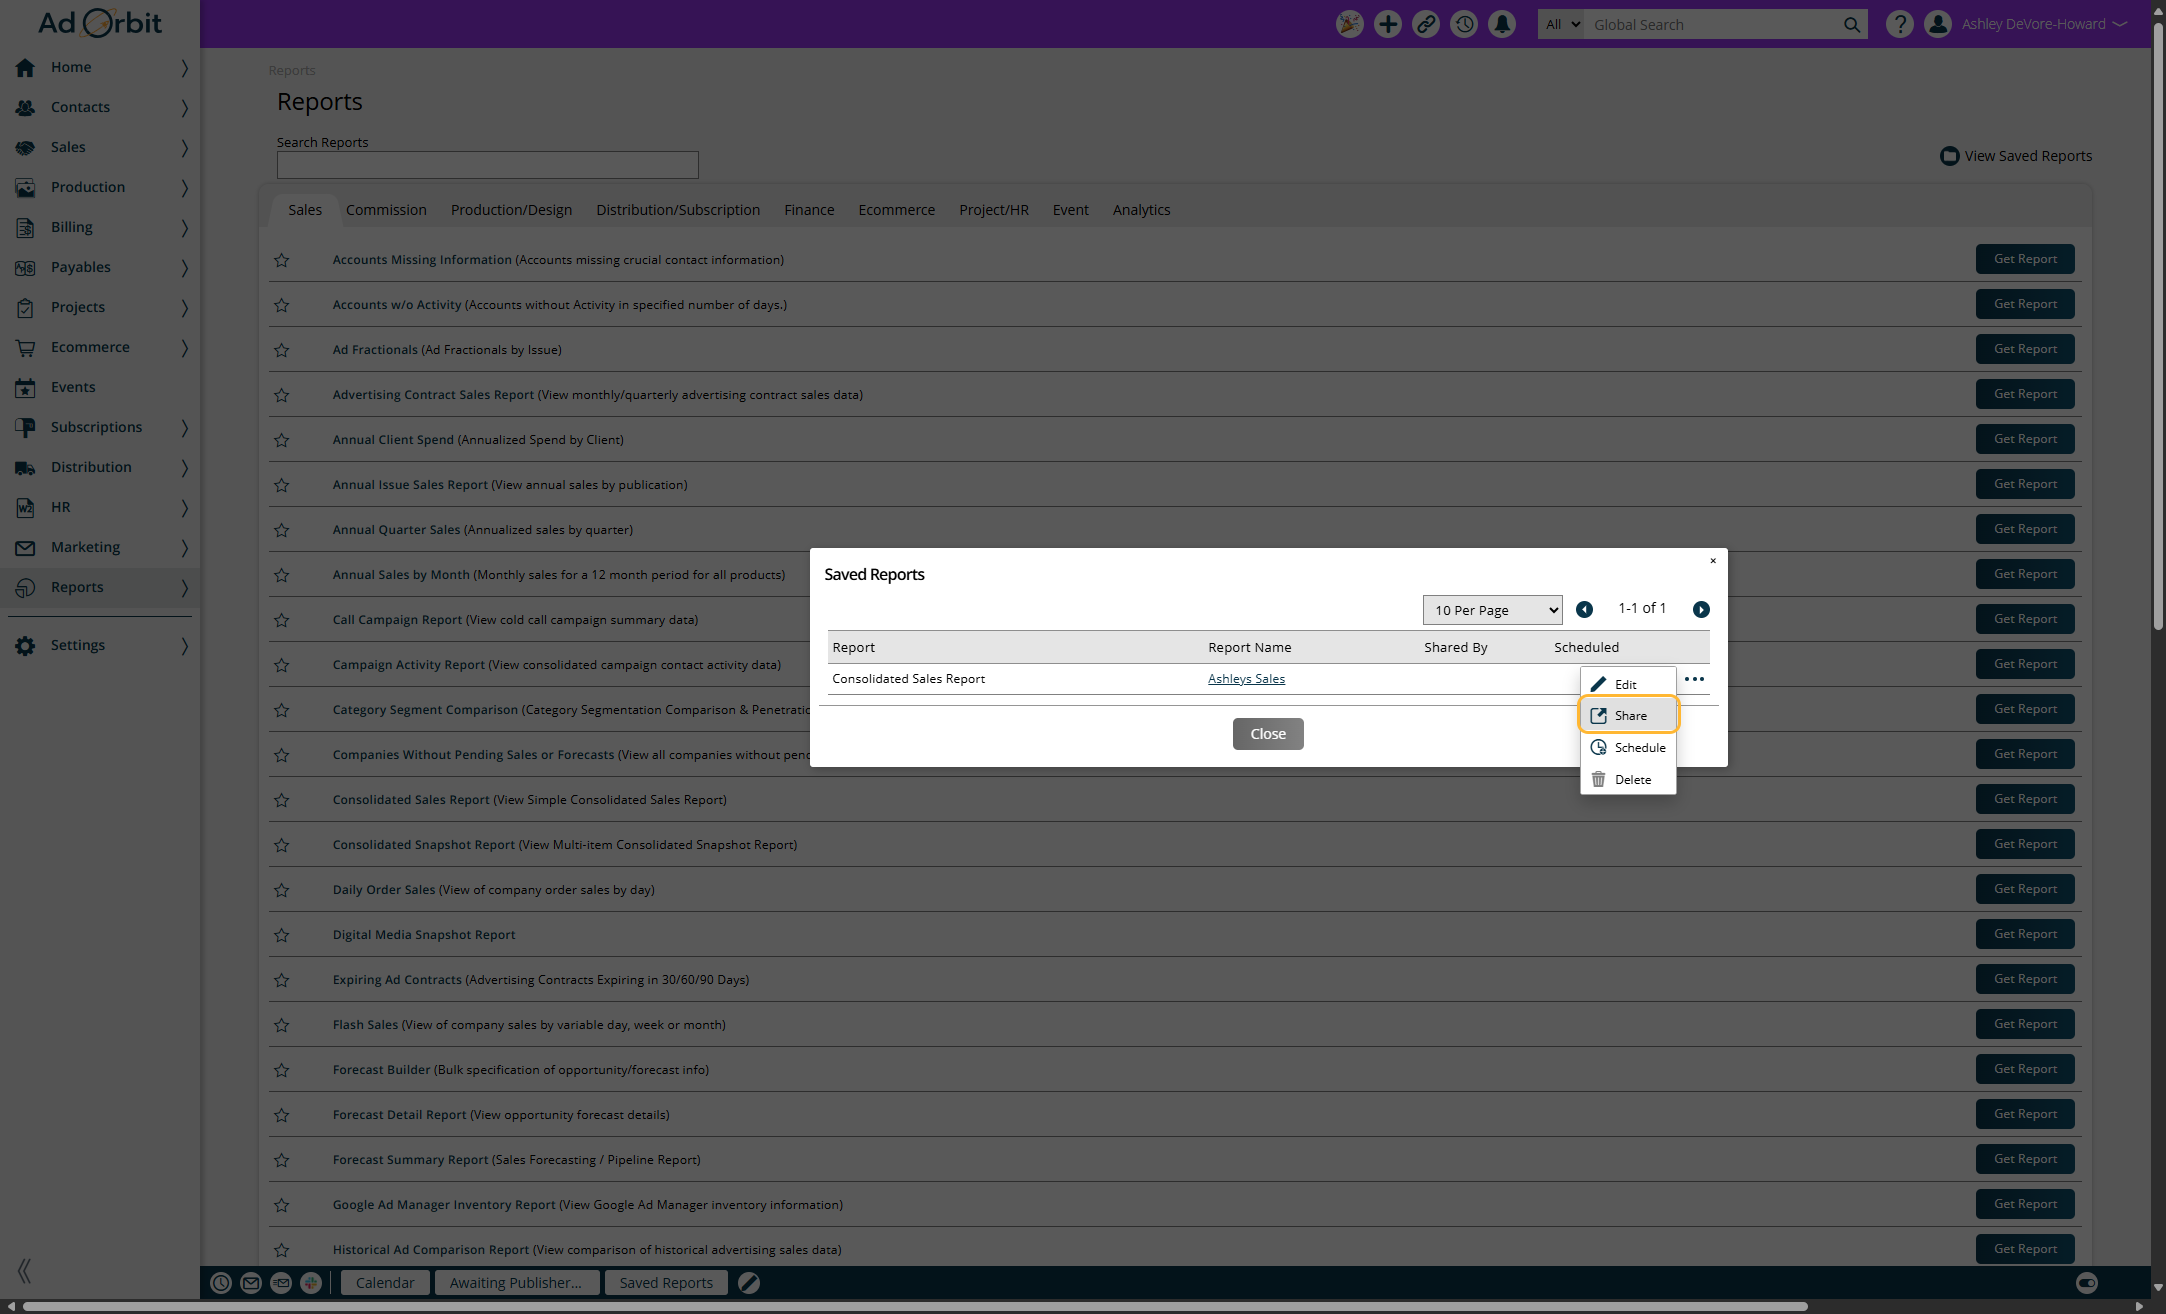
Select the users you want to share the report with then click save.
Additional Places you can See your Saved Searches and Reports
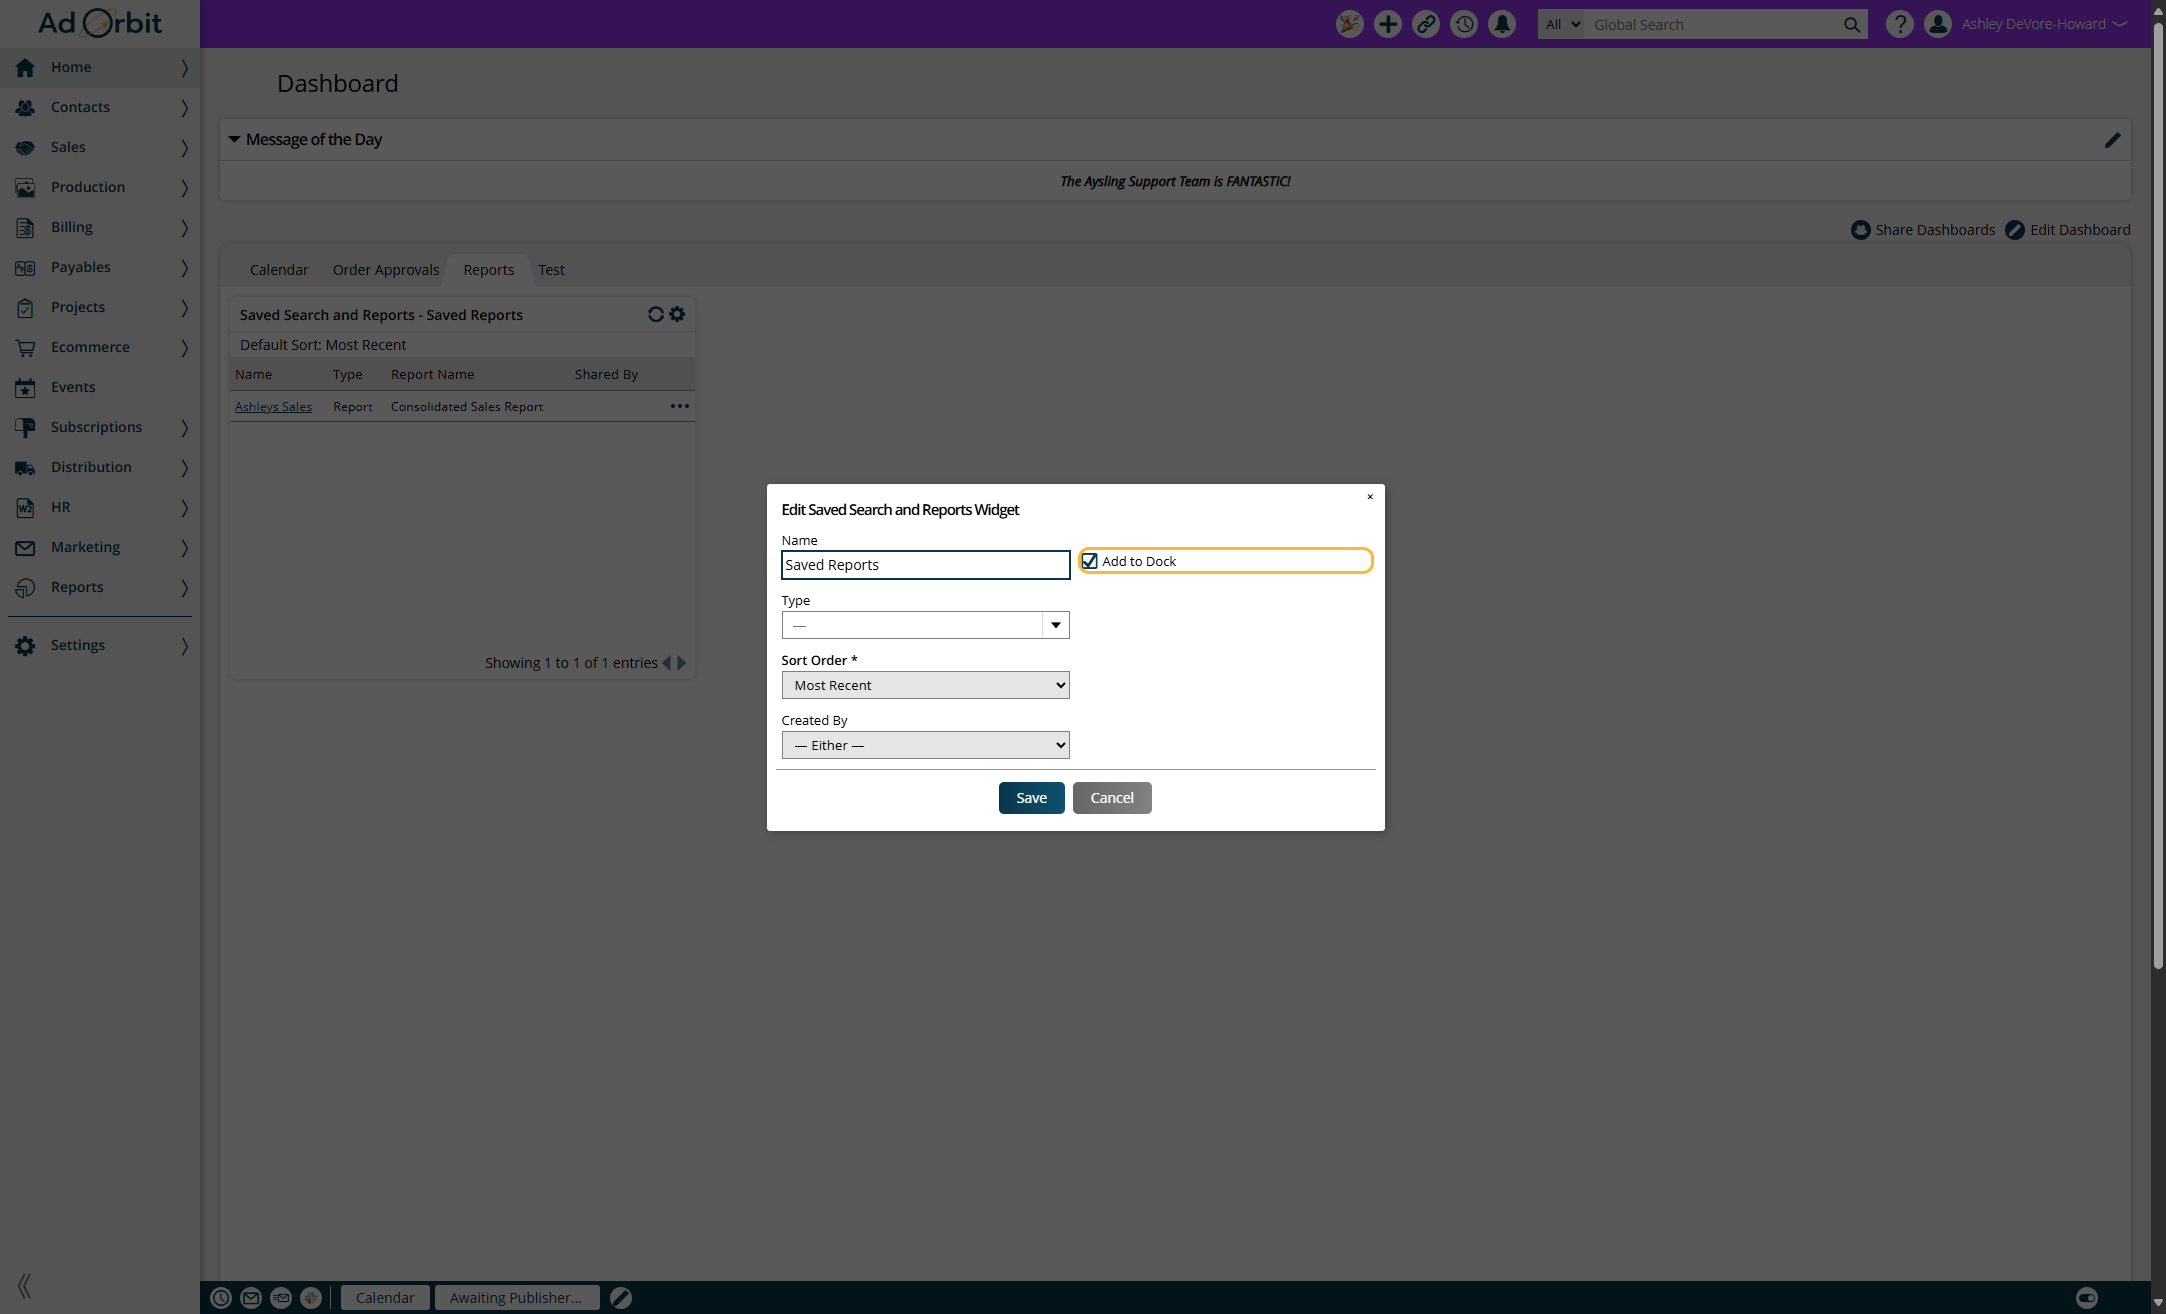
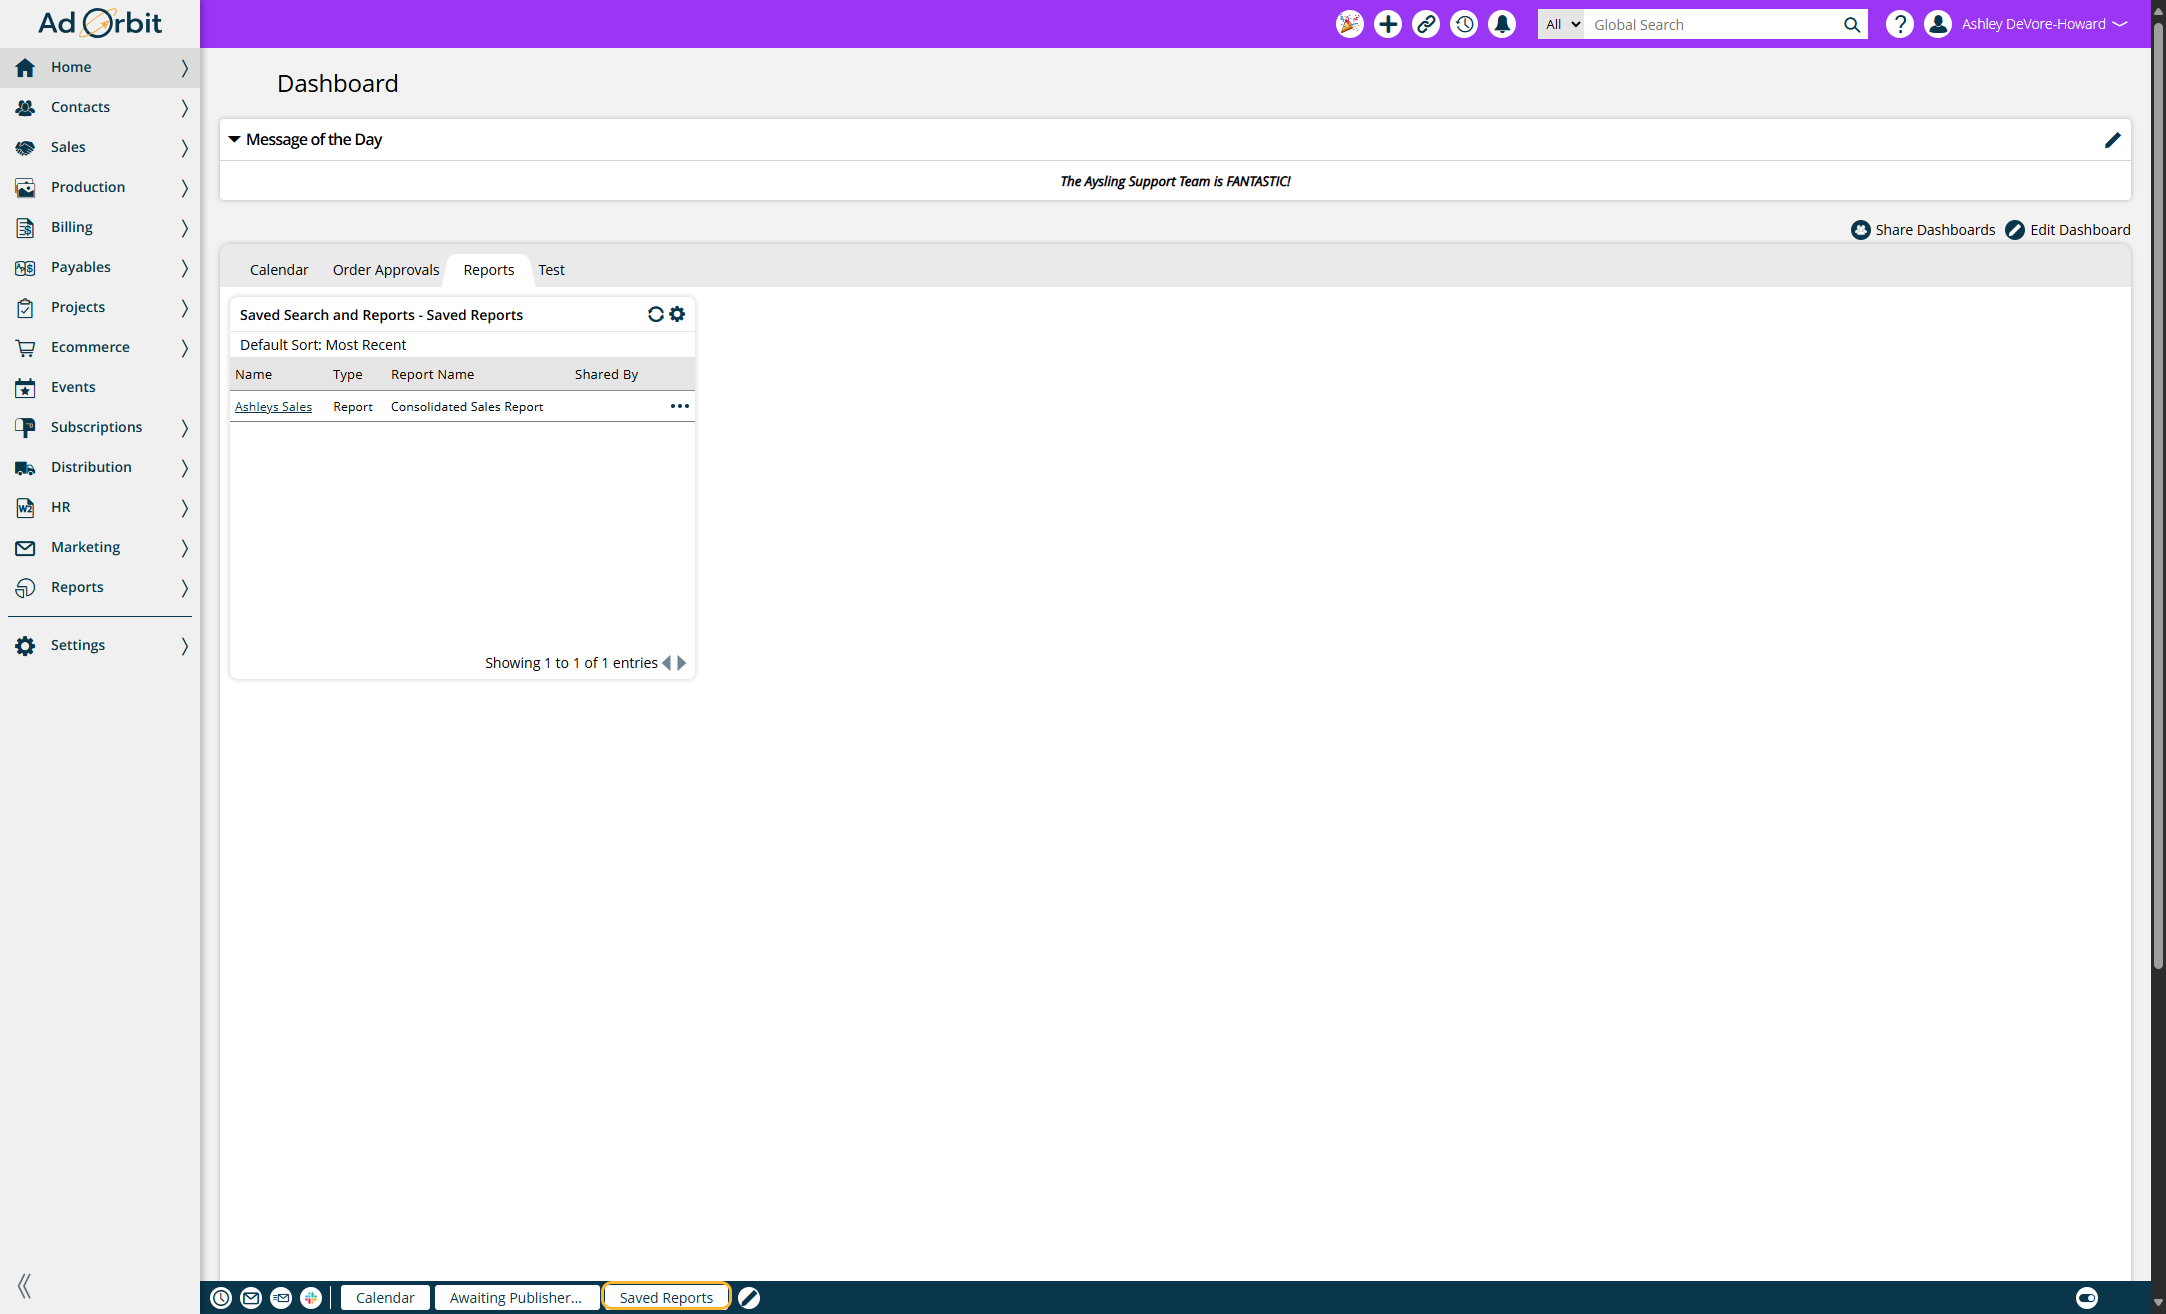
You can also see your saved searches/reports on your dashboard using the Saved Search and Reports widget, and you can also put this widget on your dock.

To put the widget on your dock - click on edit settings.

Check add to dock, and click Save.
Your saved reports widget will now show on your dock, for easy access throughout Ad Orbit.
Updated 5/7/2025