Set up a Sales Package
Sales packages help make creating orders a quicker process for your sales reps and give you flexibility over how your line items are presented to the customer. To create packages, navigate to Settings > Sales > Packages. To access this page, you need the User Permission ‘Packages.’ On this page, you can create new, and edit existing sales packages.
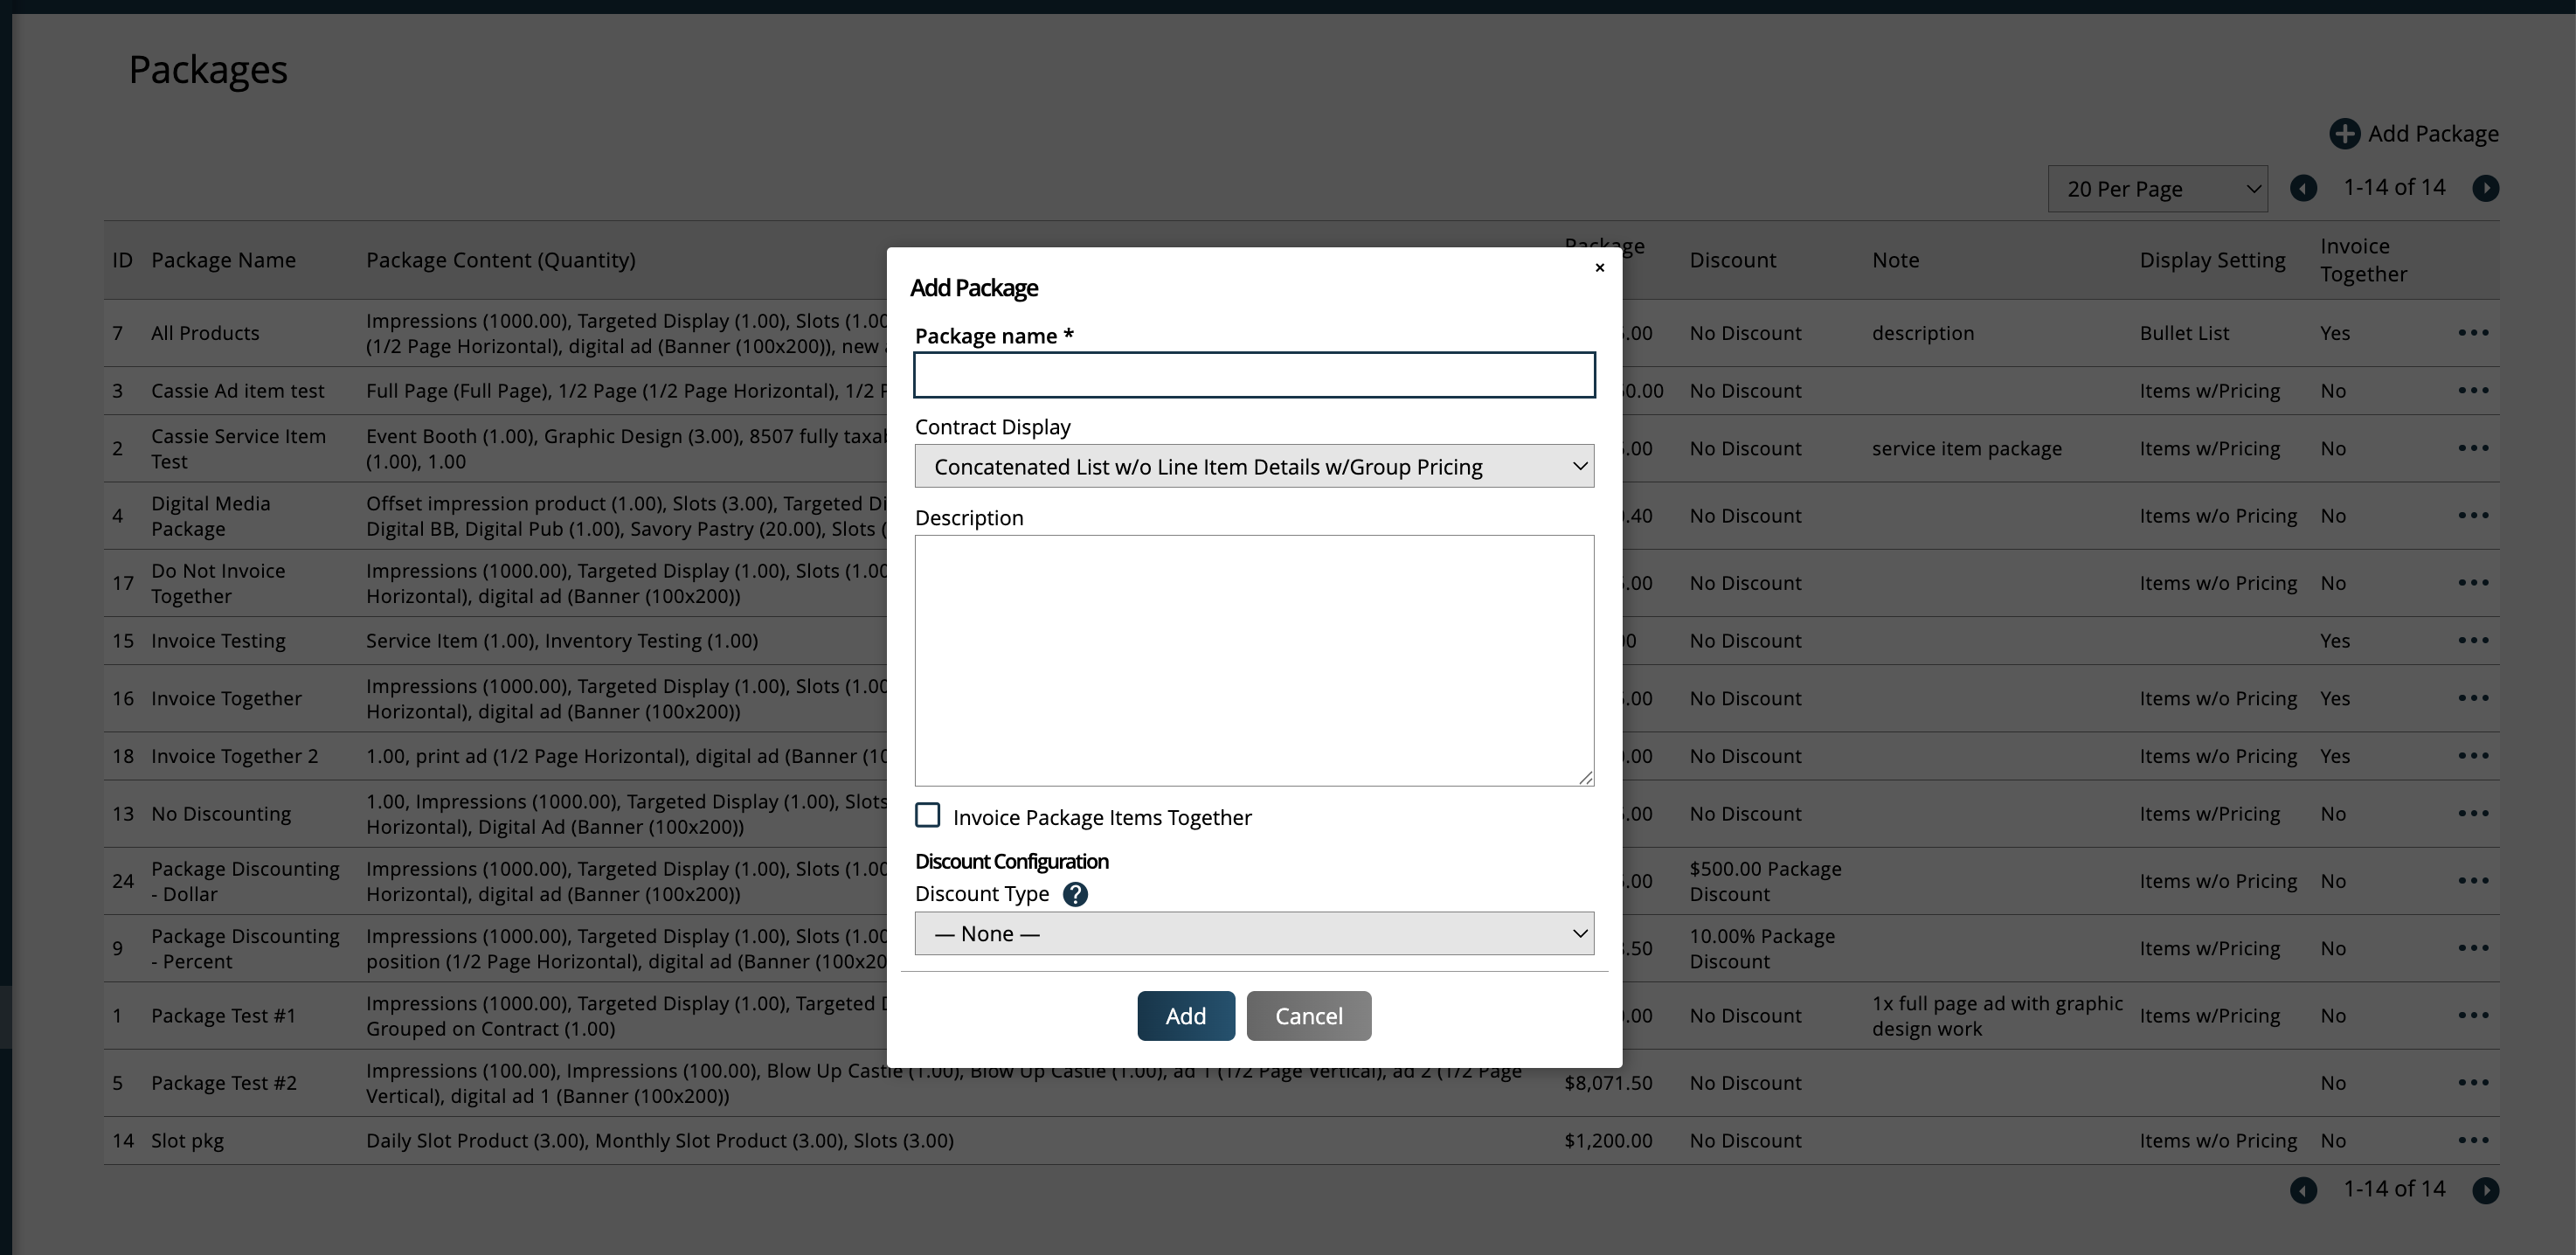
To create a new package, click on the Add Package icon. In the Add Package popup, you are required to enter a name for your new package and can add a description.
The Publication field is optional, and is purely used for filtering purposes when adding packages to an order. If specified, when adding a package to an order and selecting the Publication, only packages associated with the selected Publication will show up to choose from. Setting a Publication here does not limit the line items included on the package to only that Publication, you can use line items for any Publication.
You can also choose how to display the line item details for the package on your contracts.
Line Item Details w/Group Pricing: The contract will show individual line item details of the package contents but will only show a total price for the entire package, and you will not see the prices of the individual line items.
Line Item Details w/Line Pricing: The contract will display the individual line item details of the packages and will include the price information for each item.
Concatenated List w/o Line Item Details w/Group Pricing: The contract will show each item's name, separated by commas. This option shows a total price for the entire package, and you will not see the prices of the individual line items.
Bullet List w/o Line Item Details w/Group Pricing: The contract will show each item's name, in list format, each item being one bullet point. This option shows a total price for the entire package, and you will not see the prices of the individual line items.
Note
The display settings for your package will override those set on the Package element on your contract templates.
When adding or editing a package, you can also choose if you want to 'Invoice Package Items Together'. If left unchecked, the line items will be invoiced individually and will go through the regular invoicing process. If checked, the line items on the package cannot be invoiced individually and the invoice for the package will need to be created on the Create Group Invoice page. For more information about group invoicing, click here.
You can also set up a discount on the package. For the discounting options, you can choose between item level or package level.
Package Level: The discount will be applied to the package as a whole. If you select Package Level, the next steps are to determine if you want the discount to be a flat rate or percentage. Then, enter the percent or dollar amount for the desired discount value.
Item Level: If you choose the Item Level discount option, you will set up the discounts on the individual items included in the package. On the Edit Package Contents page for a package set up with Item Level discounting, you'll be able to specify percentage, flat rate, or override price discount amount on each of the line items.
Tip
The Item Level discounting option gives you more flexibility over how your discounts are applied to your package items. For example, using this option, you could have one item in your package with a discount, and a second item in the same package without any discount applied.
When adding a package to an order with a discount specified on the package, the discount amount(s) will be shown in the Add Package popup.
Click ‘add’ to create your new package.
Once a package is created, it will be listed in the table, with any package contents and notes, as well as pricing and other package settings. You can always edit the package settings by using the ellipsis icon and clicking the ‘Edit Package’ action.
Tip
Existing packages can be cloned to create new packages. To do so, click the ellipses icon on a package, and click the 'Clone' action. This will clone both the package settings as well as the line items from the original package.
To add line items to your package, use the ellipsis icon and click ‘Edit Package Contents.’ On the Package Contents page, you can add, edit, and delete the line items that make up the contents of your package.
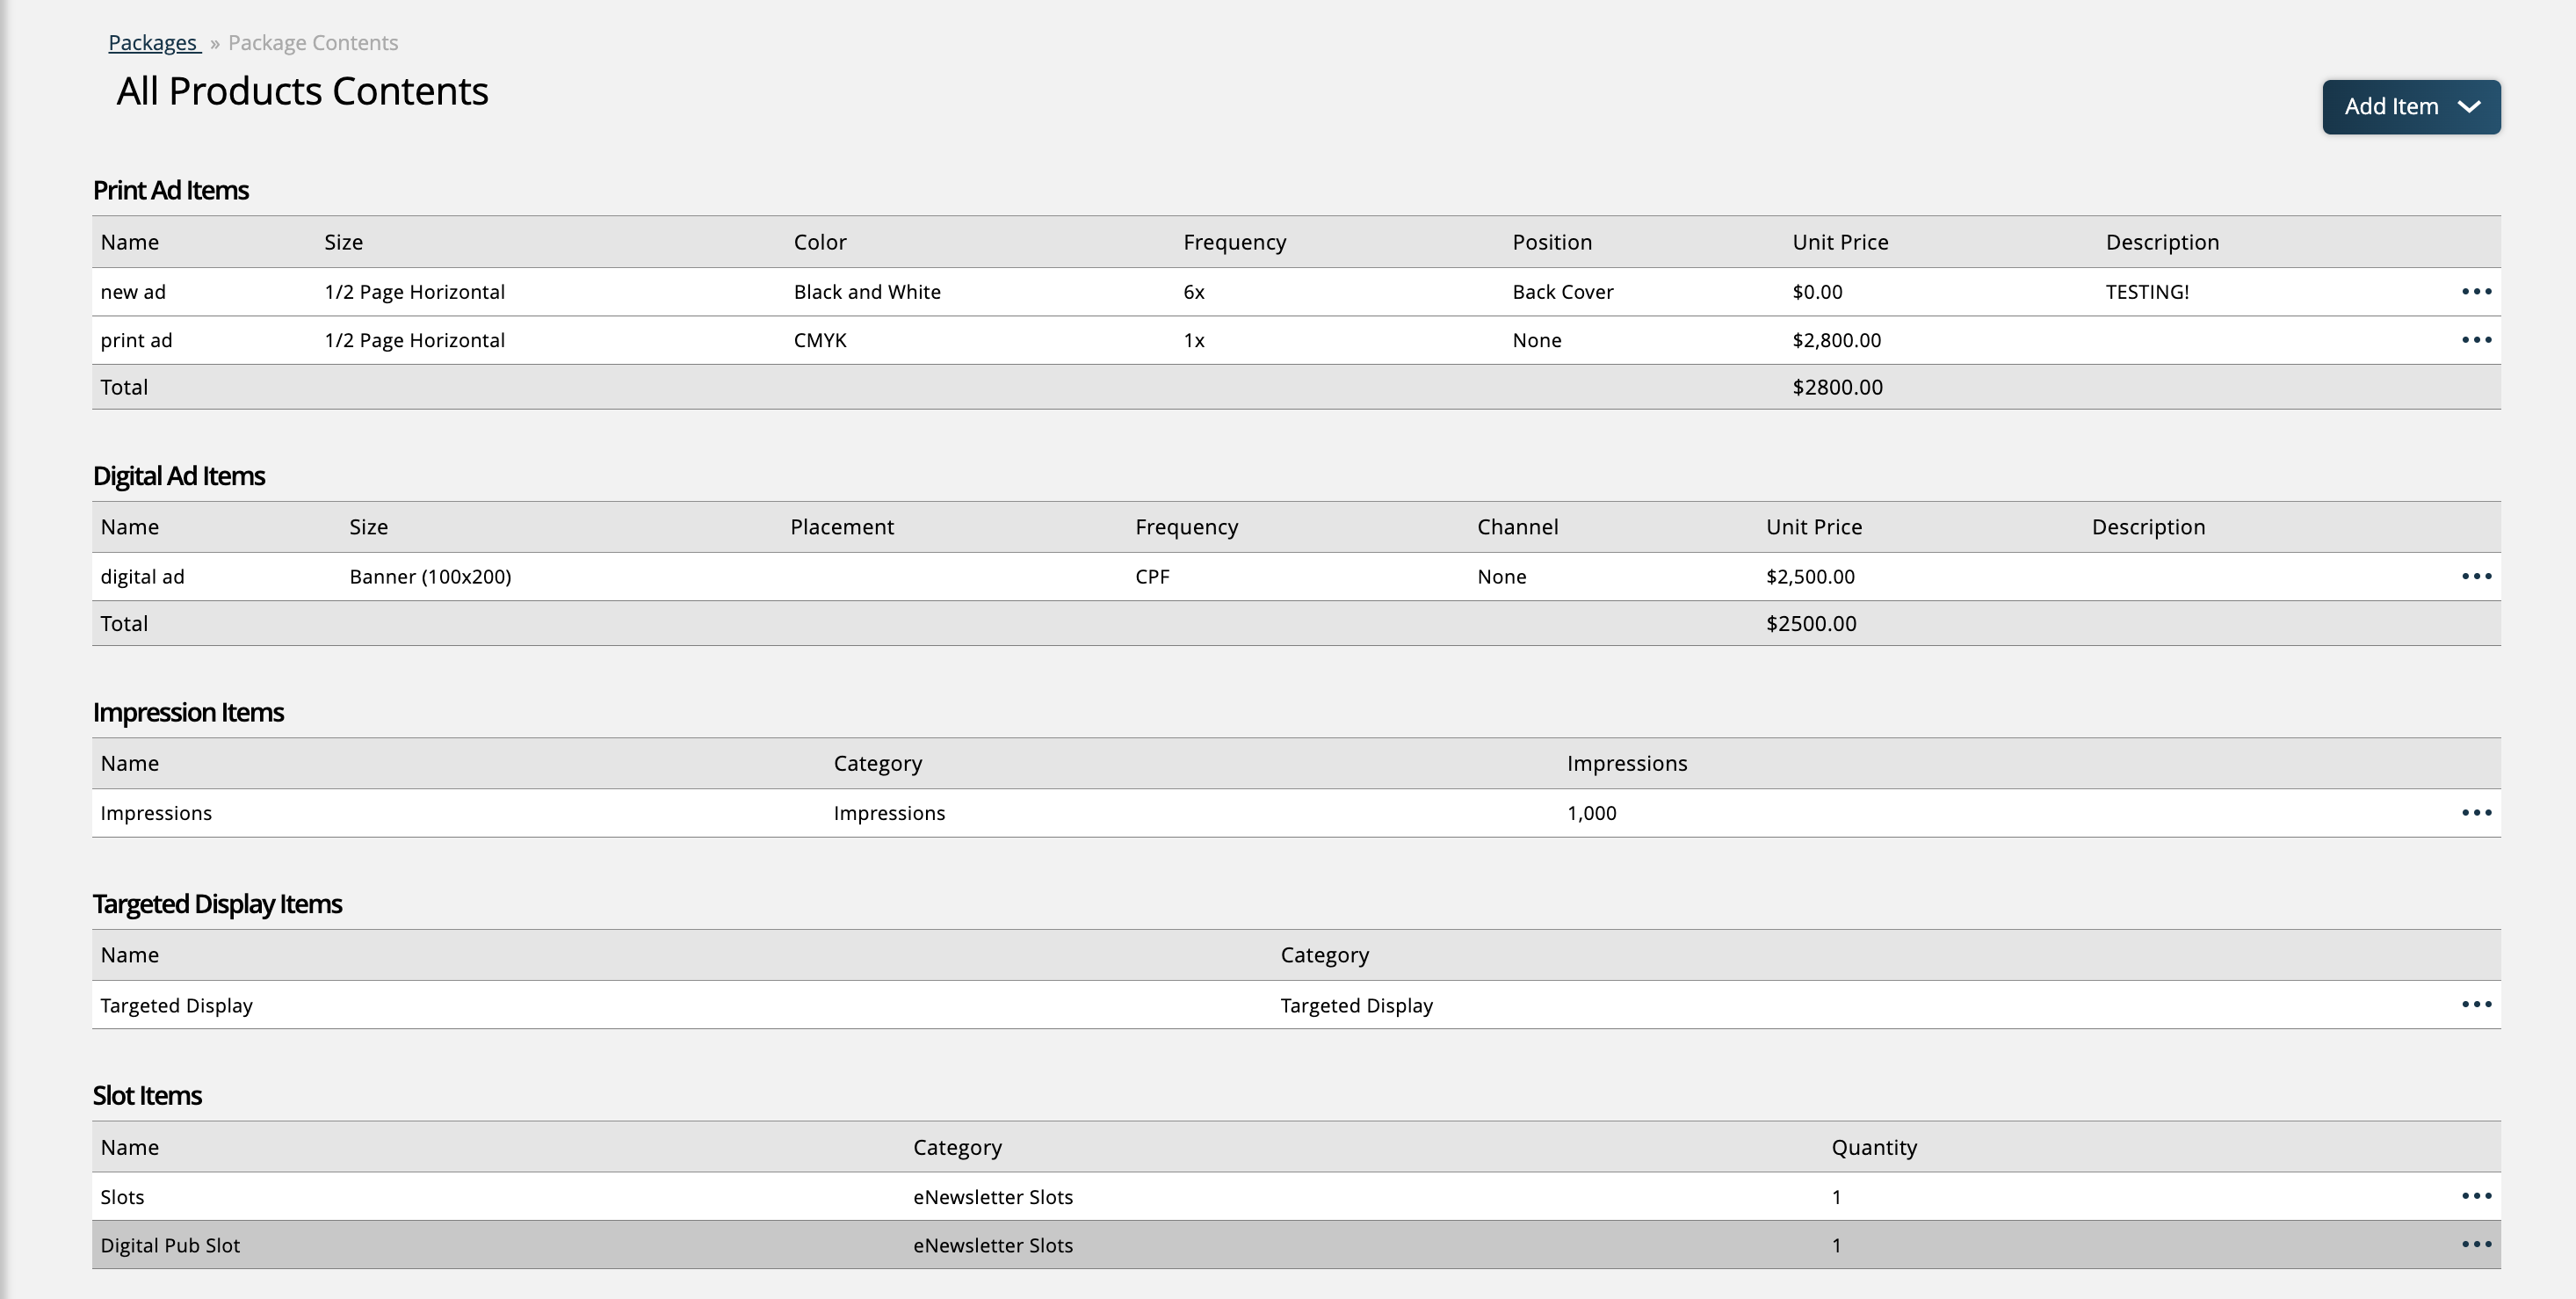
At the top of the page, you will see the various add line item actions. Depending on which type of item you are adding, the popup will require you to enter different information.
Ad Items: In the ad item popup, you will be required to enter a name for the item, as well as choose the rate card, ad size, and frequency. If a print rate card is chosen, you will also be required to select a color. There are also options to select a placement and position/channel, as well as enter a description.
Impression Items: For impression items, you simply need to choose the impression product, and enter the number of impressions. Depending on your system configurations, you may be required to select a rate card for the product as well. If not required based on your system configurations, this will be an optional field.
Slot Items: Like impression items, for the slot item popup, you only need to choose the slot product and the quantity.
Targeted Display Items: For this product type, you will at least be required to choose the product. Depending on your system configurations, selecting a rate card may also be required.
Reserved Items: Choose the product and set the number of units. If your system configurations require a rate card, you will need to select one here as well. If not, the rate card field will be optional.
Service Items: For service items, choose the service item and a default quantity. You also have the choice of entering a description for the item.
Event Items: For event items, you will need to choose the type – either Ticket or Booth – and the quantity. You can also choose to enter a description here if you wish.
If your package has Item Level discounting set up, you will also see optional discount fields in each line item popup.
After a line item has been added to the package contents, you can use the ellipsis icon on the item to edit its settings, disable, or delete it from the package.
When adding a package to an order, any of the information entered on the line items on the Package Contents page will be automatically filled in for the sales reps. For example, if the package contains an impression product set at 5,000 impressions, then the rep will have the product and quantity fields pre-populated for the package and will just need to enter any additional information such as publication and run dates.
Updated 4/9/2026