Dynamic Attribute Setup
Dynamic Attributes are fields that can be used to capture additional data within Ad Orbit to meet your needs. There are standard, hard-coded fields within Ad Orbit such as company category or email address. However, there may be information that you need to capture that Ad Orbit does not provide. In this case, use Dynamic Attributes. Read through this help center document to learn about how to create and manage your Dynamic Attributes.
To create and manage Dynamic Attributes, go to Settings > System Design & Info > Dynamic Attributes. To access this page, you need the User Permission 'Dynamic Attributes'.
On the Dynamic Attributes page, you will see various tabs that present you with different areas within Ad Orbit where Dynamic Attributes can be applied. Depending on how your Ad Orbit account is configured, you may not see every available option. Some of the potential Dynamic Attribute areas include Contacts, Companies, Activities, Subscriptions, and Asset Templates.
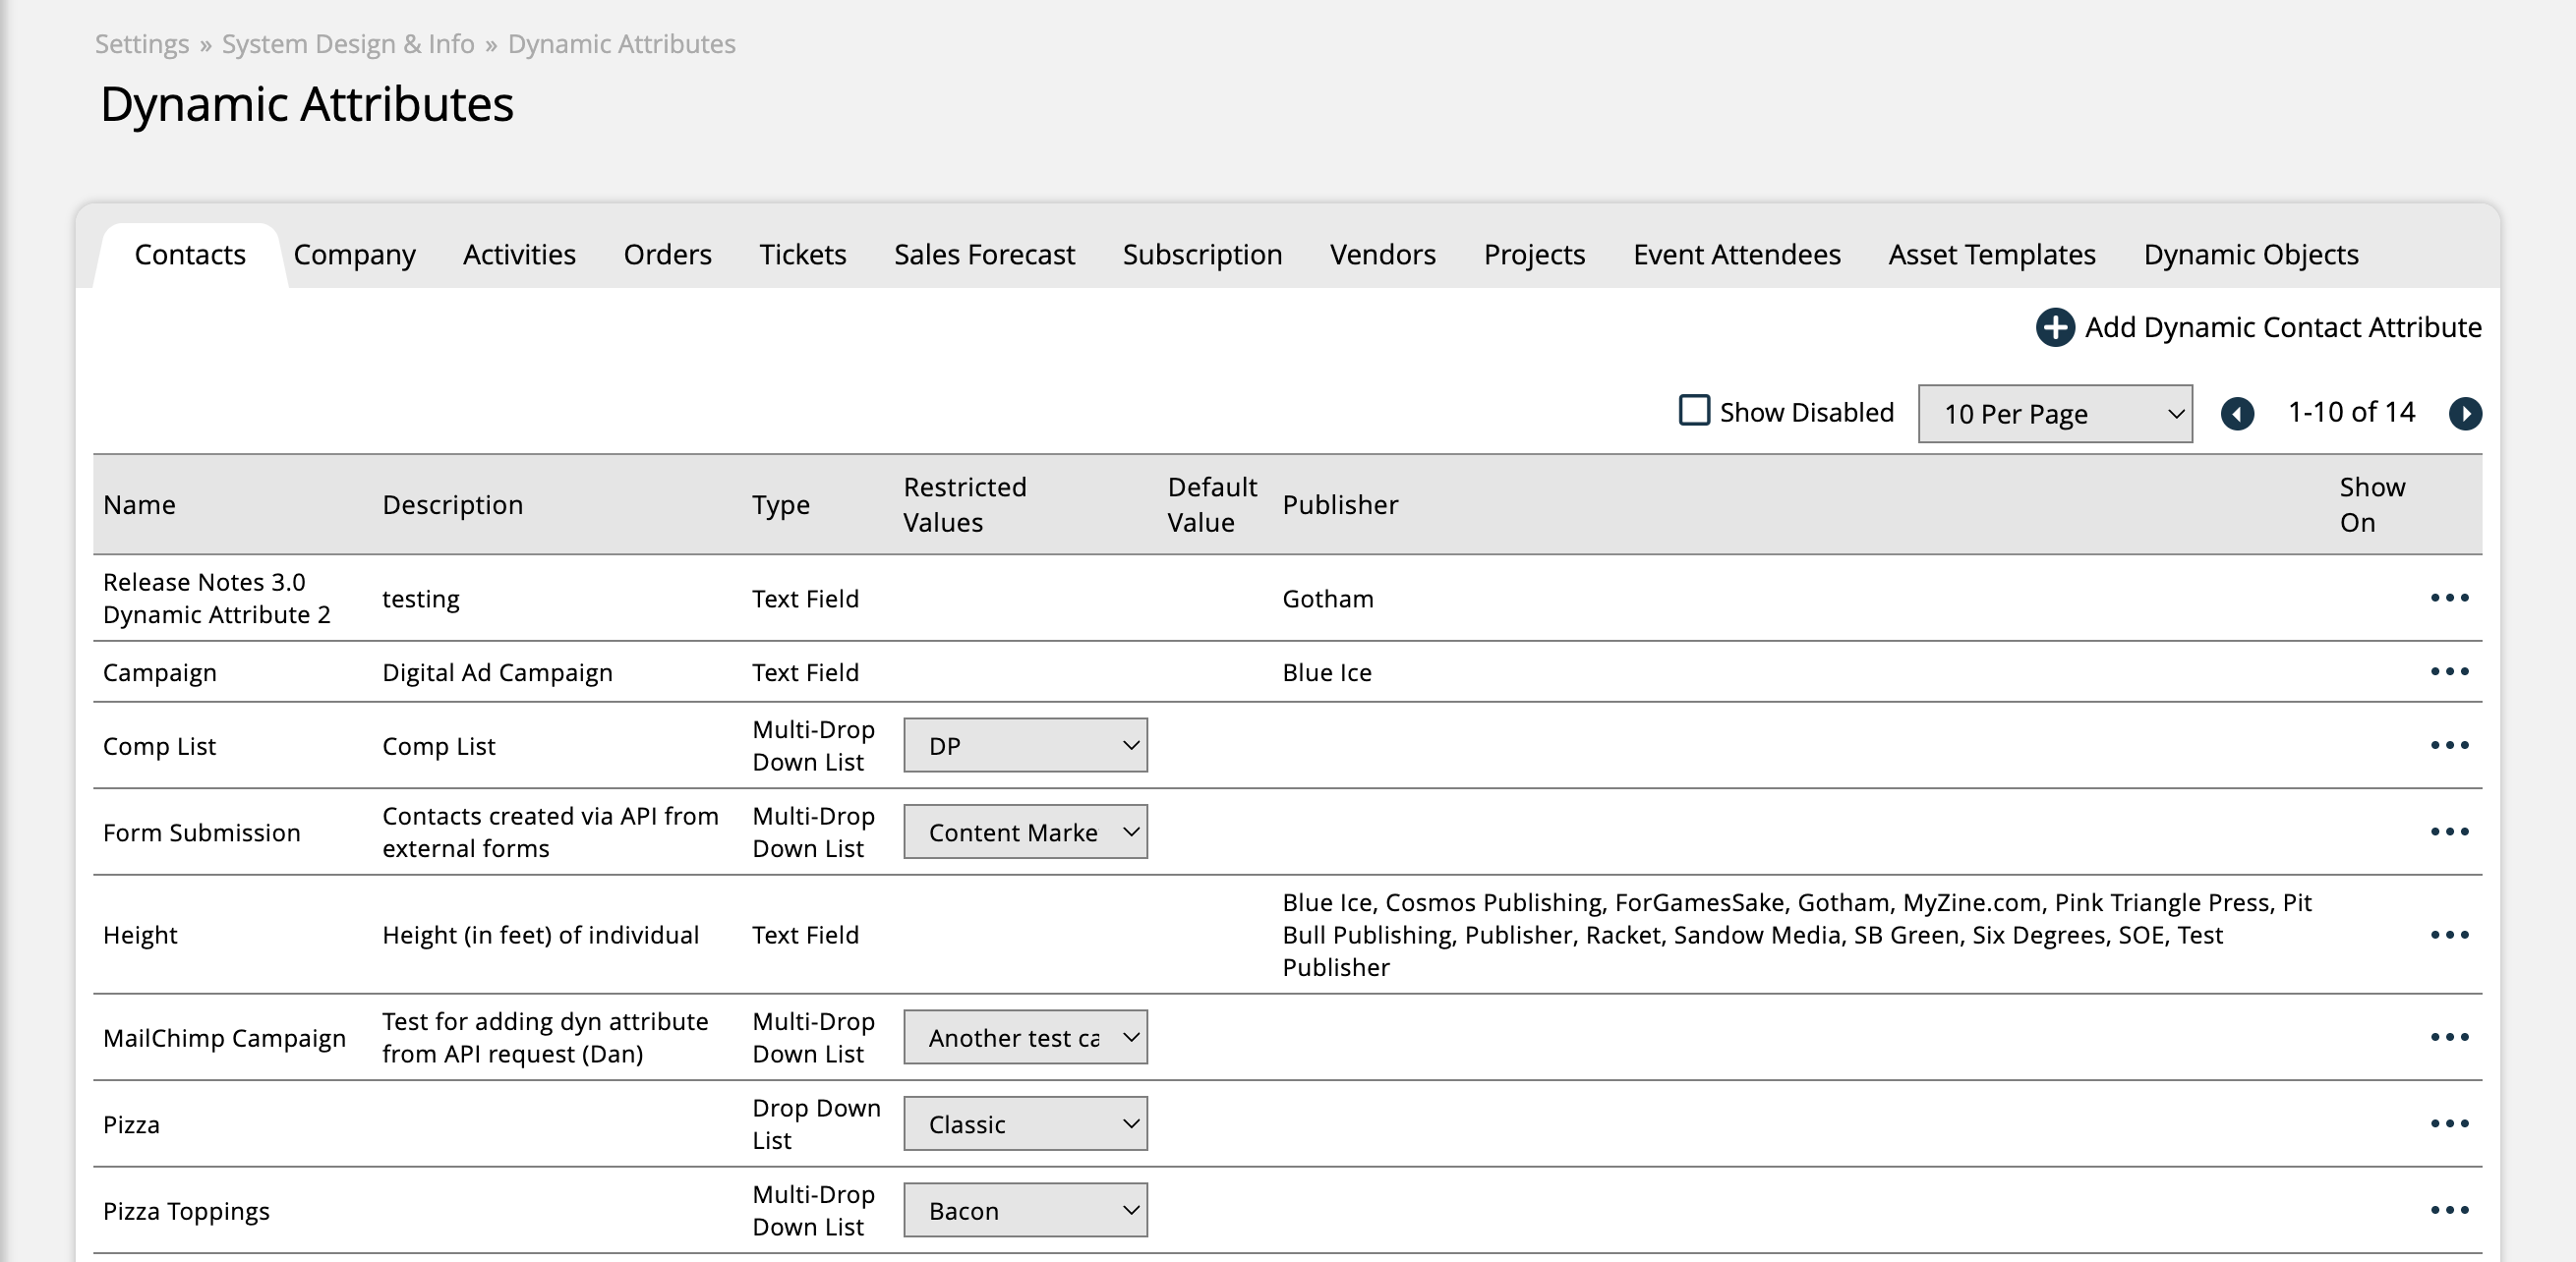
To create a new attribute, select the tab for the type of attribute you would like to create, such as 'Company', then click the +Add Dynamic Attribute button.
In this popup, there are some basic settings for the attribute that are the same regardless of which tab you are creating the attribute for. These basic settings are the following:

Name: Each Dynamic Attribute requires a name. You cannot have duplicate attribute names within the same type.
Description: Add a description to let users know the purpose of the attribute. This field is optional.
Publisher: The publisher field will restrict what attributes will display on tickets based on the company. For example, if you assign a ticket dynamic attribute to publisher ABC but your advertiser’s publisher is XYZ, then you won’t be able to use that ticket attribute on the advertiser.
Field Type: Determine what type of value should be entered when using this attribute. There are a handful of options to select from.
Date Field: When this field type is used, users will be presented with a date picker to select a date for the attribute value. You can filter by a specific date on search pages and the date can display on reports and searches. Dates are particularly helpful for contact information and ticket attributes.
Drop Down List (Multi-Select): When a multi-select drop down field type is used, you will be required to enter the restricted values that a user can choose from when setting the attribute on an item. Each restricted value must be separated by a semi-colon, e.g., Yes; No; Maybe. When using an attribute with this field type, users can pick and choose from as many of the restricted values as desired.
Drop Down List (Single Select): When a single-select drop down field type is used, you will be required to enter the restricted values that a user can choose from when setting the attribute on an item. Each restricted value must be separated by a semi-colon, e.g., Yes; No; Maybe. When using an attribute with this field type, users can pick one of the restricted values.
Text Area/HTML Field: Large field to type notes. Good for communication about a ticket, company, or contact. The maximum number of characters is 1200. Specifically when using Ticket dynamic attributes, HTML can be entered in attributes of this field type.
Text Field: Smaller field used for labels and names. The maximum number of characters is 100.
Radio Buttons: When a radio button field type is used, you will be required to enter the restricted values that a user can choose from when setting the attribute on an item. Each restricted value must be separated by a semi-colon, e.g., Yes; No; Maybe. When using the attribute, a user will only get to choose one option, but unlike single-select drop downs, the option can only be changed and not undone after it is selected. Radio Buttons are good if you want the user to see all the options right away.
Display Order: The display order determines the order in which attributes display on a page and in drop-downs. If you want an item to show up first in a list, enter the number 1.
Default Value: Enter a value you want to the system to automatically populate when a user uses the attribute.
Required: A user will be required to enter the attribute when creating or editing a contact, company, project, etc. that this attribute is being utilized on.
Depending on which type of attribute you are creating (companies, projects, etc.), you may see more settings in addition to the basic attribute settings. Below are the more specialized settings and what they do:
Mail Merge Tag: Available on contact, company, and ticket dynamic attributes, this optional field enables you to use the dynamic attribute on mail merge email templates. Simply enter a tag value, save your changes, and the attribute can be used on mail merge emails like any other merge tag.
Note
The value you enter in the mail merge tag field will be automatically re-formatted to match the standard mail merge tag formatting. For instance, if you enter 'assigned to' in this field, once saved, it will be re-formatted to 'ASSIGNED_TO'.
Client Facing/Public: On contact, event attendee, and order dynamic attributes, enable this setting to allow customers to view and update the dynamic attribute when checking out of the ecommerce storefront. Any dynamic attributes without this setting will not be visible to your contacts. When in the portals or checking out on the ecommerce storefront, contacts will have the option to enter or update information for these dynamic attributes, but they will not be required. Any updates made to the attributes by your contacts will be reflected within Ad Orbit.
Client Facing/Public Required: If you enabled the ‘Client Facing/Public’ setting on a contact, event attendee, or order dynamic attribute, then you also have the choice to make it required. With this setting, the contact will be required to enter information in the dynamic attribute field before they can proceed through the checkout process on the ecommerce storefront. Any updates made to the attributes by your contacts will be reflected within Ad Orbit. The ‘Client Facing/Public Required’ setting is different from the ‘Required’ dynamic attribute setting. Required is for internal use, whereas this setting is to make the attribute required for your customers.
Show in Lead Status Report: Specific to contact dynamic attributes, use this option to determine if the attribute should display under the 'Additional Info' column on the Lead Status report.
Show in Tickets: On company and order dynamic attributes, checking this option will enable the attribute to display on internal Ad Orbit ticket pages.
Show on Reserved Product Scheduler: Choose to display this dynamic attribute on the Reserved Product Scheduler. Available on order, company, and ticket attributes that are set up to show on line items, you can select as many attributes to display as you need. They will be shown when hovering over a scheduled item. You will only see this setting if you have Reserved digital media products enabled in your system.
Show on Offers: Specifically for order dynamic attributes, if checked, this attribute will be available for a customer to submit when claiming an offer in the client center. The attribute must be 'Client Facing/Public' to be set up to 'Show on Offers'.
Show on Contract: Specific to order dynamic attributes, when this setting is checked, the attribute will be displayed in the 'Dynamic Attributes' element on contract PDFs.
Show on Invoice: Specific to order dynamic attributes, when this setting is checked, the attribute will be displayed in the 'Dynamic Attributes' element on invoice PDFs.
Show in Client Center: Specific to support tickets. A customer will see the attribute when they view their tickets in the client center.
Show in Vendor Center: Ticket dynamic attributes can be set up to show in the vendor center on tickets that vendor contacts have access to.
Show in MagBuilder: A ticket dynamic attribute that displays in MagBuilder will show up when you hover over the info icon on the MagBuilder run sheet.
Show on Line Item: The show on line items setting on ticket dynamic attributes allows a user to enter the field when entering an order. Up to 16 ticket dynamic attributes can be set up to be used on line items. For more information about line item attributes, reference the 'Ticket Dynamic Attributes' help center page.
Product Type: On ticket attributes, this optional field allows you to pick and choose if you only want the attribute to apply to specific product types, such as Event line items, or Digital Media. If you leave this field blank, the attribute will apply to all of your tickets. If you choose a product type, the attribute will only be displayed on that product type, and not on others.
Product Subtype: Only applicable if you chose the Digital Media Product Type, this field allows you to choose which type of digital media product you wish the attribute to apply to (impression, slot, reserved, or targeted display). If left blank, the attribute will apply to all digital media items. If you choose a subtype, the attribute will only show on those digital media products.
Product: Only applicable if you chose the Service Product Type, or a Digital Media Product Subtype, this field allows you to get even more granular and choose the specific products that the attribute should be used on. This gives you a lot of flexibility, in that you can pick and choose very specific items that an attribute can be used for. If left blank, the attribute will apply to all products in the chosen subtype.
Existing attributes can be managed by using the ellipses icon on the right side of the table. Attributes can be edited, enabled or disabled, and imported. For more information about dynamic attribute imports, please reference the 'Dynamic Attribute Imports' help center page.
New 11/13/2025