Ticket Dynamic Attributes
Ticket dynamic attributes are perhaps the most customizable of all the dynamic attribute types. They can be set up as simply or nuanced as your team needs. You can use ticket attributes to help filter your reports and display information to your team and customers. Since these attributes have more available settings than some of the other attribute types, we will use this help center document to walk through the different ways ticket dynamic attributes can be configured.
Like all dynamic attributes, ticket dynamic attributes can be created and managed by going to Settings > System Design & Info > Dynamic Attributes, and clicking on the Tickets tab. The only required settings for ticket dynamic attributes are name and field type, e.g., multi-select or text field.
Important
You will also need to enter restricted values if you choose to make the attribute a single select, multi-select, or radio button. Use a ; to separate each of your options.
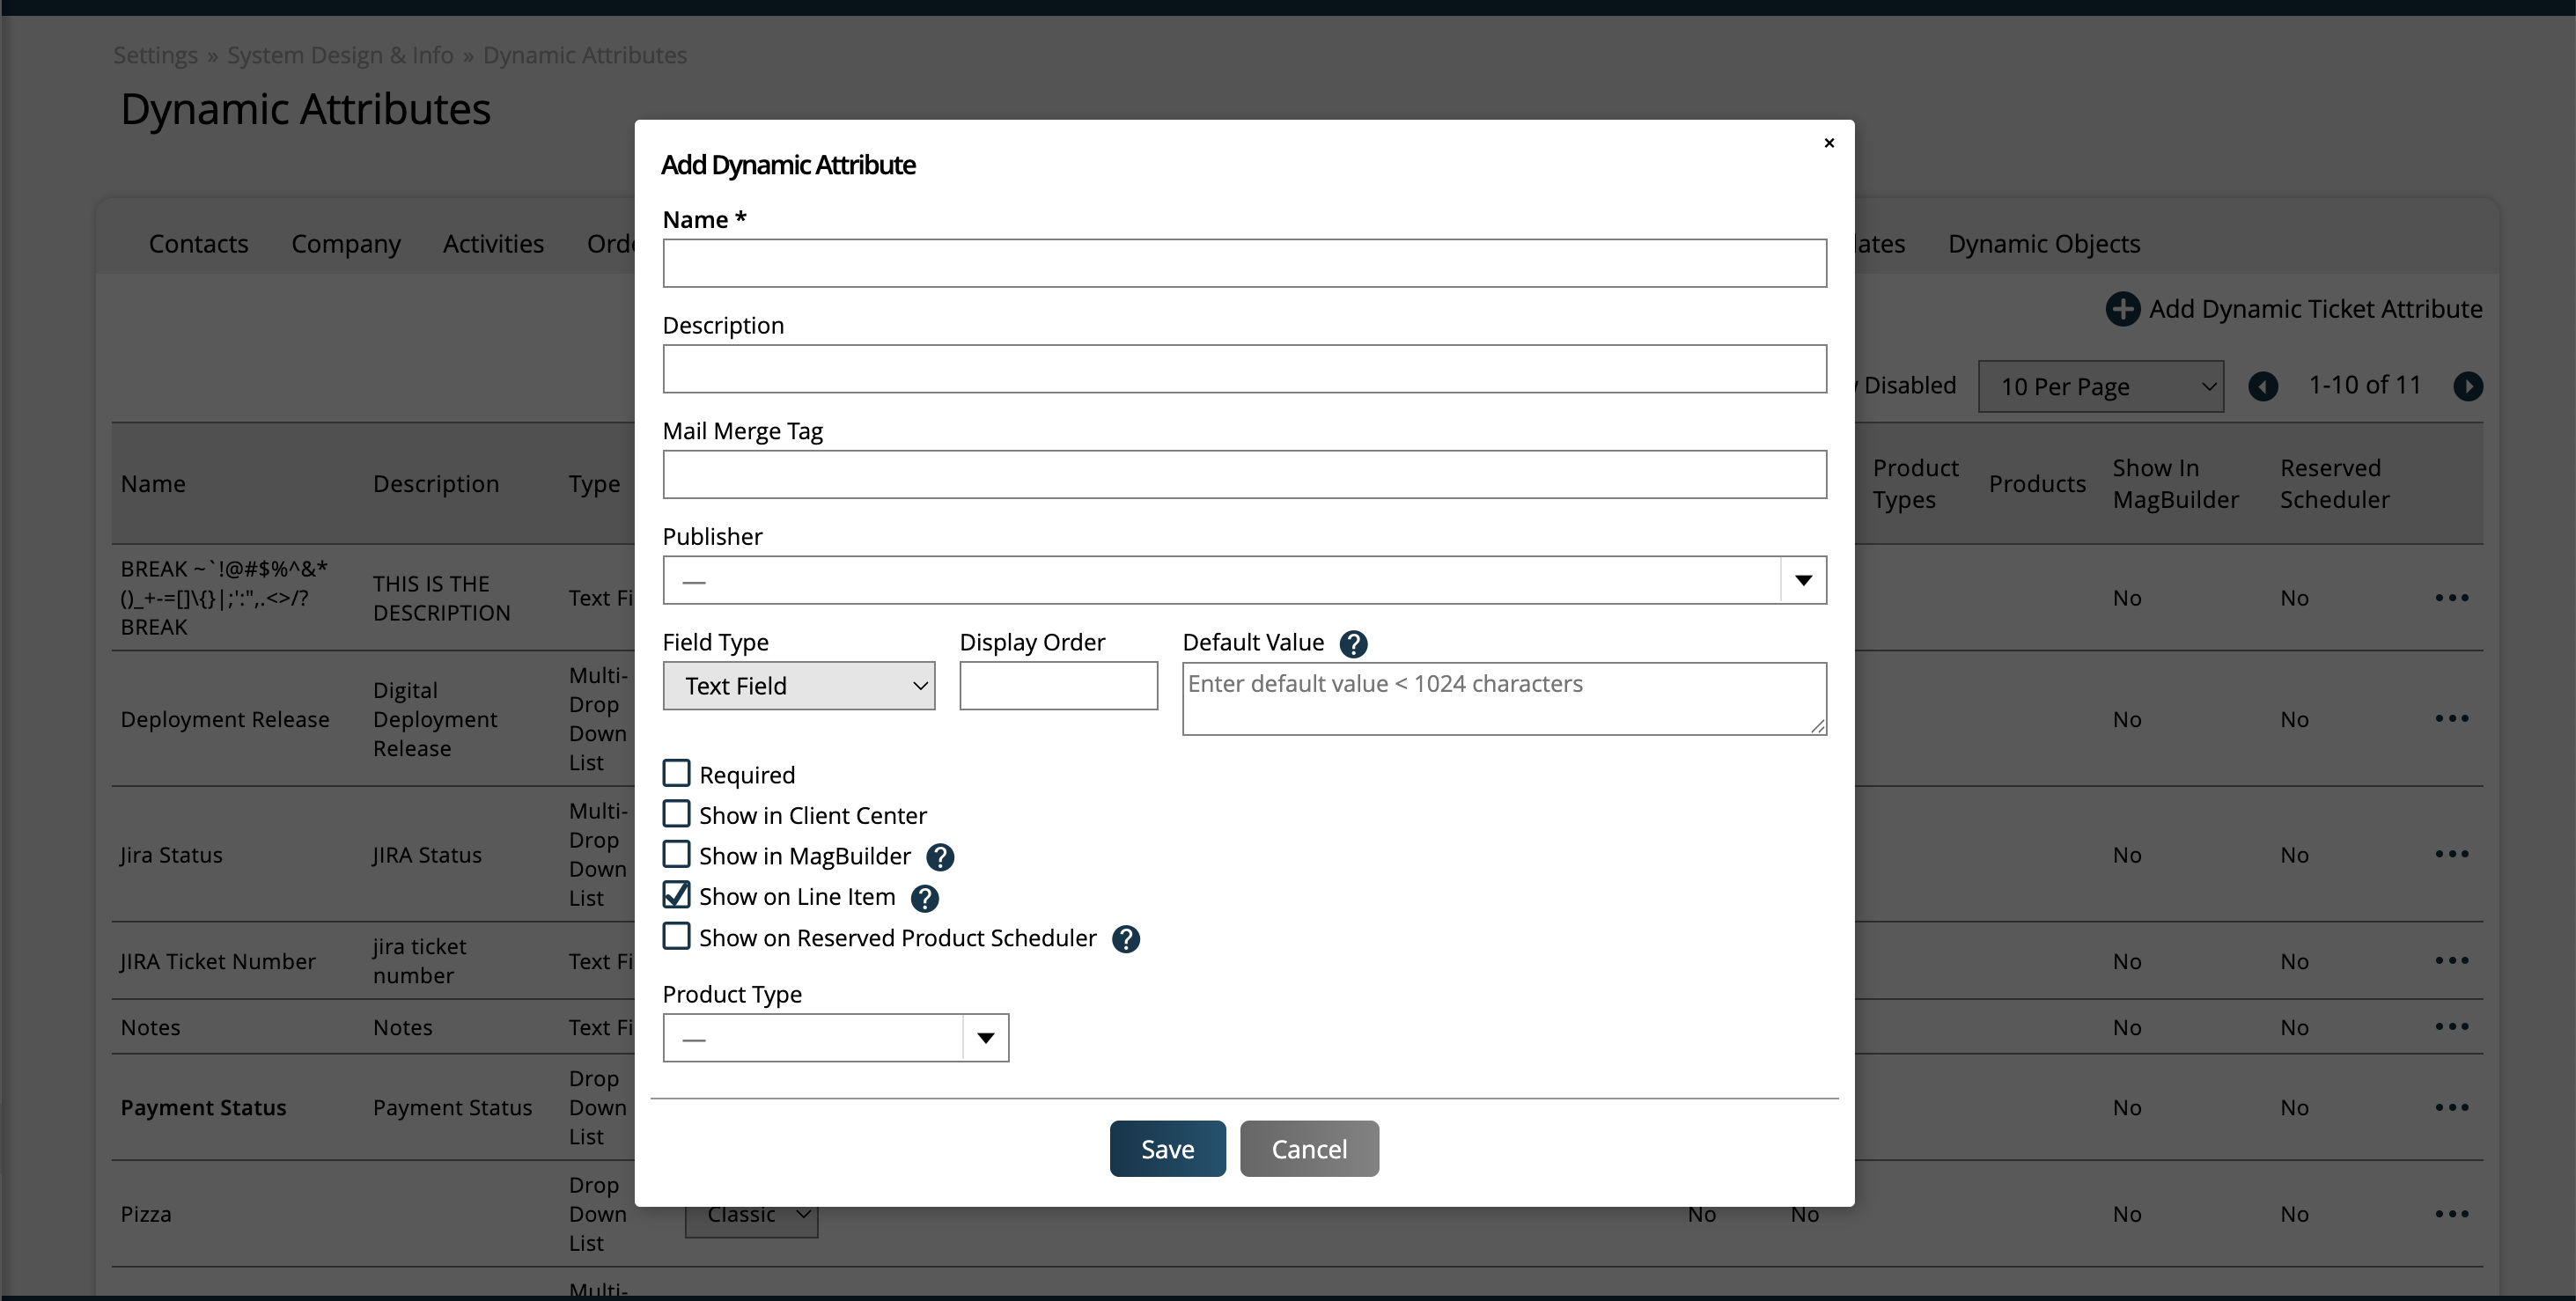
Ticket attributes are usually added when on the ticket page, but you can also flag ticket attributes to be line item attributes. Users can add line item attributes when entering an order.
Line item attributes show up on when adding line items to your orders. You can have up to sixteen line item attributes. You are also able to select from any field type, including drop down multi selects, radio buttons, dates, etc., to help you customize your system to fit your needs.
Set your attribute to 'Show on Line Items' to make a ticket attribute display on the line item entry form.

You can add up to 16 line item attributes. You will get a warning if you try to add more.
Now with your attributes set up, you will see new options when creating your line items for an order. You can also show the attribute on the contract and invoice template by adding the column to your template elements.
If you want to display the attributes as columns on the Order page or in the Client Center, contact support to enable the setting.
The Publisher field will restrict the ticket attributes to only display on tickets based on a the company's Publisher. For example, if you have two Publishers: Corporate and Regional, and assign an attribute to the Corporate Publisher, users will only see the attribute on tickets associated with companies where the Publisher is set to Corporate.
You also control where the attribute will display through your system. By default, ticket attributes will only display to user when they view the individual ticket, but you can choose to show attributes in other areas of your system.
Show in Client Center: Service items marked as support tickets appear in Client Center. Your Clients can communicate with you over a ticket discussion and see any attributes you flag to display in Client Center.
Show in Vendor Center: Service tickets assigned to Vendors appear in Vendor Center. Any attribute flagged to show in Vendor center will display in the Ticket Search and Ticket Overview page.
Show in Magbuilder: Tickets attributes on print ad tickets can show up for to your production when they layout the magazine. All attributes will appear in the 'i' icon on the ticket. Hover over to see the additional details.
Show on Reserved Product Scheduler: This option only displays if the attribute is set up to show on the line item. When checked, the attribute will be shown when hovering over a scheduled item in the Reserved Product Scheduler. You will only see this setting if you have Reserved digital media products enabled in your system.
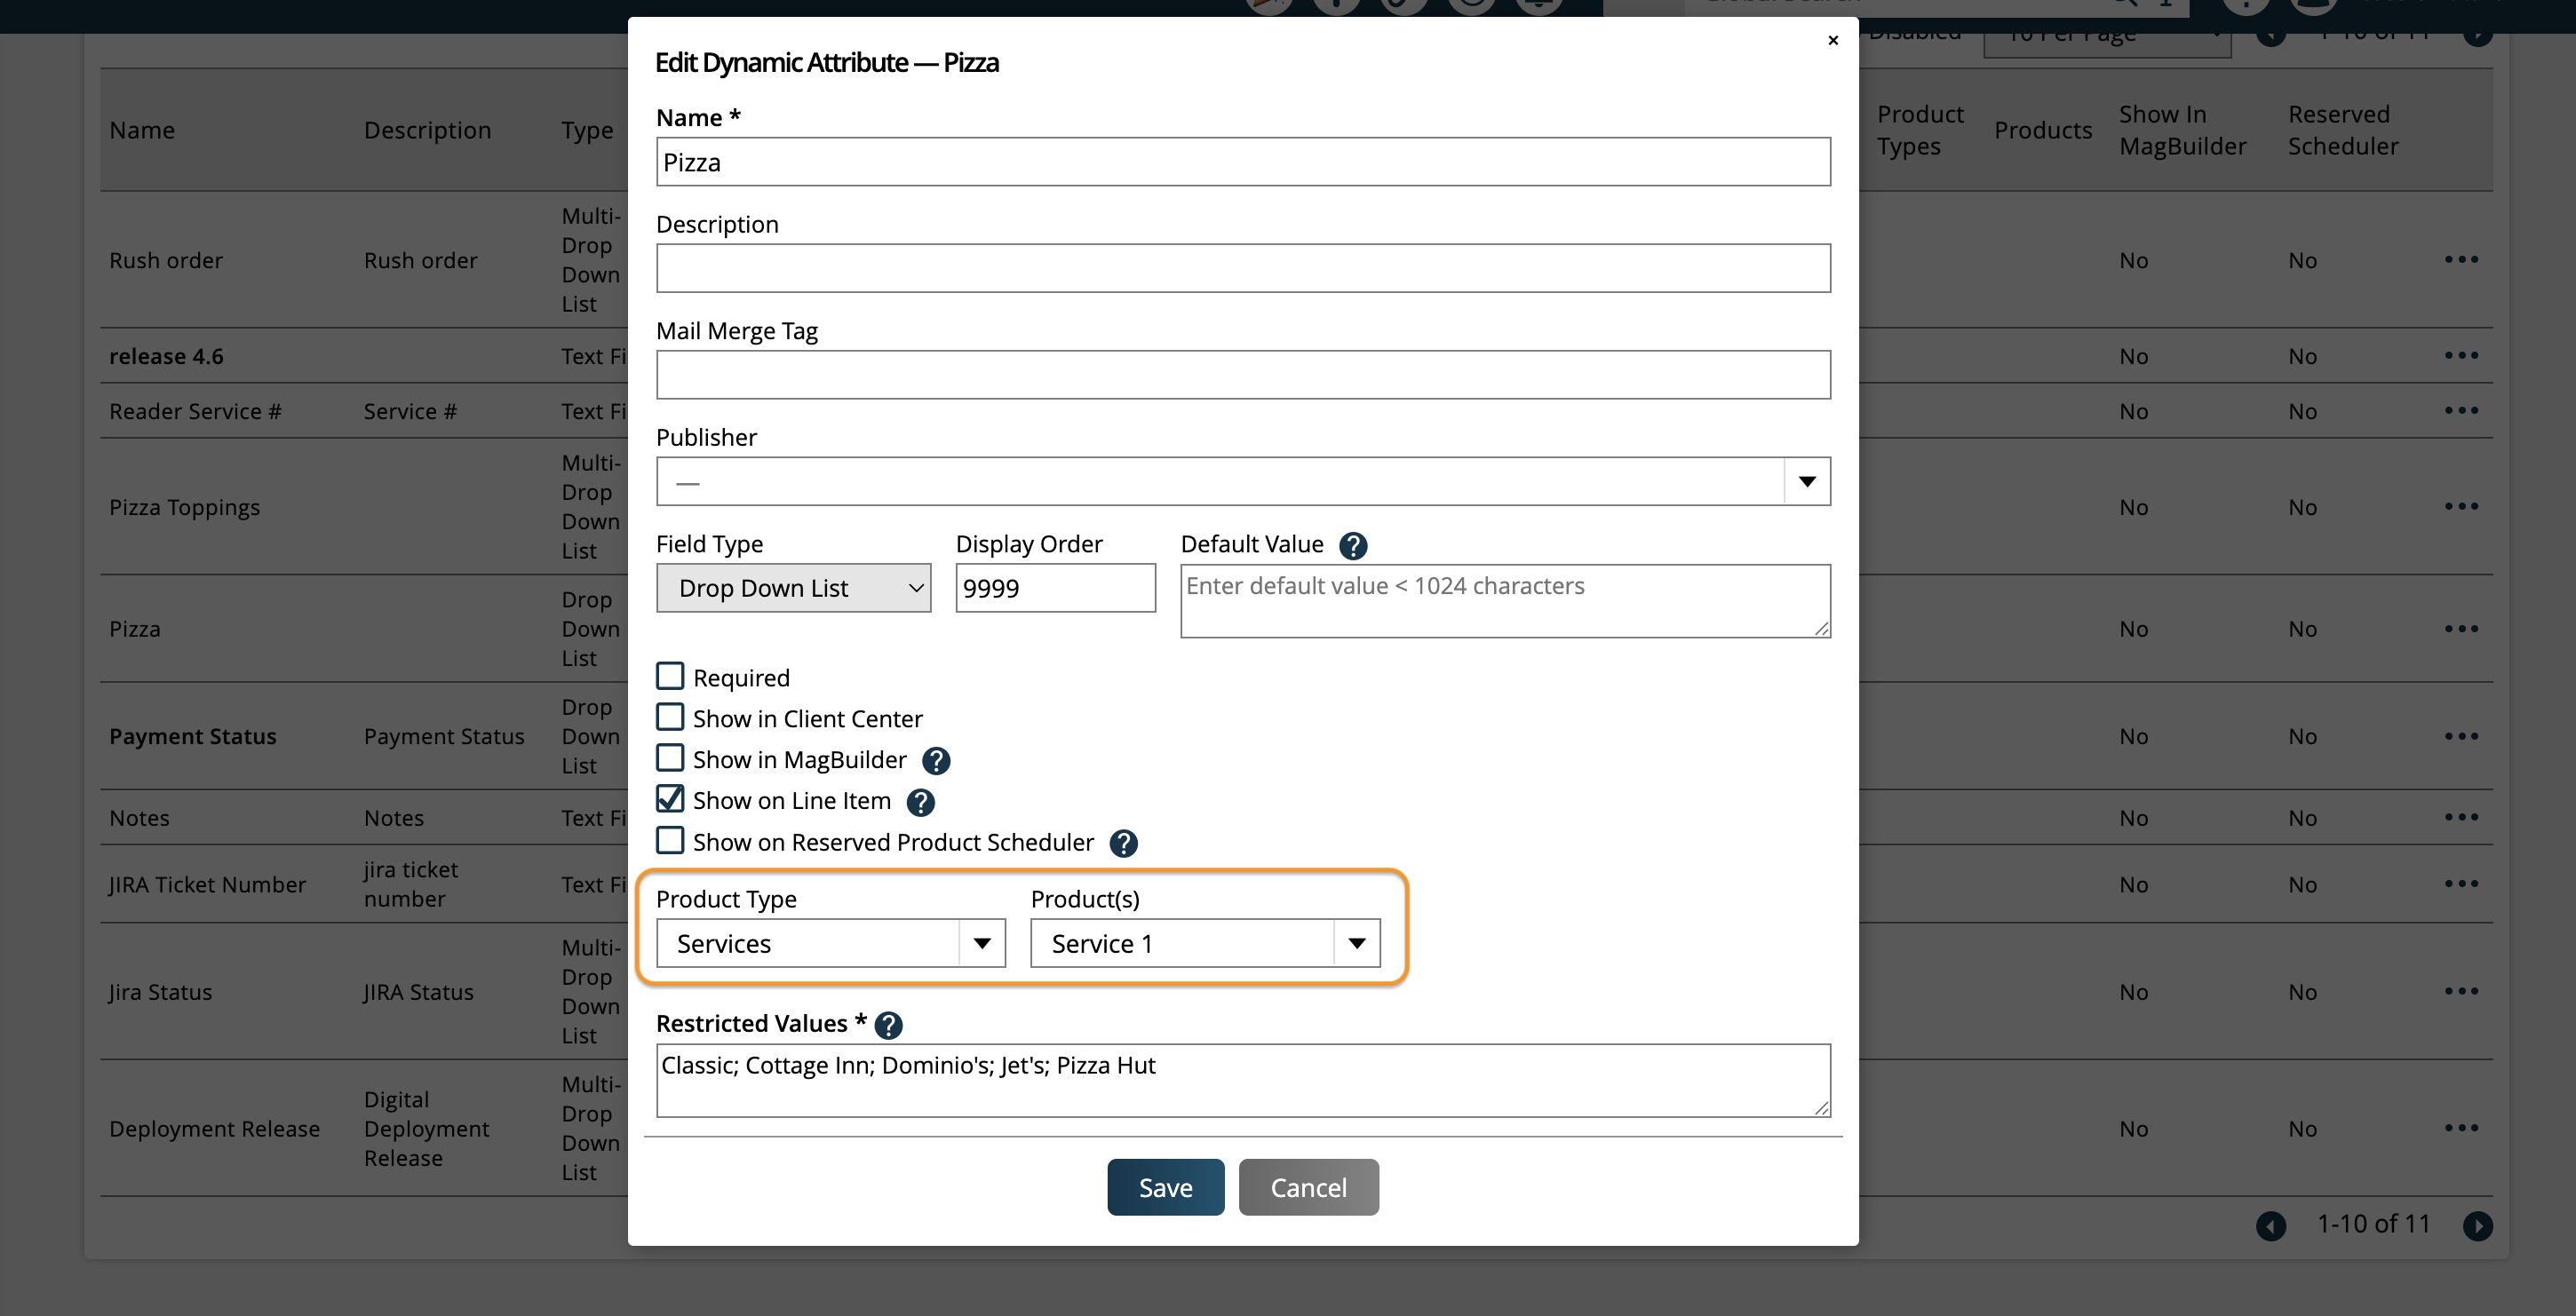
You can also specify whether the attribute should only be used for specific product types, subtypes, or products. These fields are all optional. If they are not filled out, the attribute can be used on any ticket.
Note
This restriction can be added whether the attribute is a 'line item' attribute or not.
First, you’ll see a multi-select dropdown for Product Type. This allows you to pick and choose if you only want the attribute to apply to particular product types, such as Event line items, or Digital Media. If you leave this field blank, the attribute will apply to all of your tickets. If you choose a product type, the attribute will only be displayed on tickets of that product type, and not others.
If you choose the Digital Media product type, you will see two additional fields: Product Subtype and Products. Product Subtype allows you to choose which type of digital media product you wish the attribute to apply to (impression, slot, reserved, or targeted display). If left blank, the attribute will apply to all digital media items. If you choose a subtype, the attribute will only show on those digital media products. Product allows you to get even more granular and choose the specific products that the attribute should be used on. This gives you a lot of flexibility, in that you can pick and choose very specific items that an attribute should be used for. If left blank, the attribute will apply to all products in the chosen subtype.
If you choose the Service product type, you will see an additional Products field. This works the same as the Digital Media product field. You can pick and choose which specific service products the attribute can be used on and ignore others. If left blank, the attribute can be used on all service products.
If you’ve set up your attributes to only be used on specific product types, subtypes, or products, you may not see all of your attributes on every ticket. For example, if you have an attribute set up to only use on your ‘Daily Slot Product’, that attribute will only show up on your Daily Slot Product line items and tickets, and not on any others.
Example:
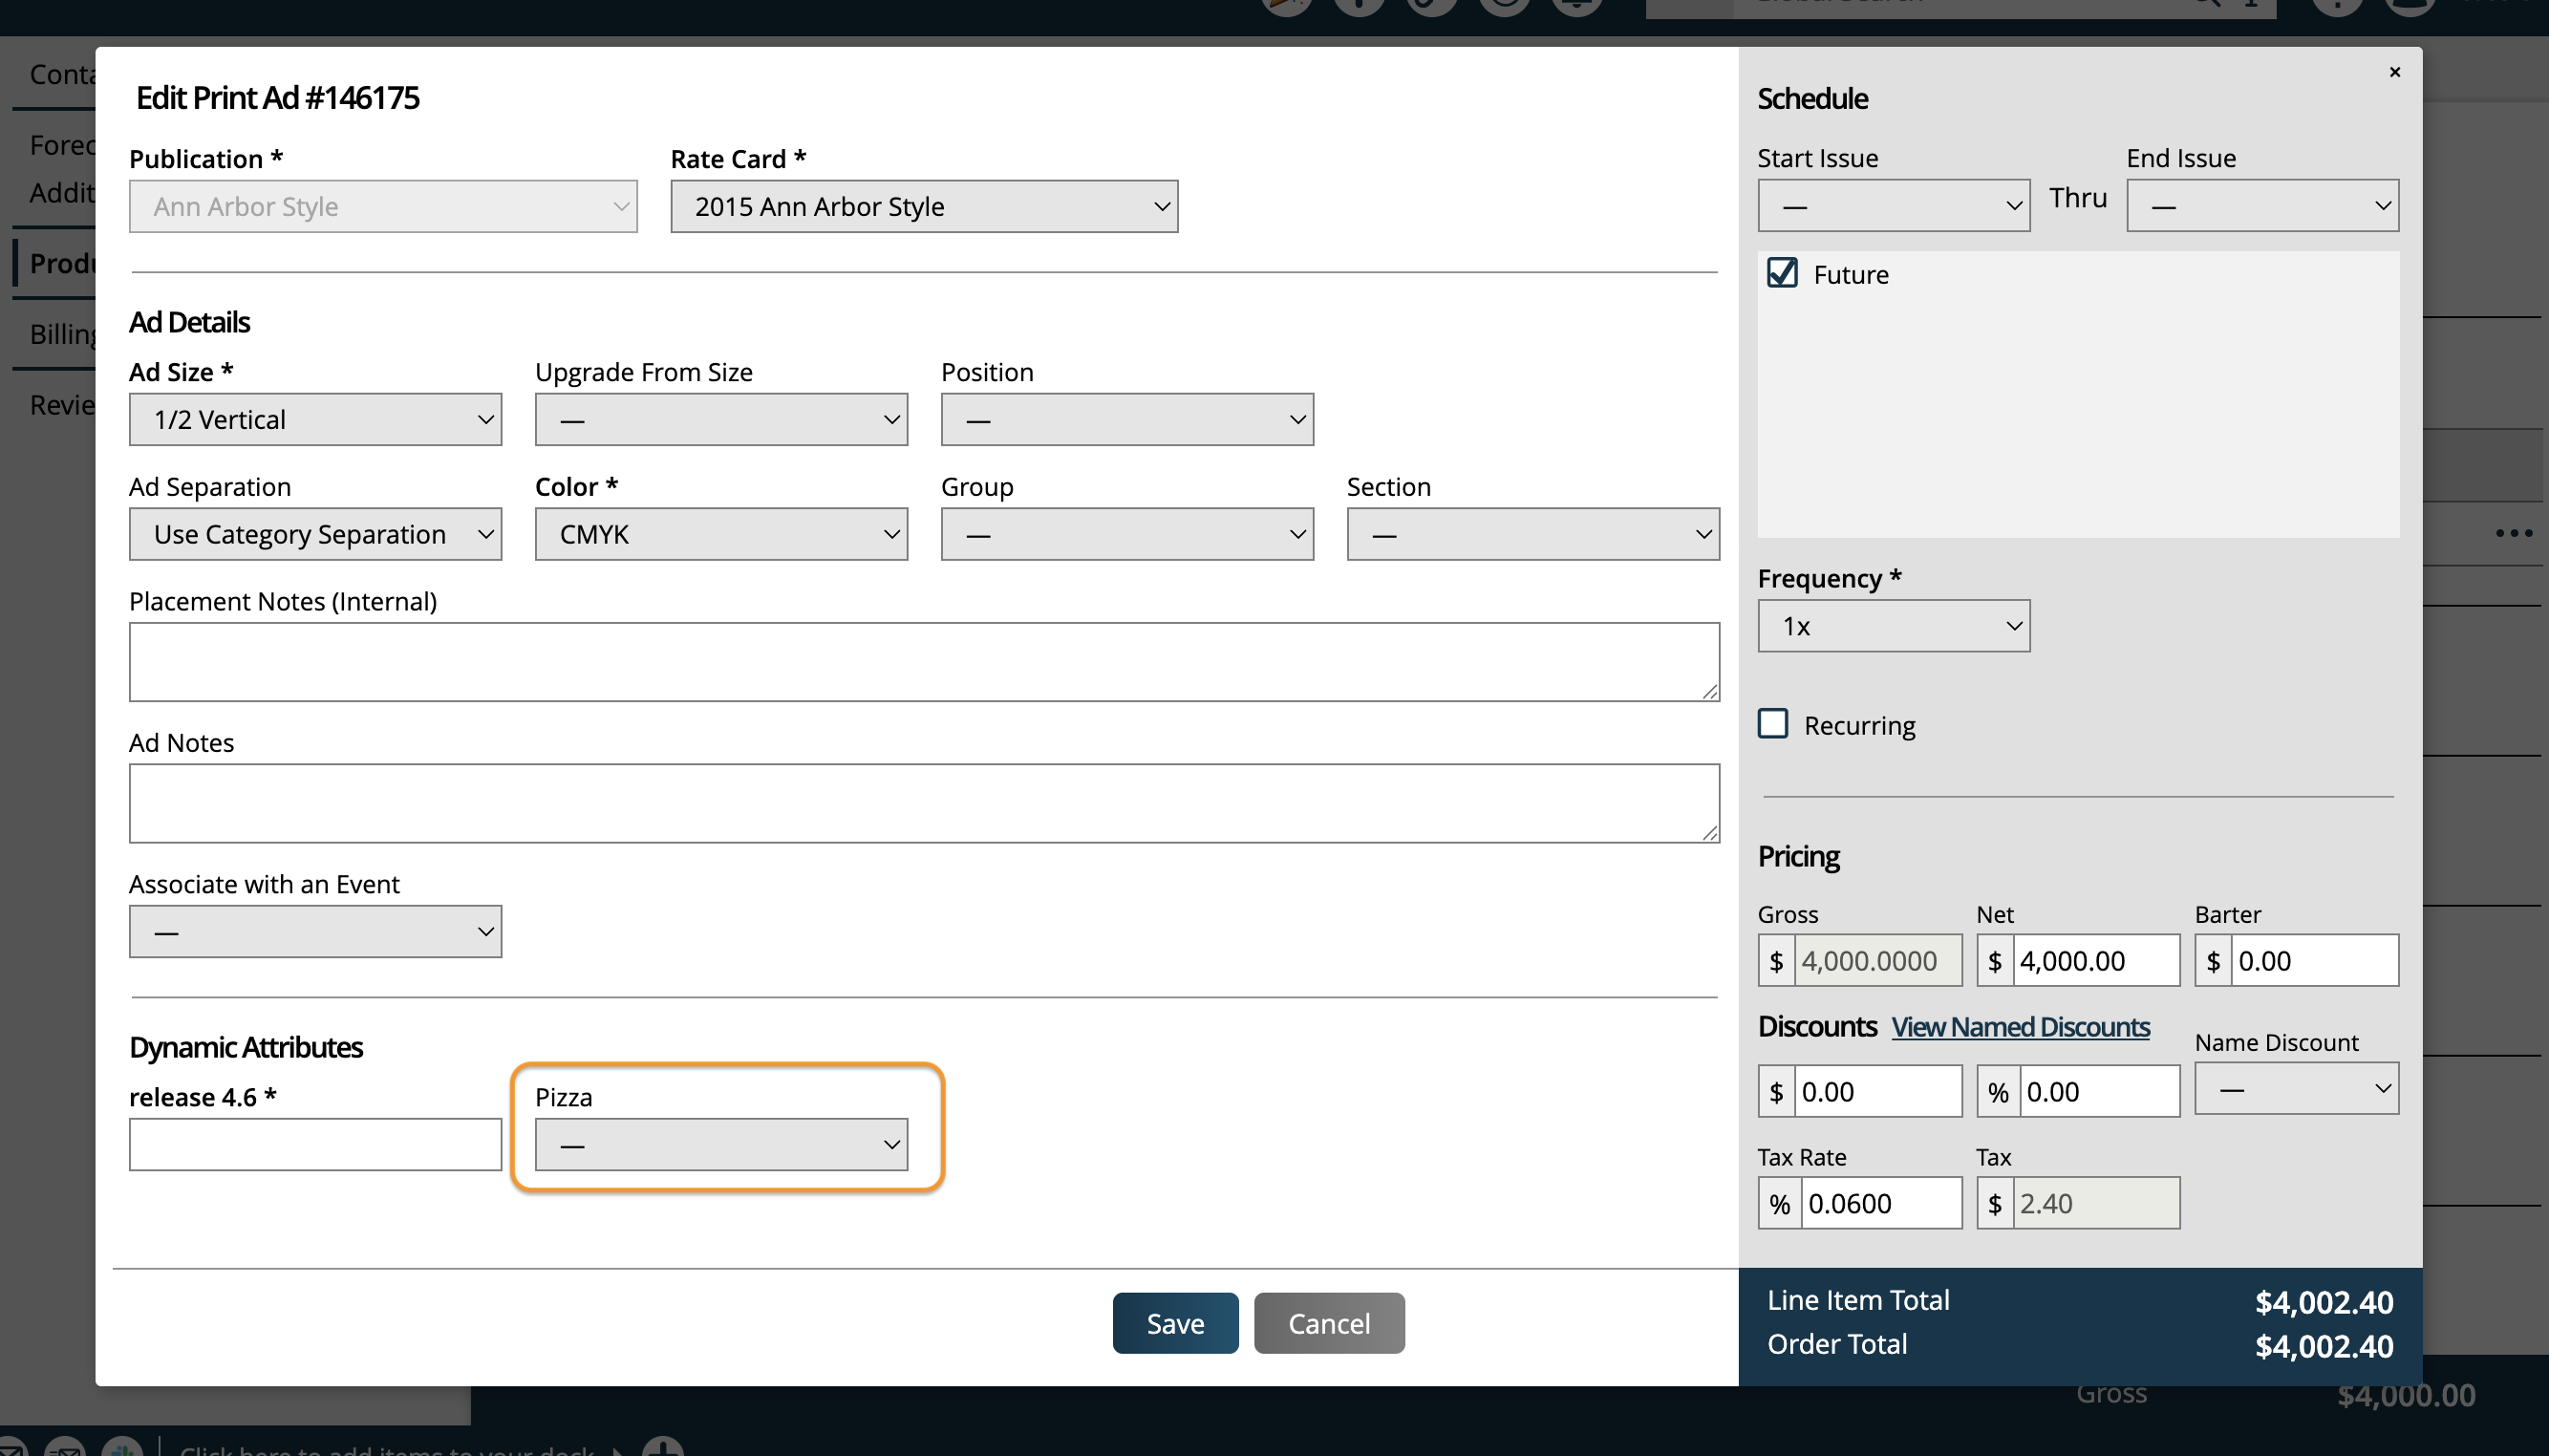
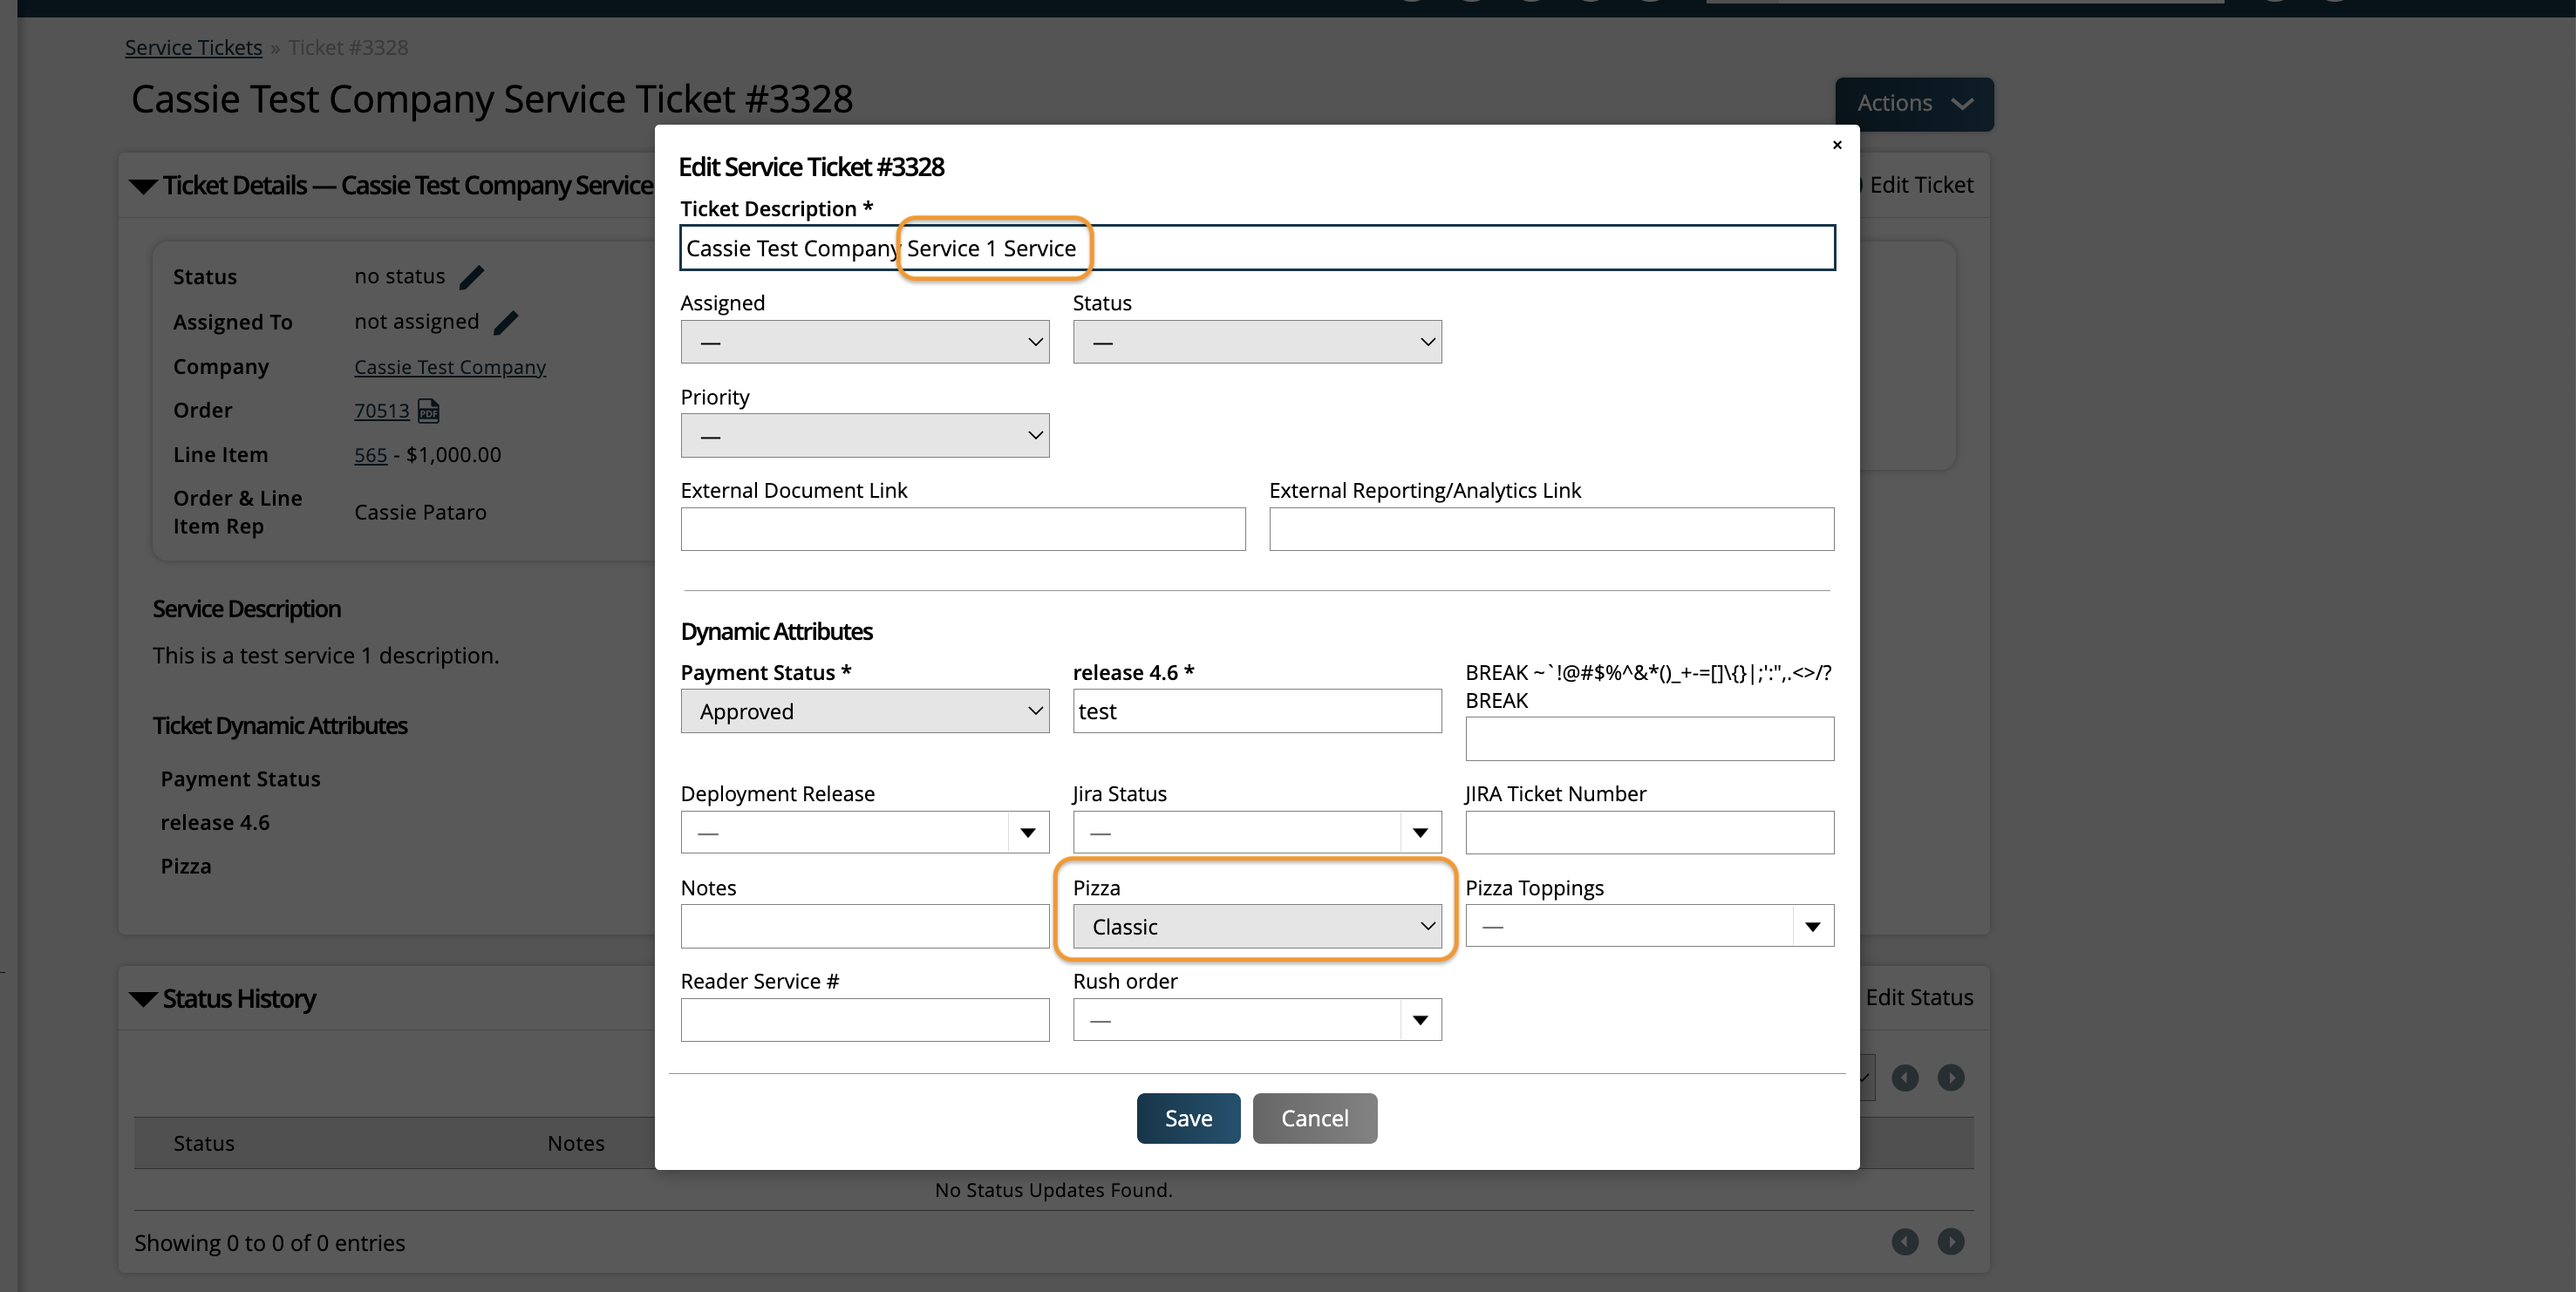
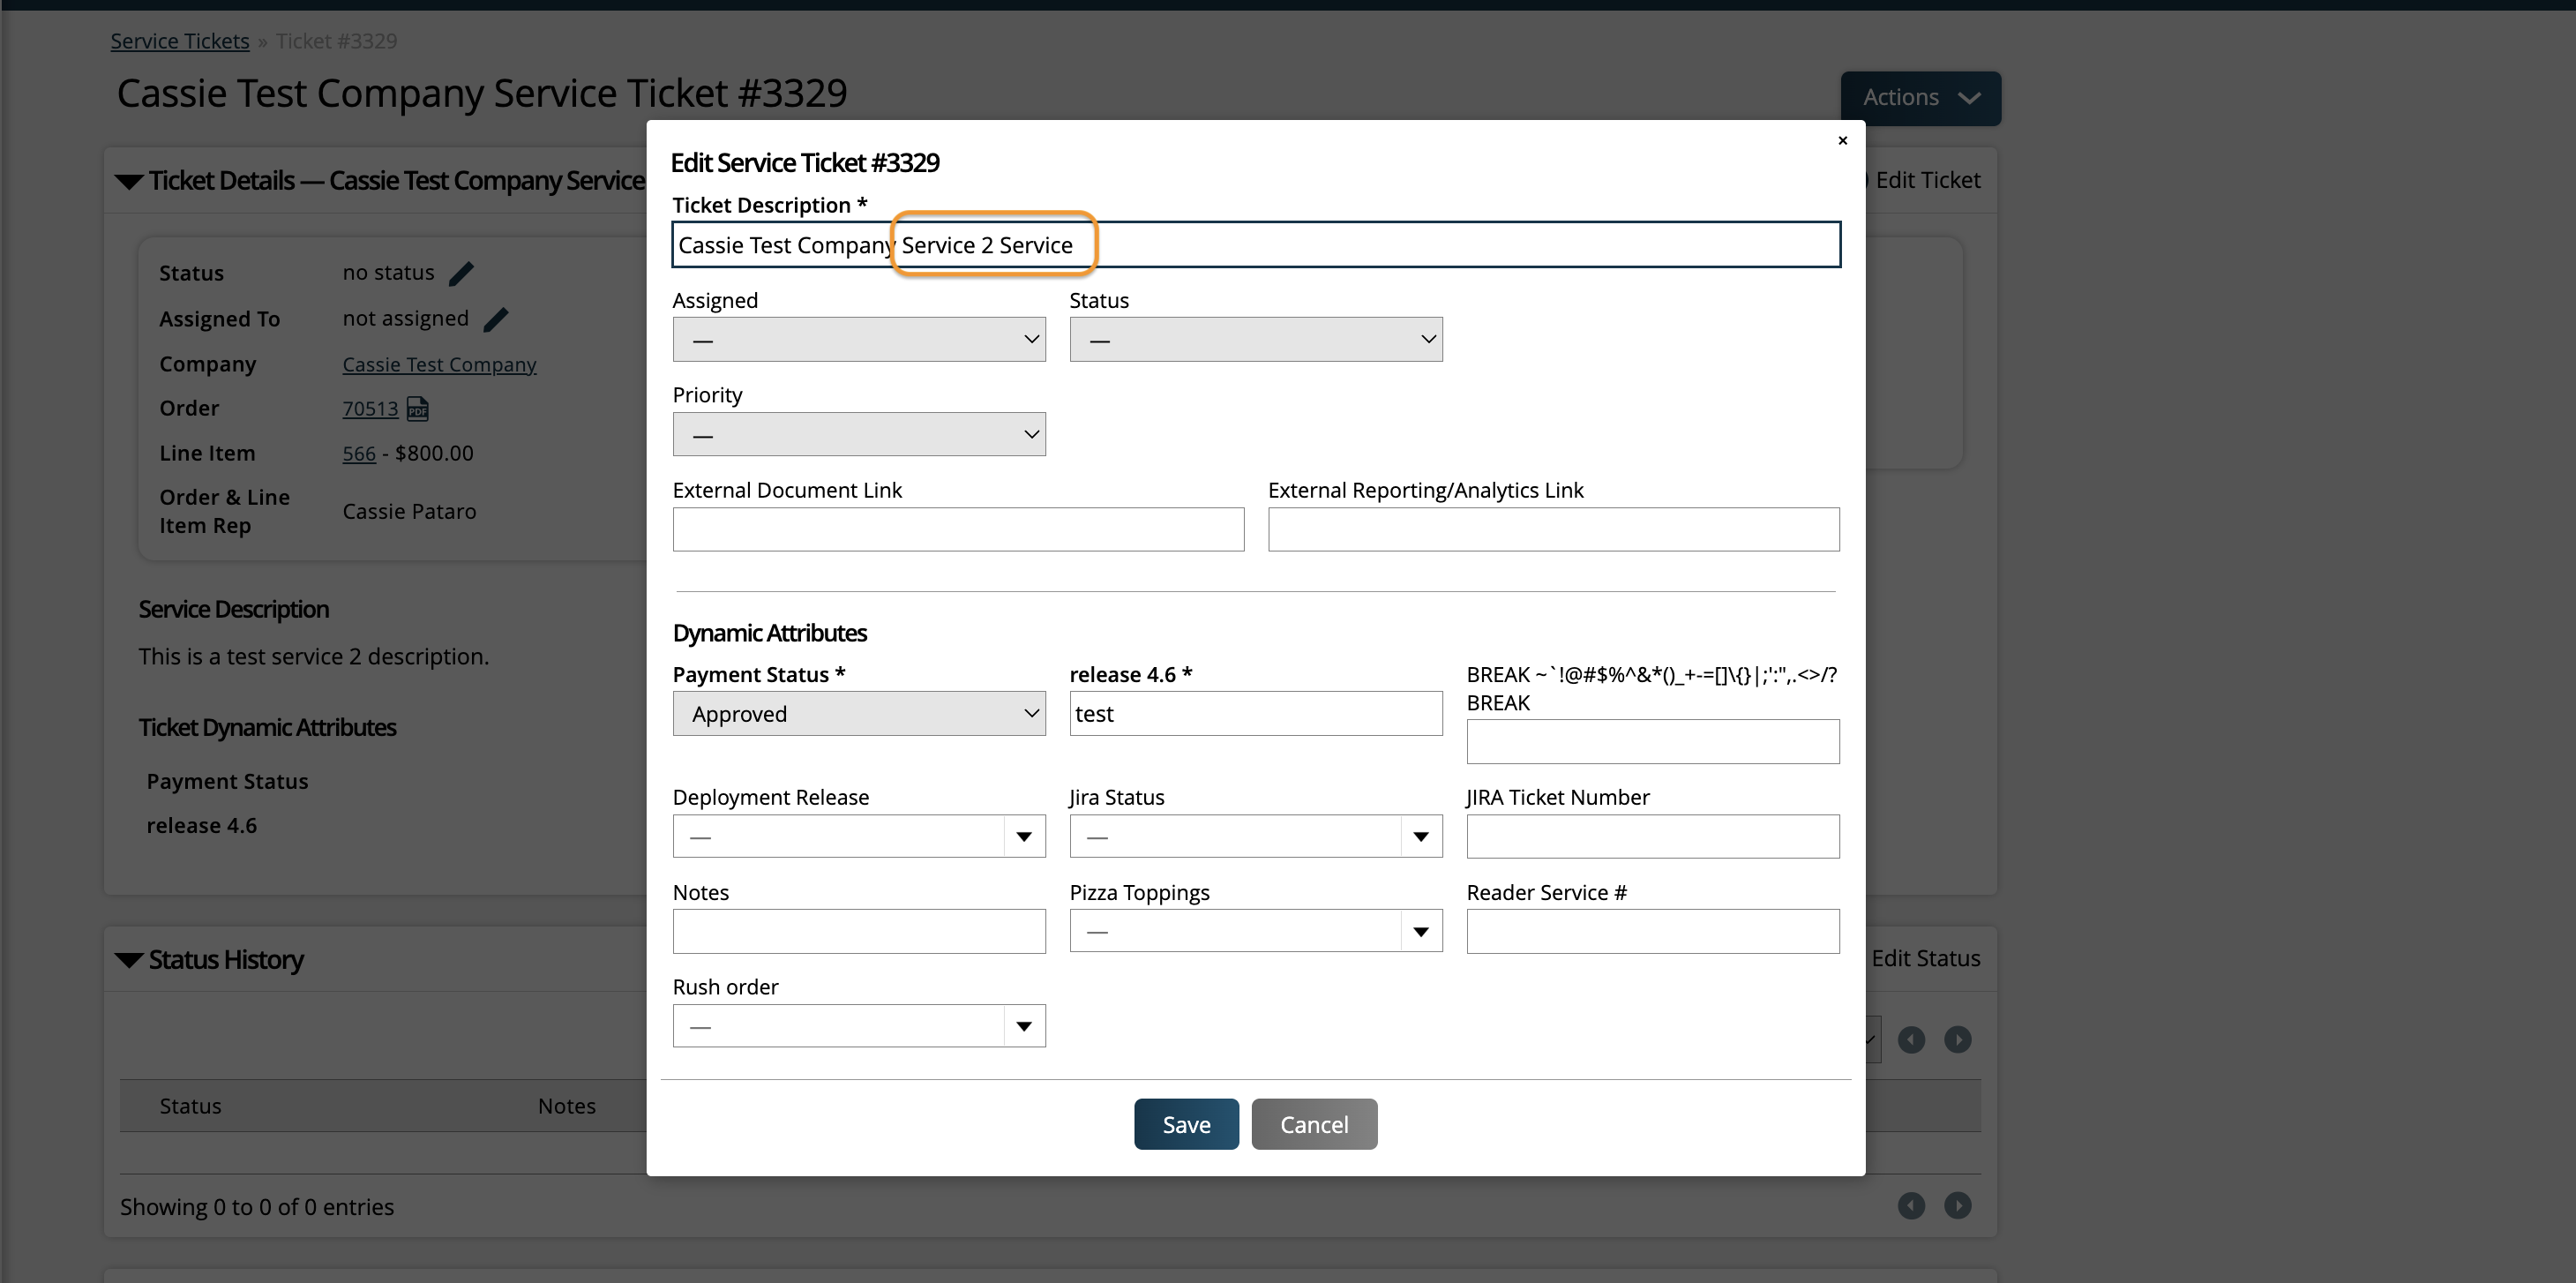
This 'Pizza' dynamic attribute was set up to be displayed on line items, and was also set to be used only on the 'Services' product type, and the 'Service 1' product.
When adding line items to an order, the 'Pizza' attribute only shows on 'Service 1' line items.

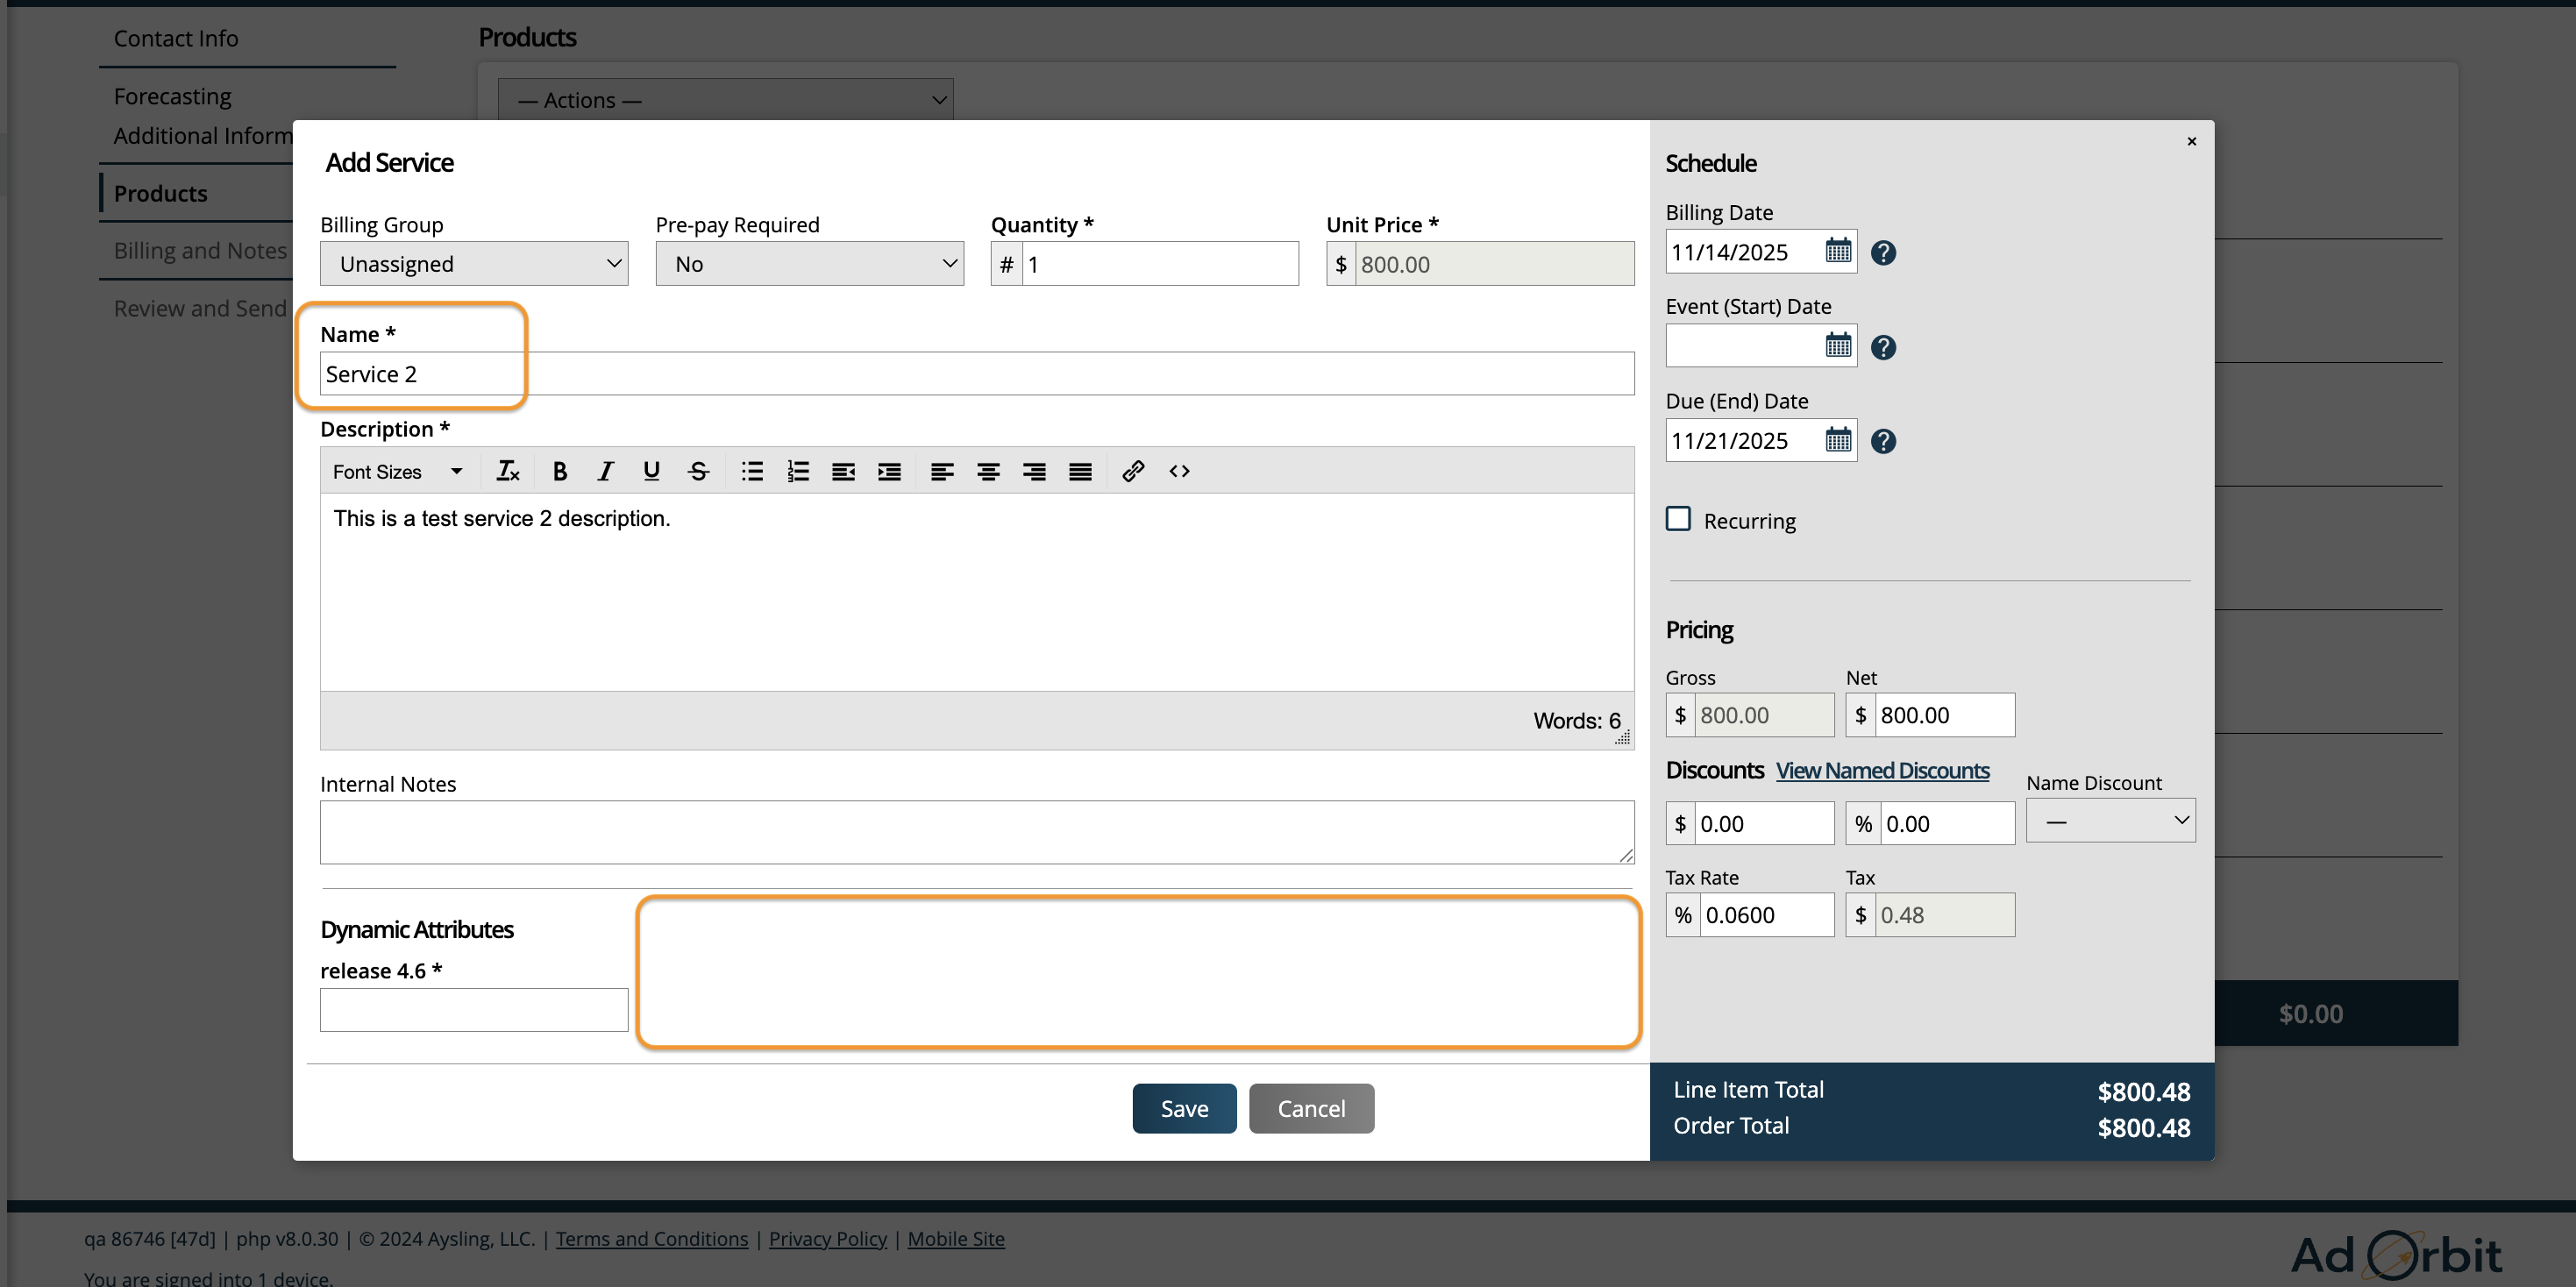
Similarly, on the ticket pages, the 'Pizza' attribute is only available on 'Service 1' tickets.
Updated 11/14/2025