Detailed Walkthrough
Using the normal importers, you can upload CSV files and directly import data into the system. However, the normal importers do not allow you do to any validation testing or checks against the system database. You can use the historical data tool to bring your data into the system and manipulate it from within the Ad Orbit before it's fully imported into the database. The tool allows you to merge your data files, append missing columns to your data, view errors and correct them, check for similar companies, and directly import the data. Once data is imported, you will be able to use your old reference numbers and the new system generated ID.
This document is a detailed walkthrough of how to use the Historical Data Tool. If you have already done a Historical Data Import, and are familiar with the process, then the Summary Walkthrough help center document may be more helpful.
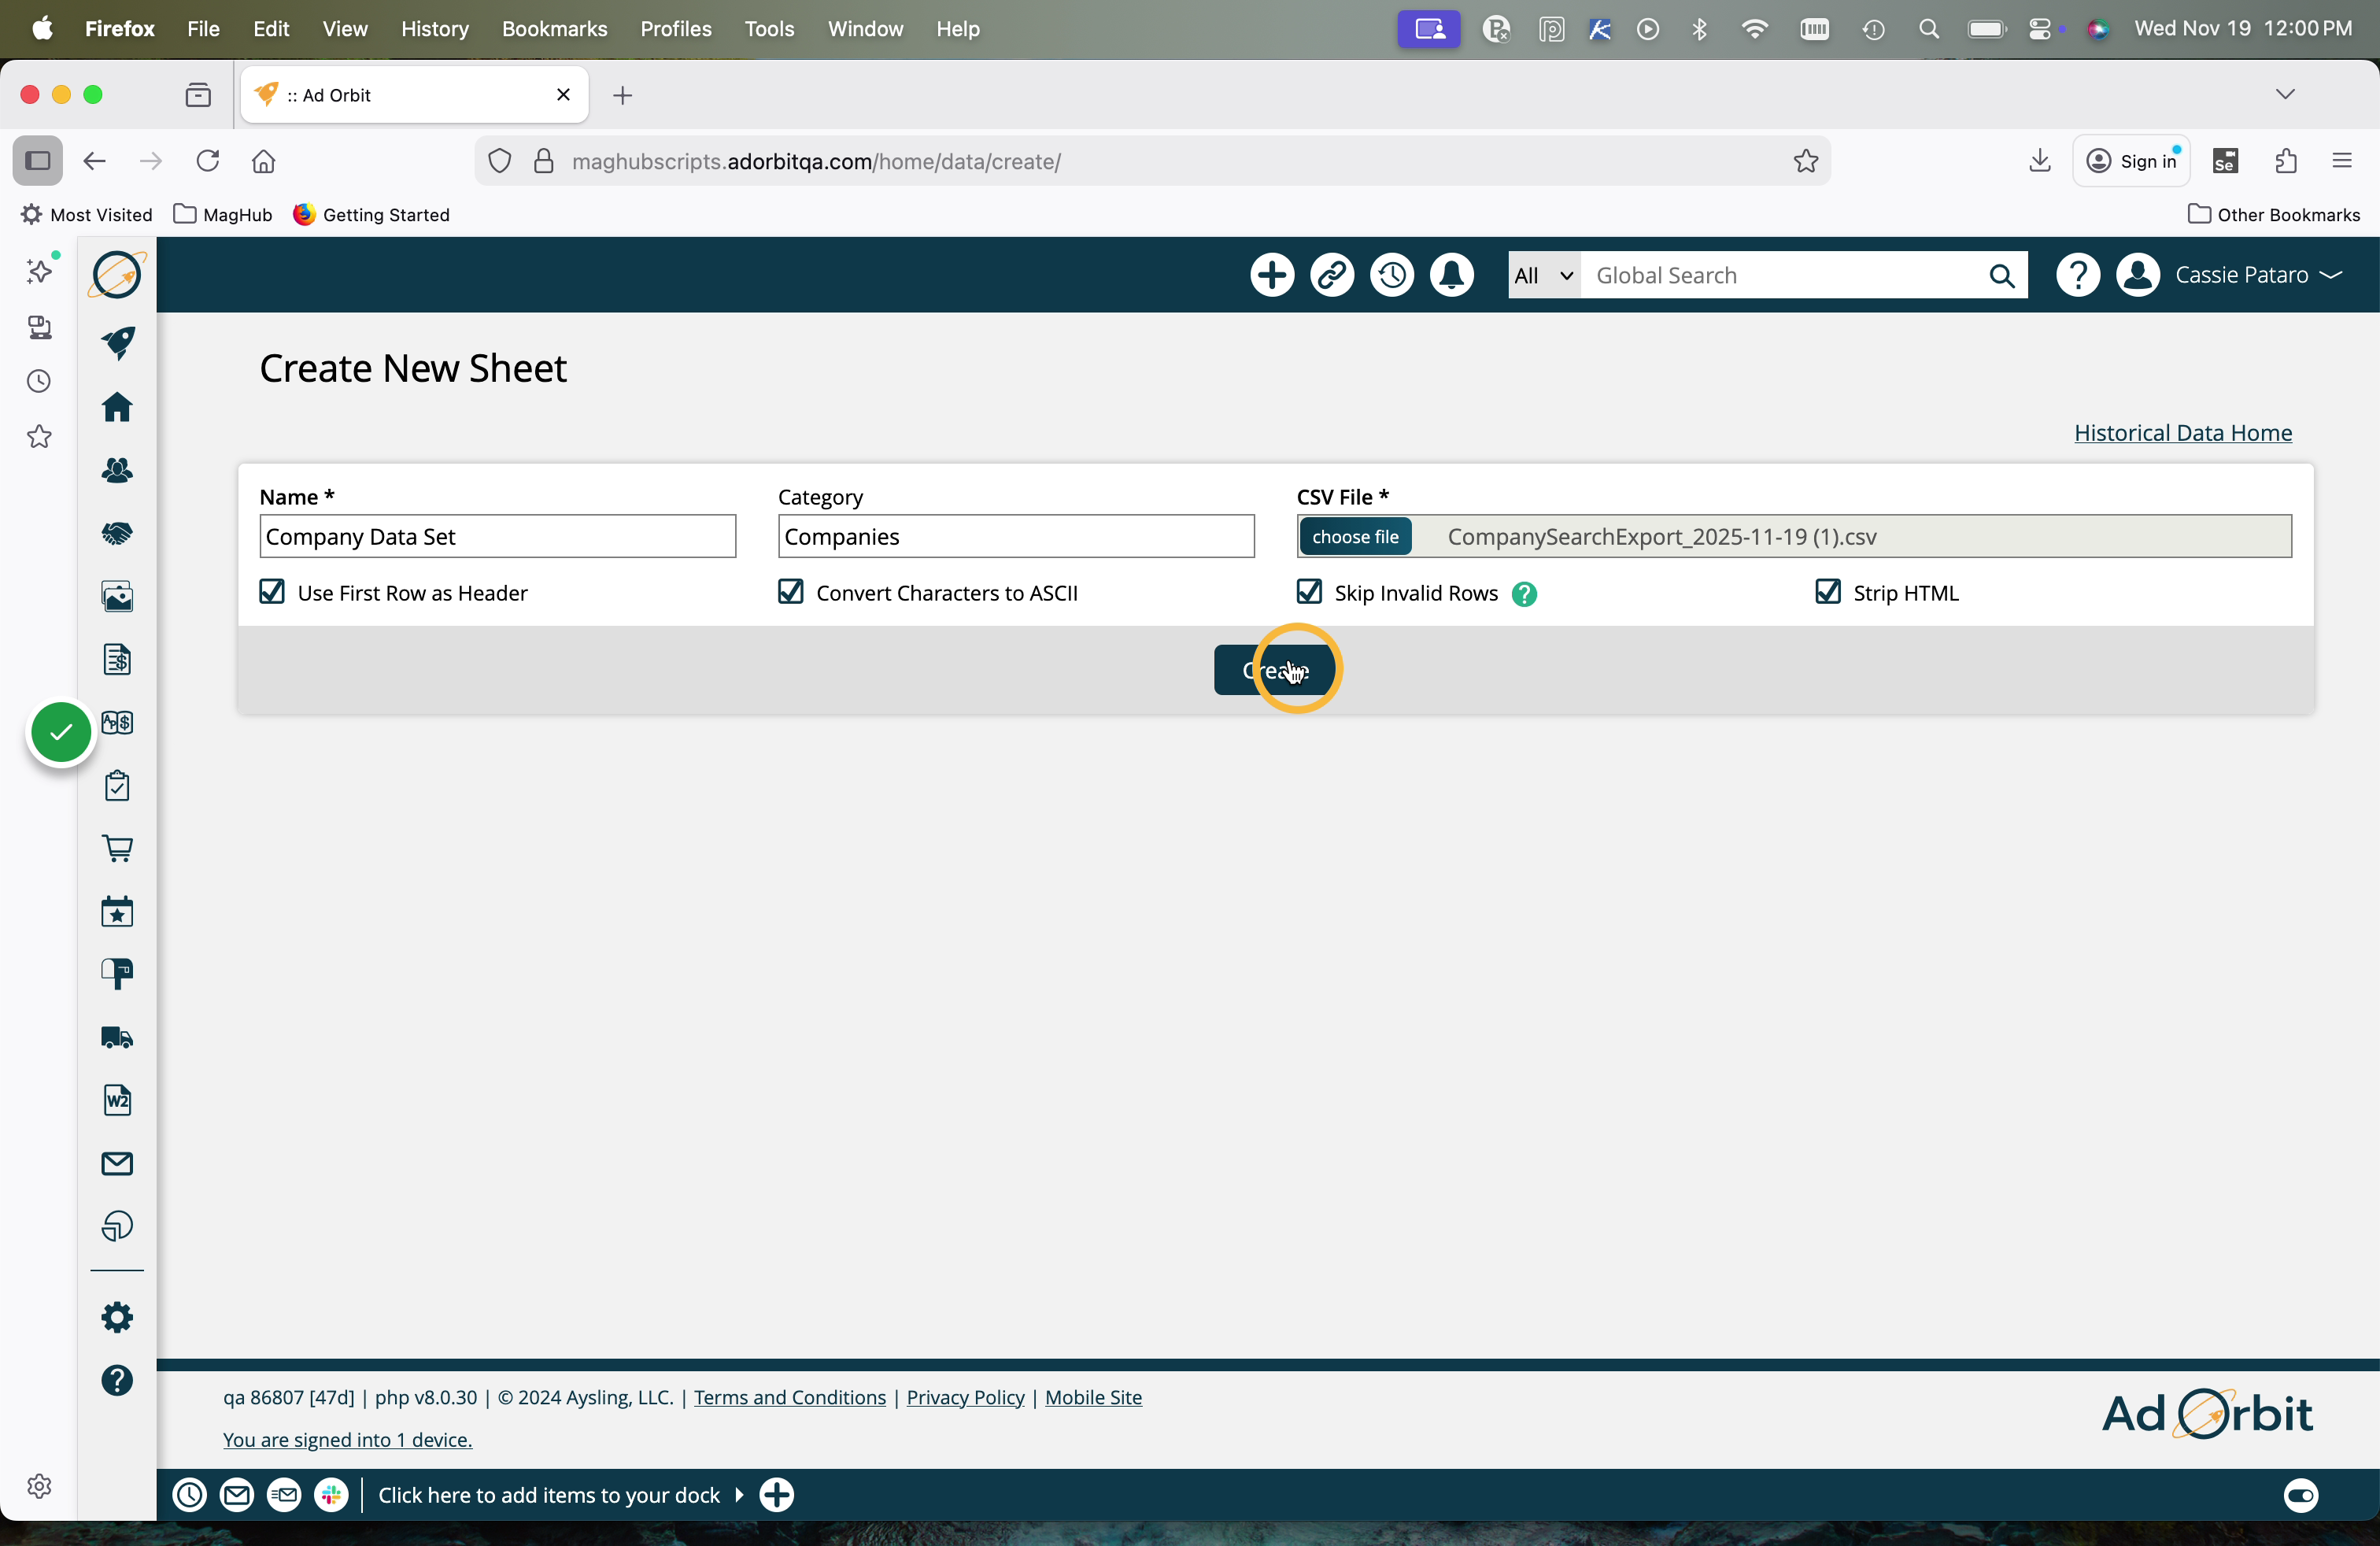
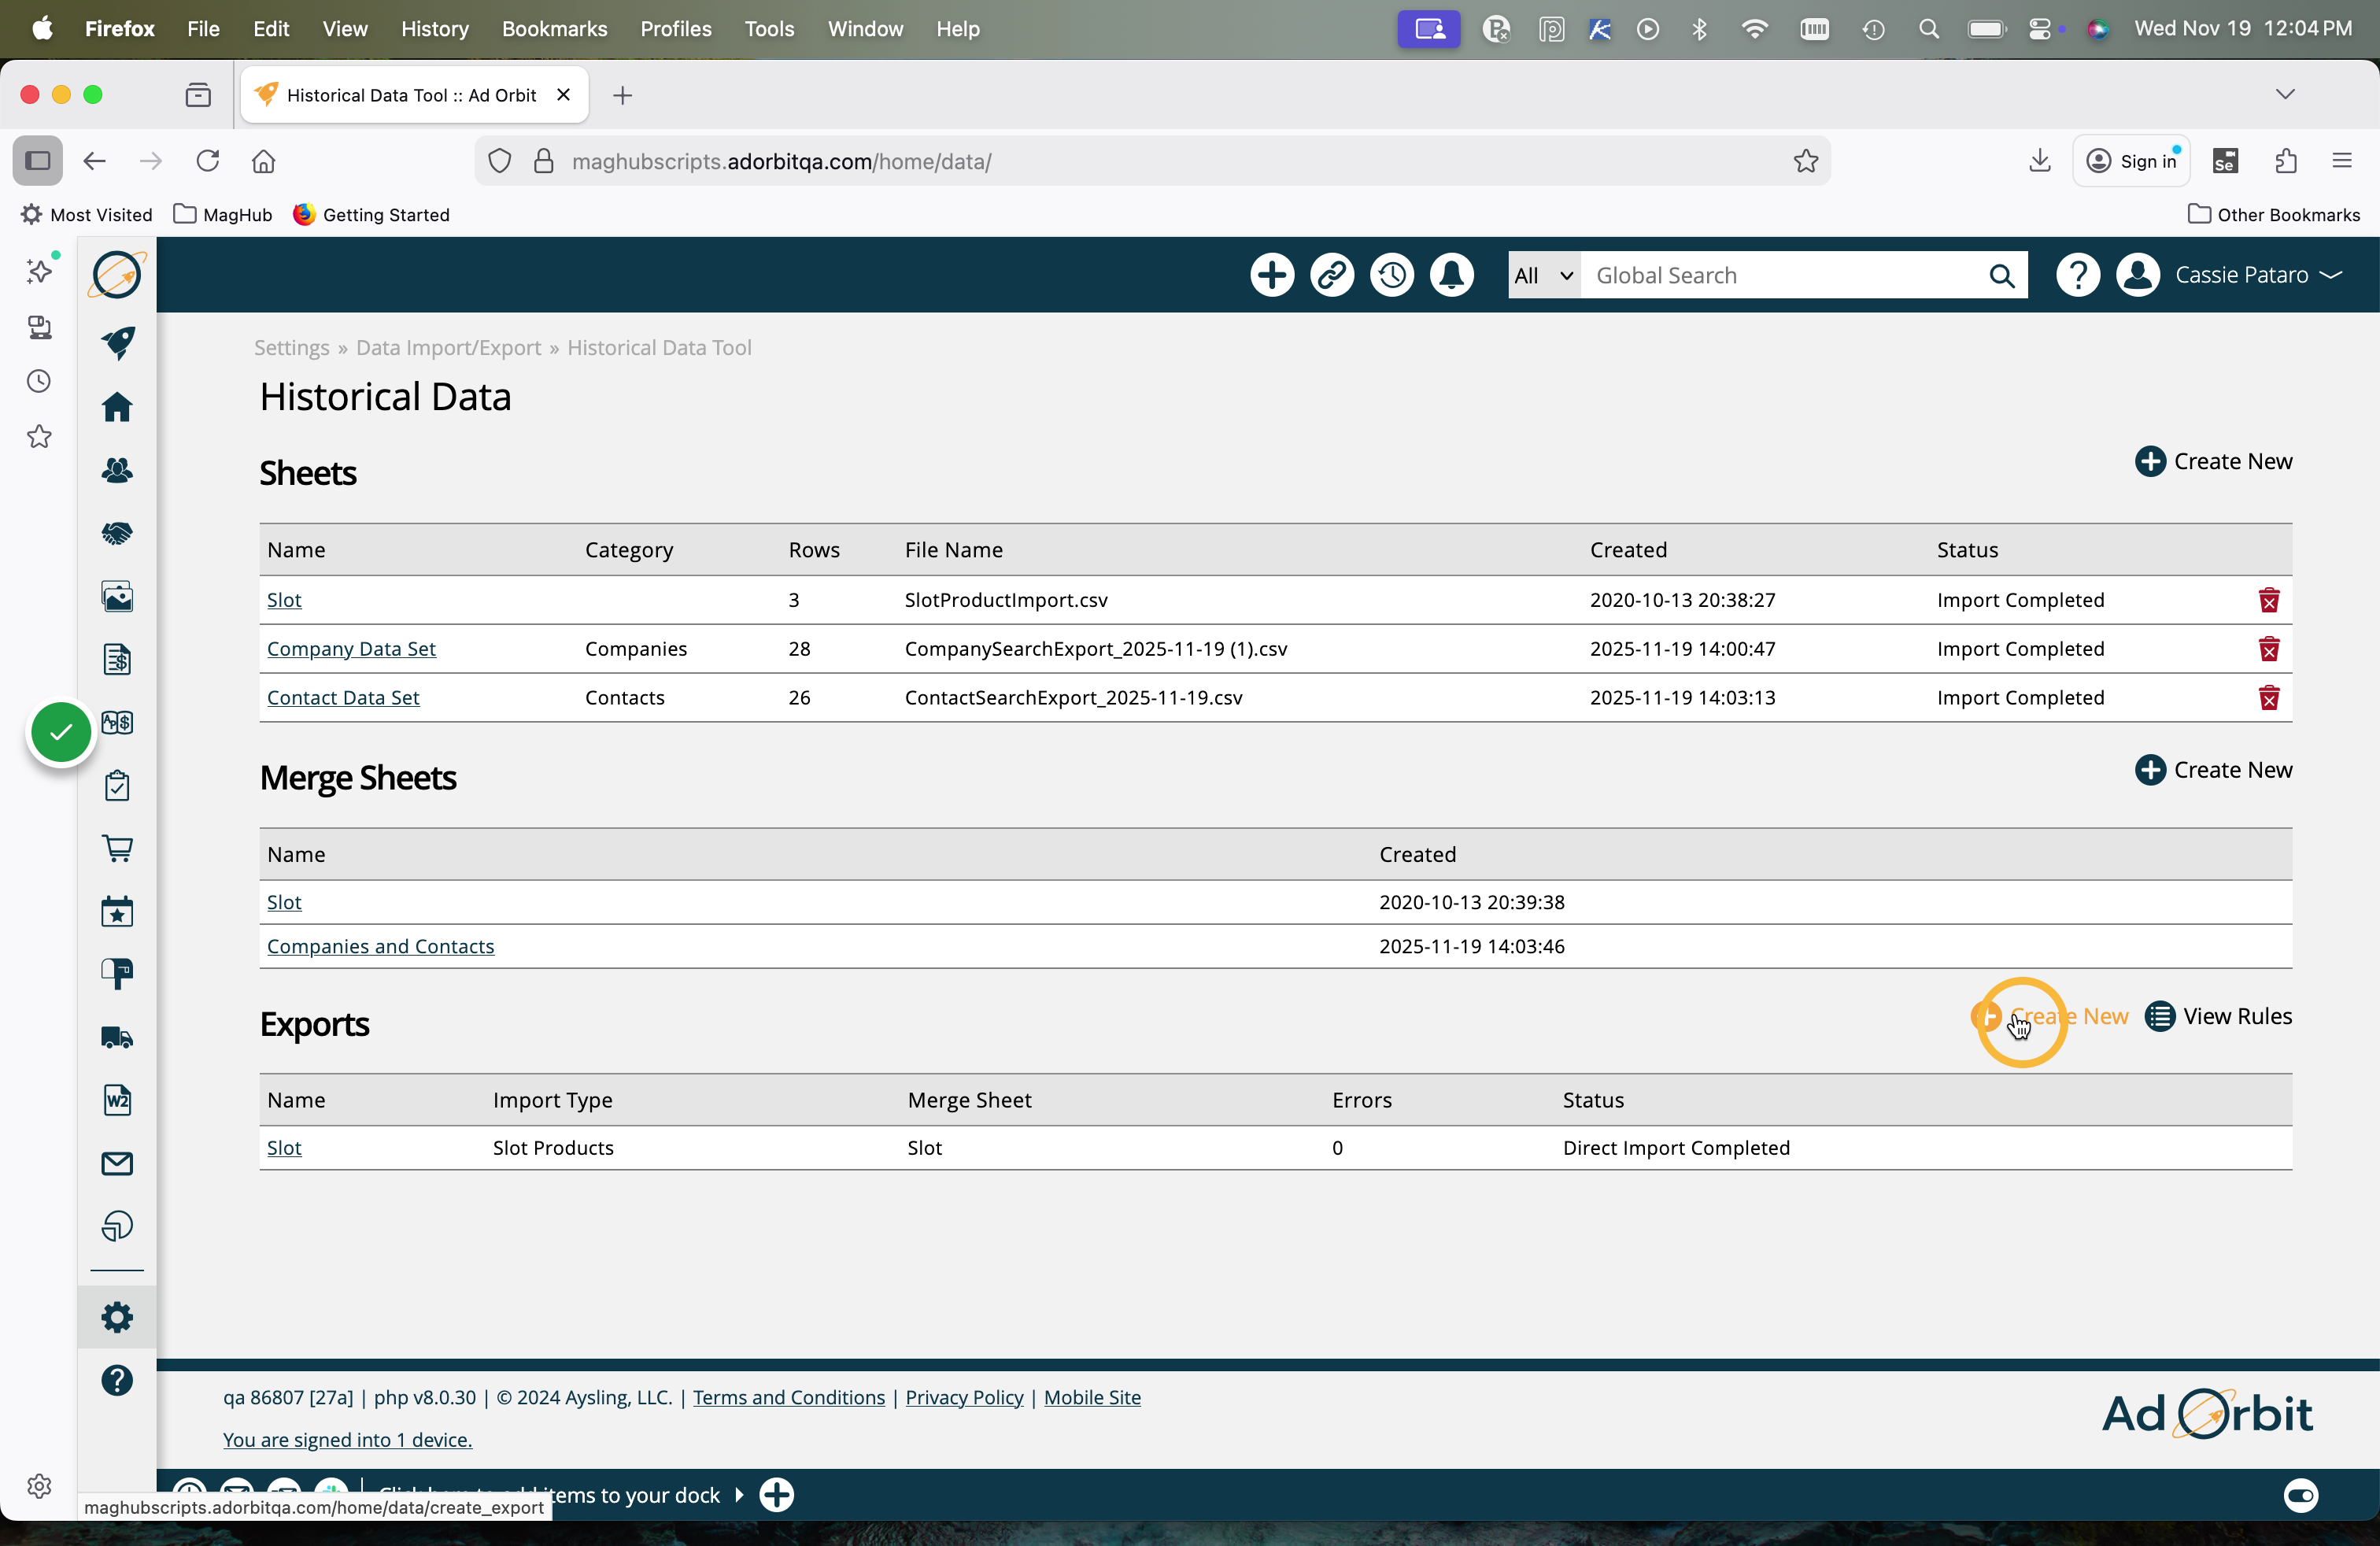
Start the process by going to Settings > Data > Historical Data Tool and uploading your data first as a 'Sheet'. To access this page, you need the User Permission 'Data Import/Export'.

When you upload CSV file as a 'sheet', you can name the sheet, give it a category, and choose to skip the header row, invalid rows, and strip out any HTML, which can cause importer errors. Select your file to upload your data to the Historical Data Tool.
Until the final Direct Import step of using the Historical Data Tool, your data is in the 'holding area' that is the Historical Data Tool. The data is accessible within the Historical Data Tool, but will not appear anywhere else in your Ad Orbit account.
All imports are processed in the background, so you don't have to wait for your data to get into the system. You will receive an email once the process is complete. If you are working with a small data set, you can wait on the page for the alert. Otherwise, go get a coffee!
After the initial upload, the 'Status' for your Sheet will show 'Upload Completed'. You will need to get to the 'Import Completed' status for your Sheet to move on to the next step.
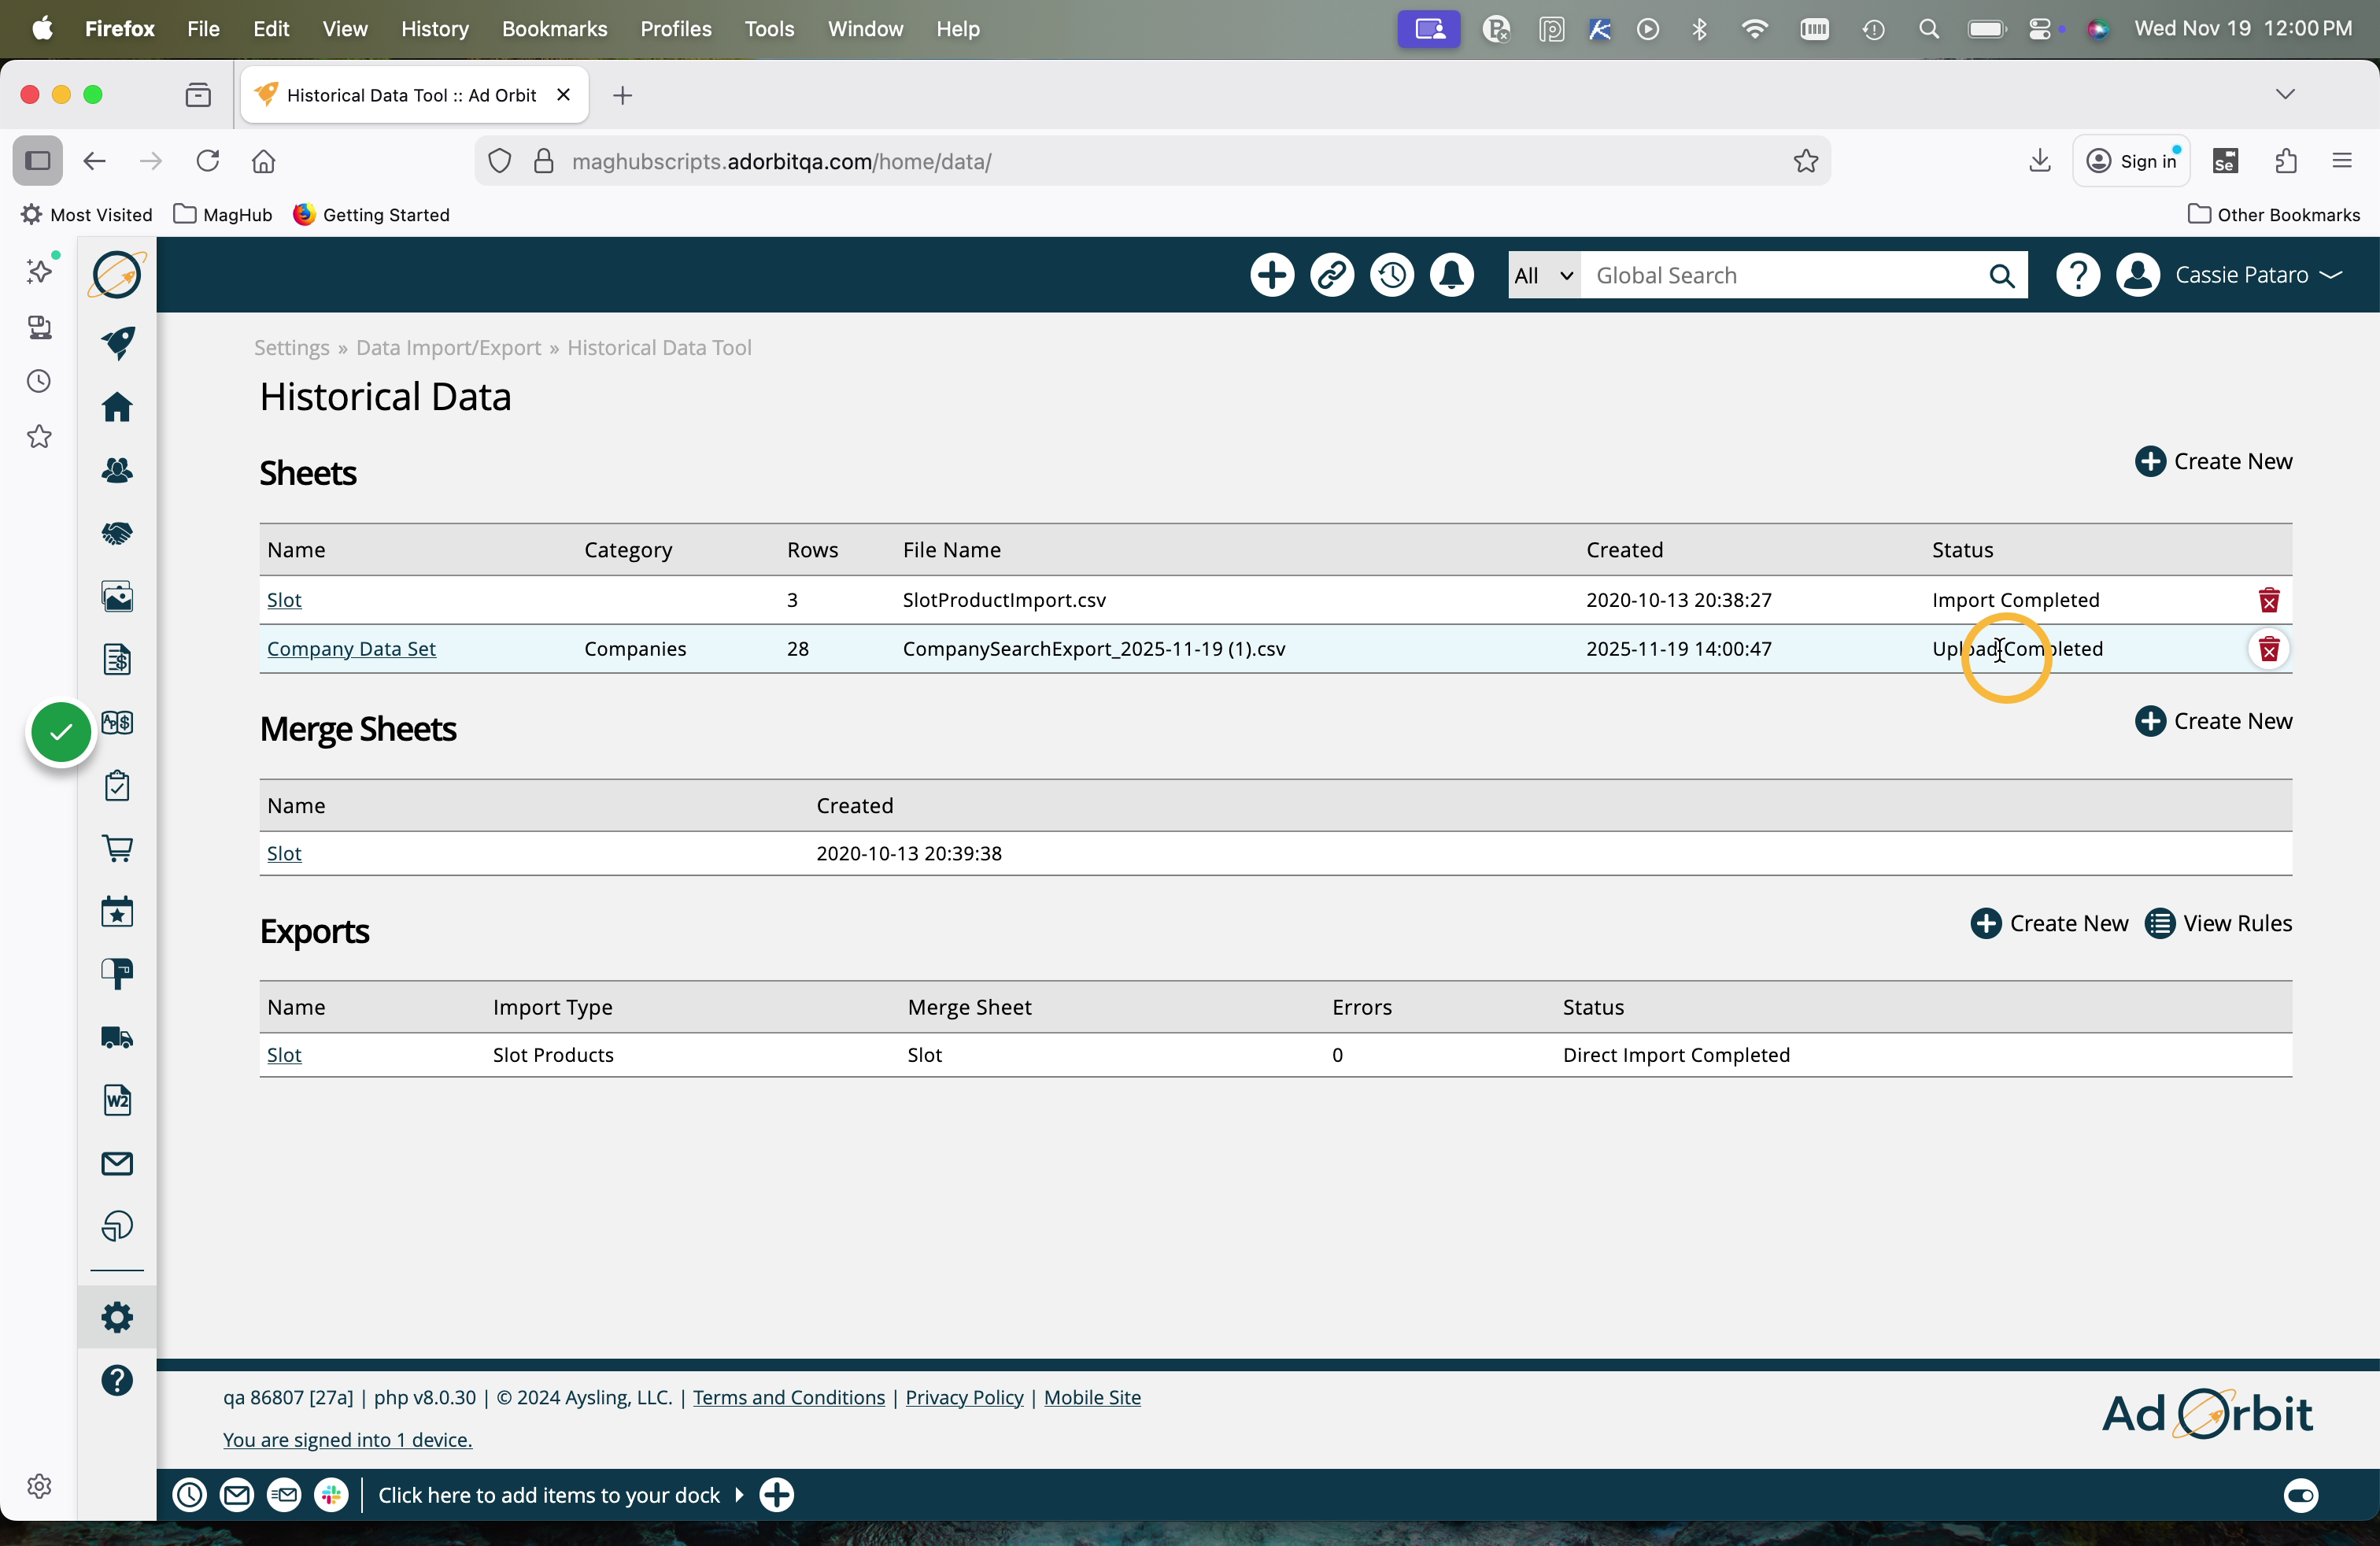
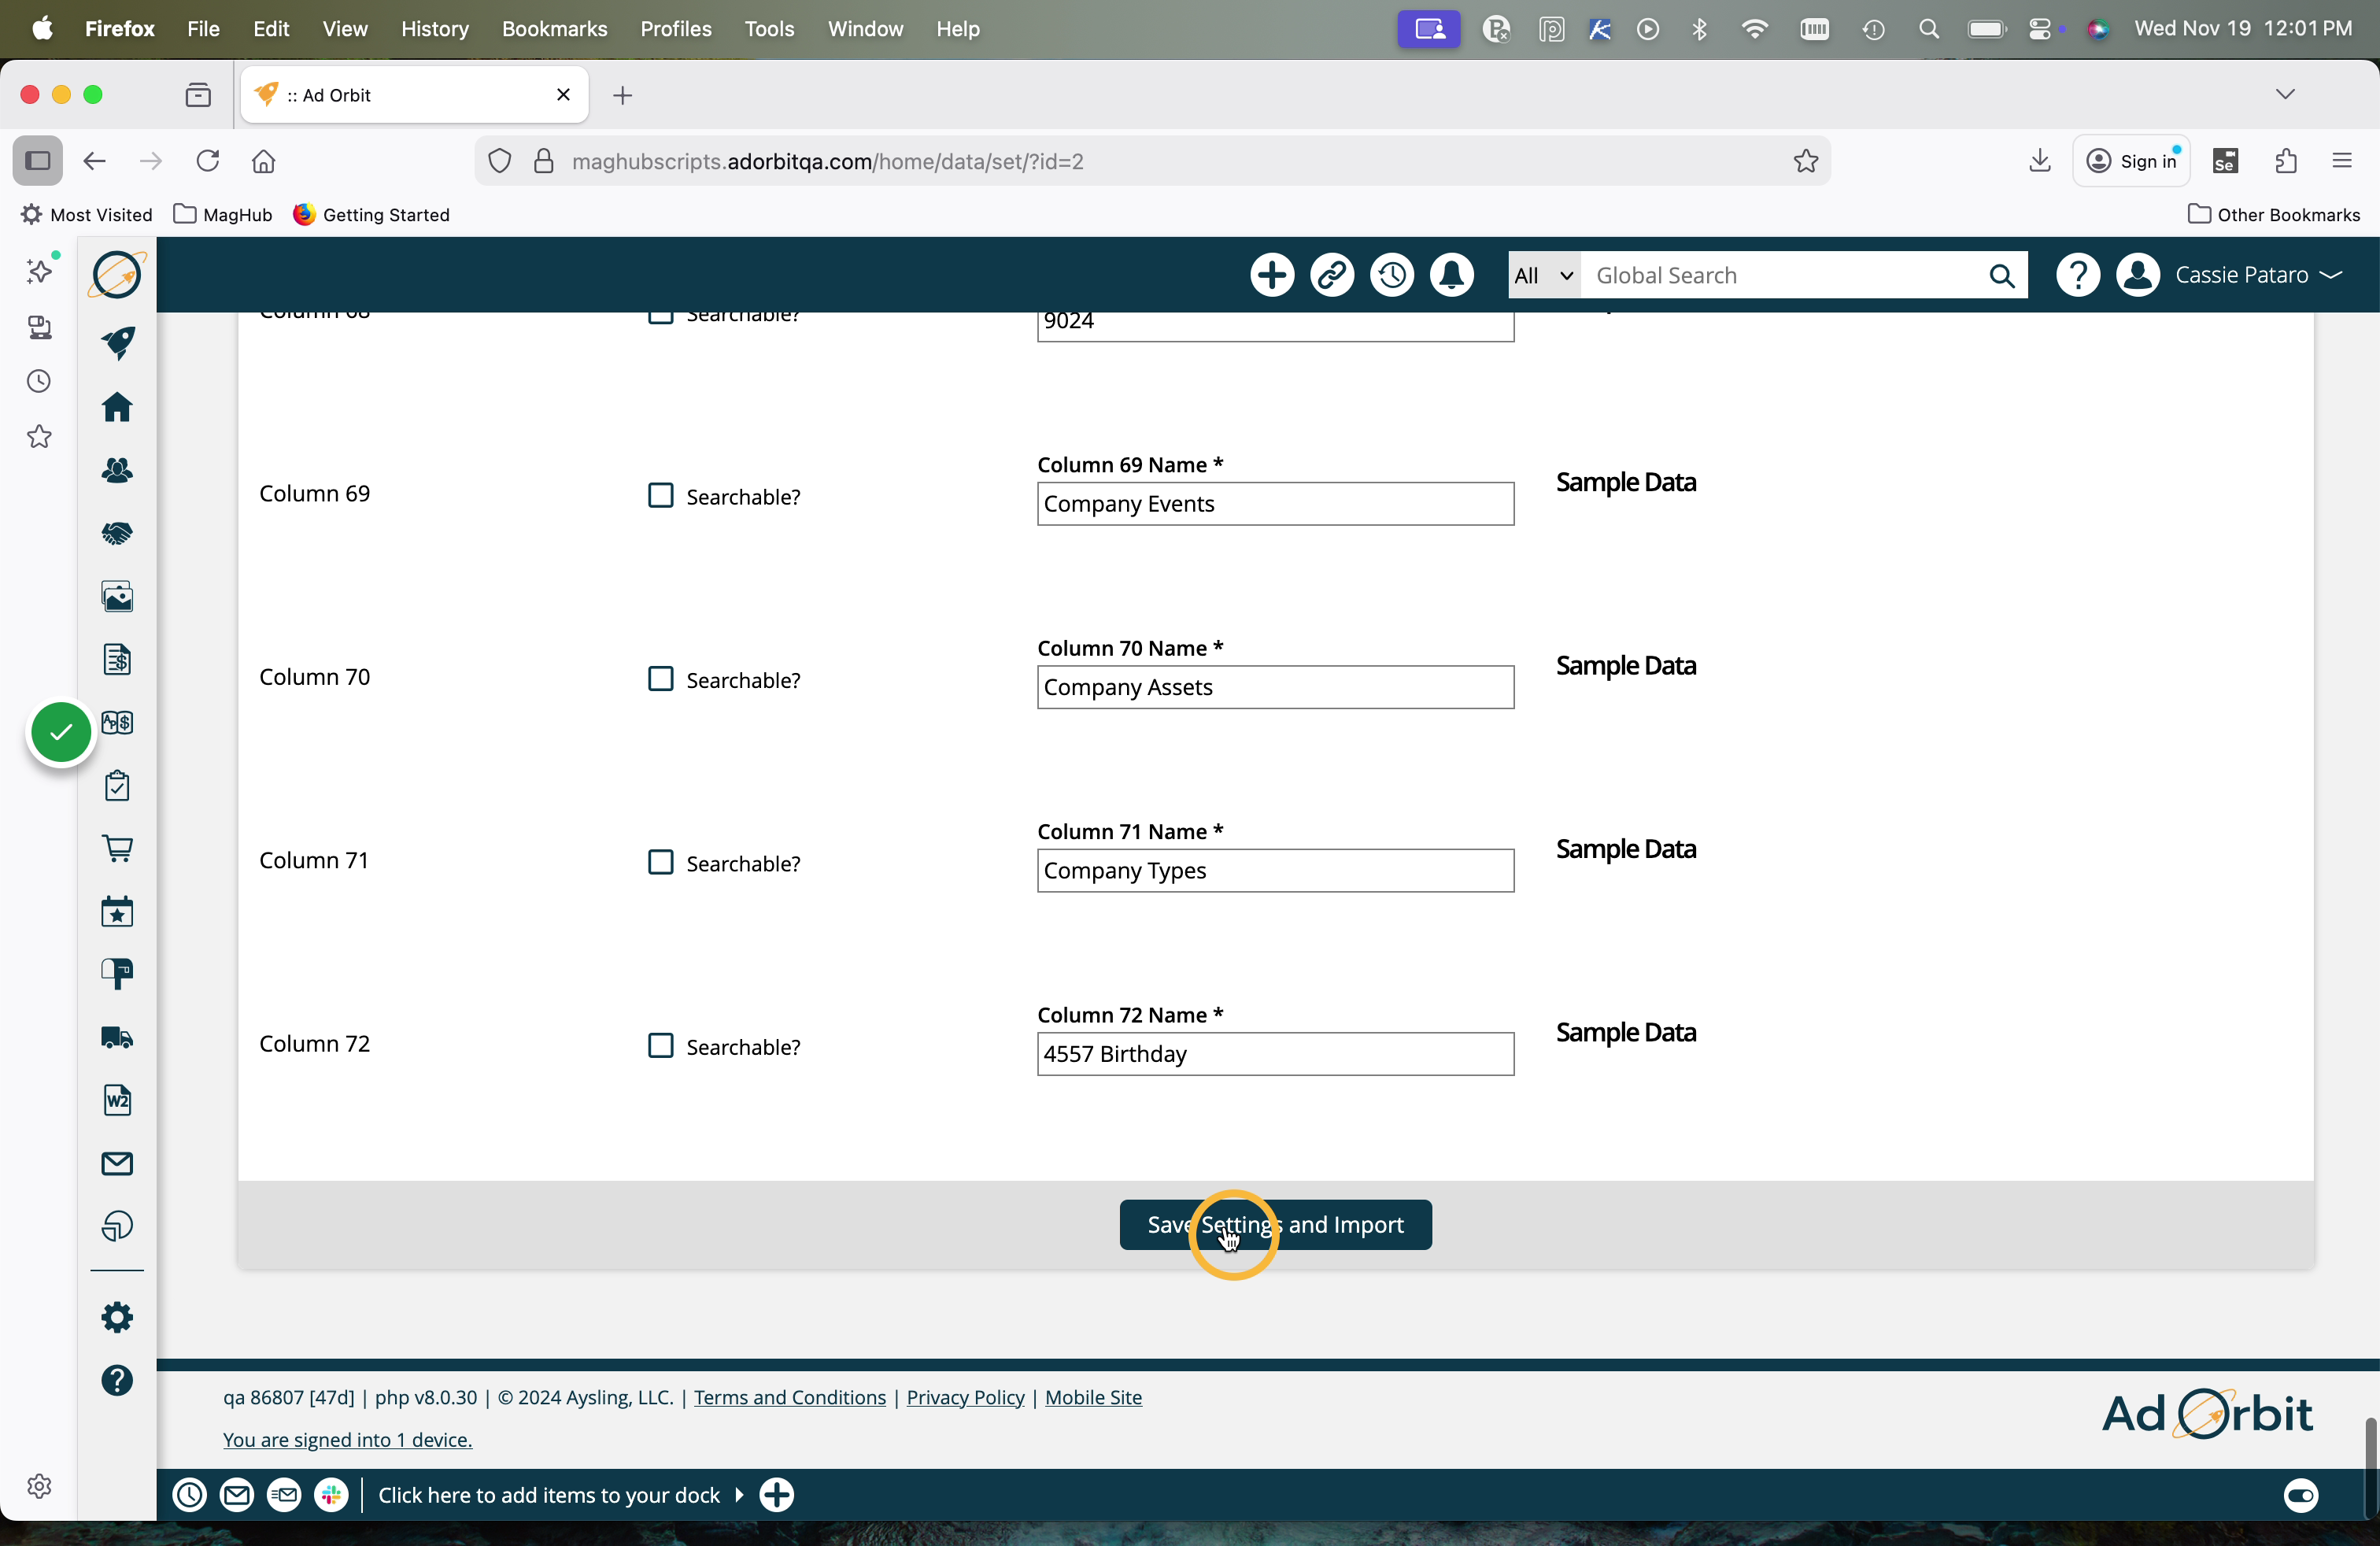
To do so, you need to make at least one column searchable. The searchable fields are also used to merge with other sheets. We recommend using IDs or Name fields when doing company and contact importers.
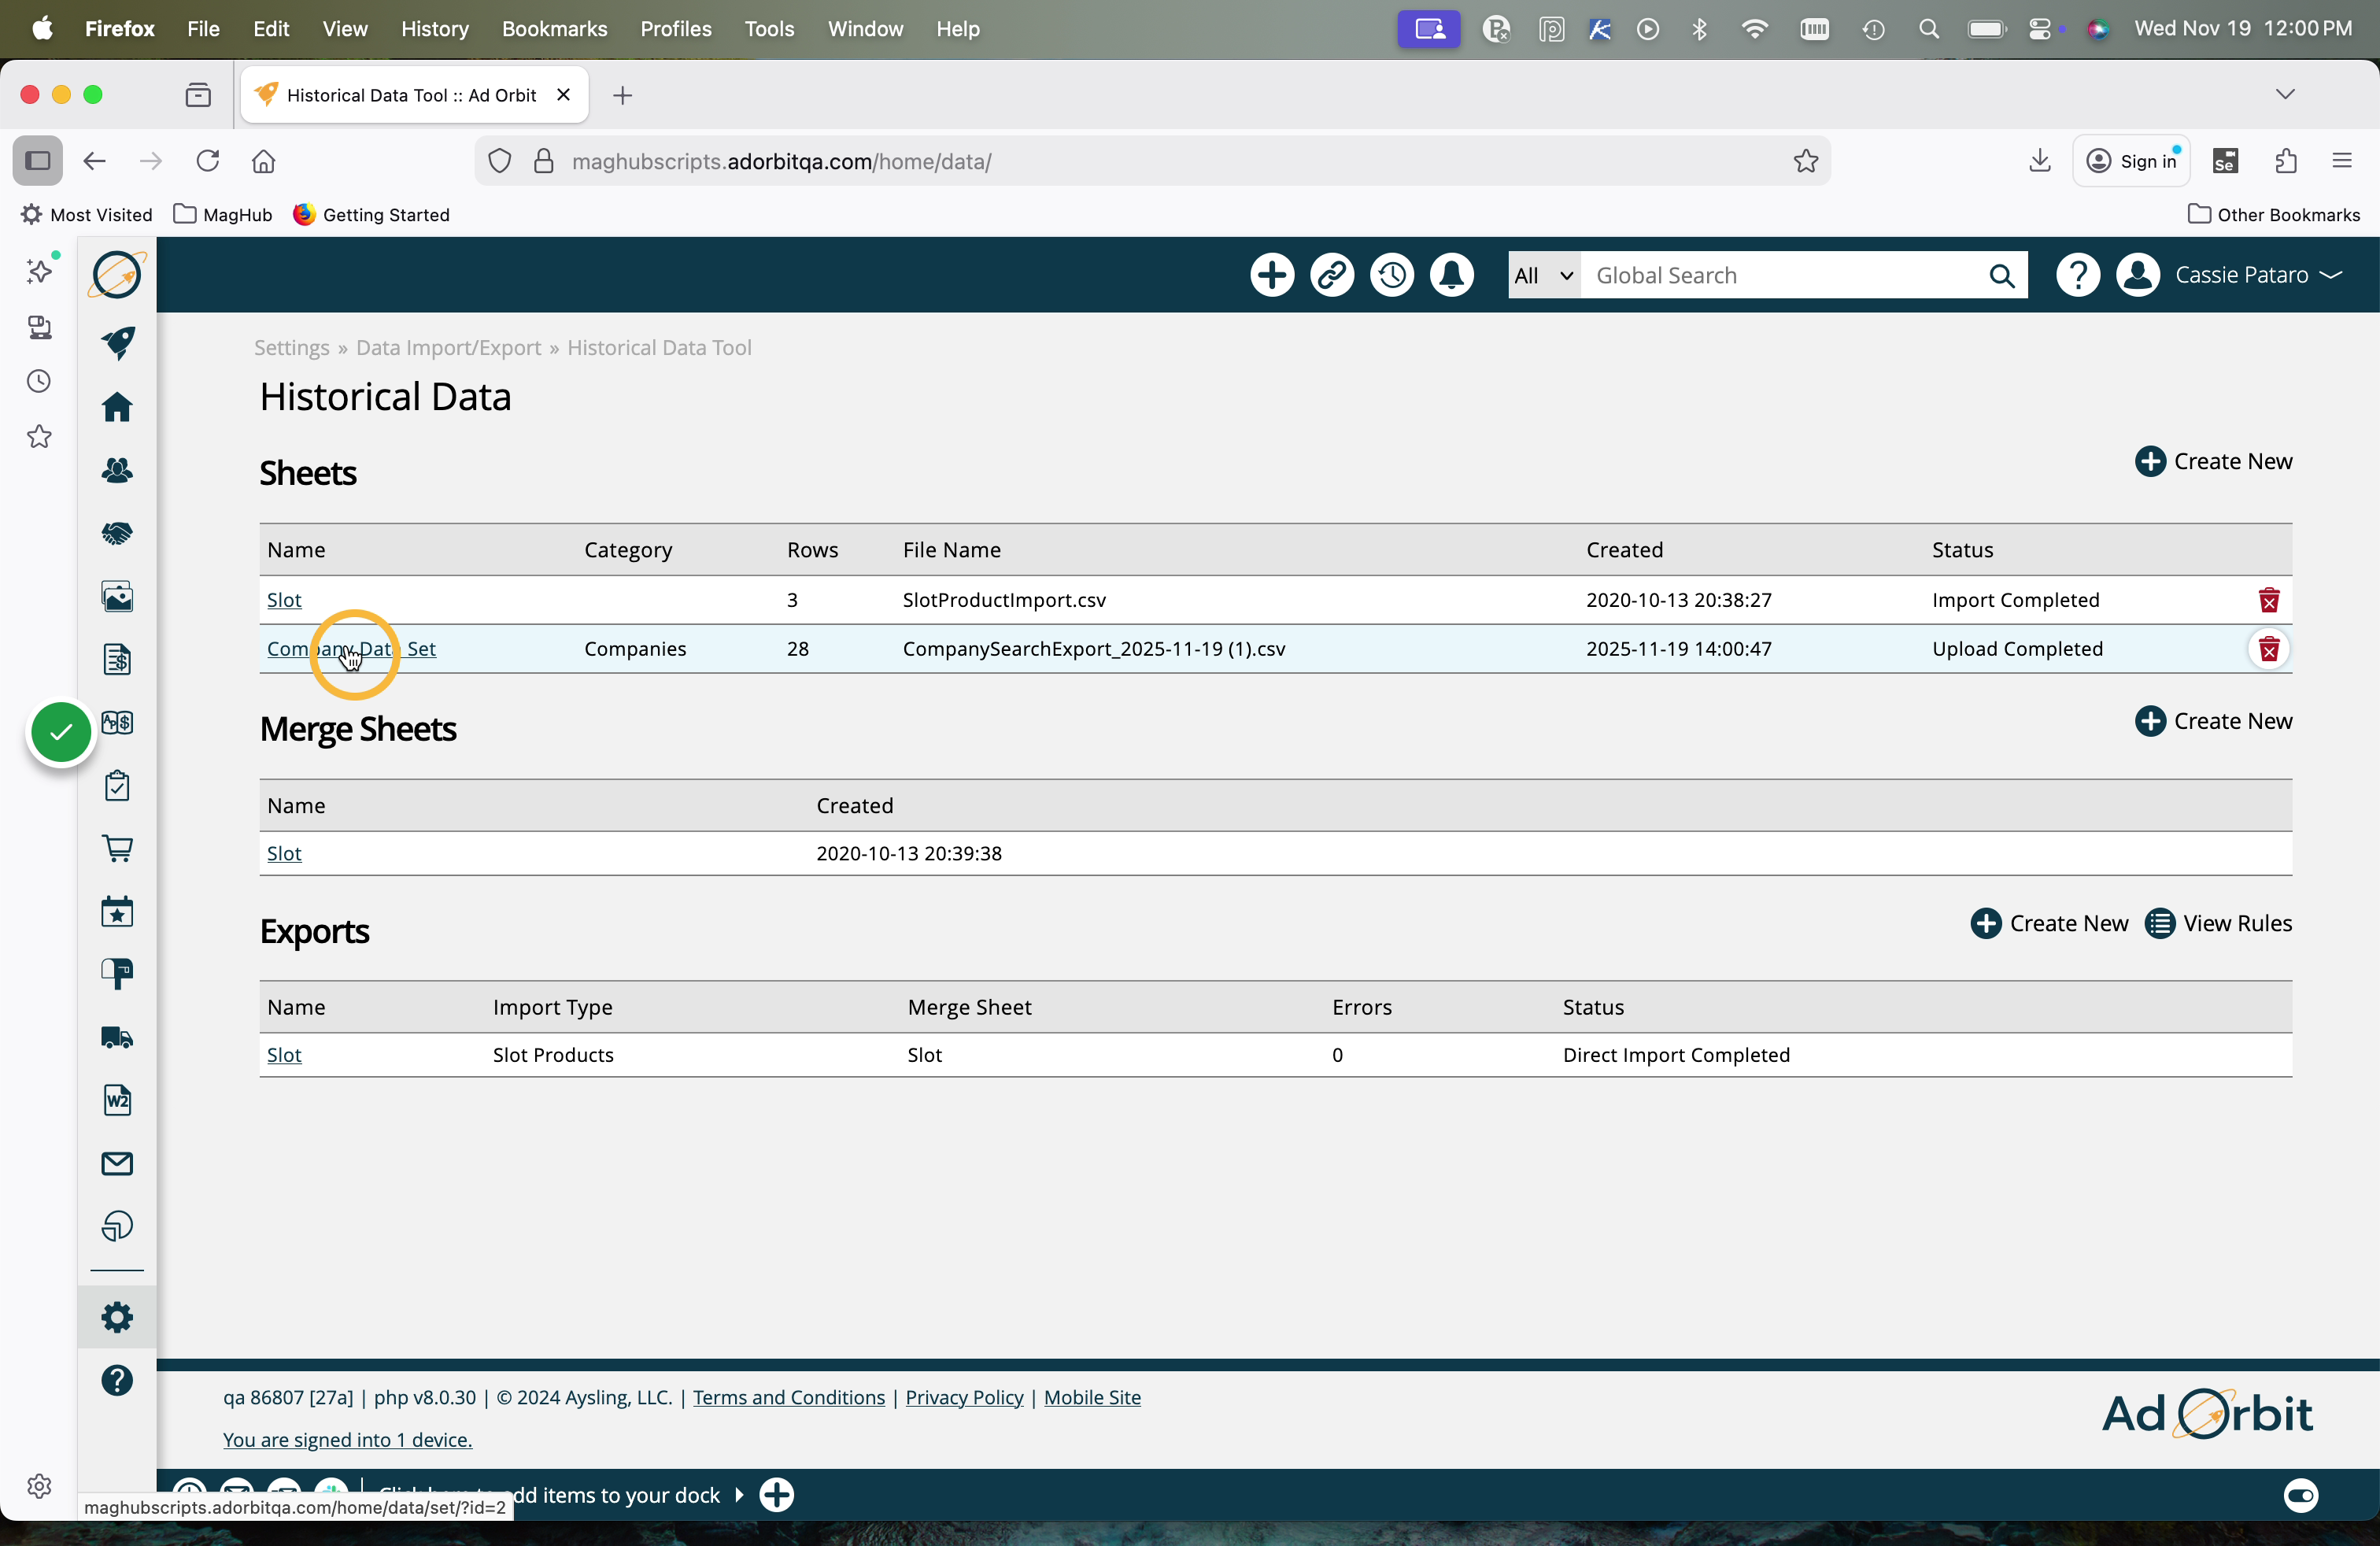
To set a column as searchable, click on the name of your uploaded Sheet from the main Historical Data Tool page. This will direct you to the page where you can select the searchable columns.
Use the checkboxes to denote columns as a 'searchable' column. You must have at least one, but can select as many as you want.
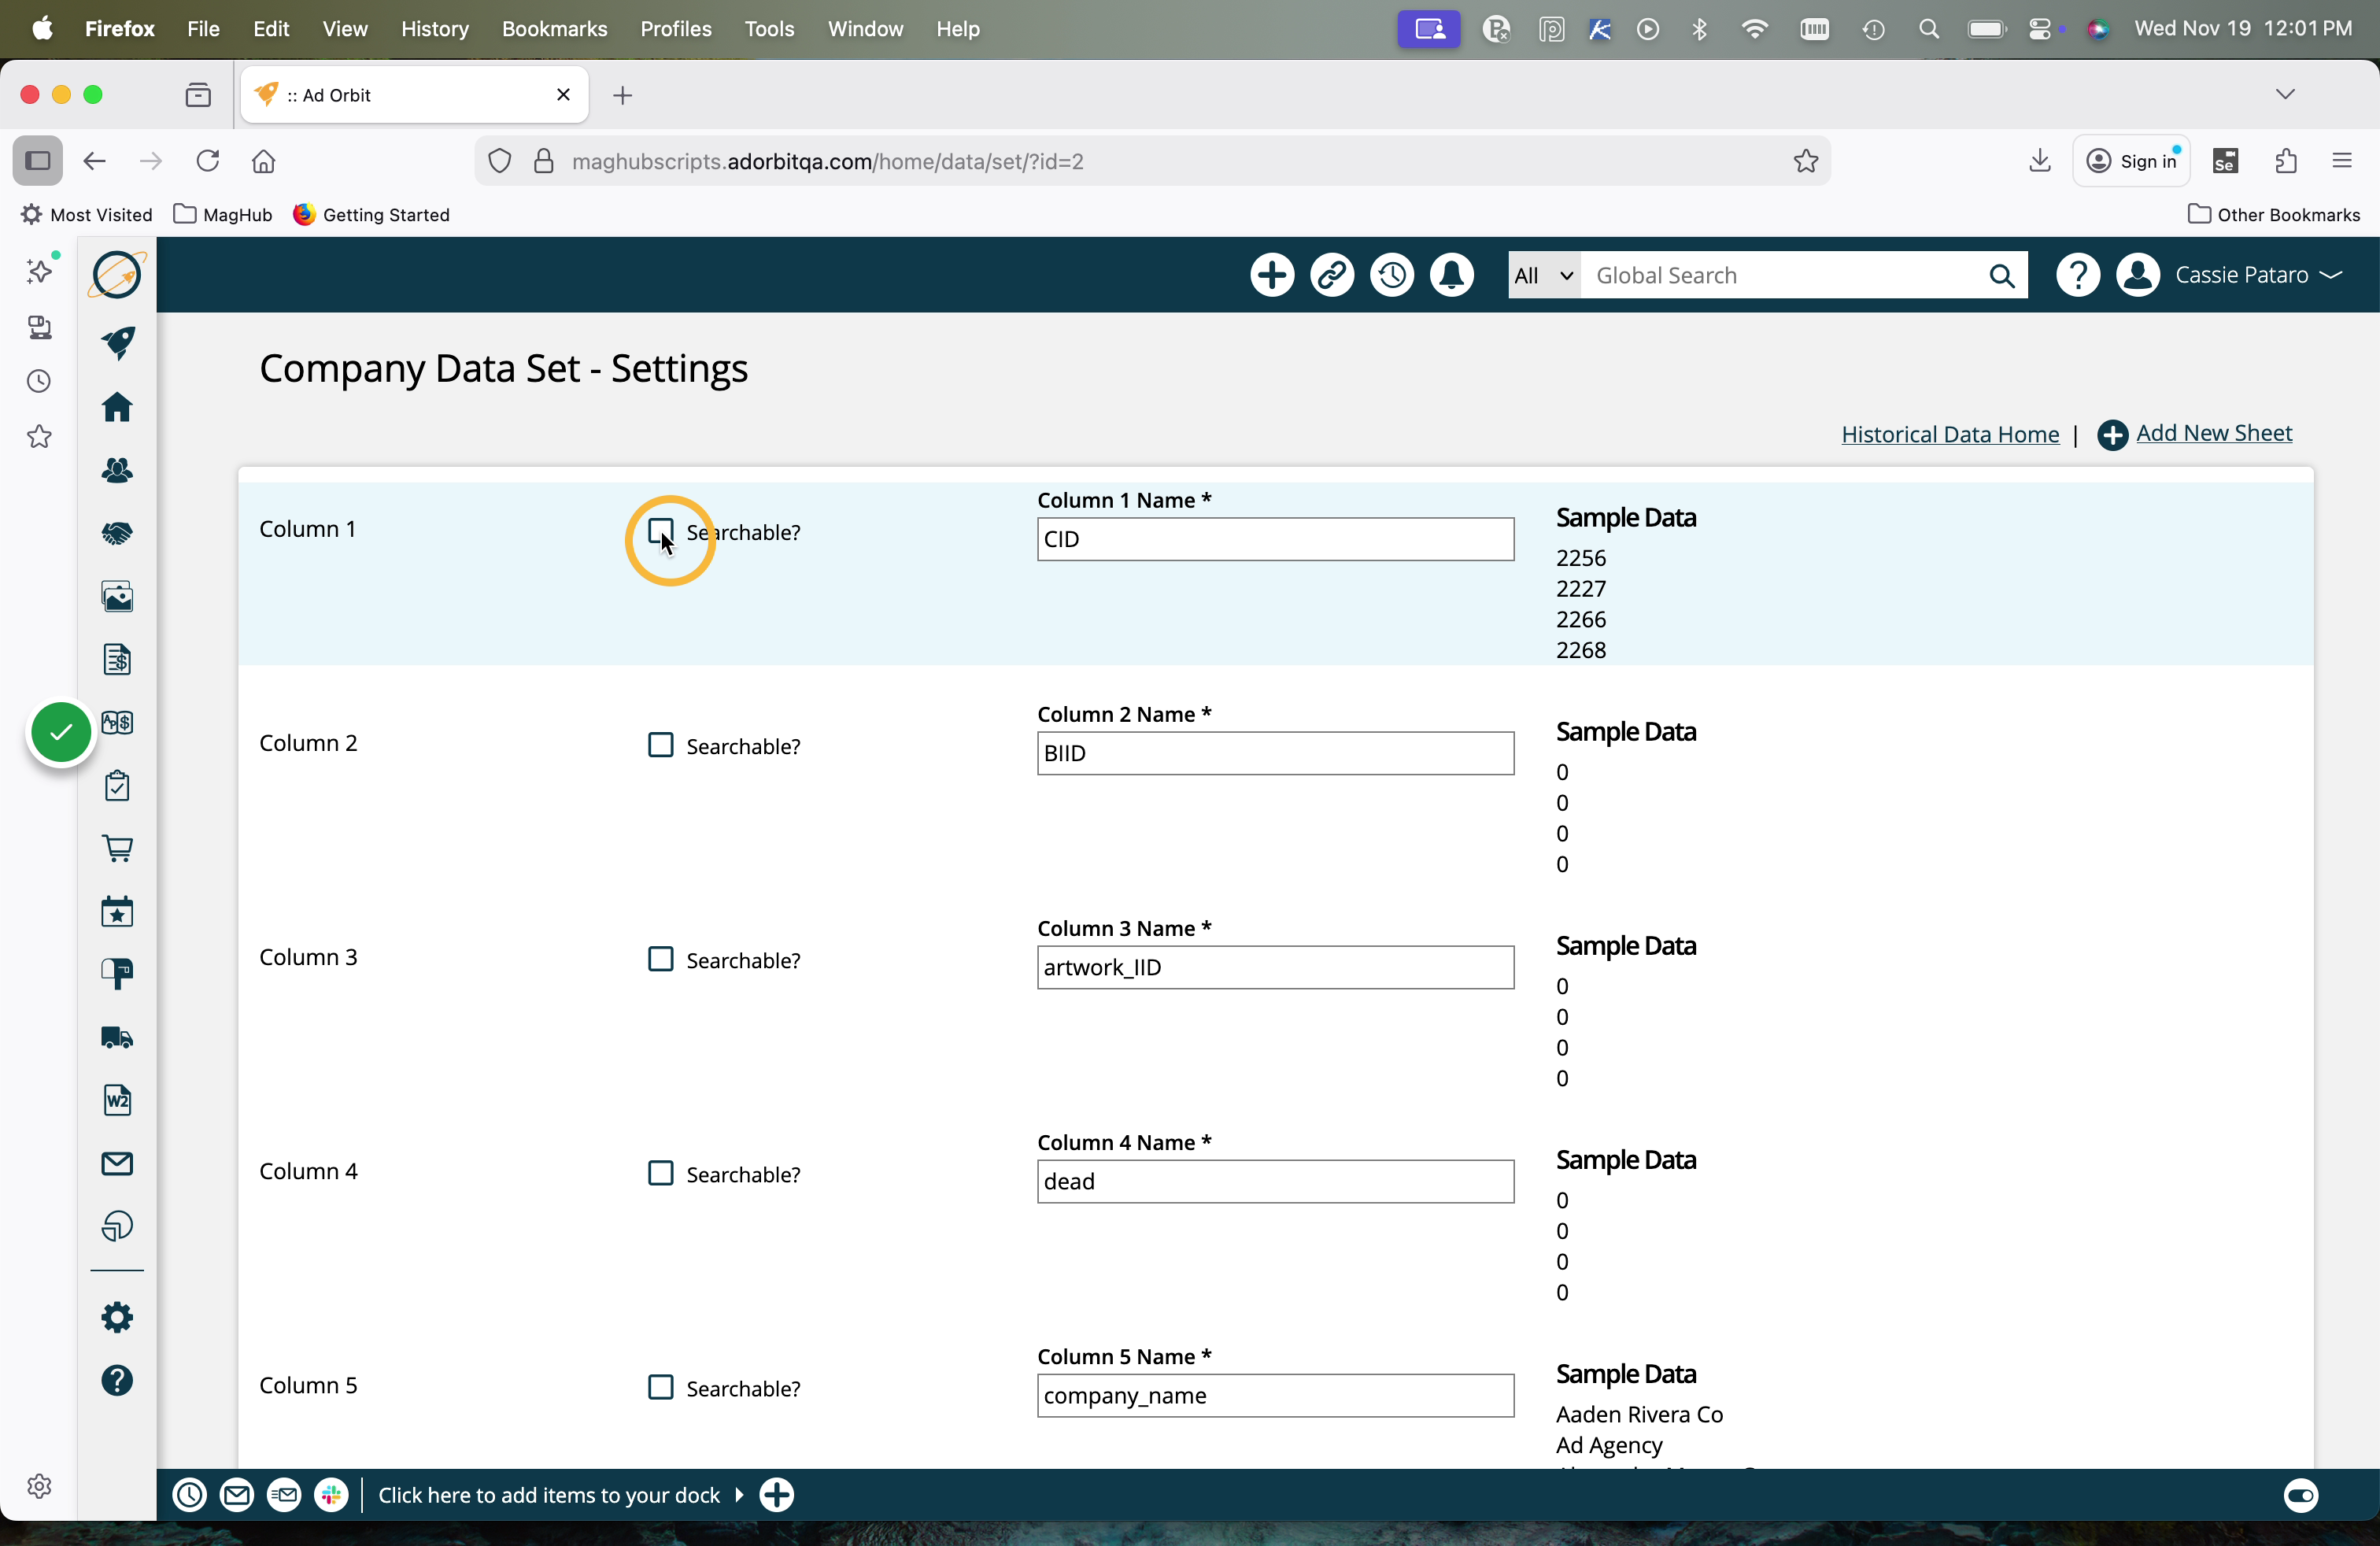
Click Save at the bottom of this page, and wait until the status on your sheet says 'Import Complete' to move on to the next step.
Tip
Once you've set searchable columns on your sheets, you can find data on the uploaded sheet easily by using those search fields. To do so, click the sheet name. Then, you can enter values into the fields you marked as searchable and run searches to find matching data.

The next step is to create a merge sheet. A merge sheet is either just your original sheet or a combination of sheets that are joined together based on a similar column. For example, you may want to import companies into the system with contacts, but you may have them on two different files. Instead of combining them outside of the system, you can upload your Company file as a sheet, then your Contact file as a sheet, and then merge them on something like the 'Company Name' or 'Company ID' columns by using a Merge Sheet.
Click Create New in the Merge Sheets section of the Historical Data Tool.
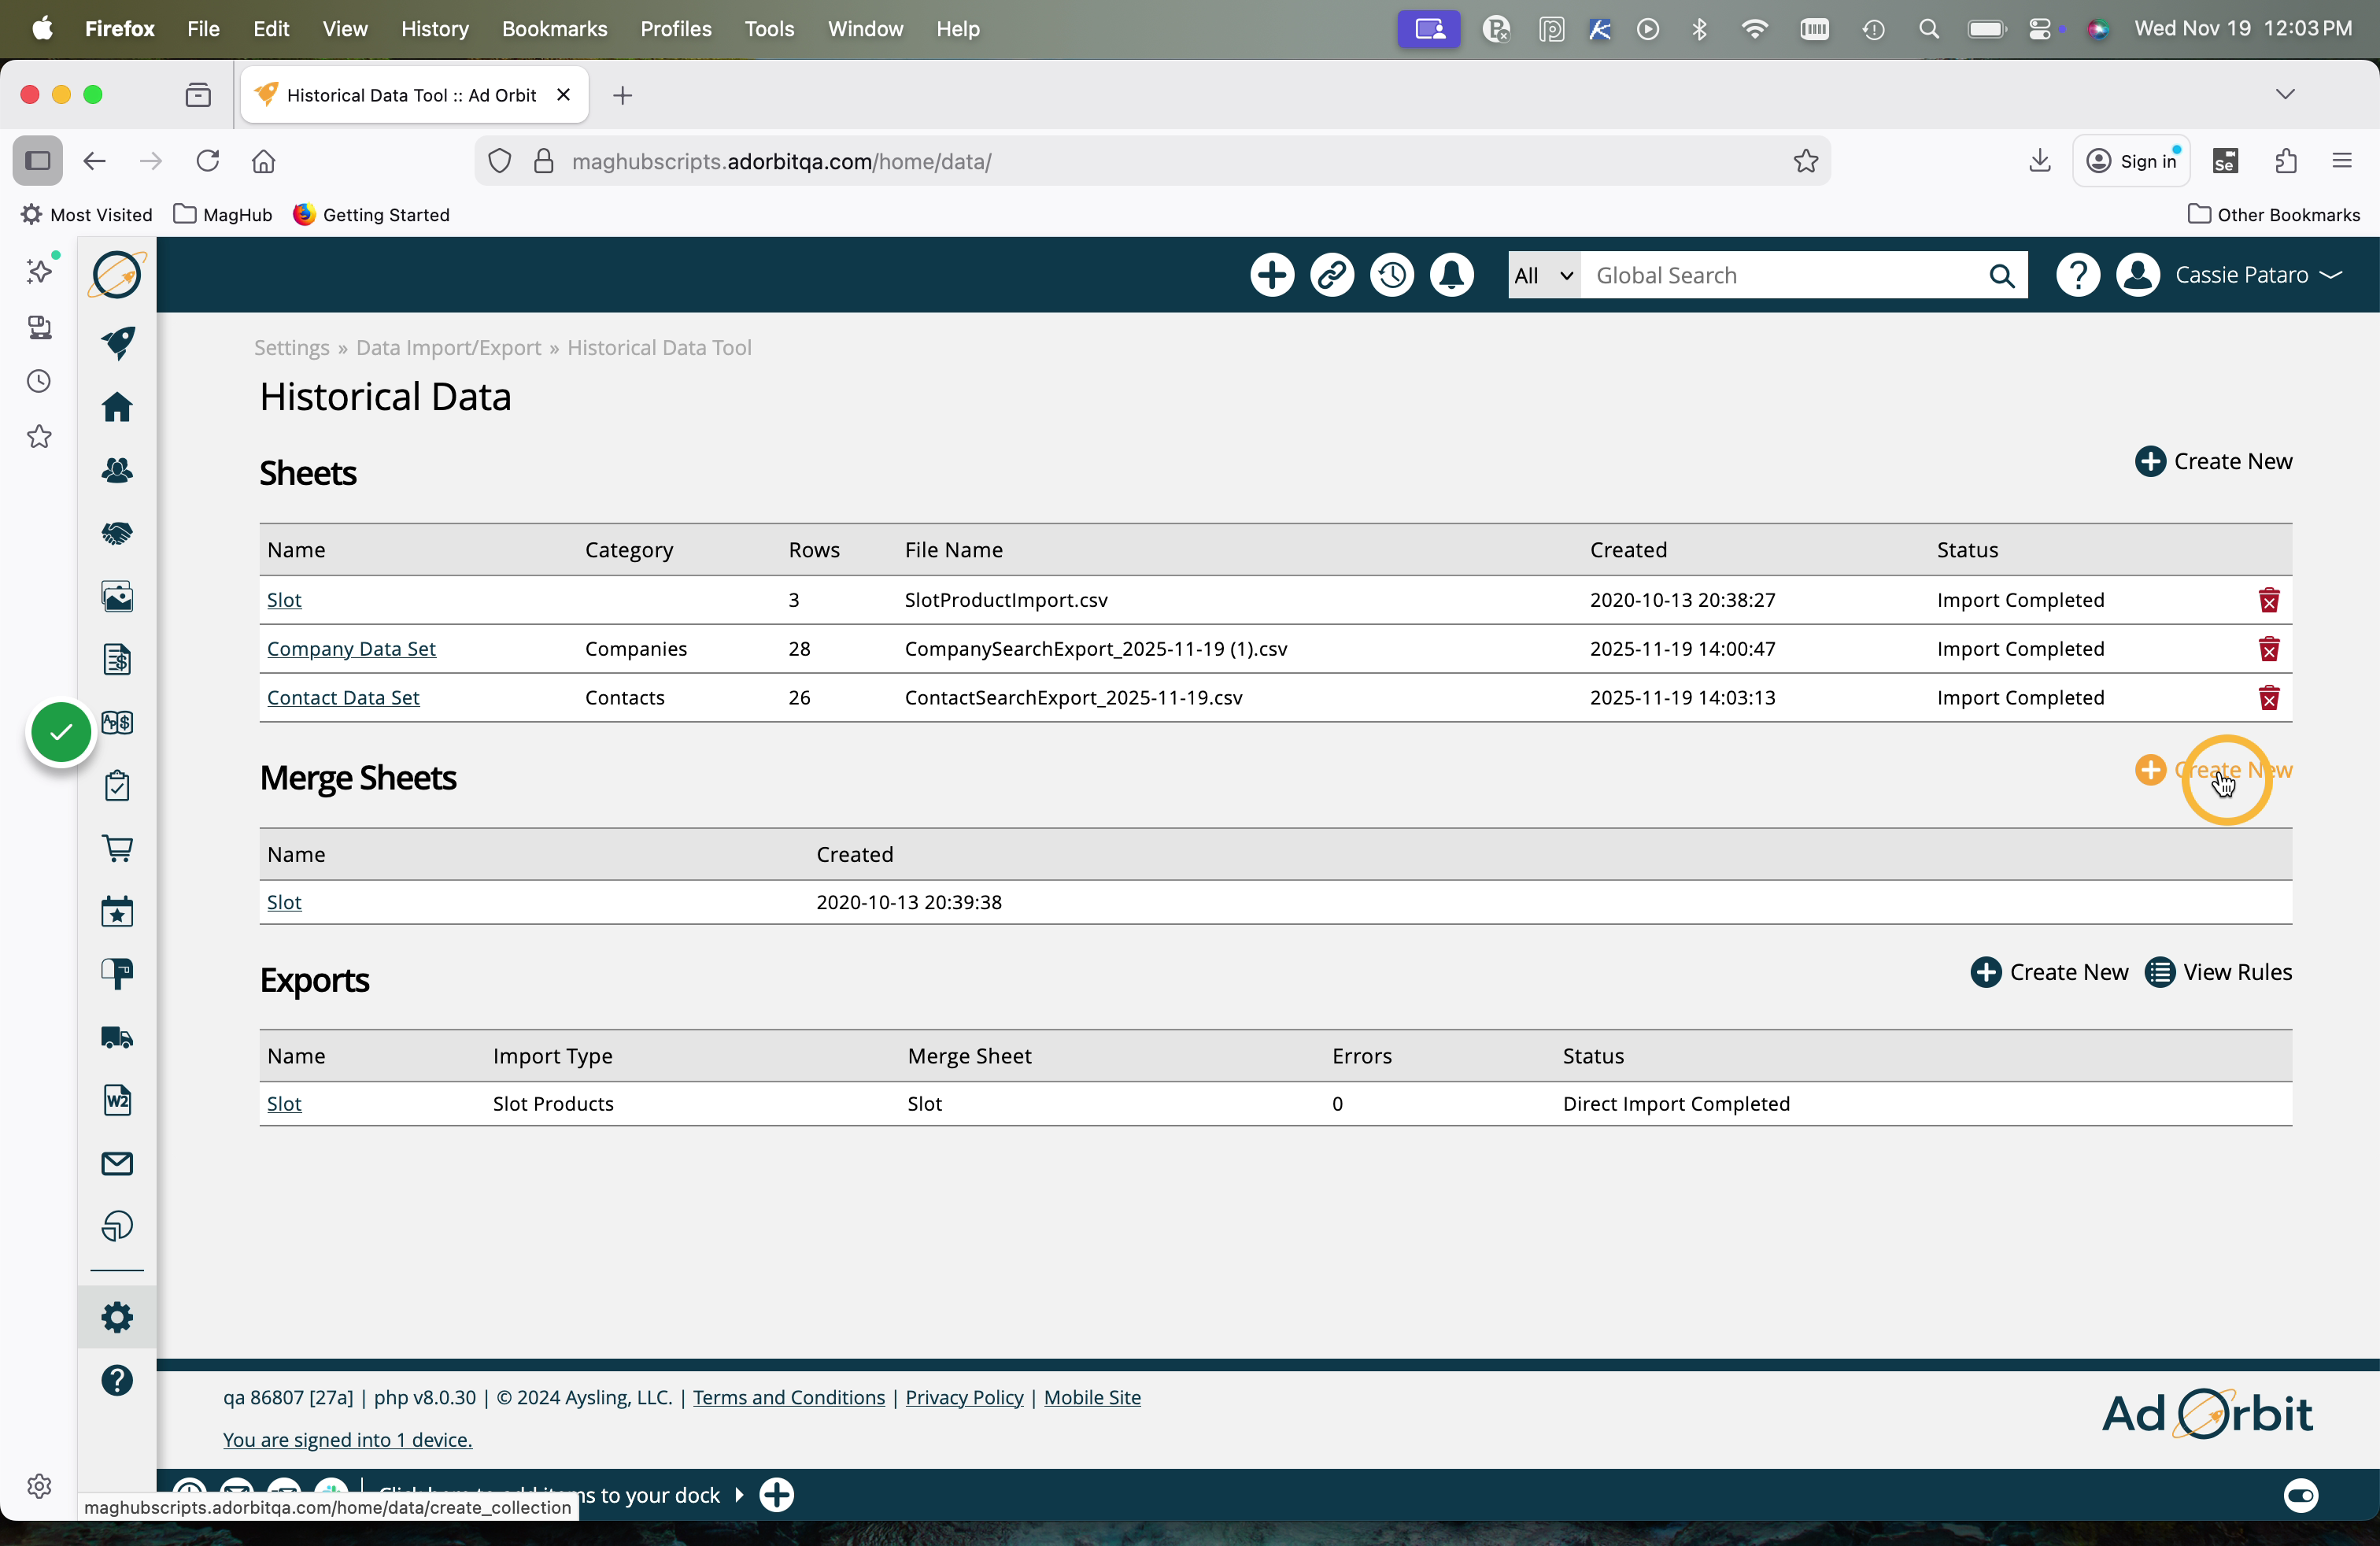
Give your merge sheet a name, and select the base sheet to begin with.
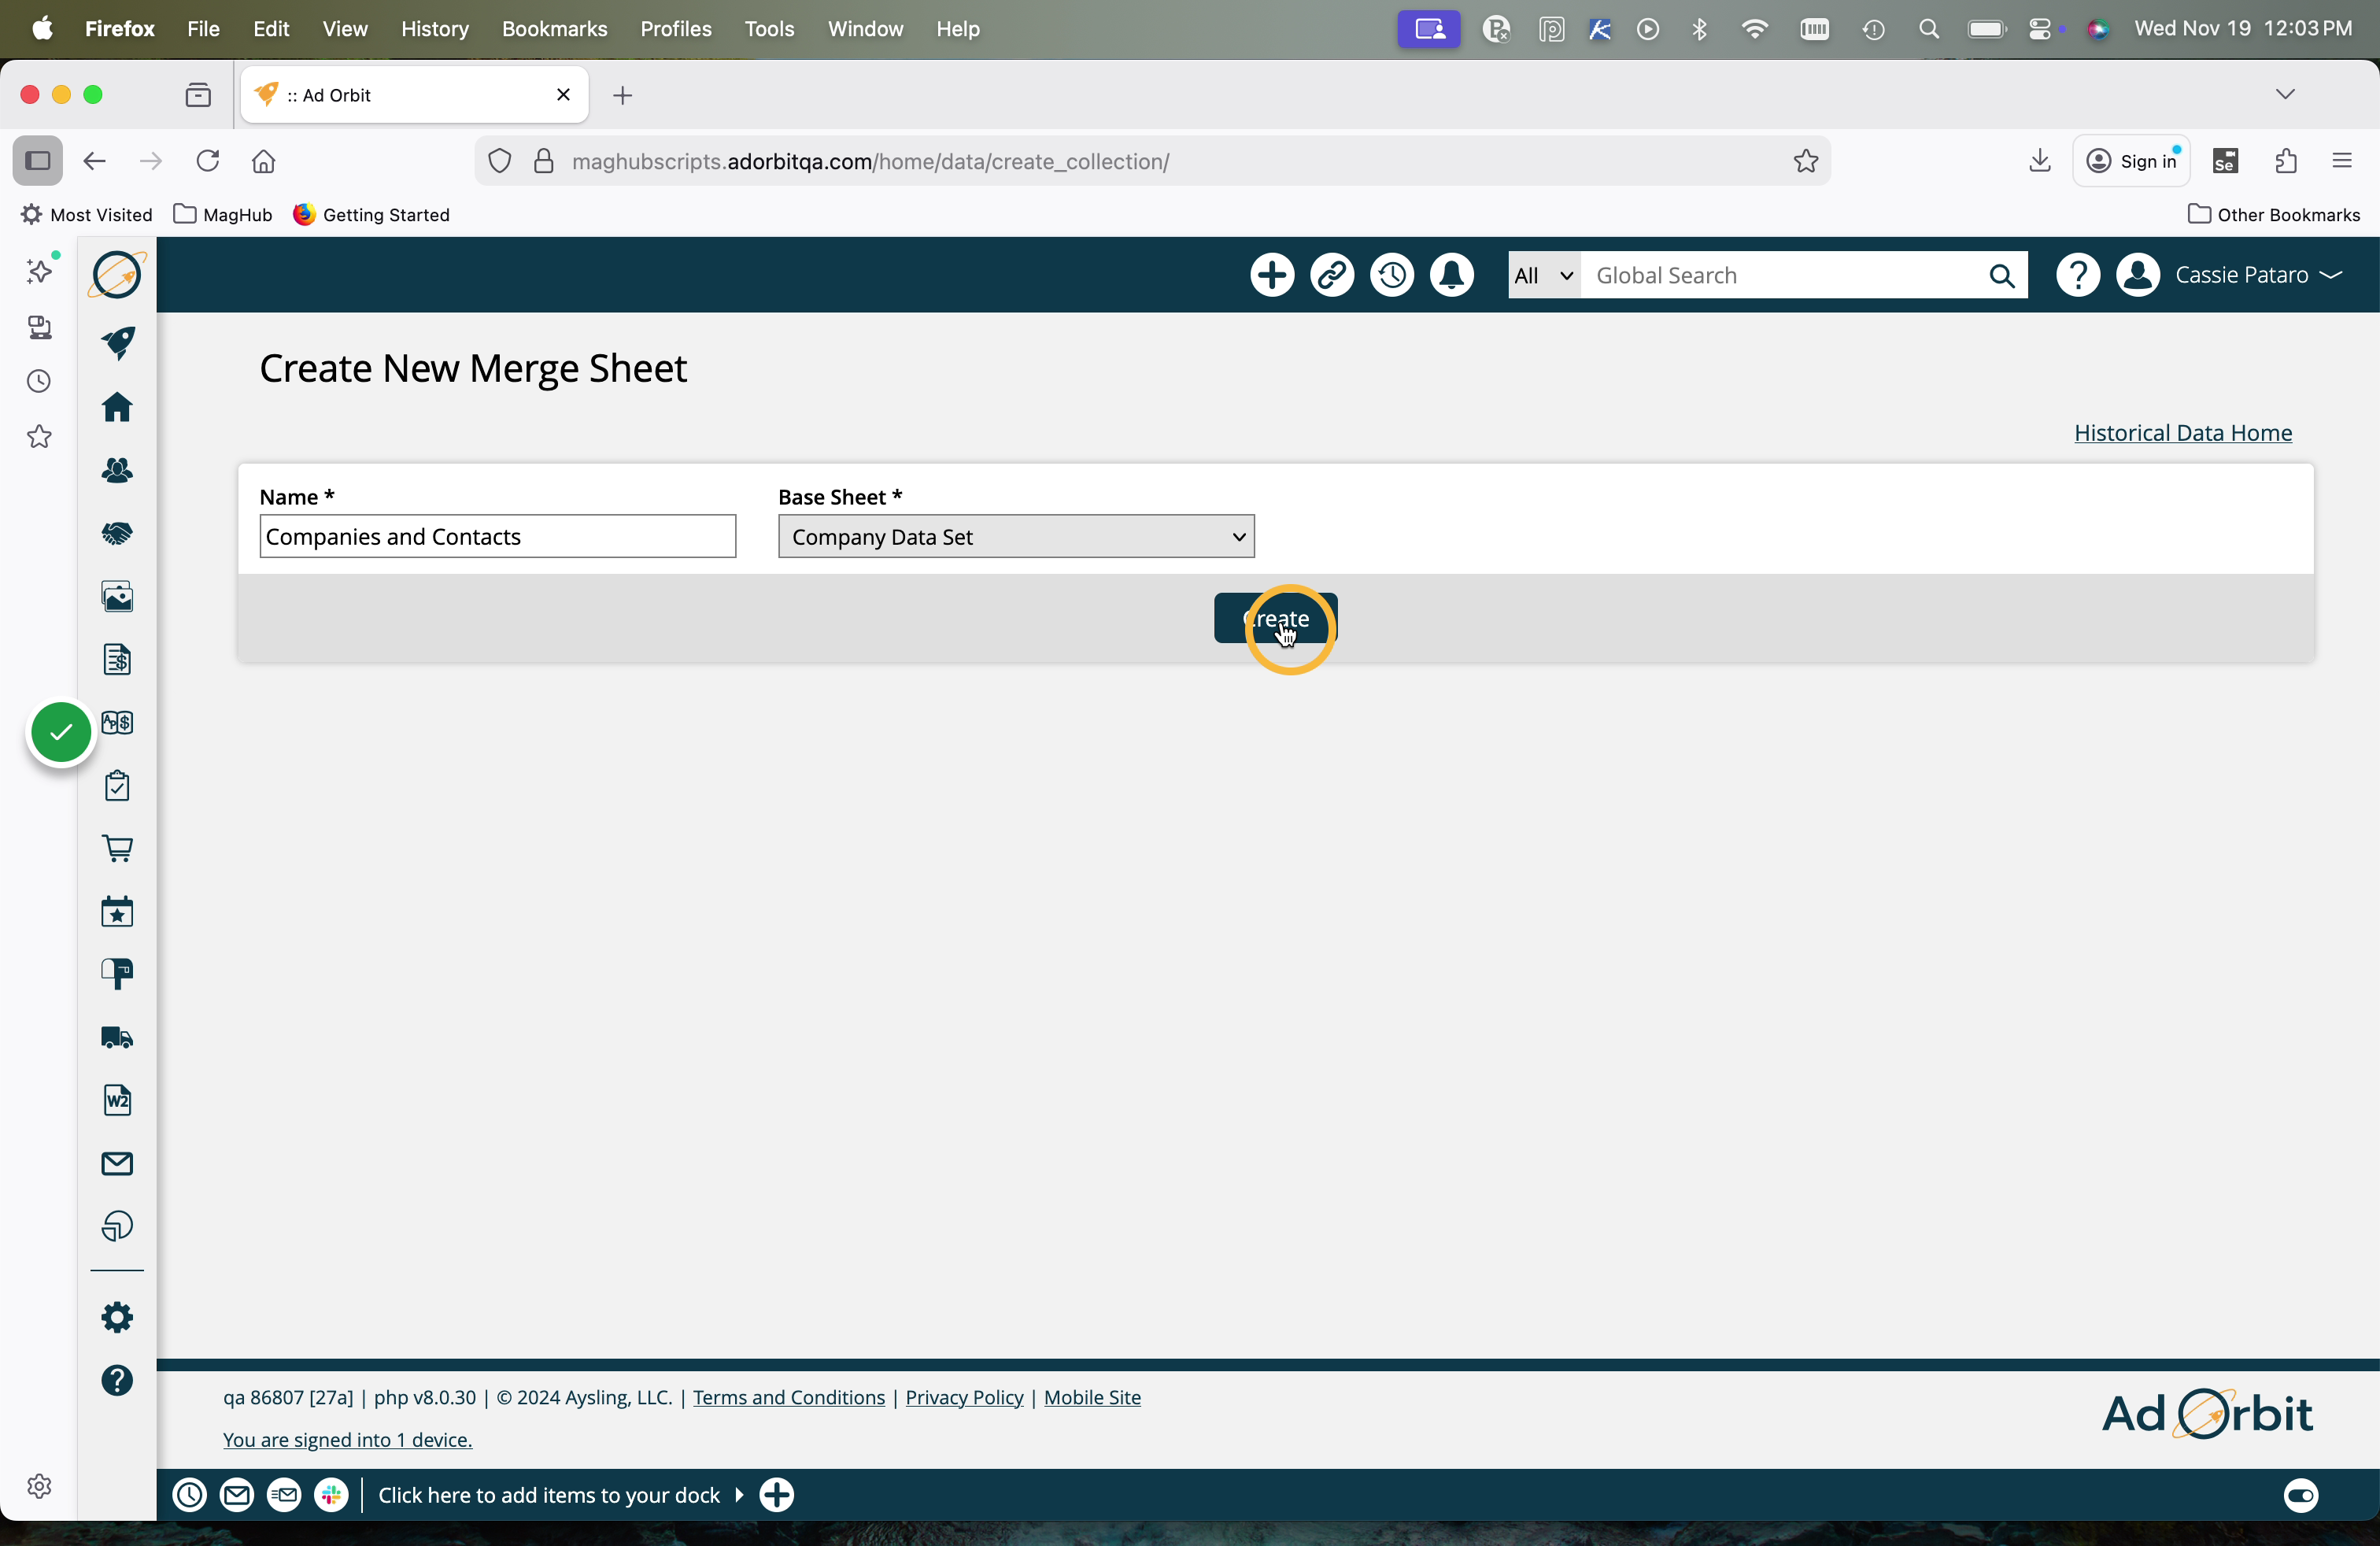
If you are only using one file of data, simply click save, and you are done creating your merge sheet. If you want to combine multiple sheets, continue through the next few merge sheet steps.
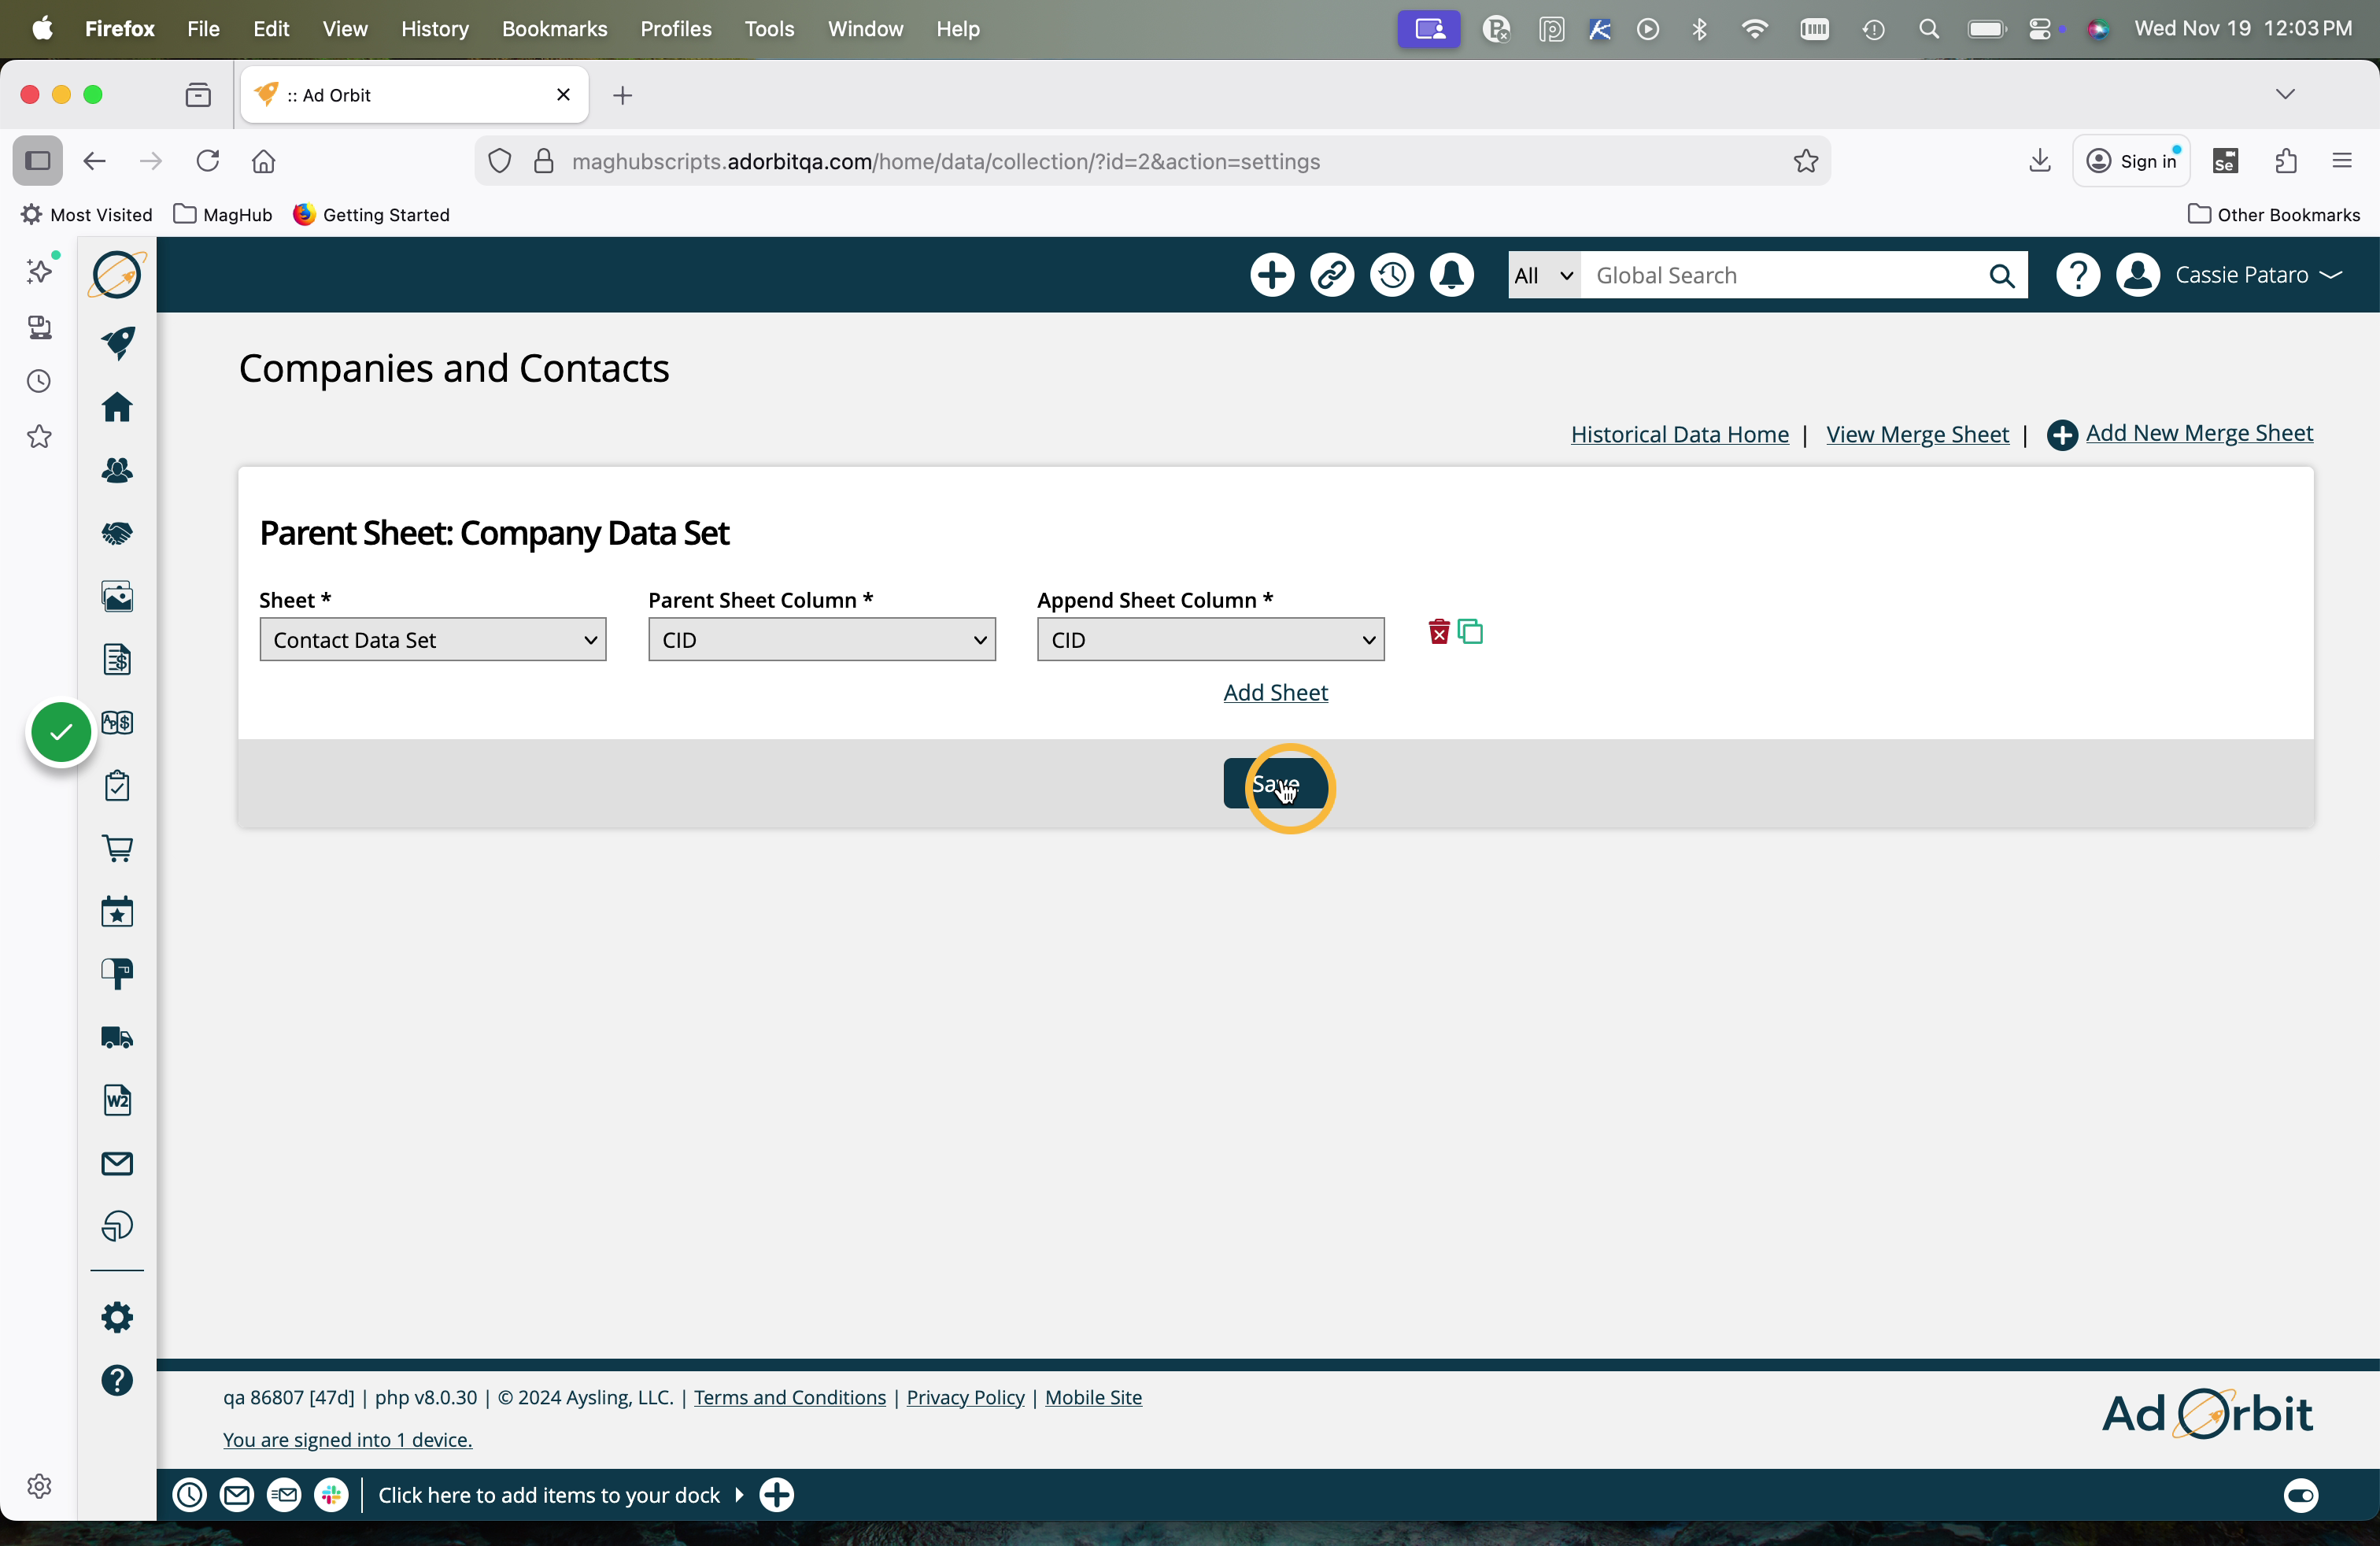
To merge an additional sheet, click the 'Add Sheet' button.
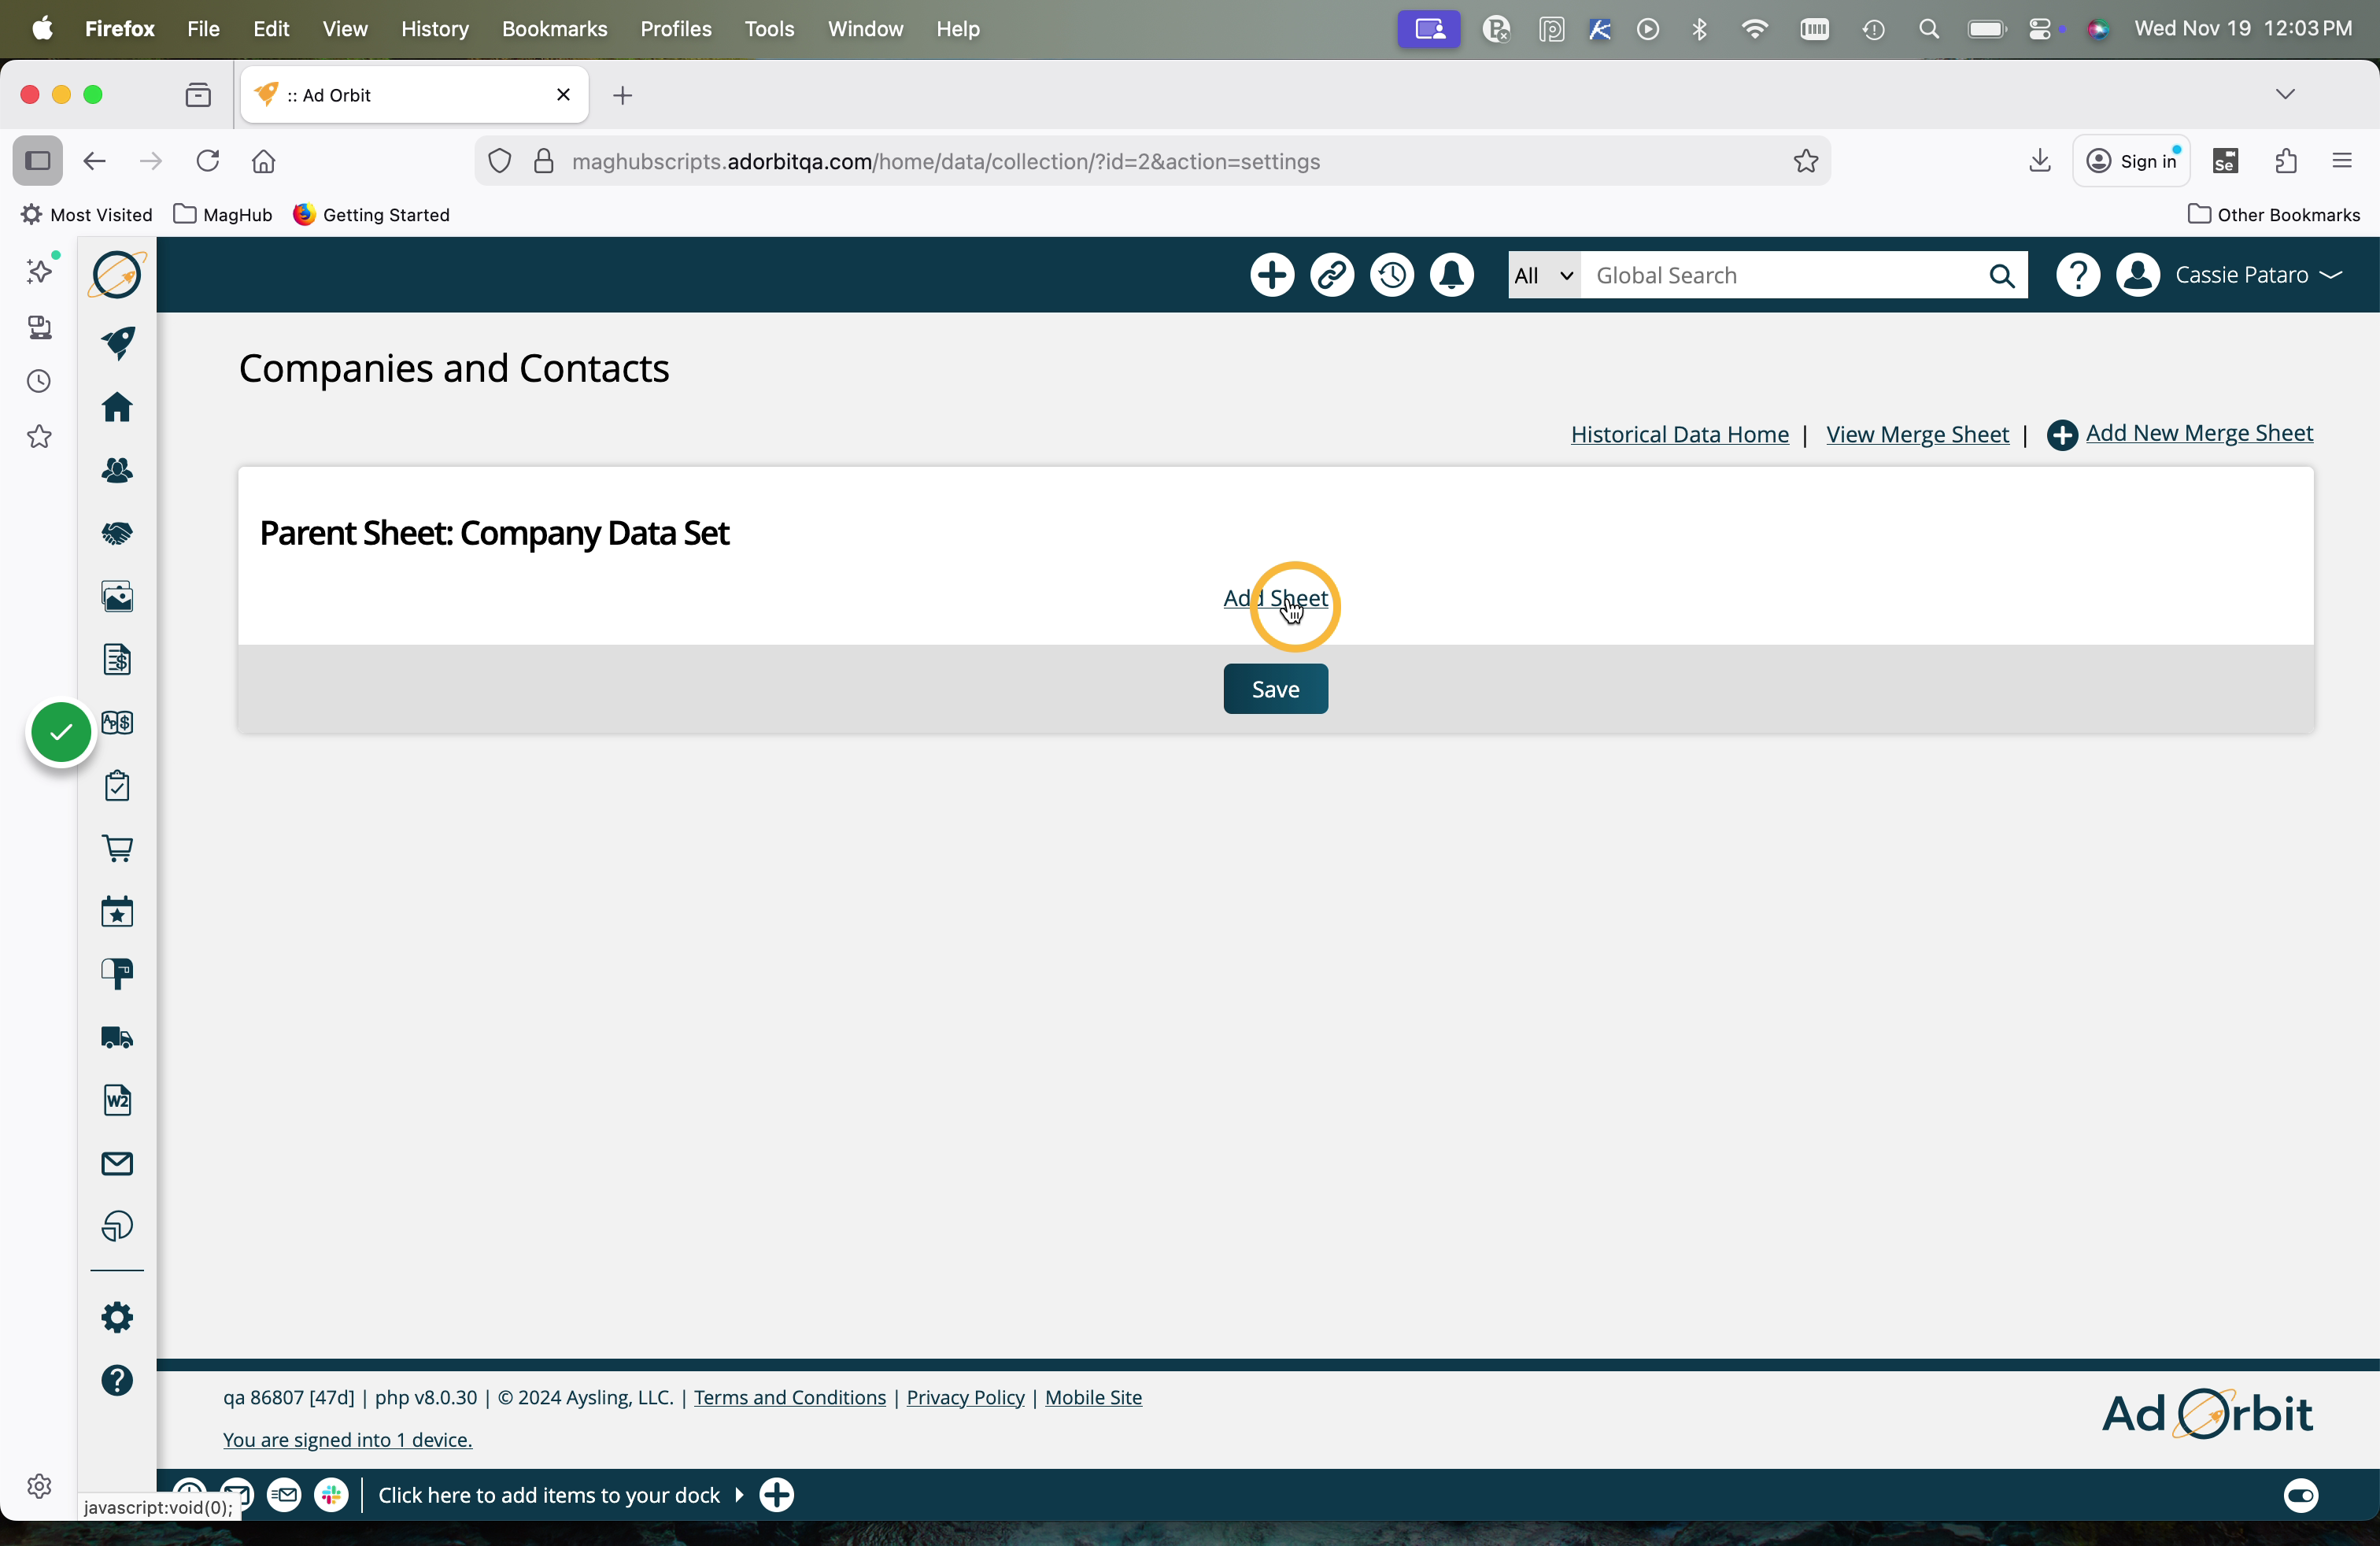
Select the additional sheet you want to merge, and select which columns should be mapped between the base sheet and your new sheet.
In the below example, I am adding my Contact data to my Company data. To do so, my base sheet is my Company data, and I am adding my Contact data sheet. I've selected 'CID' (Company ID) as the columns from both sheets to map.
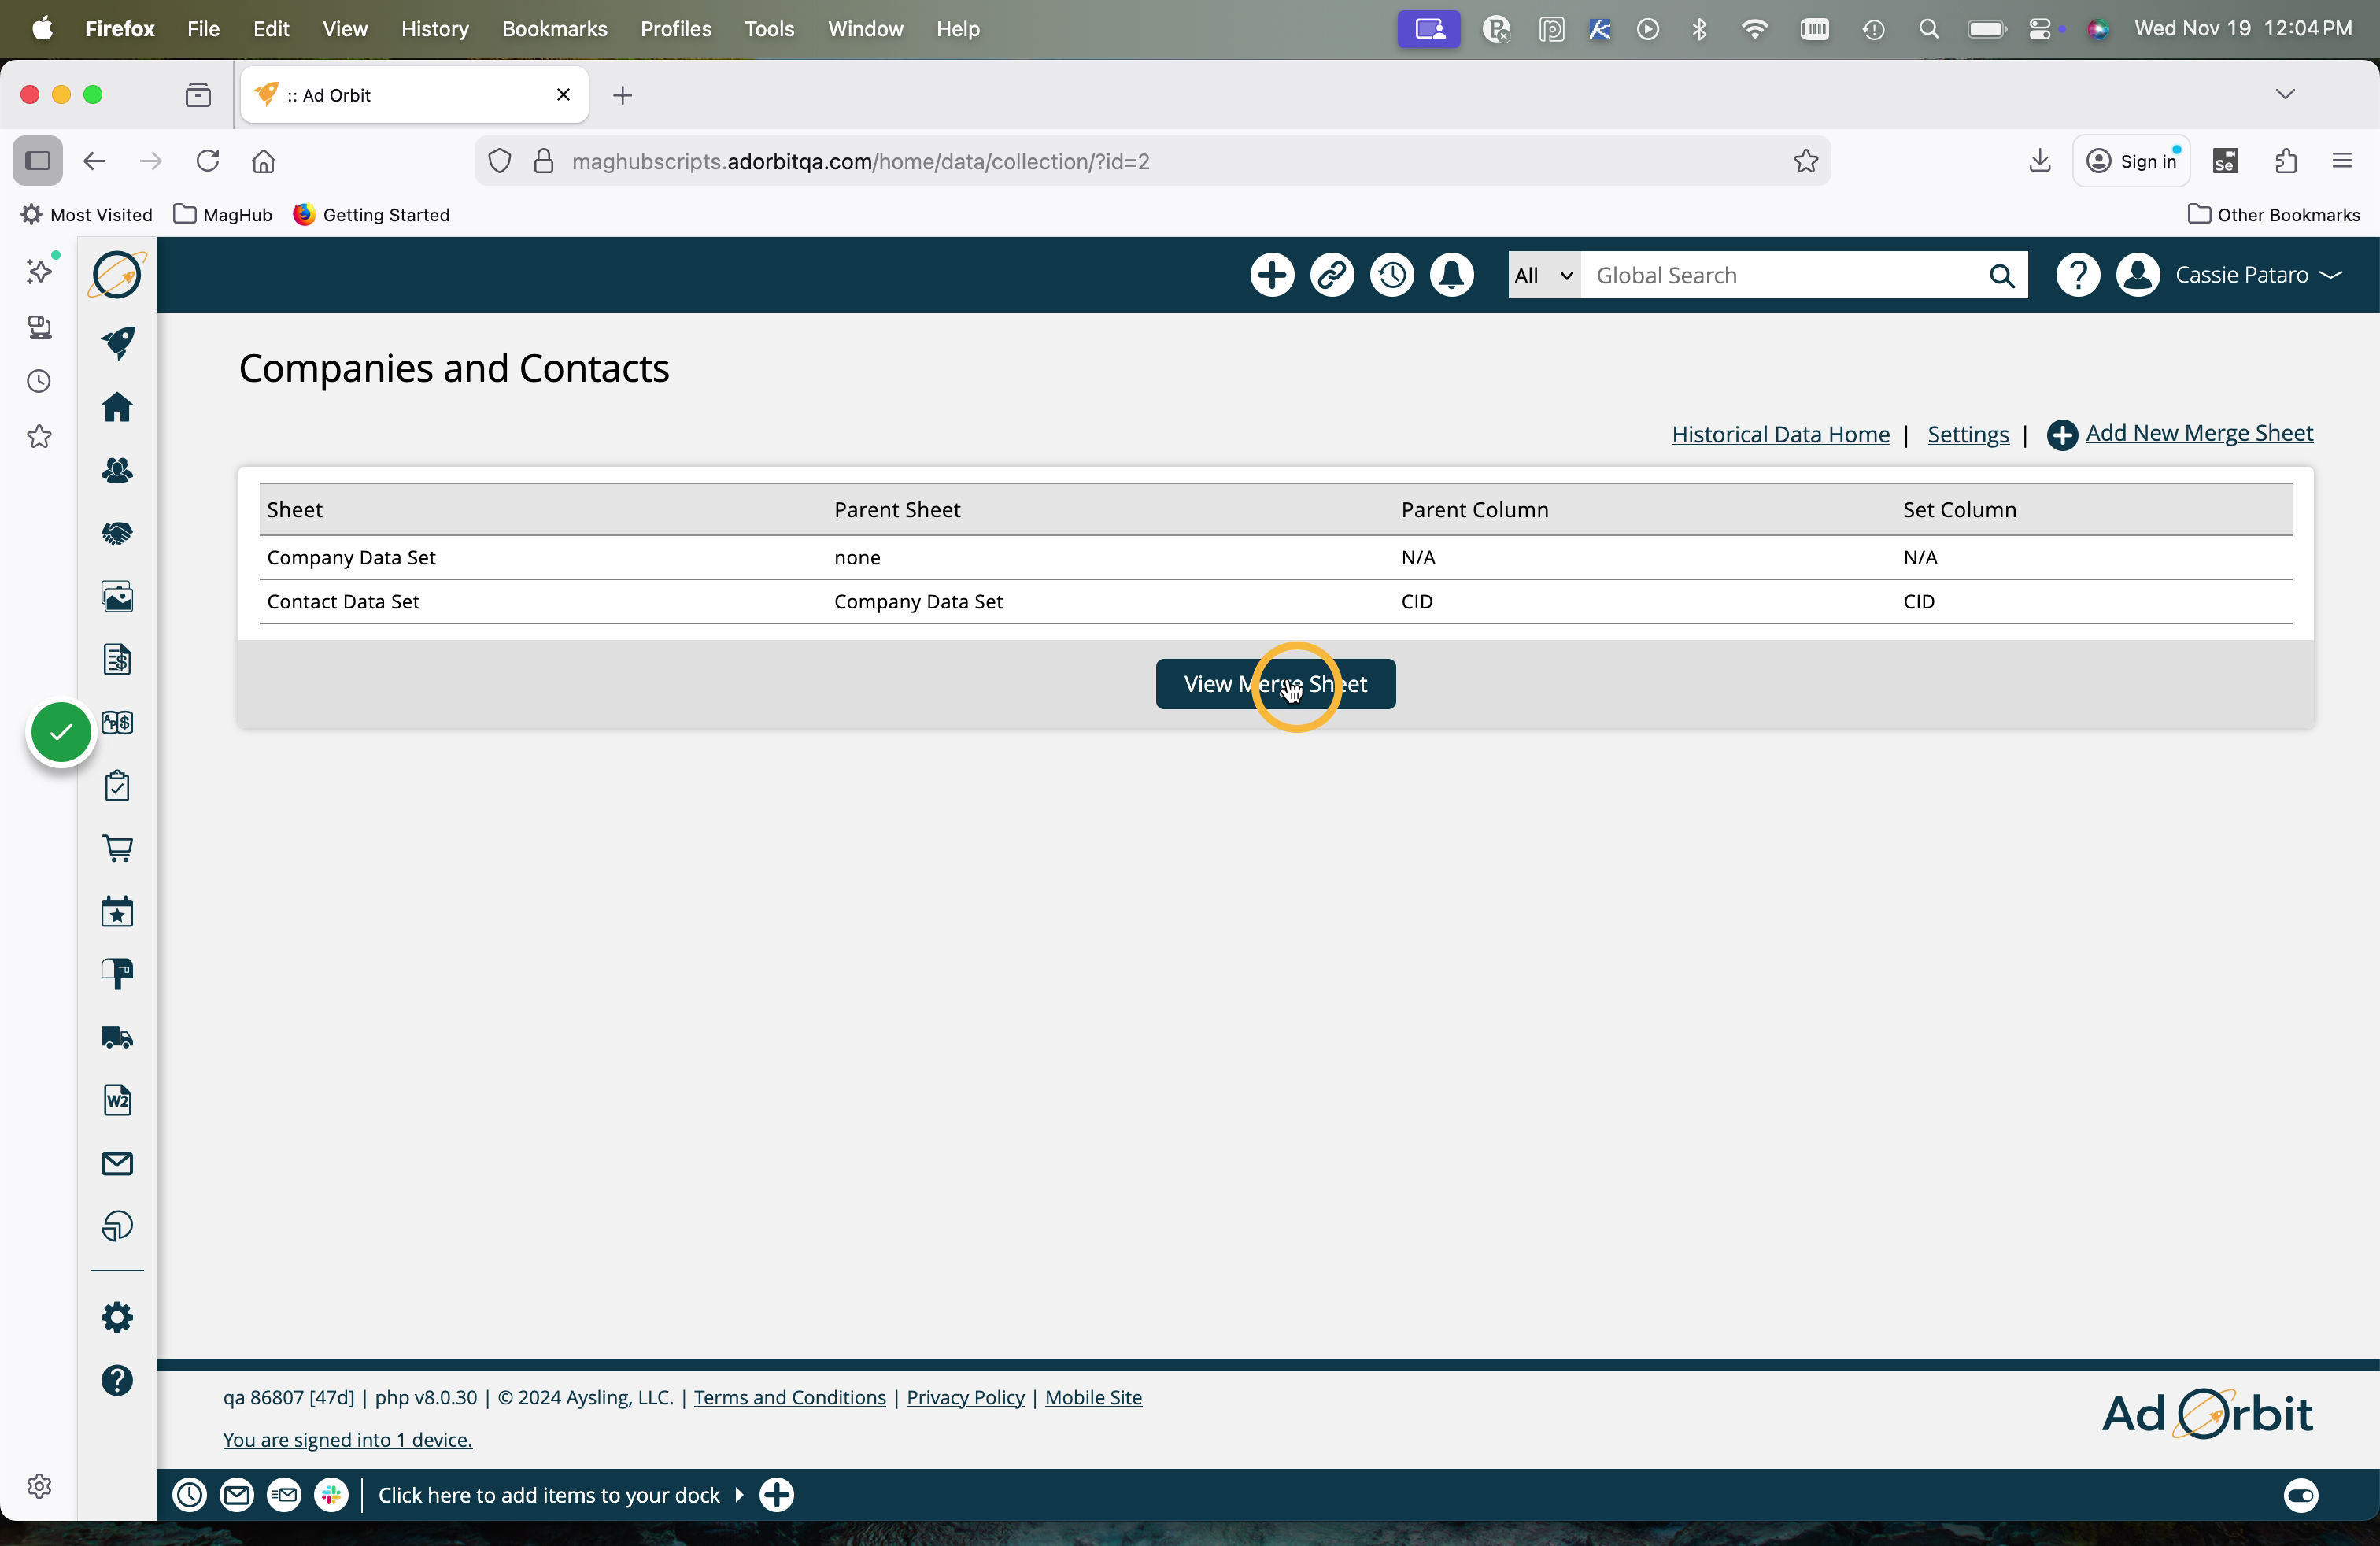
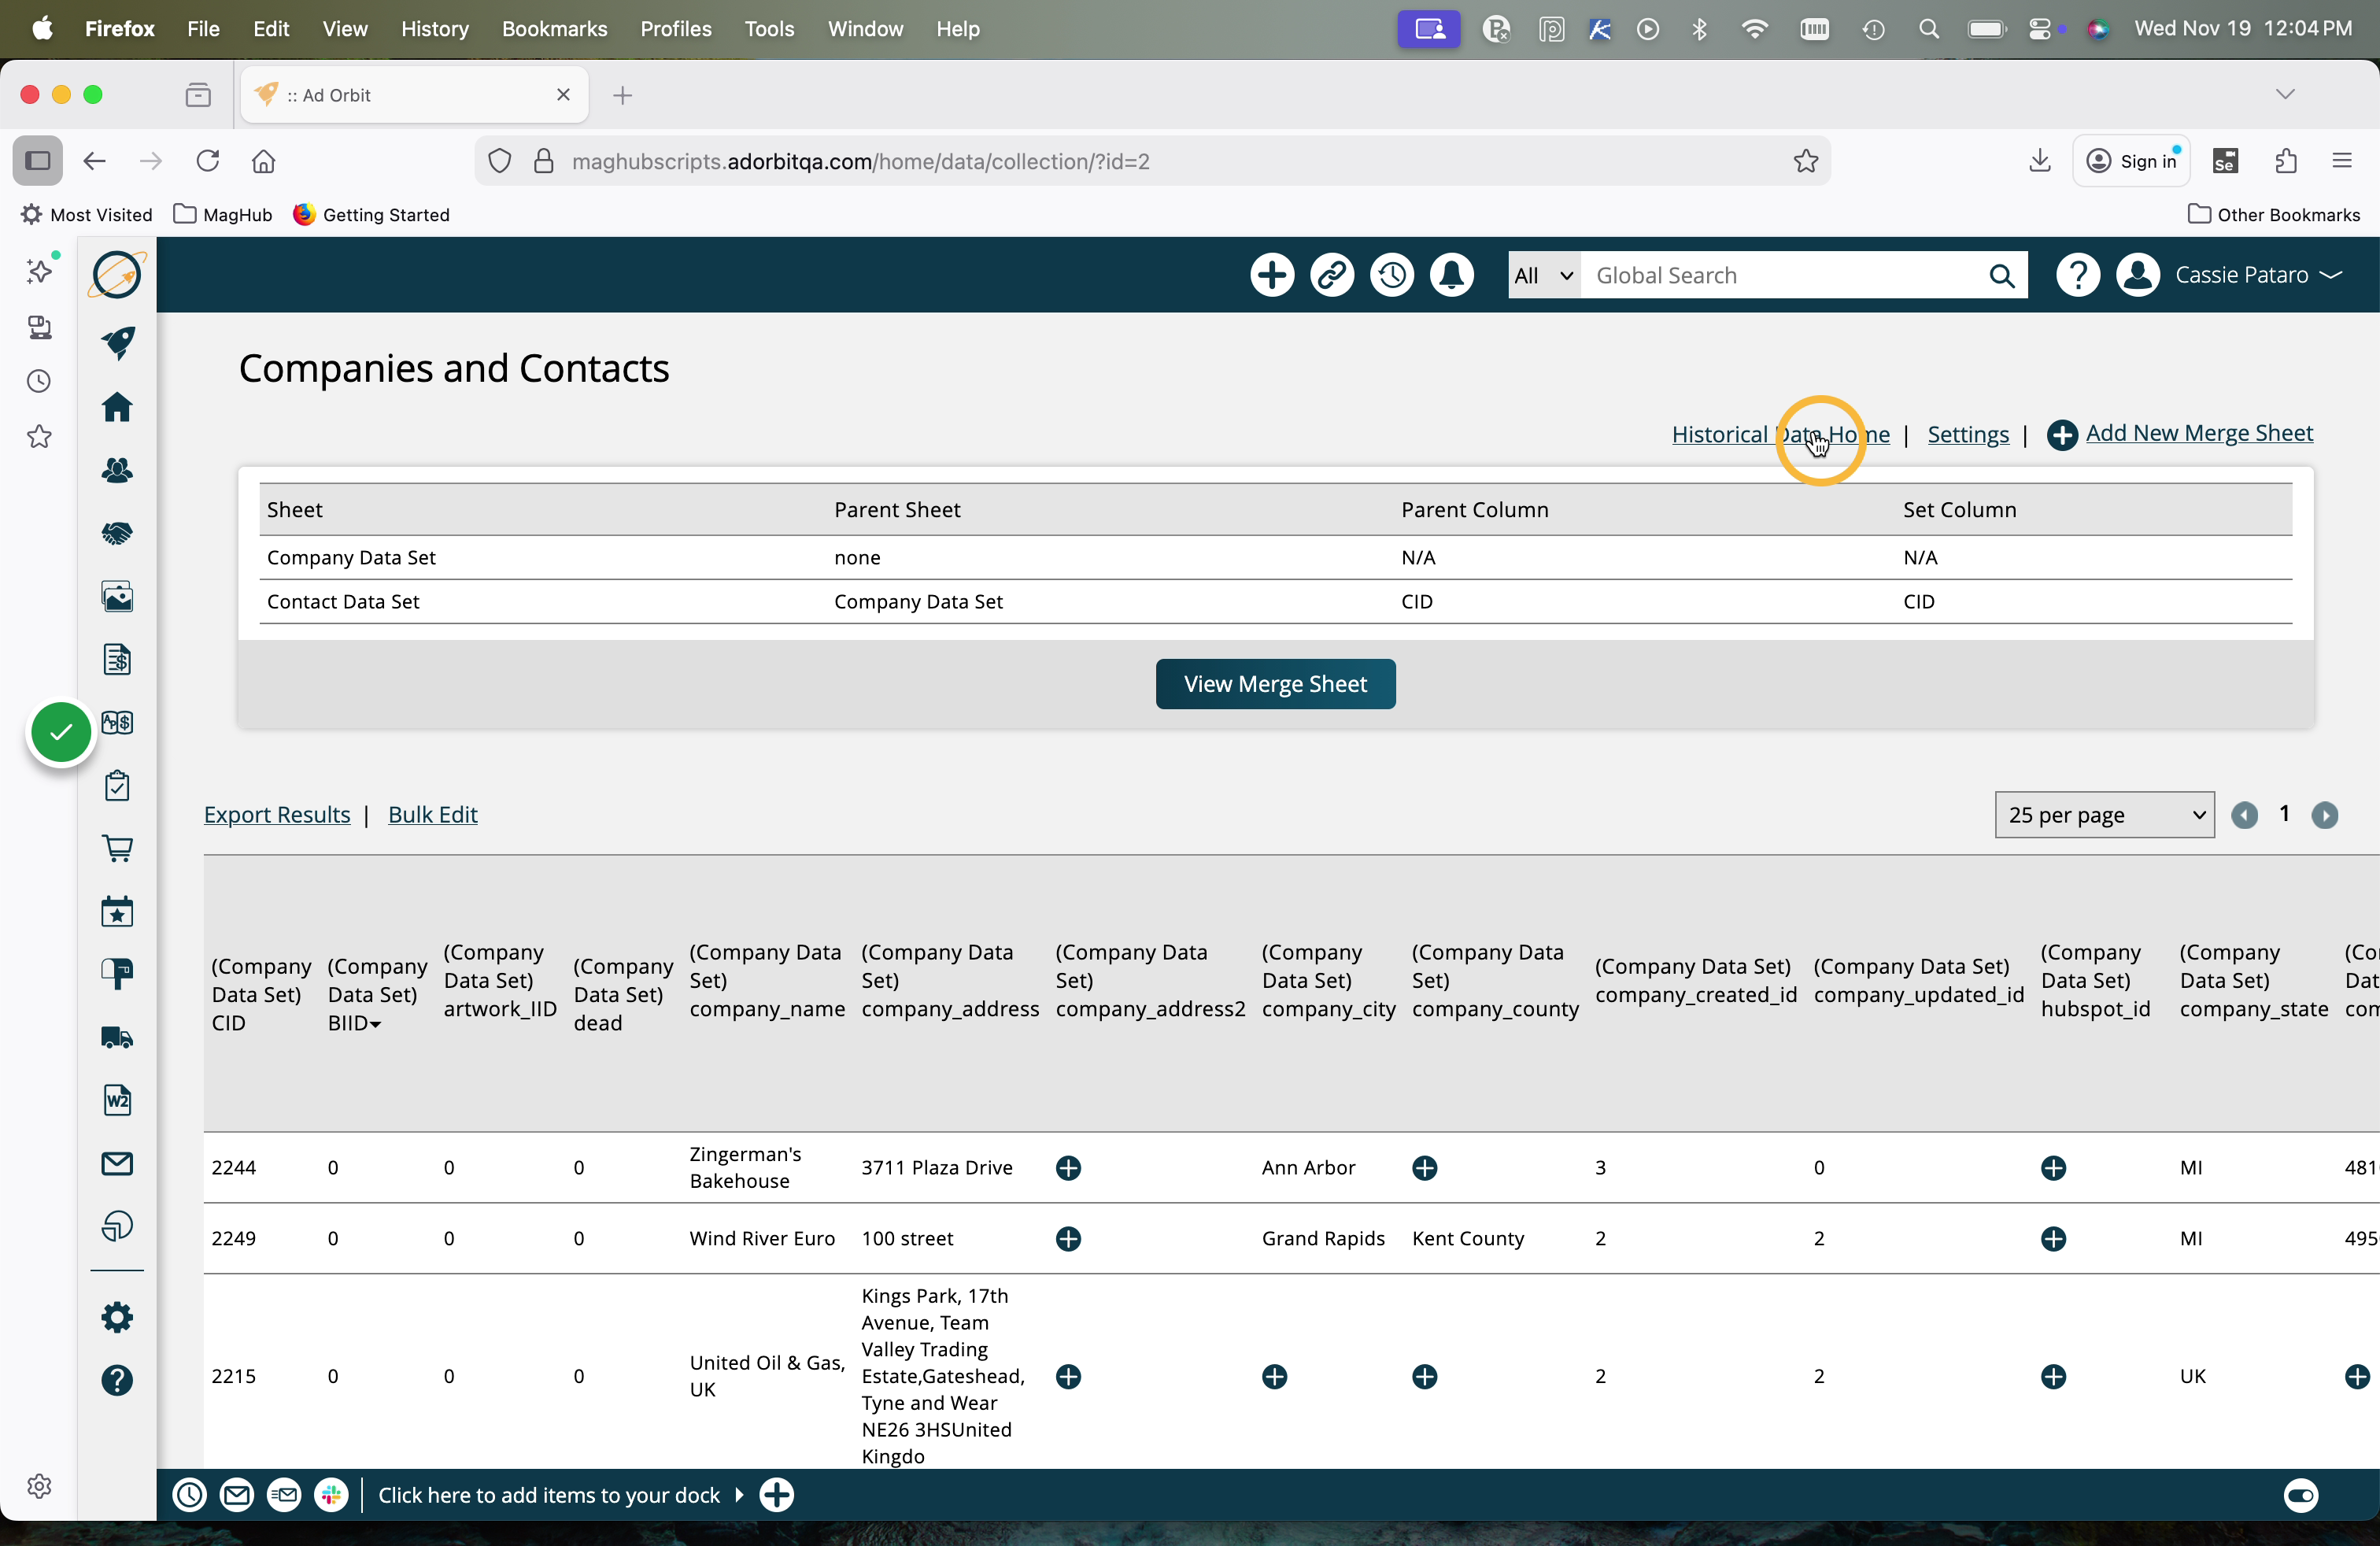
Once the sheets have been merged, you can view the data.
With the merge sheet in the system, you will see a new column on your data set: import record ID. Once the system processes the final import, your data set will include the new system ID so you can use it for reference for future imports or data overrides.
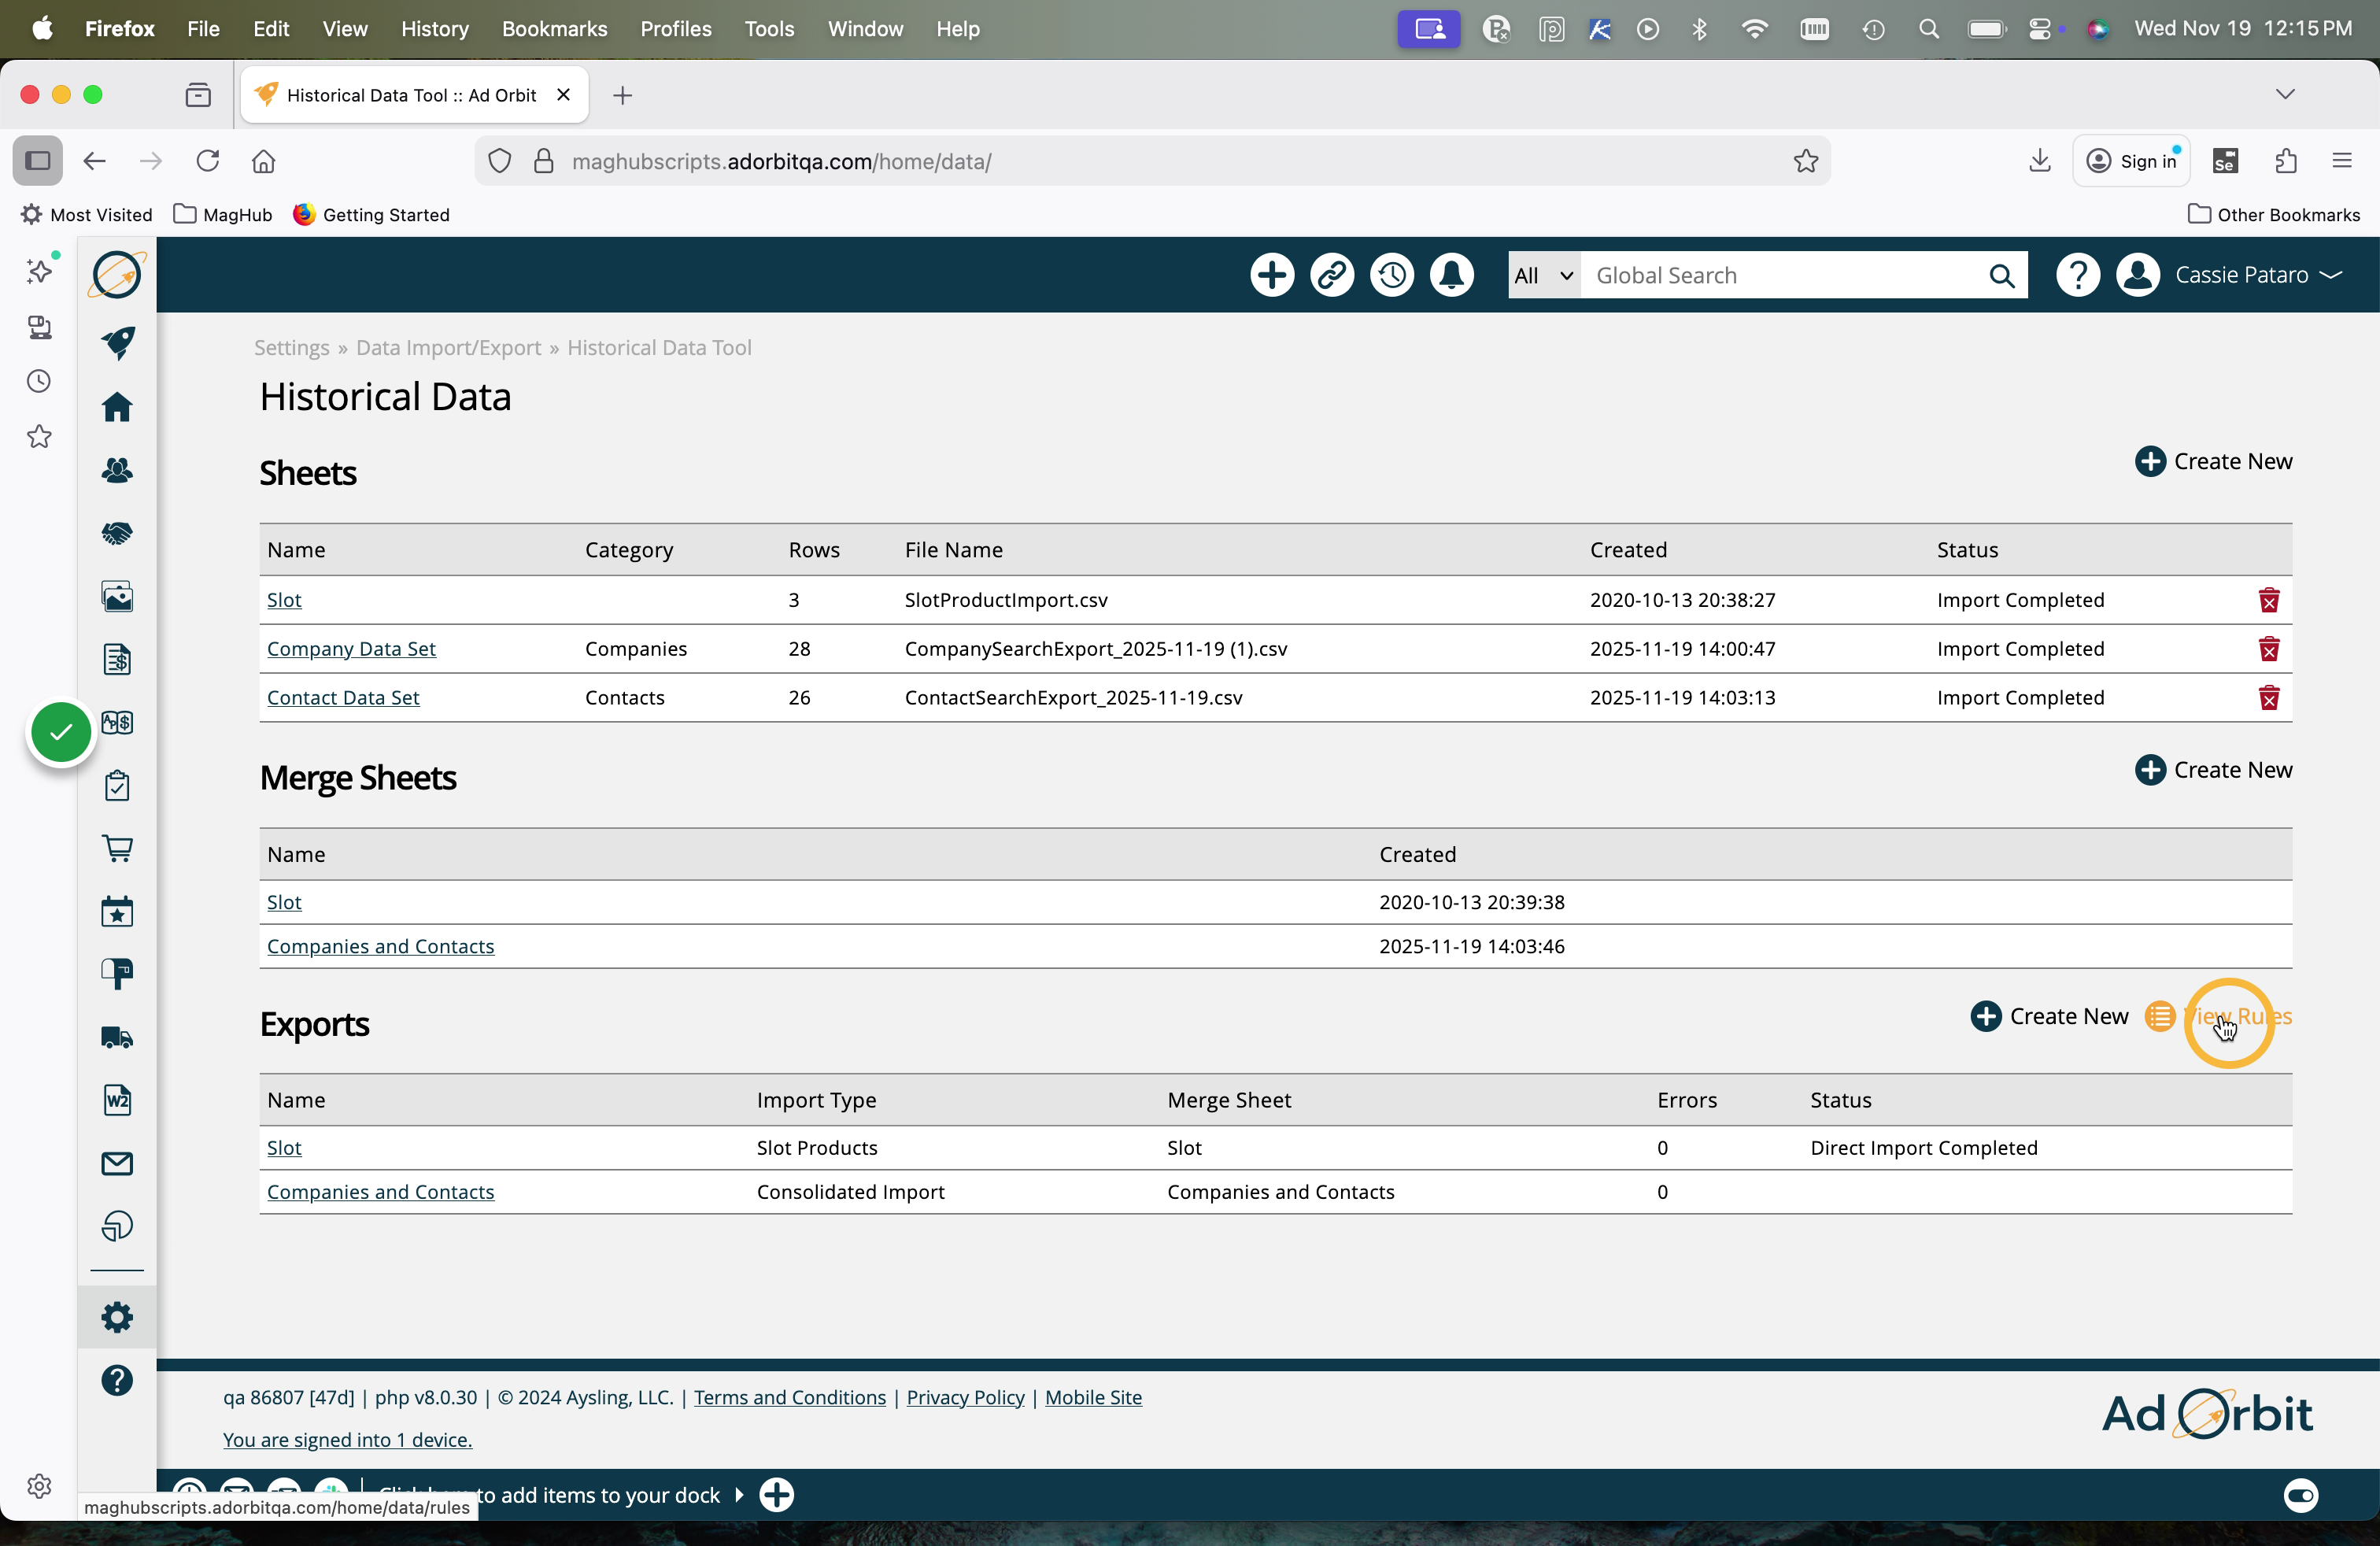
The next step is to perform an export using your merge sheet.
Note
The name of this section, 'Exports' is a bit of a misnomer. This section is where you will test and validate, as well as perform the direct import of your data into Ad Orbit.
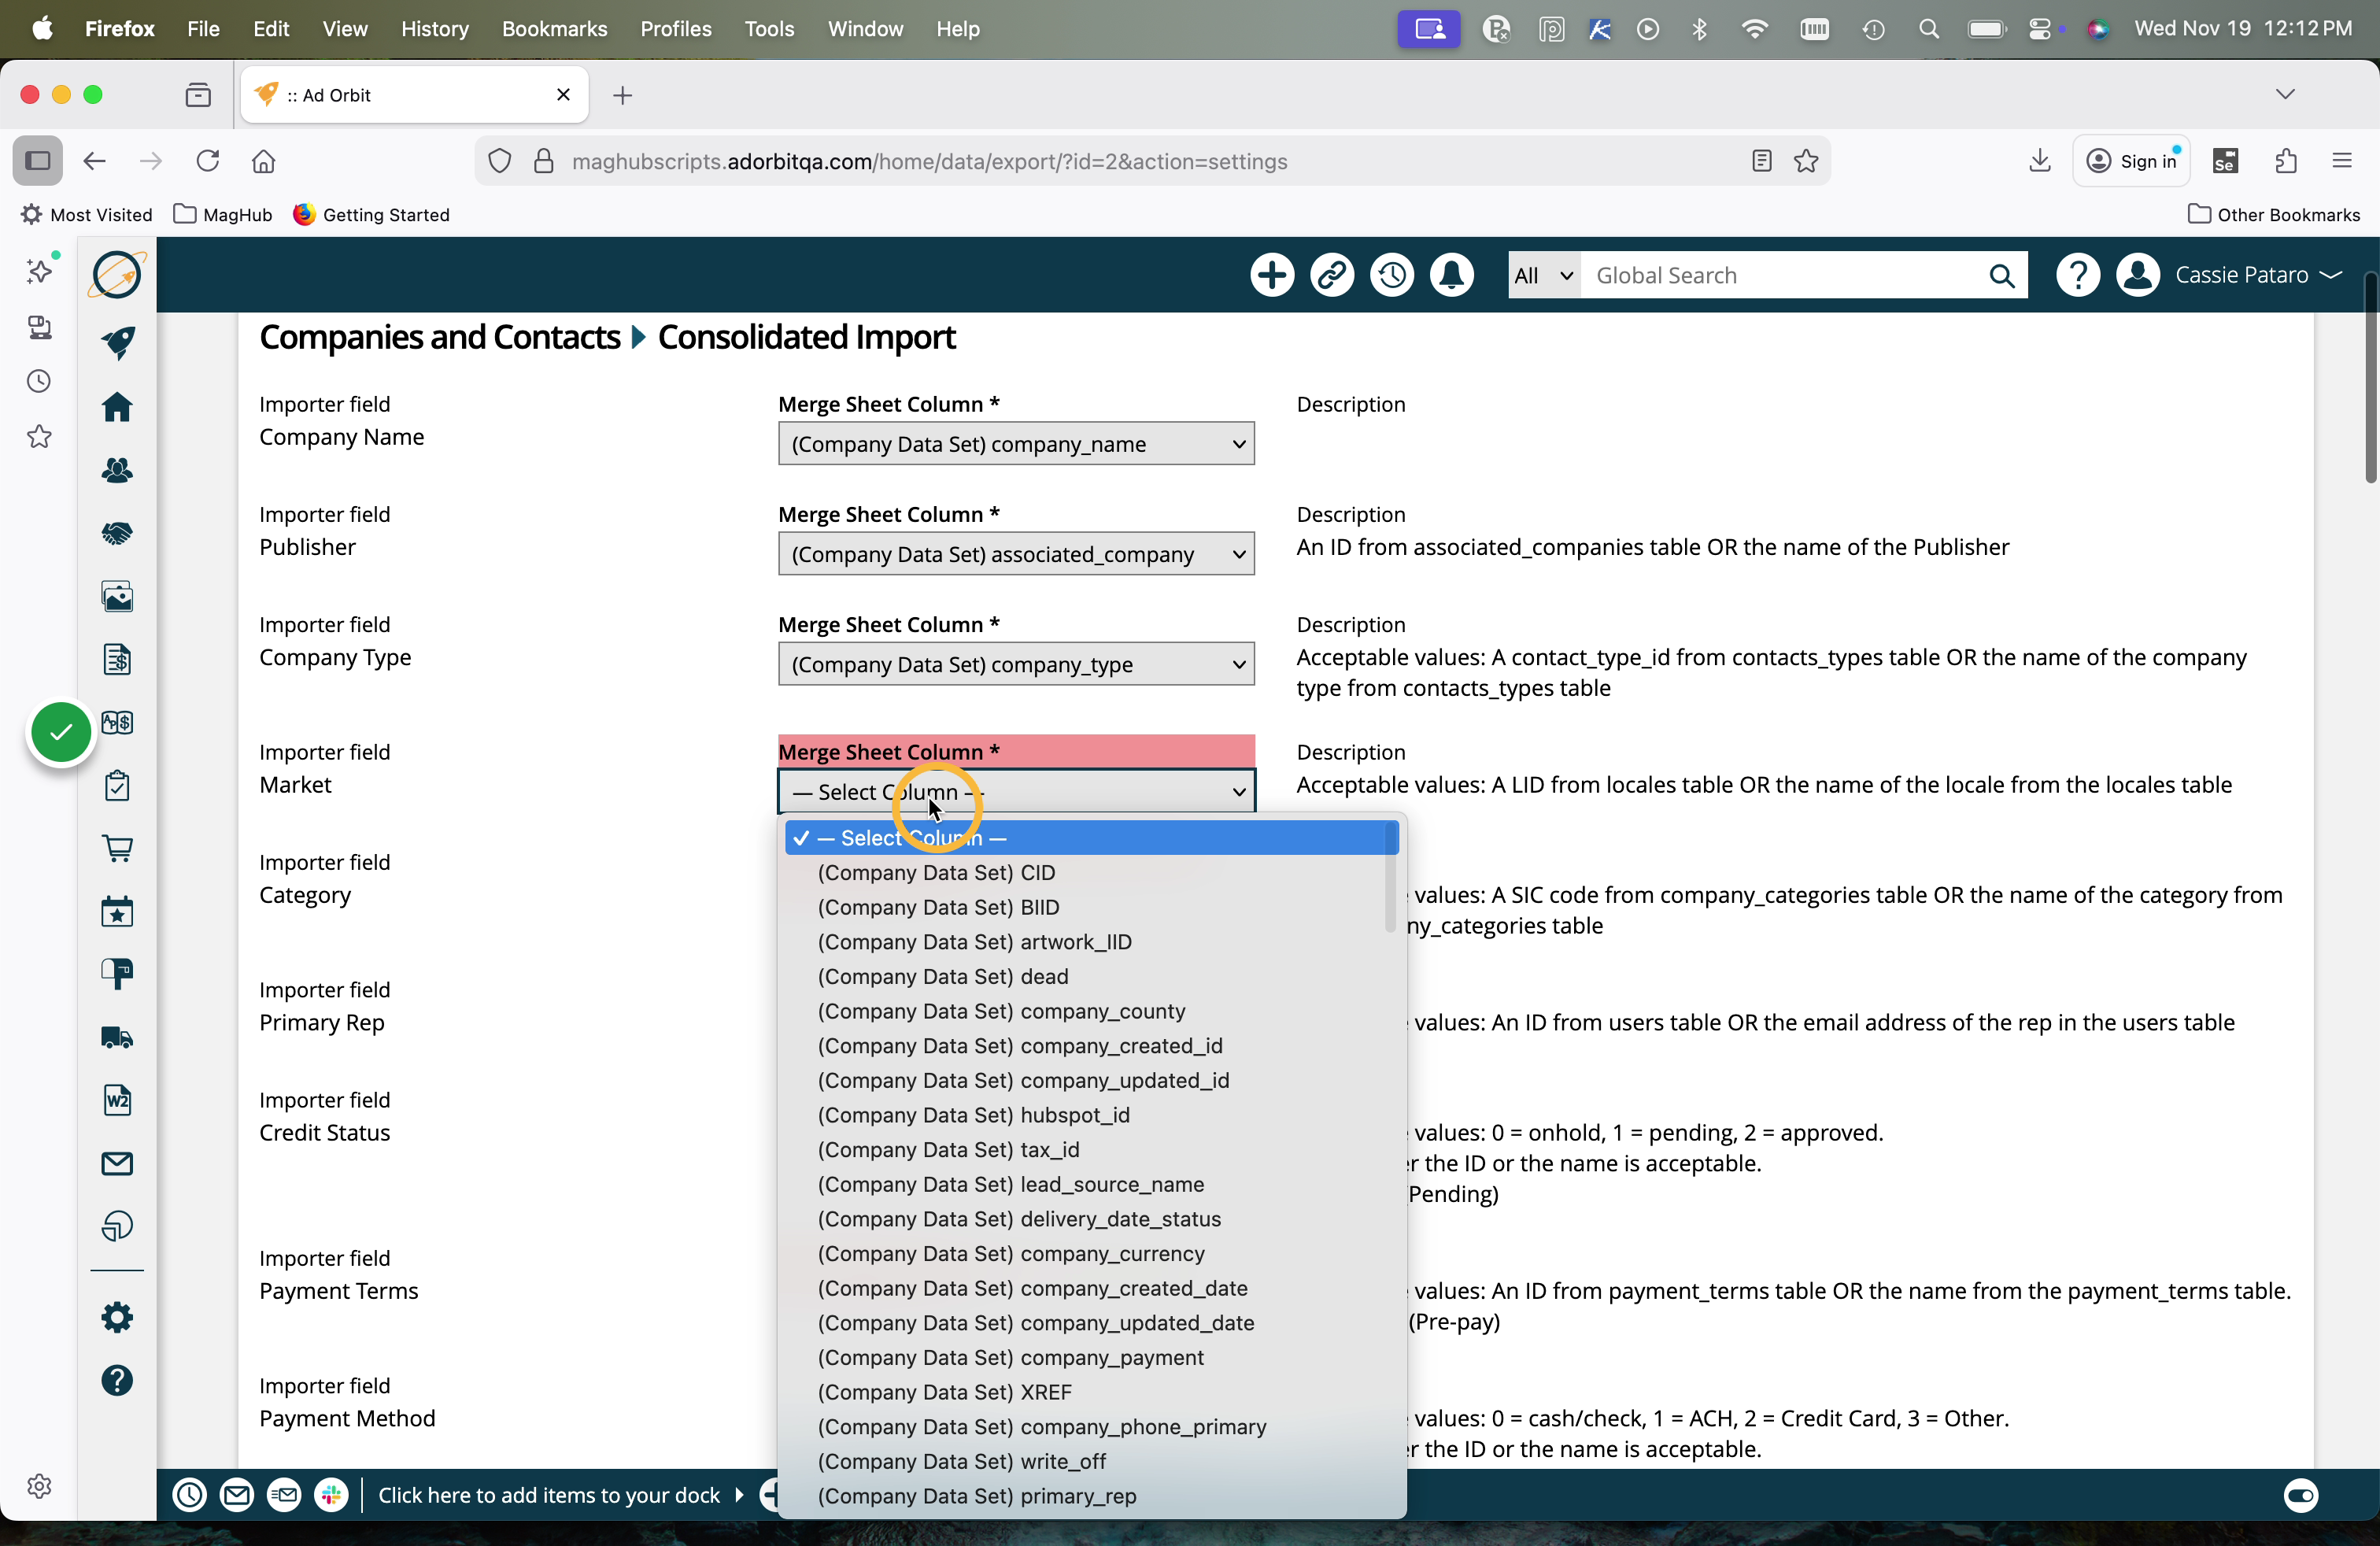
We are going to start the import process by mapping the imported columns to the required system columns. To do so, click Create New under the Exports section of the Historical Data Tool.
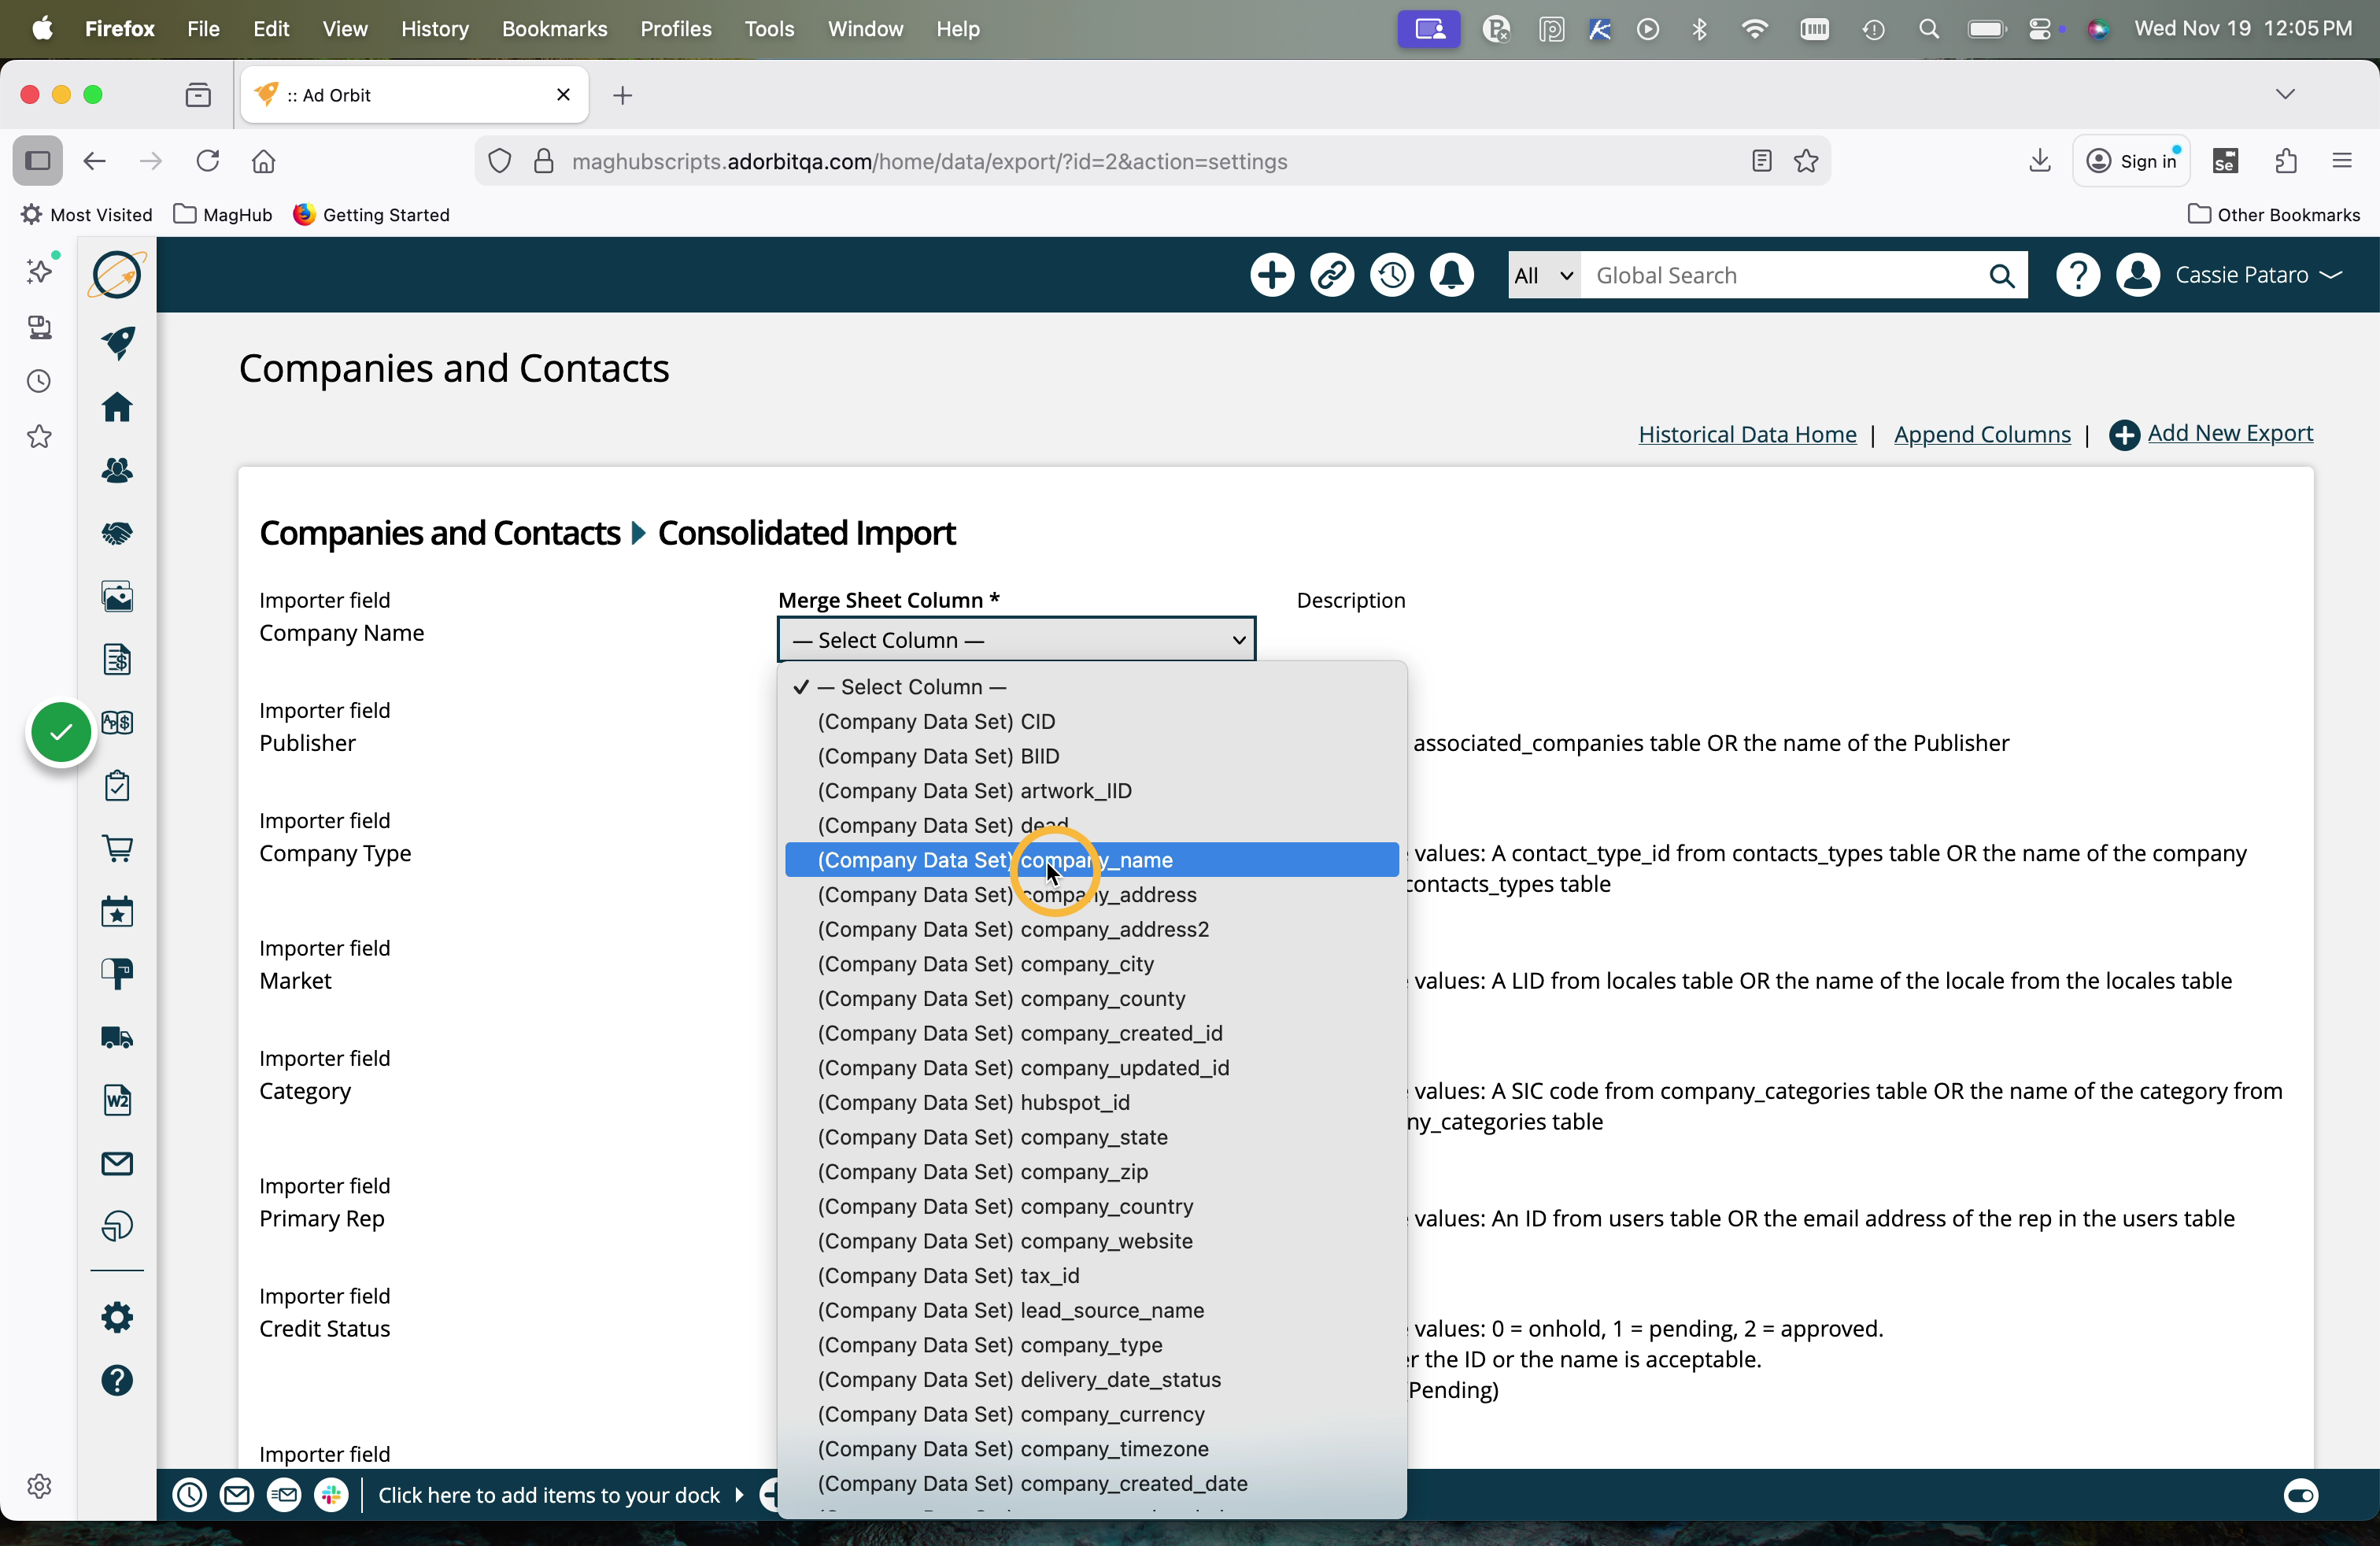
Select the Name, Merge Sheet, and desired system Importer. Once set, you will be able to map the column headers that are pulled from your file to the columns that are used on the Ad Orbit importer.

As an example, you may need to map the column 'company_name' from your file to the column 'Company Name' from the Ad Orbit importer.
You can always use the append tool to add a column and set a value for the field instead of re-importing the file. You can append your files with constant values for all records, or go back and add the column to your file and re-start the process.
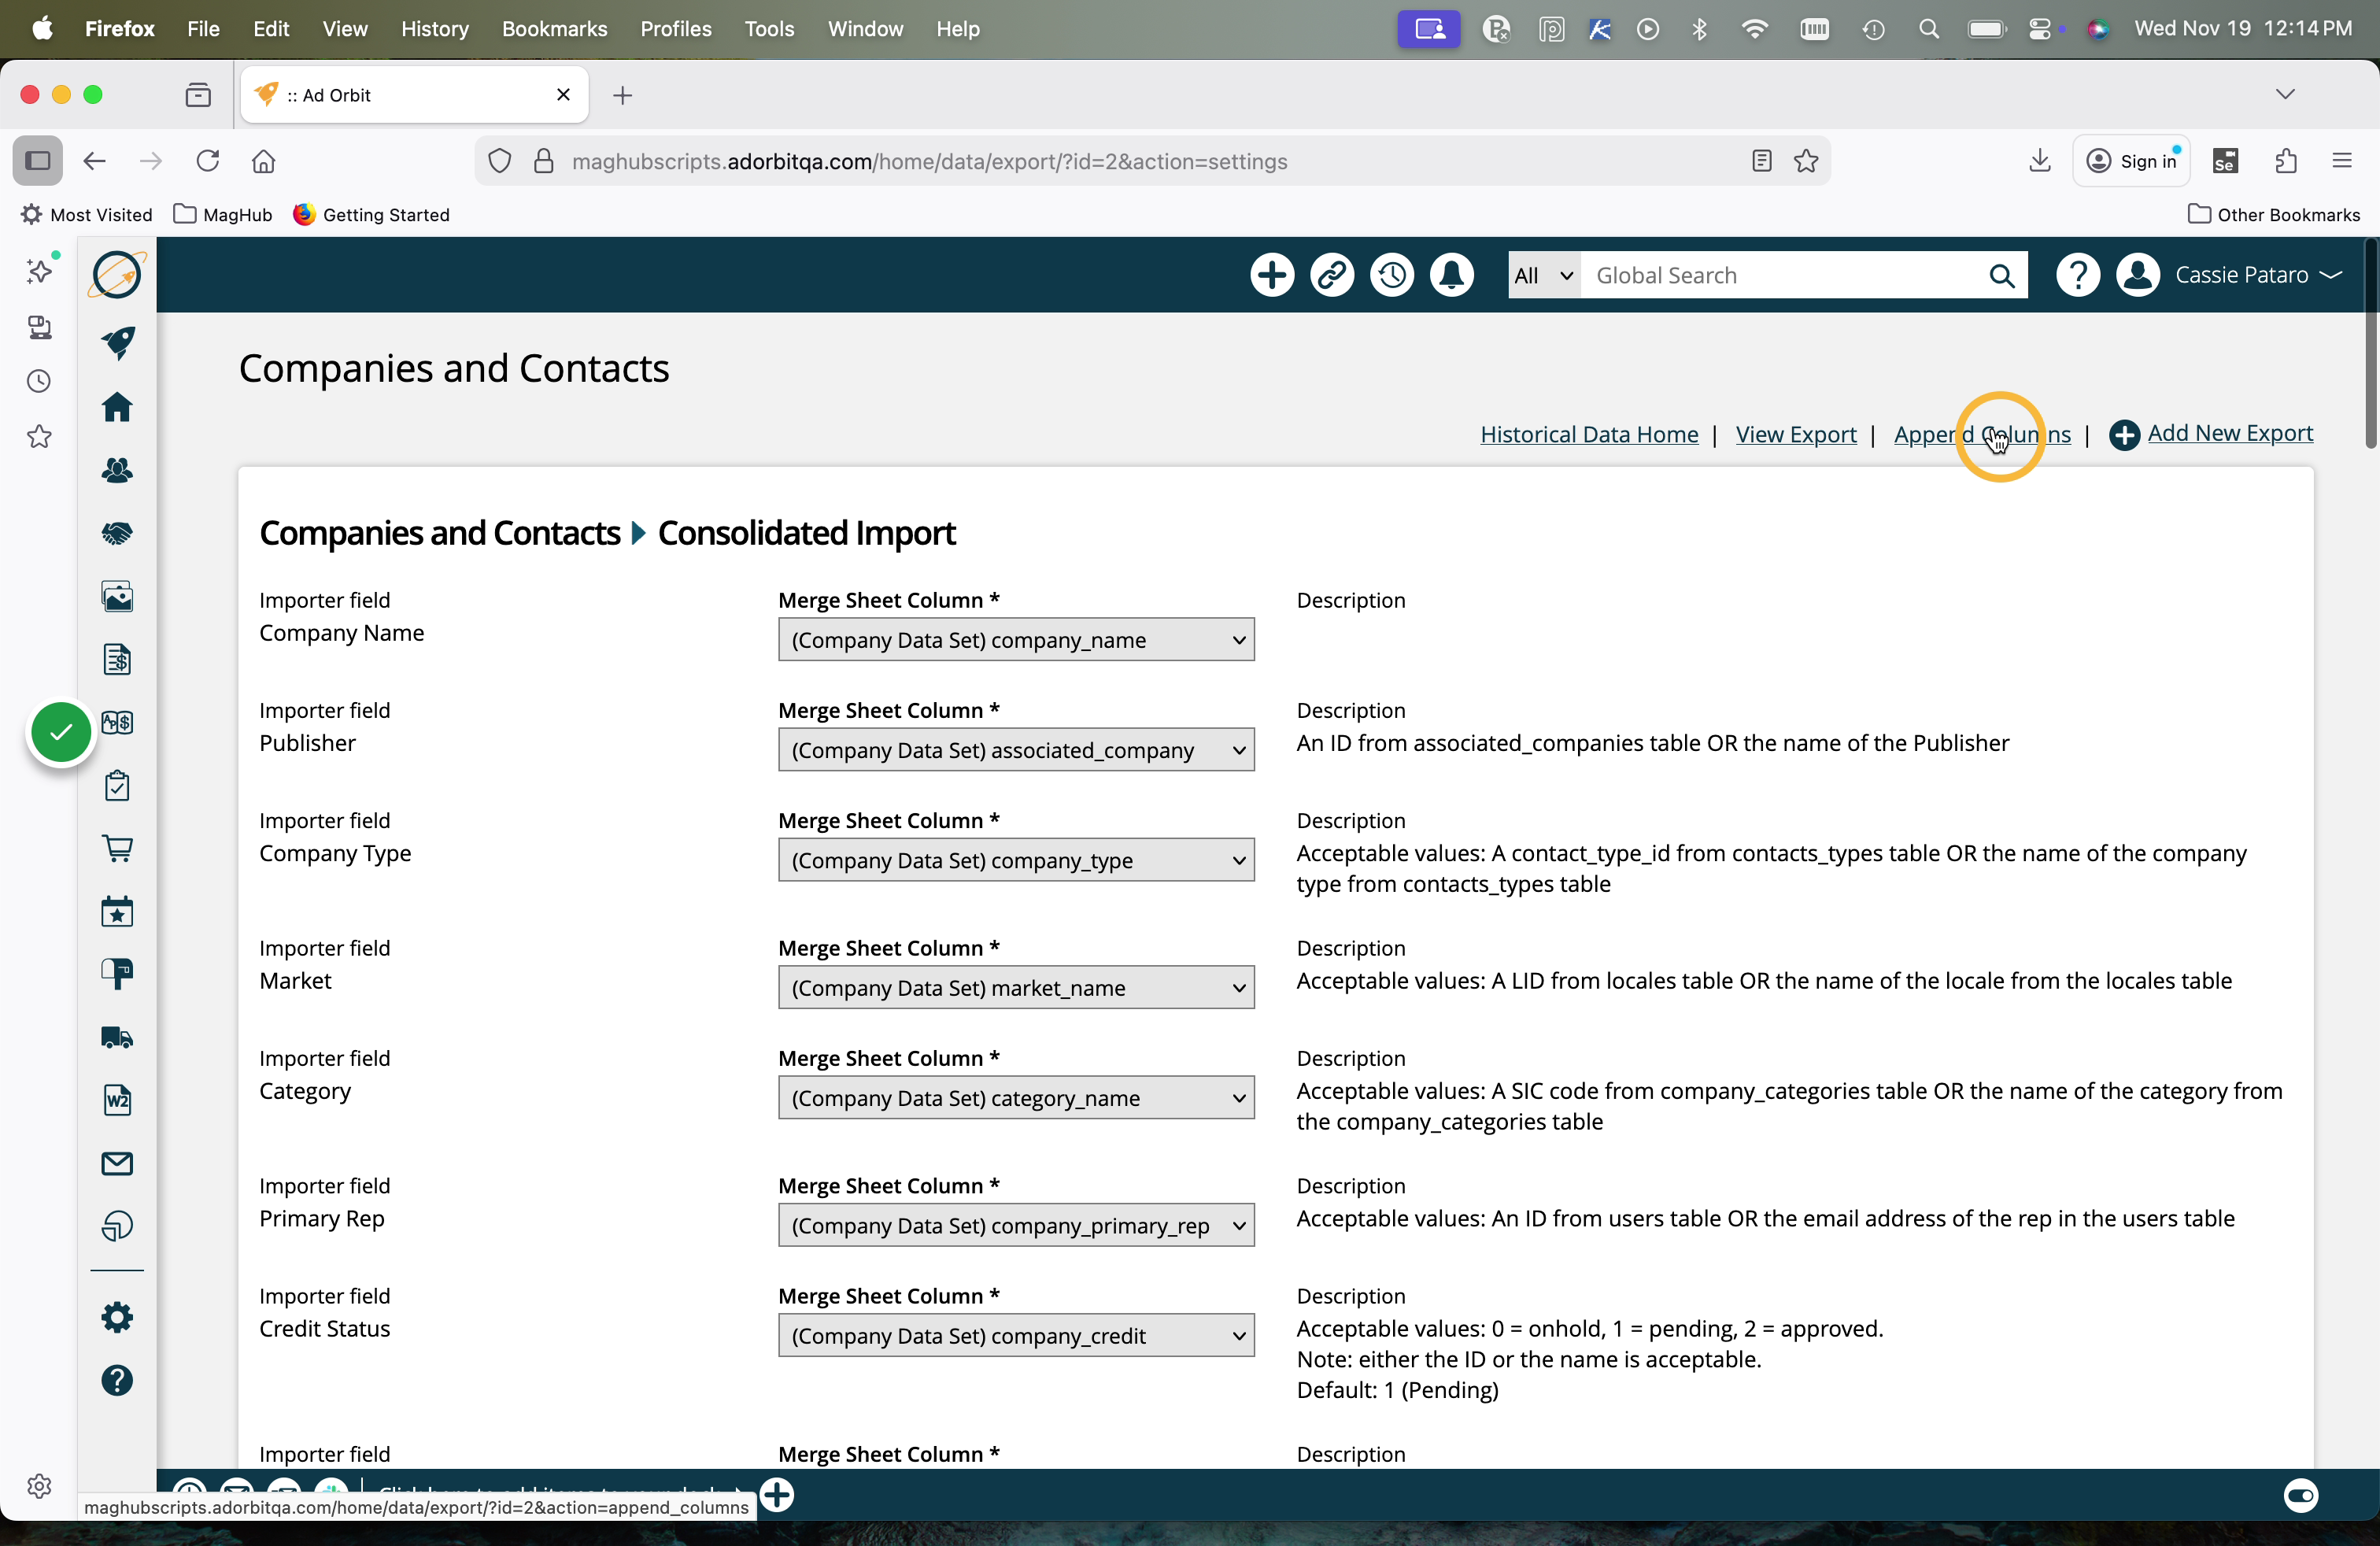
On the Append page, click 'add new column'.

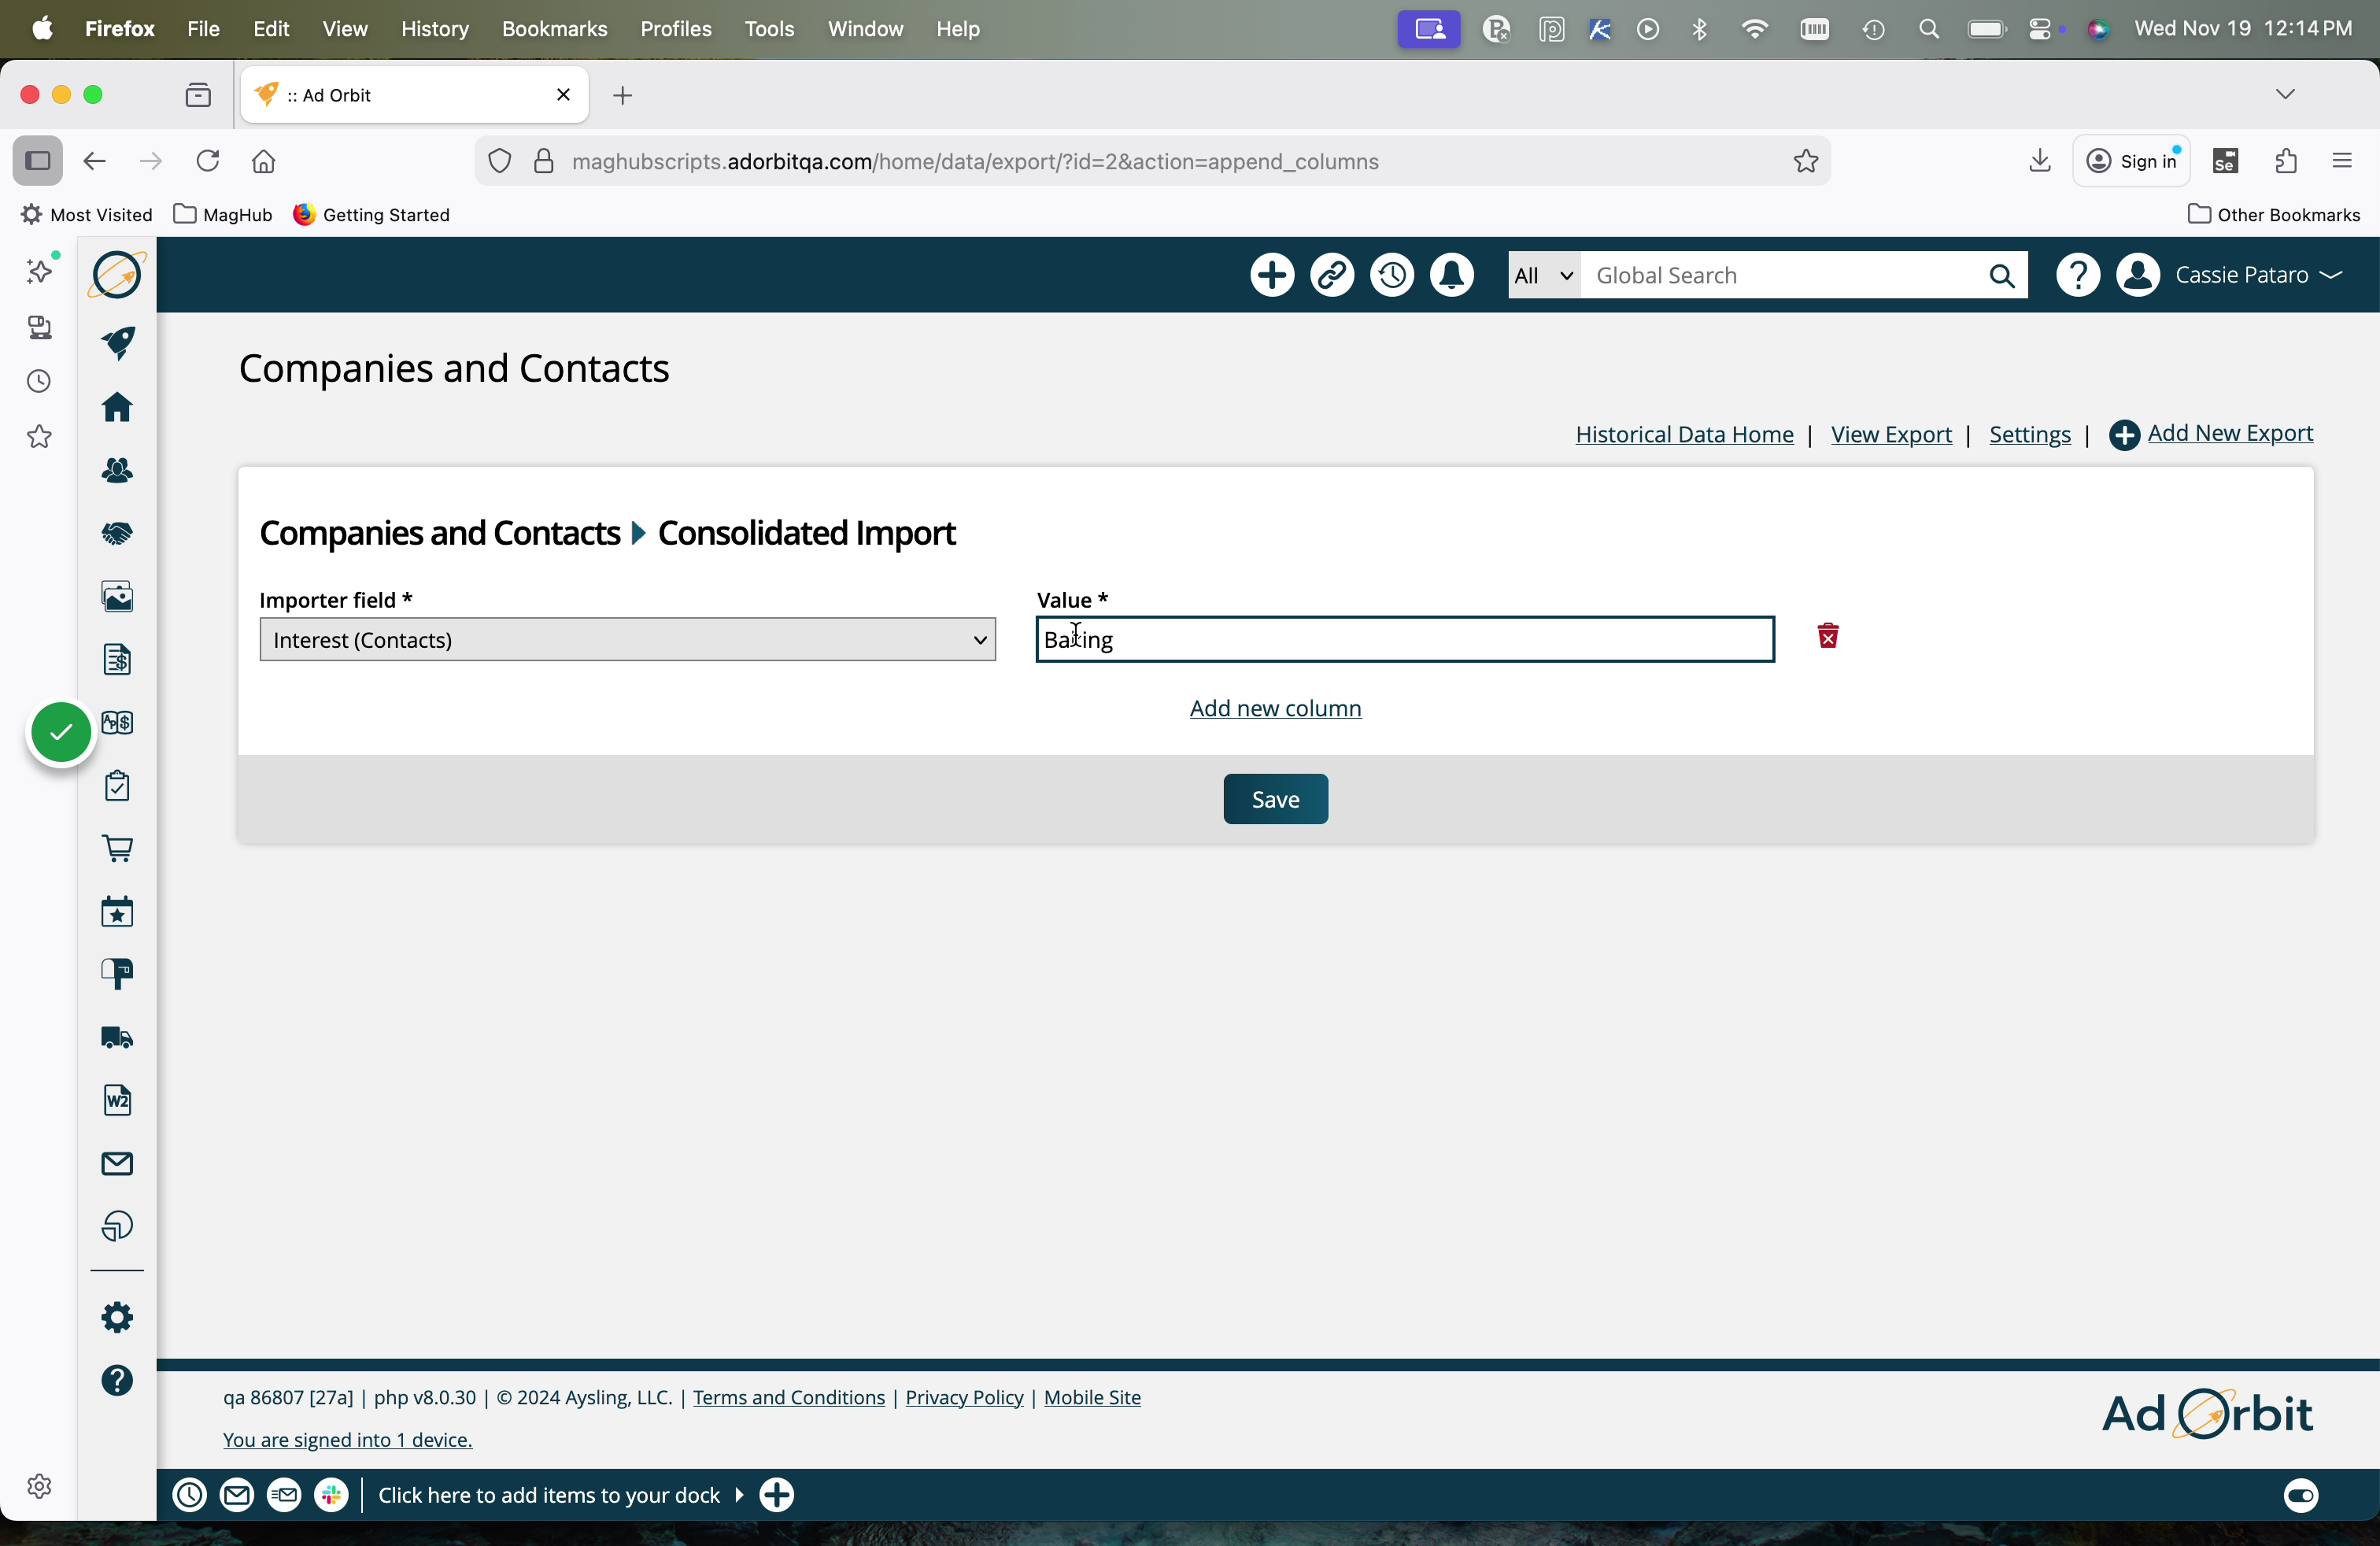
Then, select the Ad Orbit field to use, and set the desired value.
For example, maybe you are importing a Company file but none of your companies have a Publisher set. You could select 'Publisher' in the Importer Field, and enter your publisher's name in the 'Value' field.
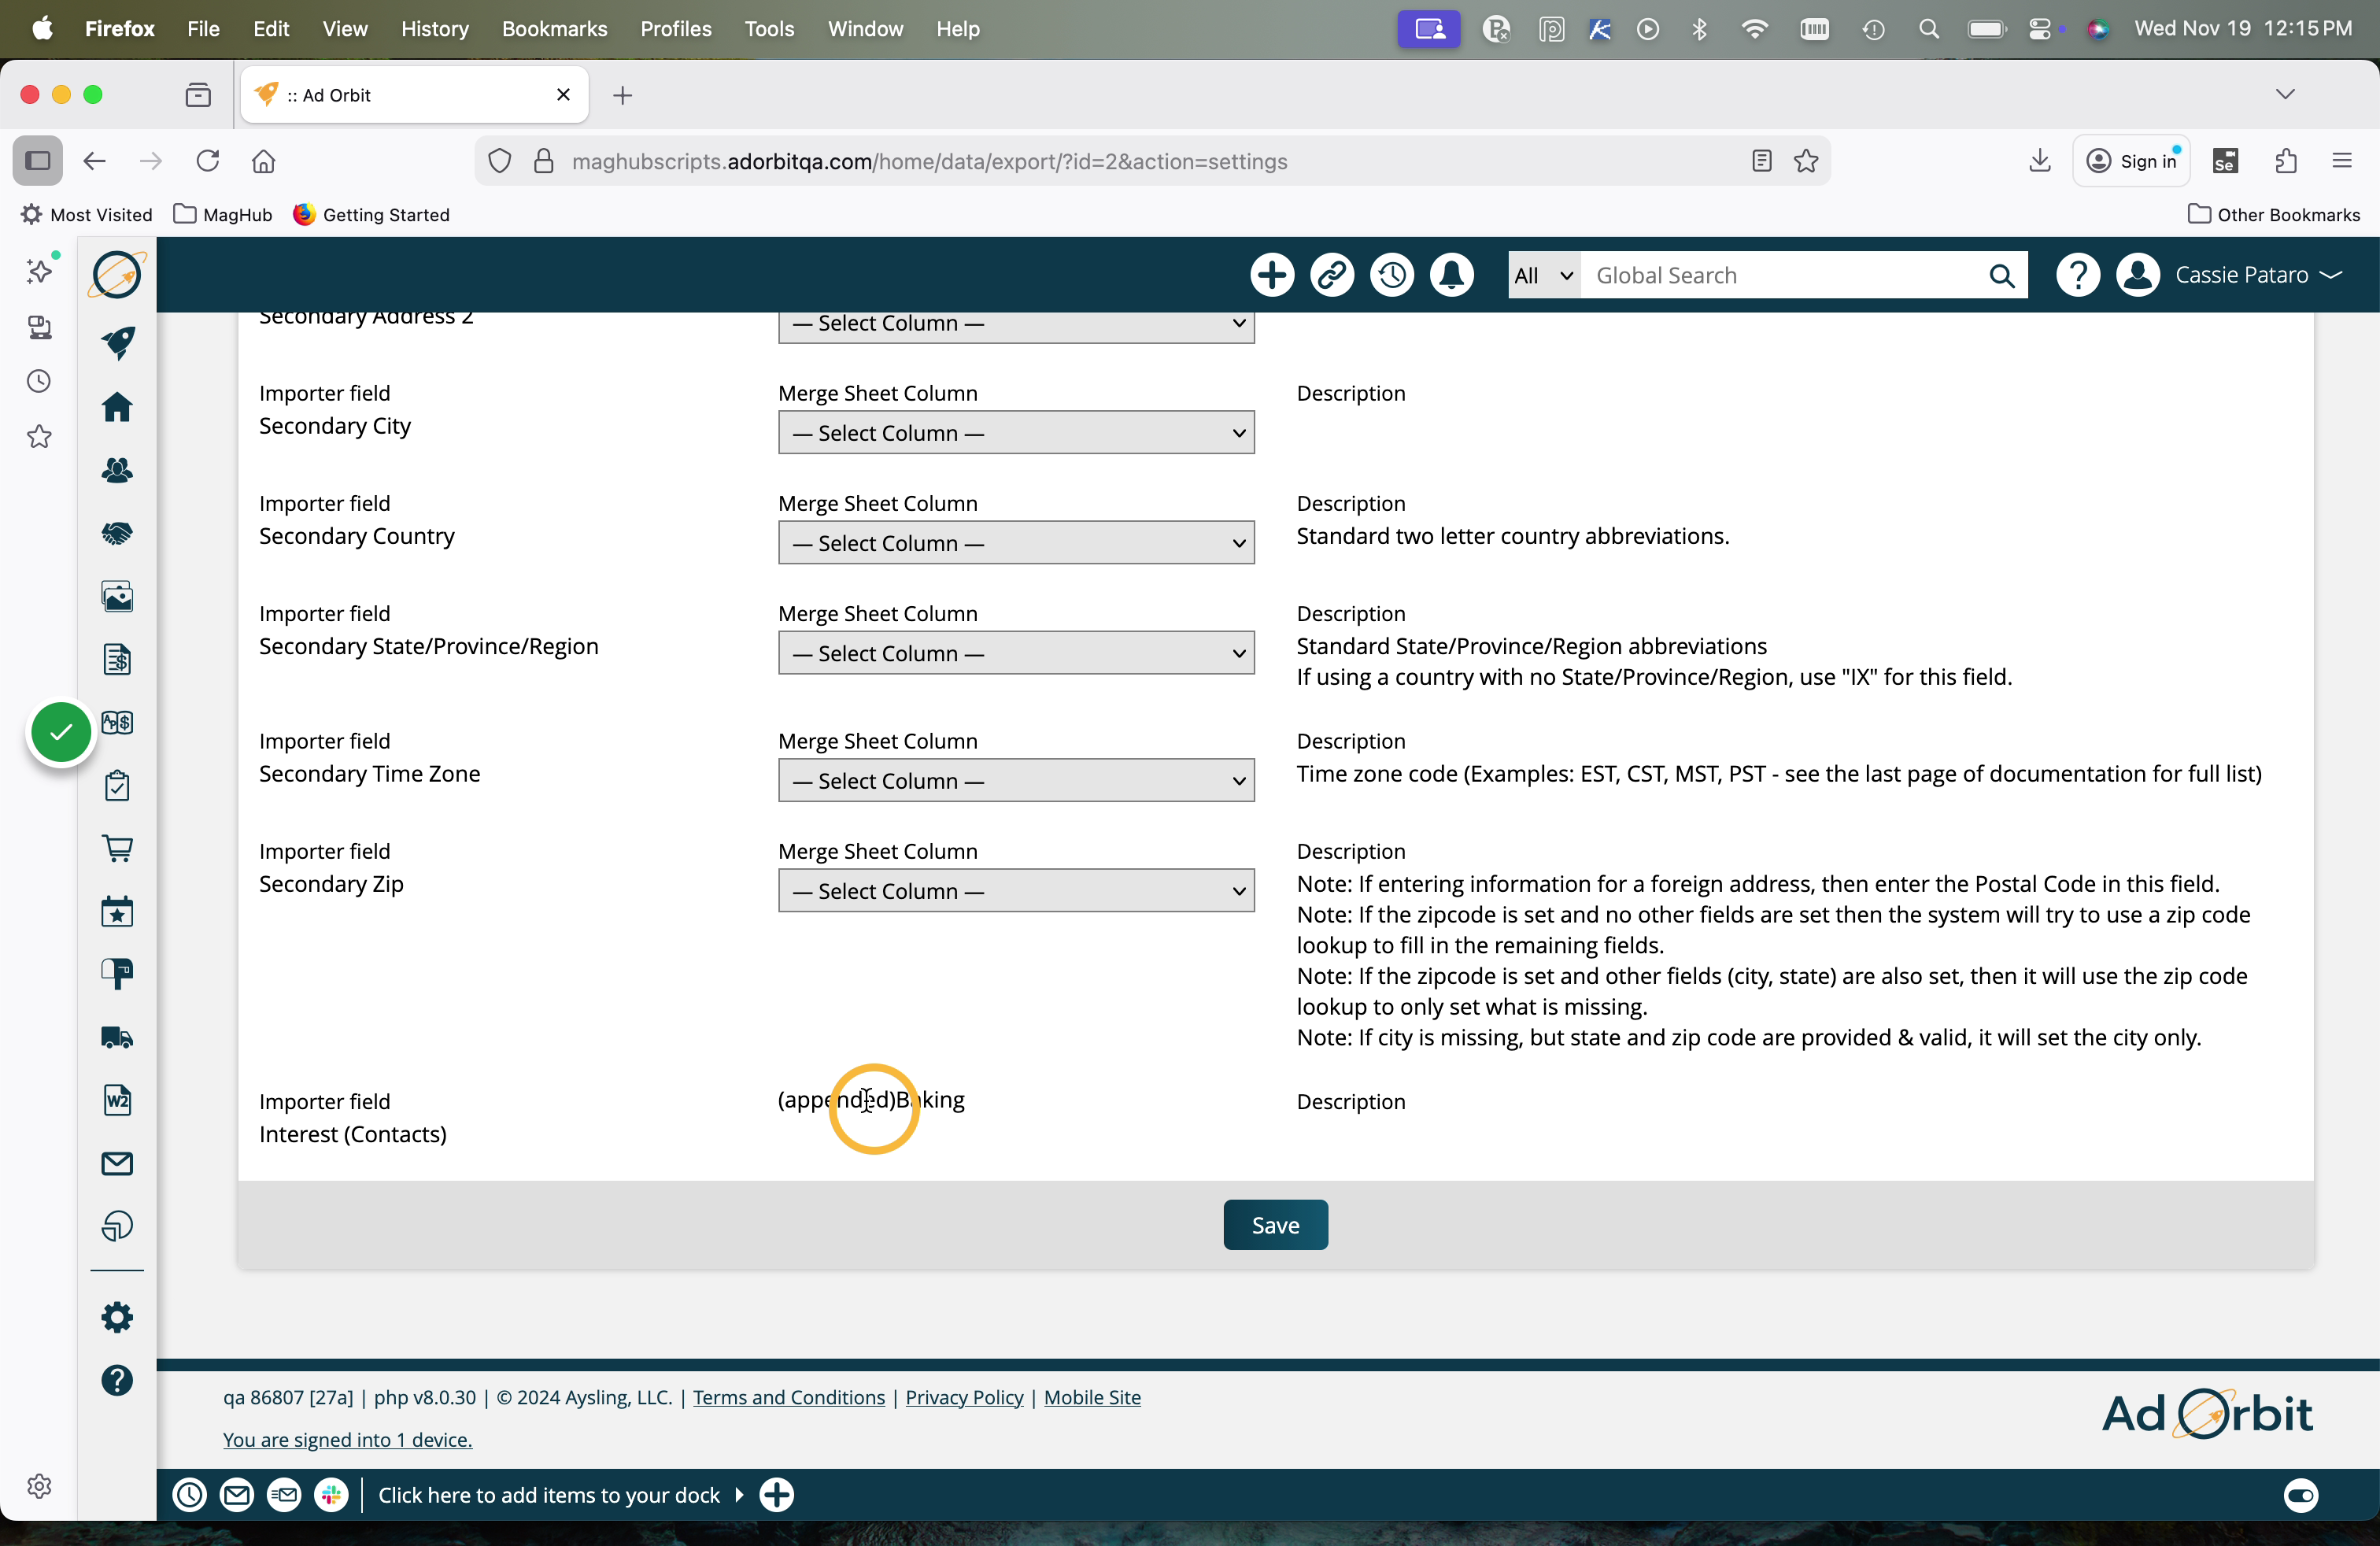
When you navigate back to the column mapping page, you will see the appended value.
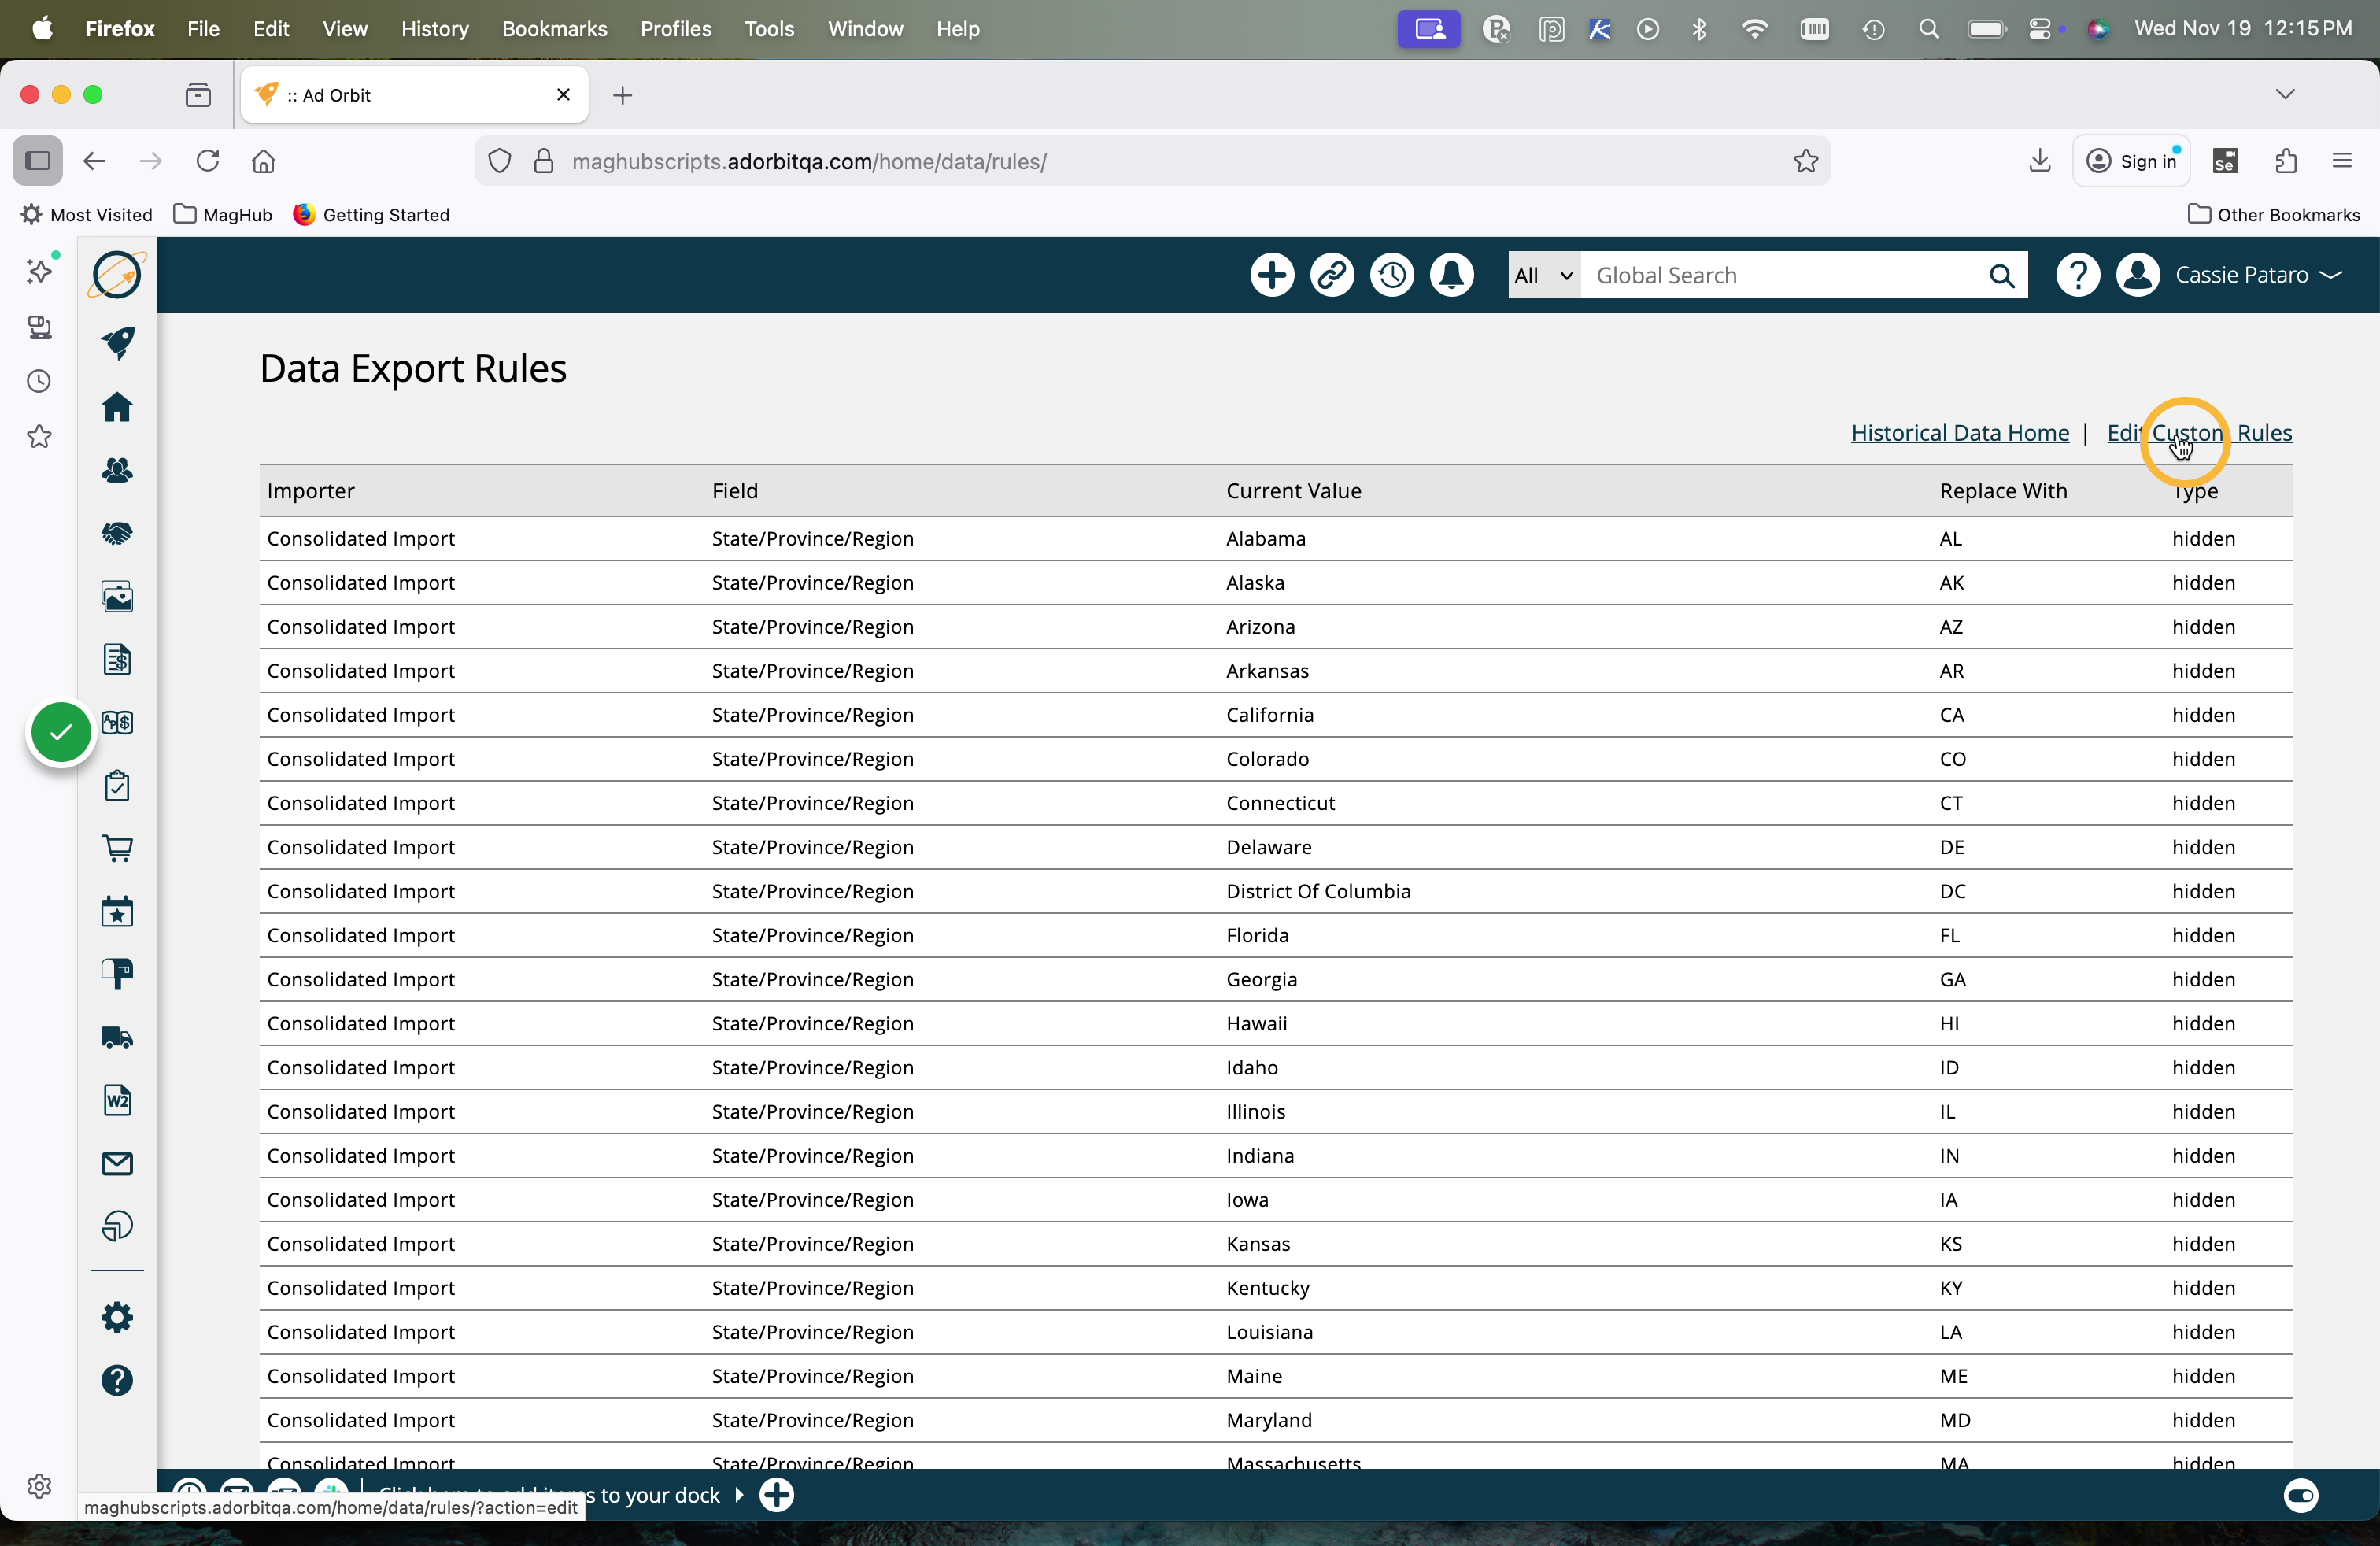
Rules will be applied to all imports. For example, if the 'Country' value is coming in from your previous system as 'United States', but you always want to use the country code of 'US' within Ad Orbit, then you could set up a rule to do so.
To create a rule, click on 'View Rules' on the Historical Data Tool page.
On the Rules page, click Edit Custom Rules.
Click Add Rule.

Select which Importer to set a rule for, as well as the field. Then set the current values that should be replaced, along with the new value that they should be replaced with.
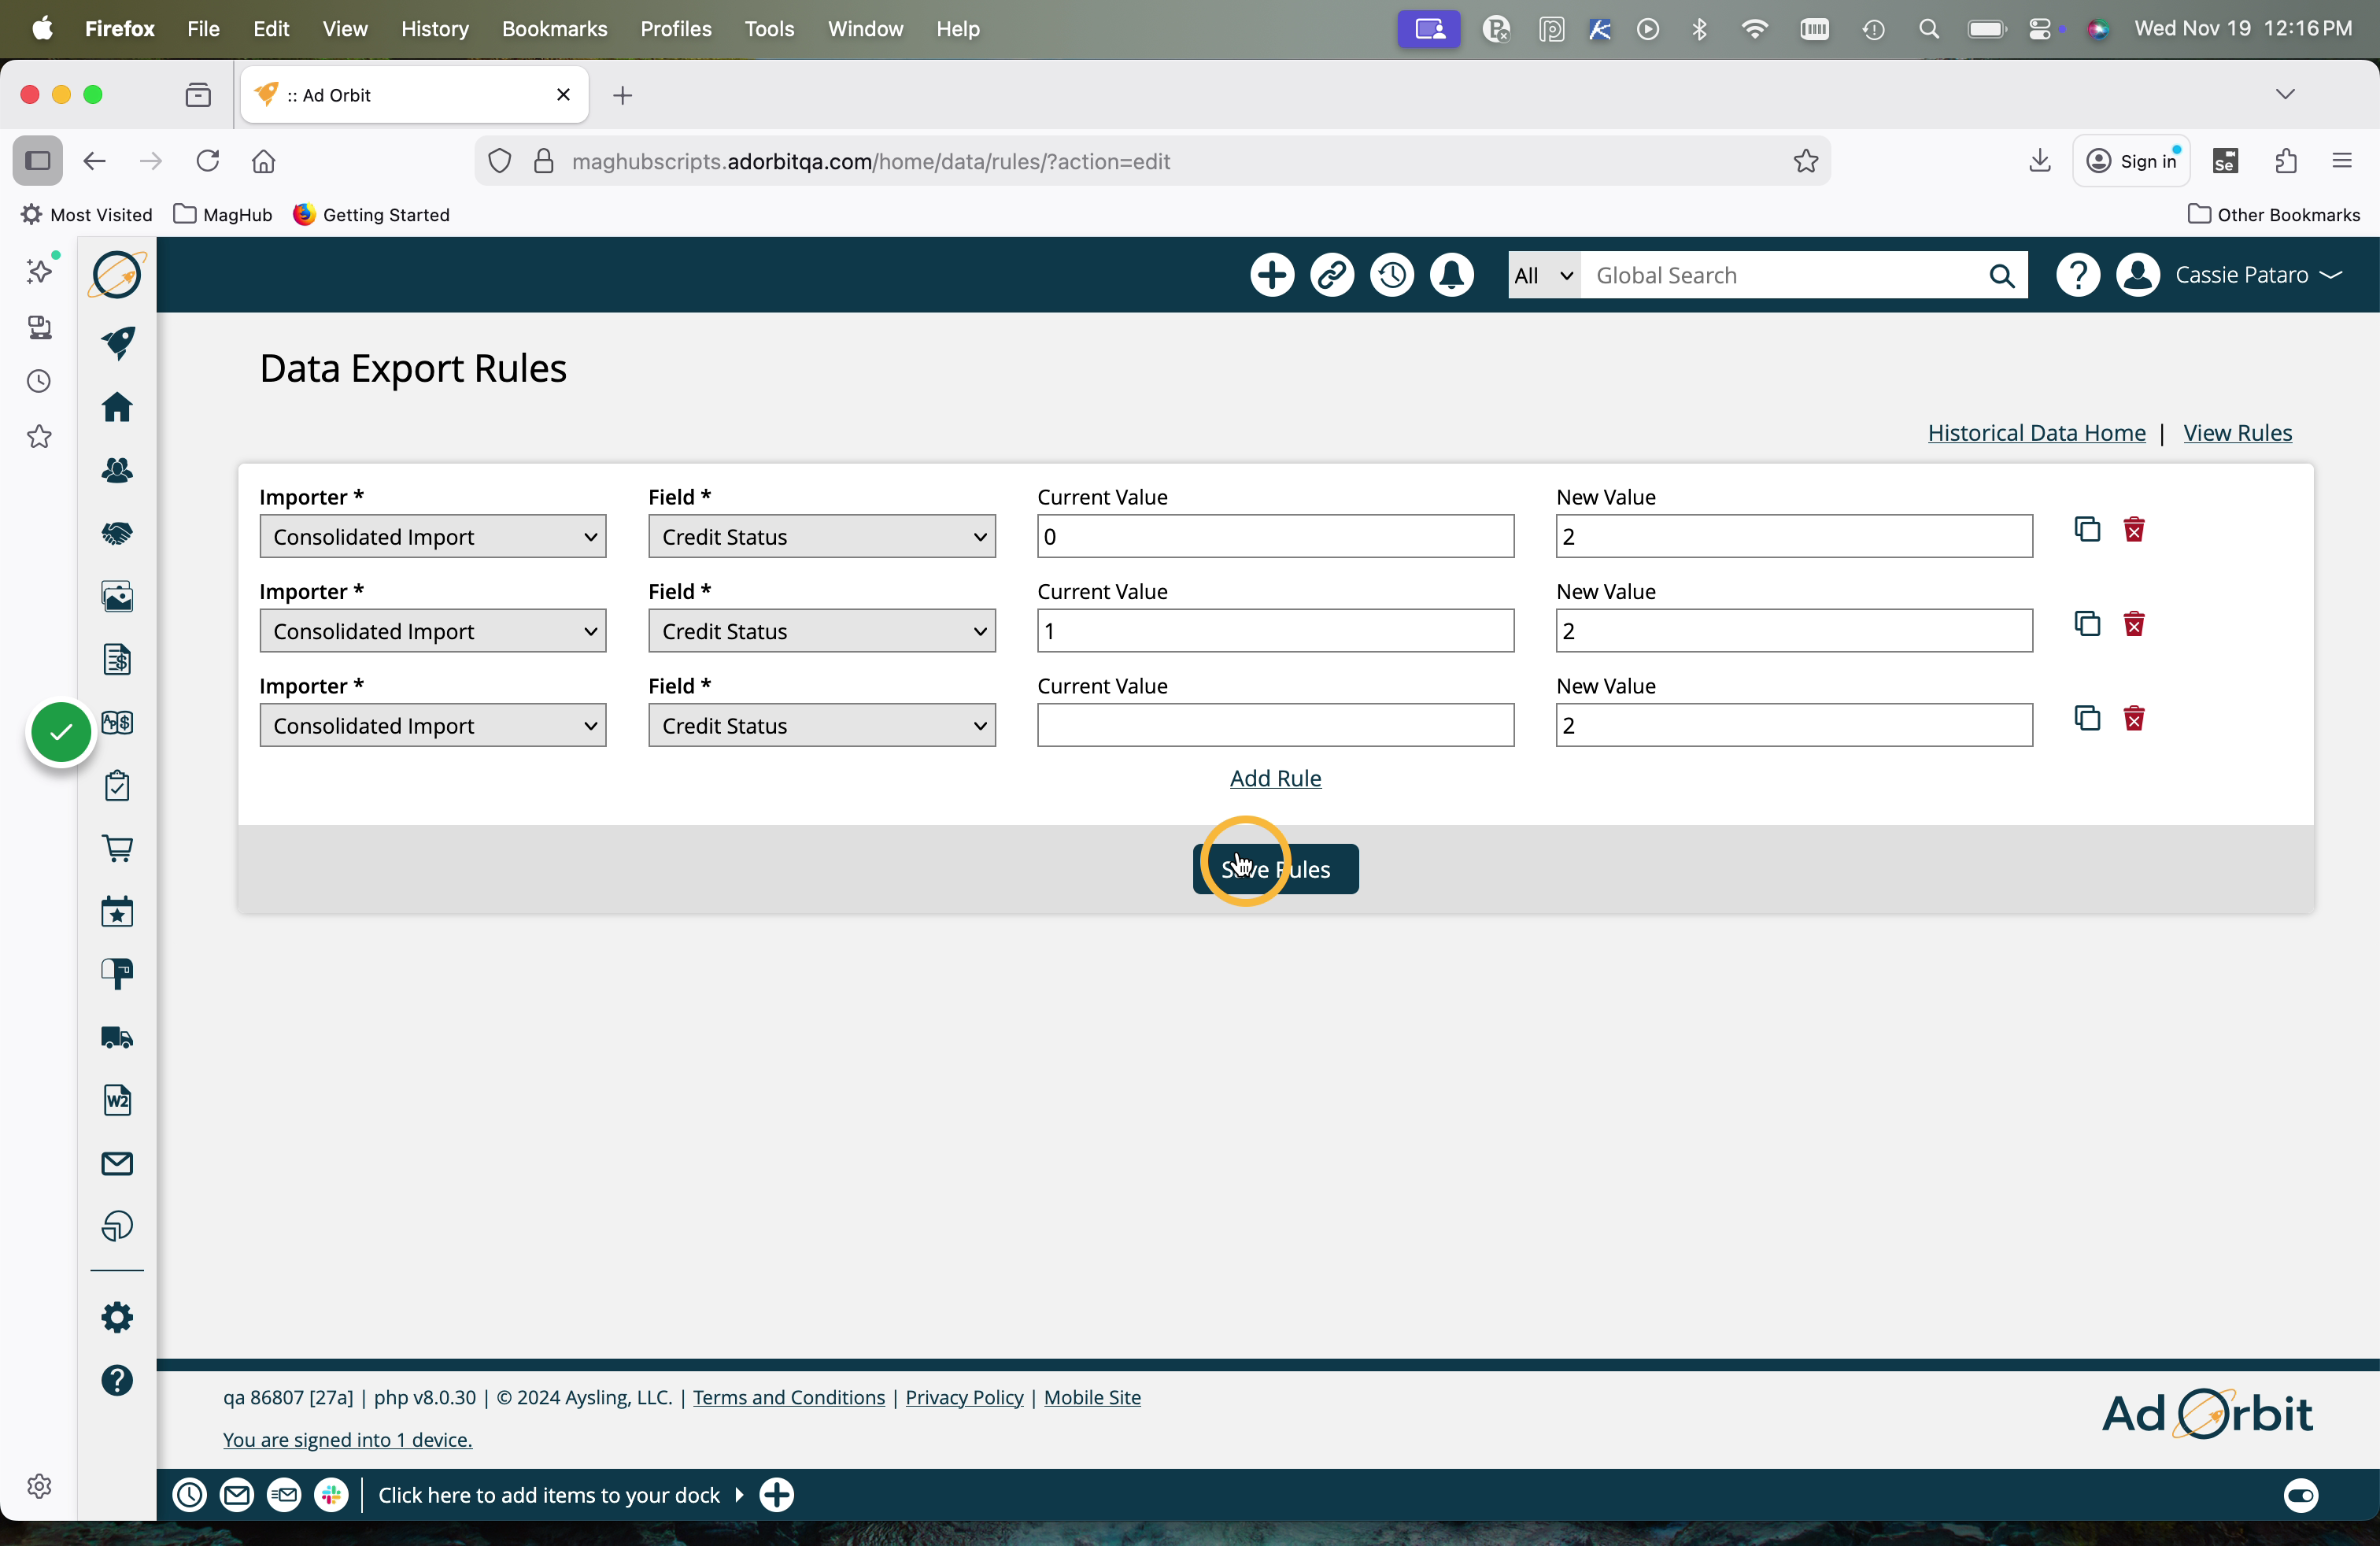
Click Save at the bottom of this page to submit the mappings.
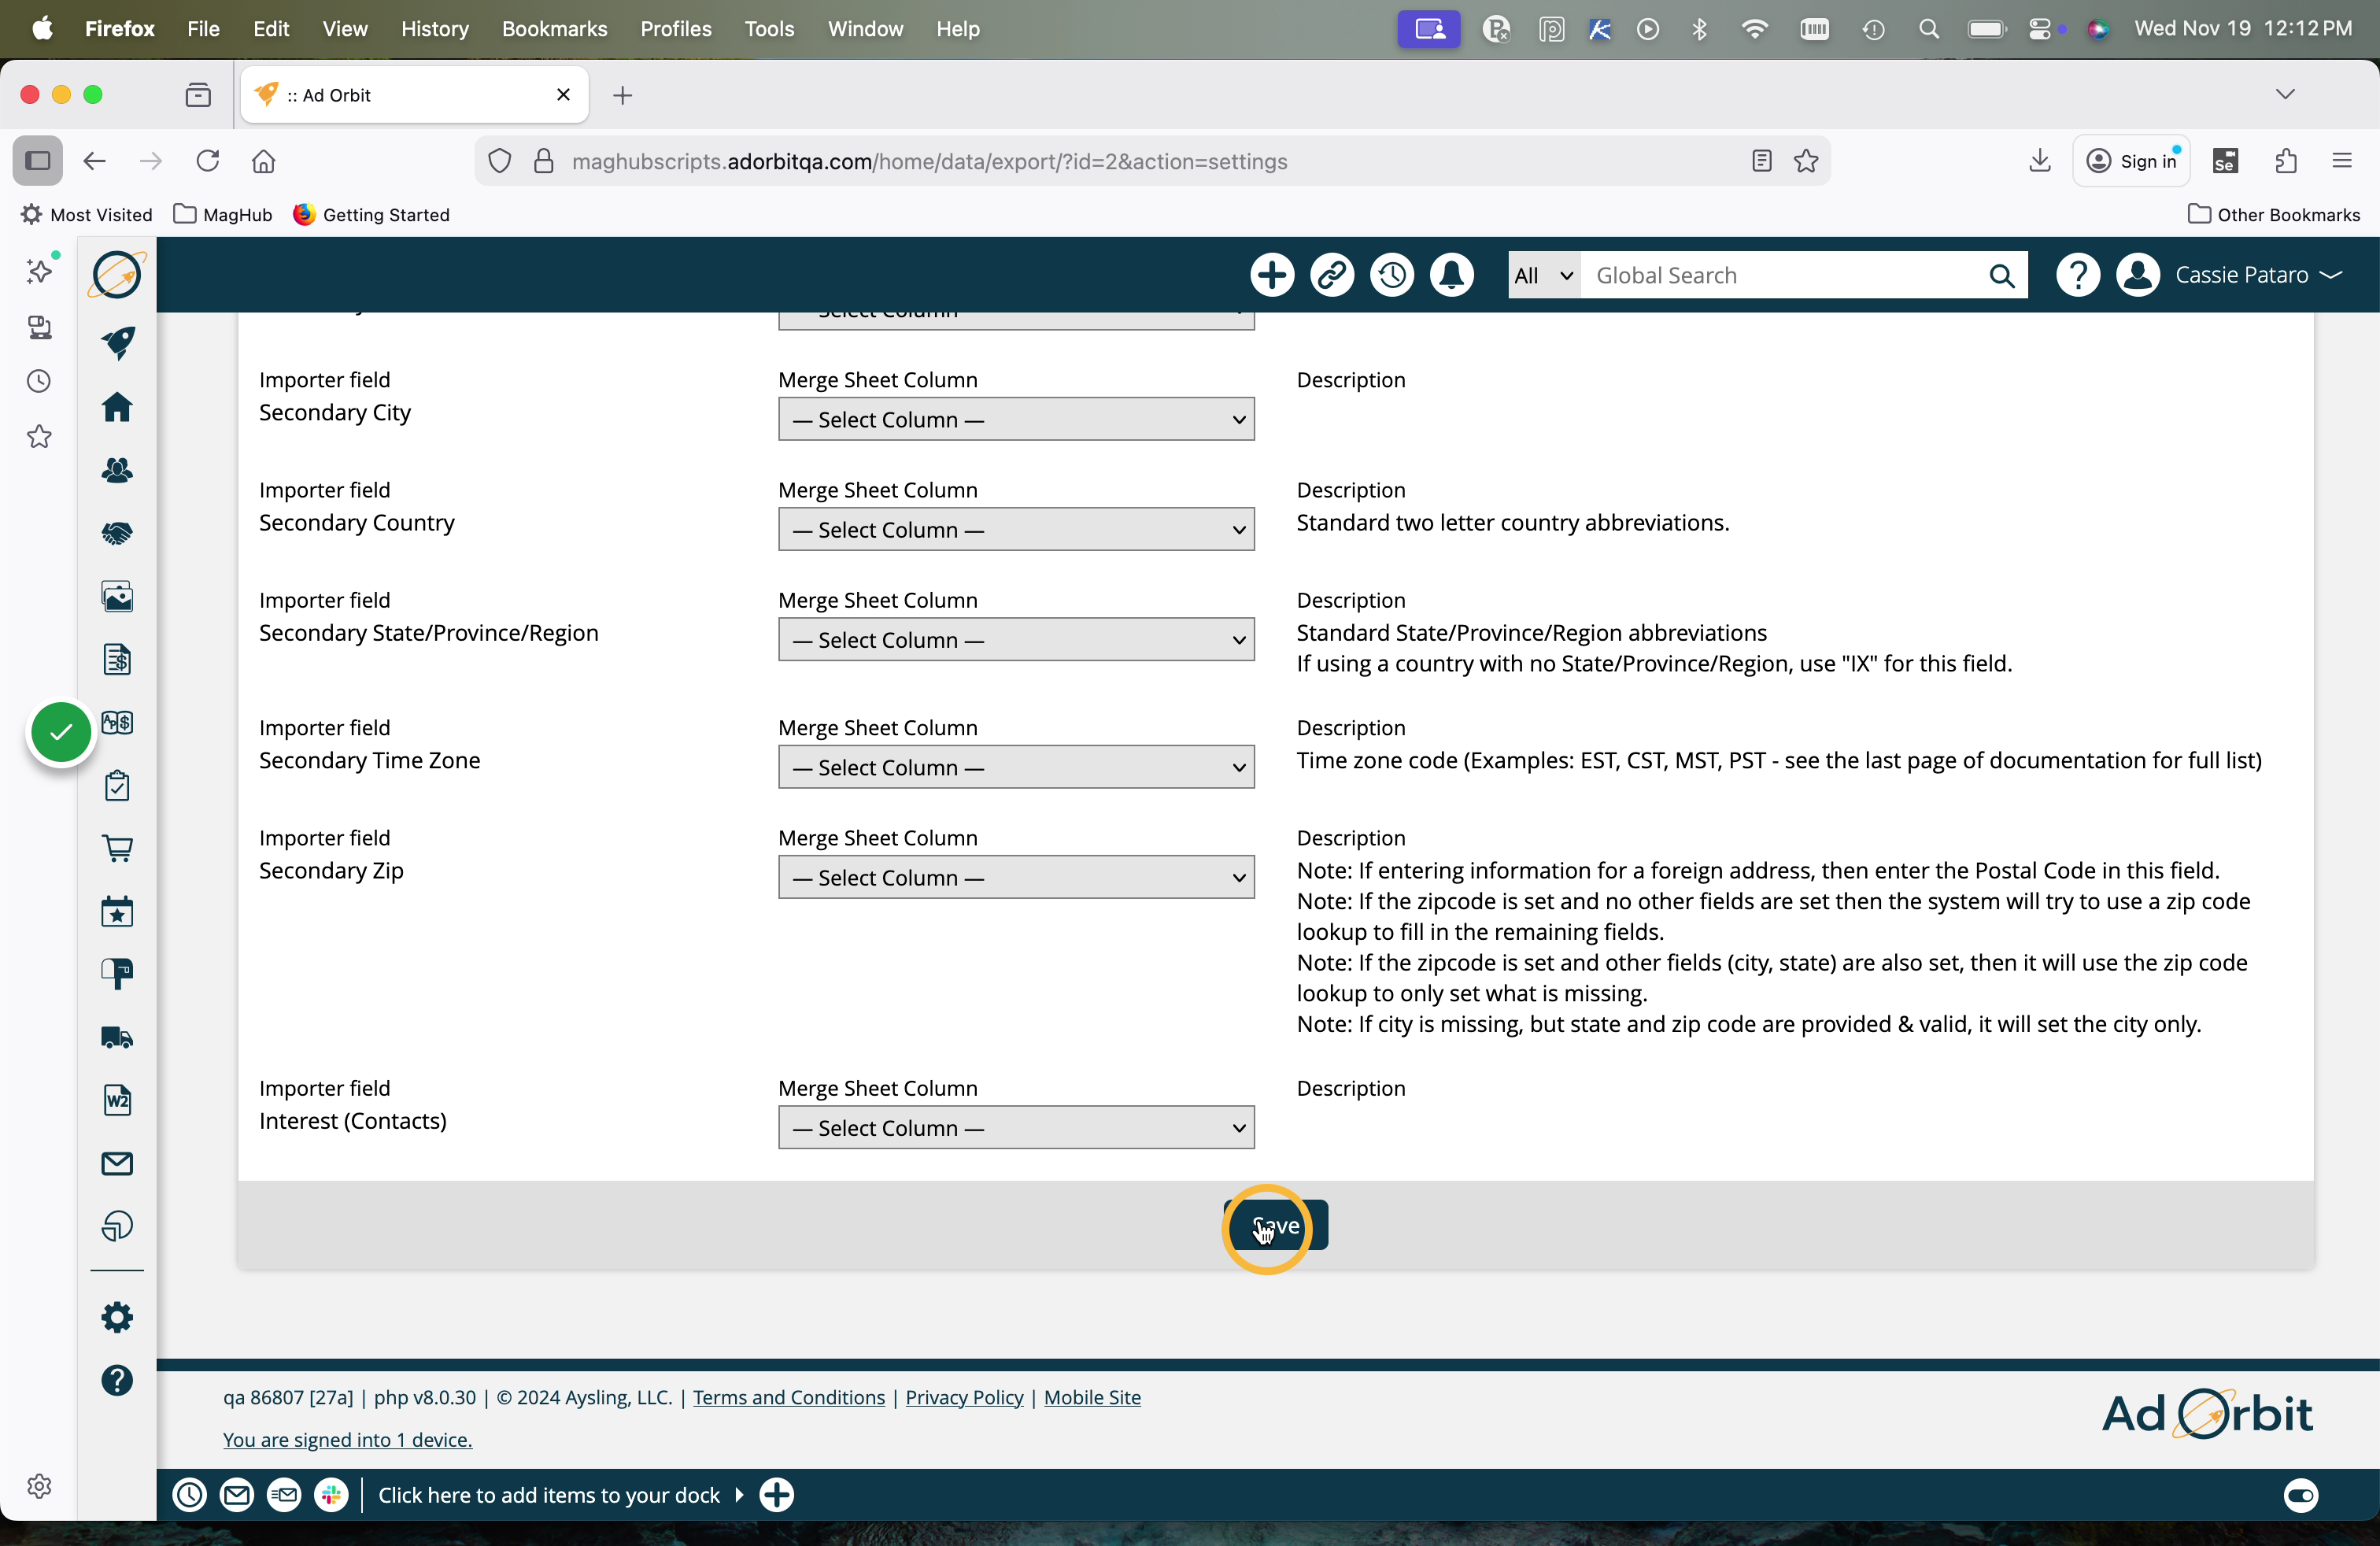
If you are missing any of the required fields necessary to perform the import, they will be highlighted in red and you will need to map them to save this page.
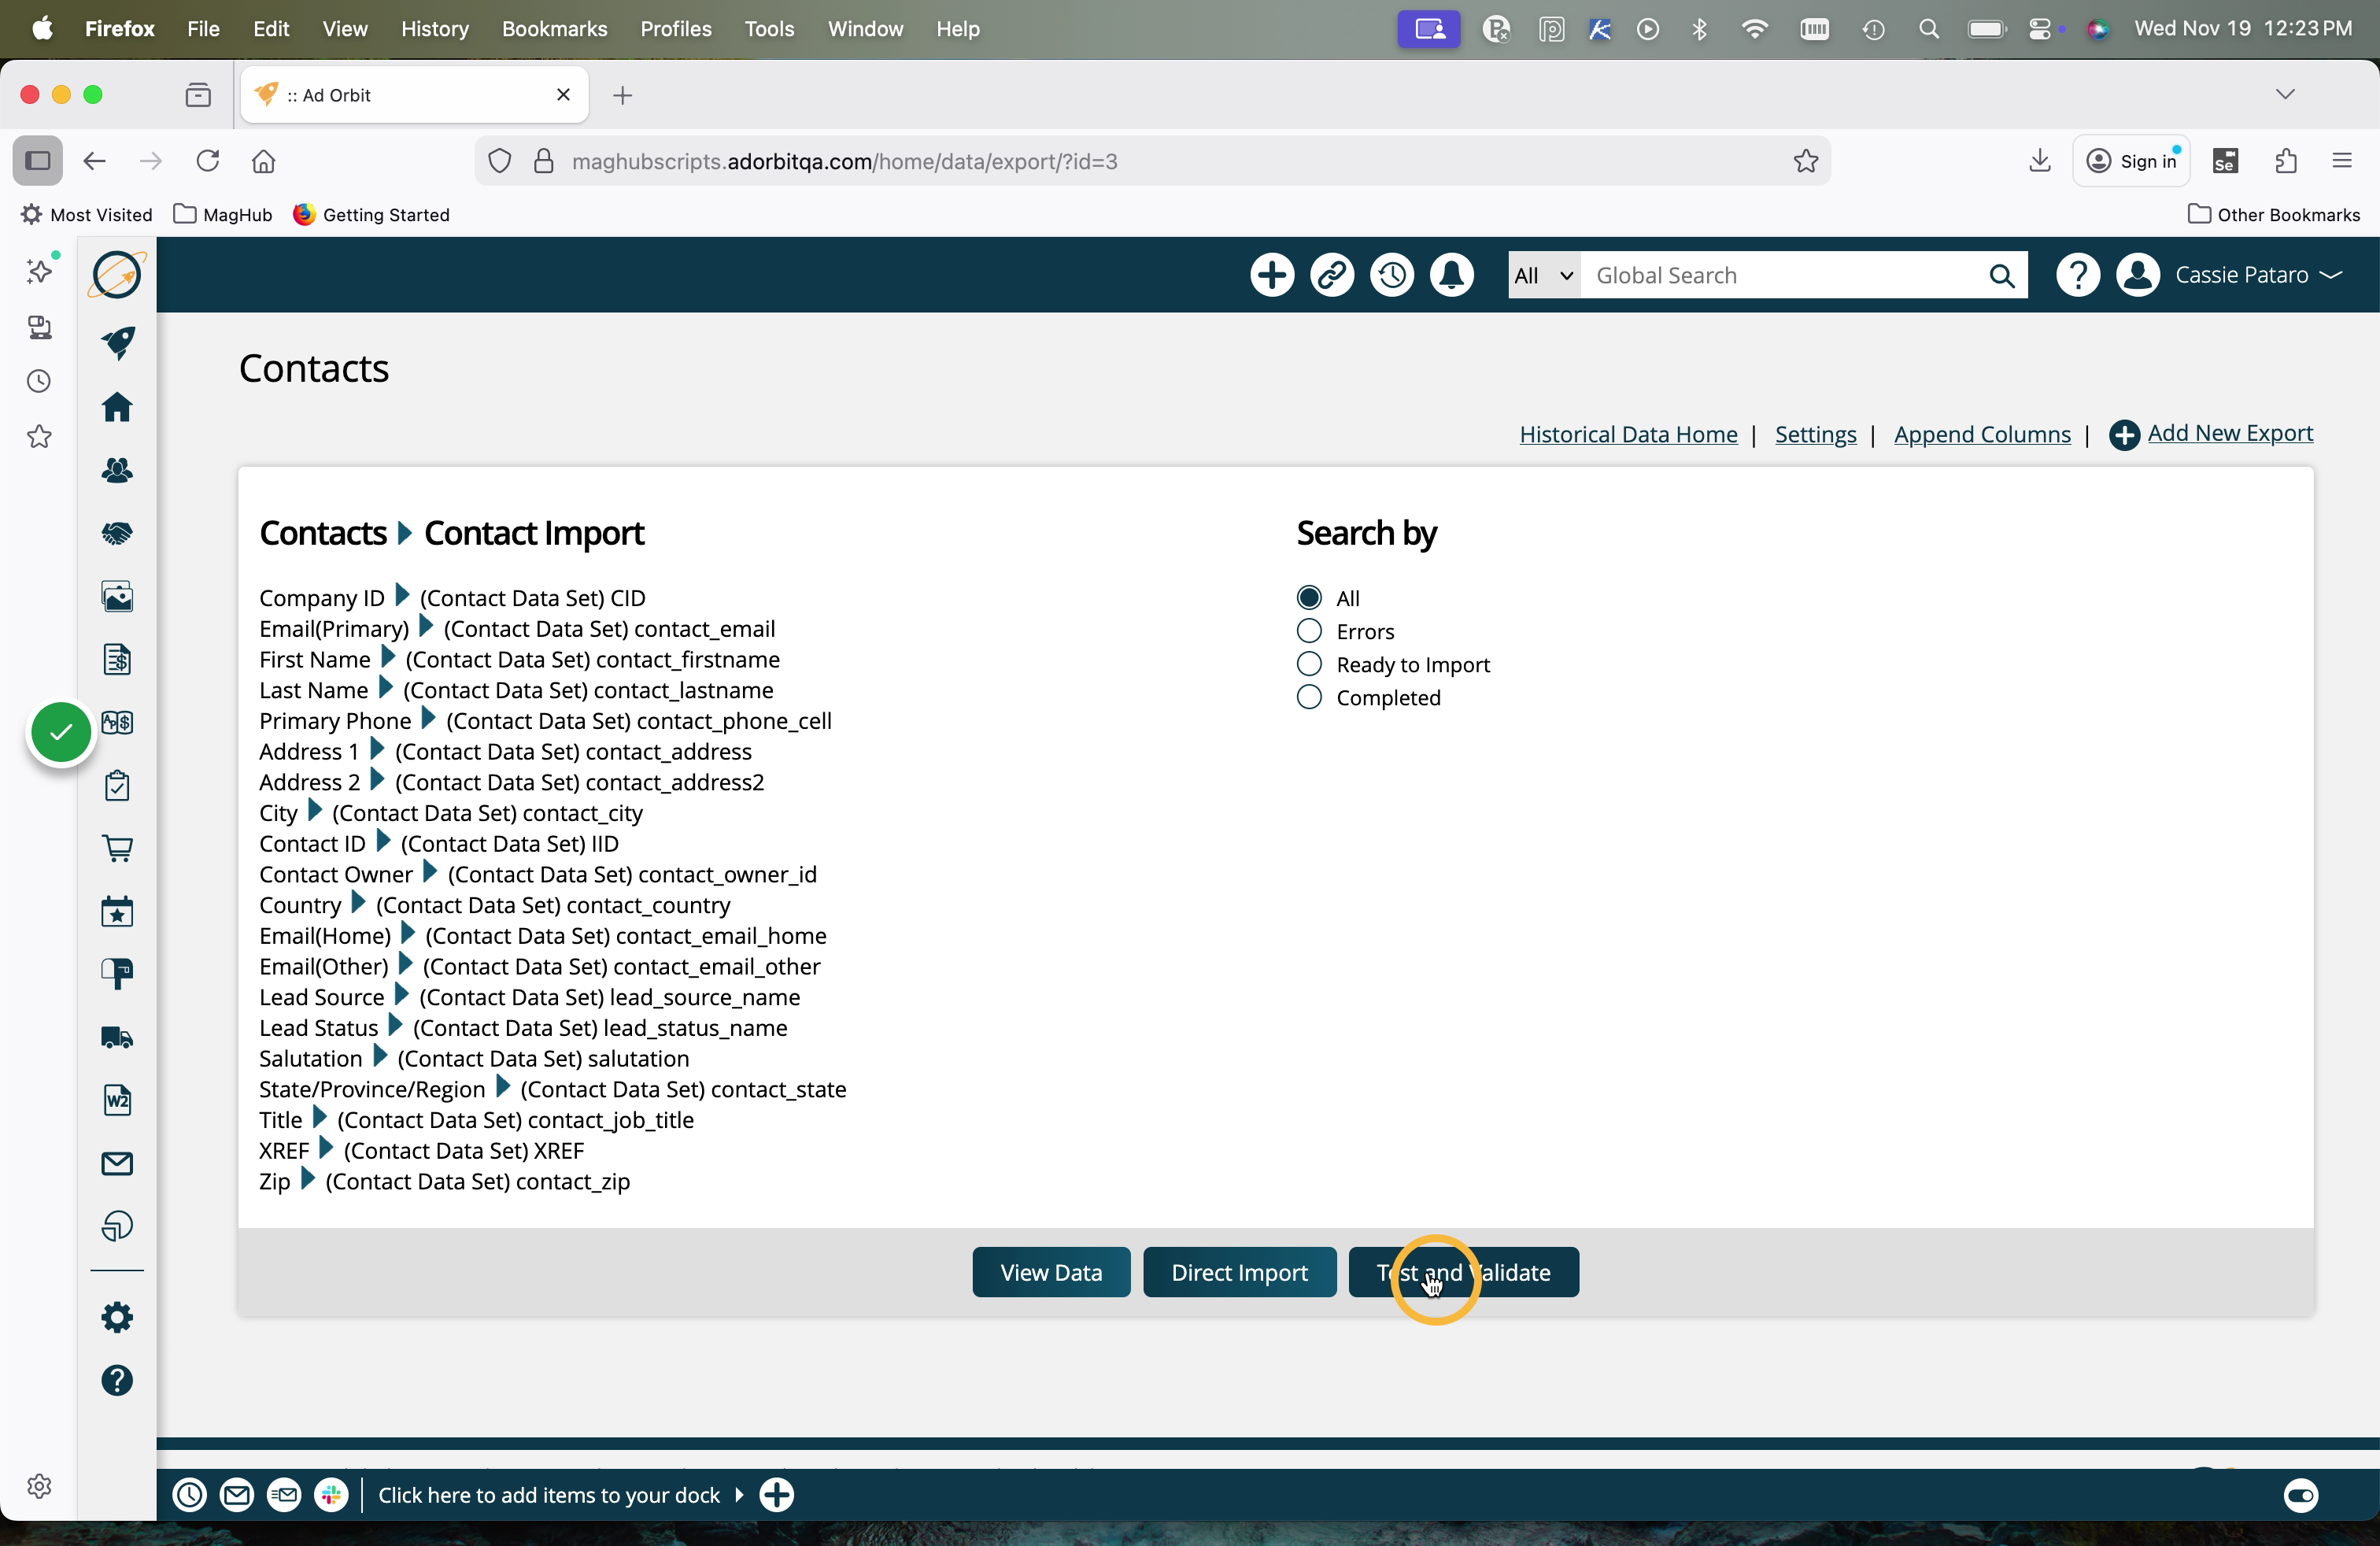
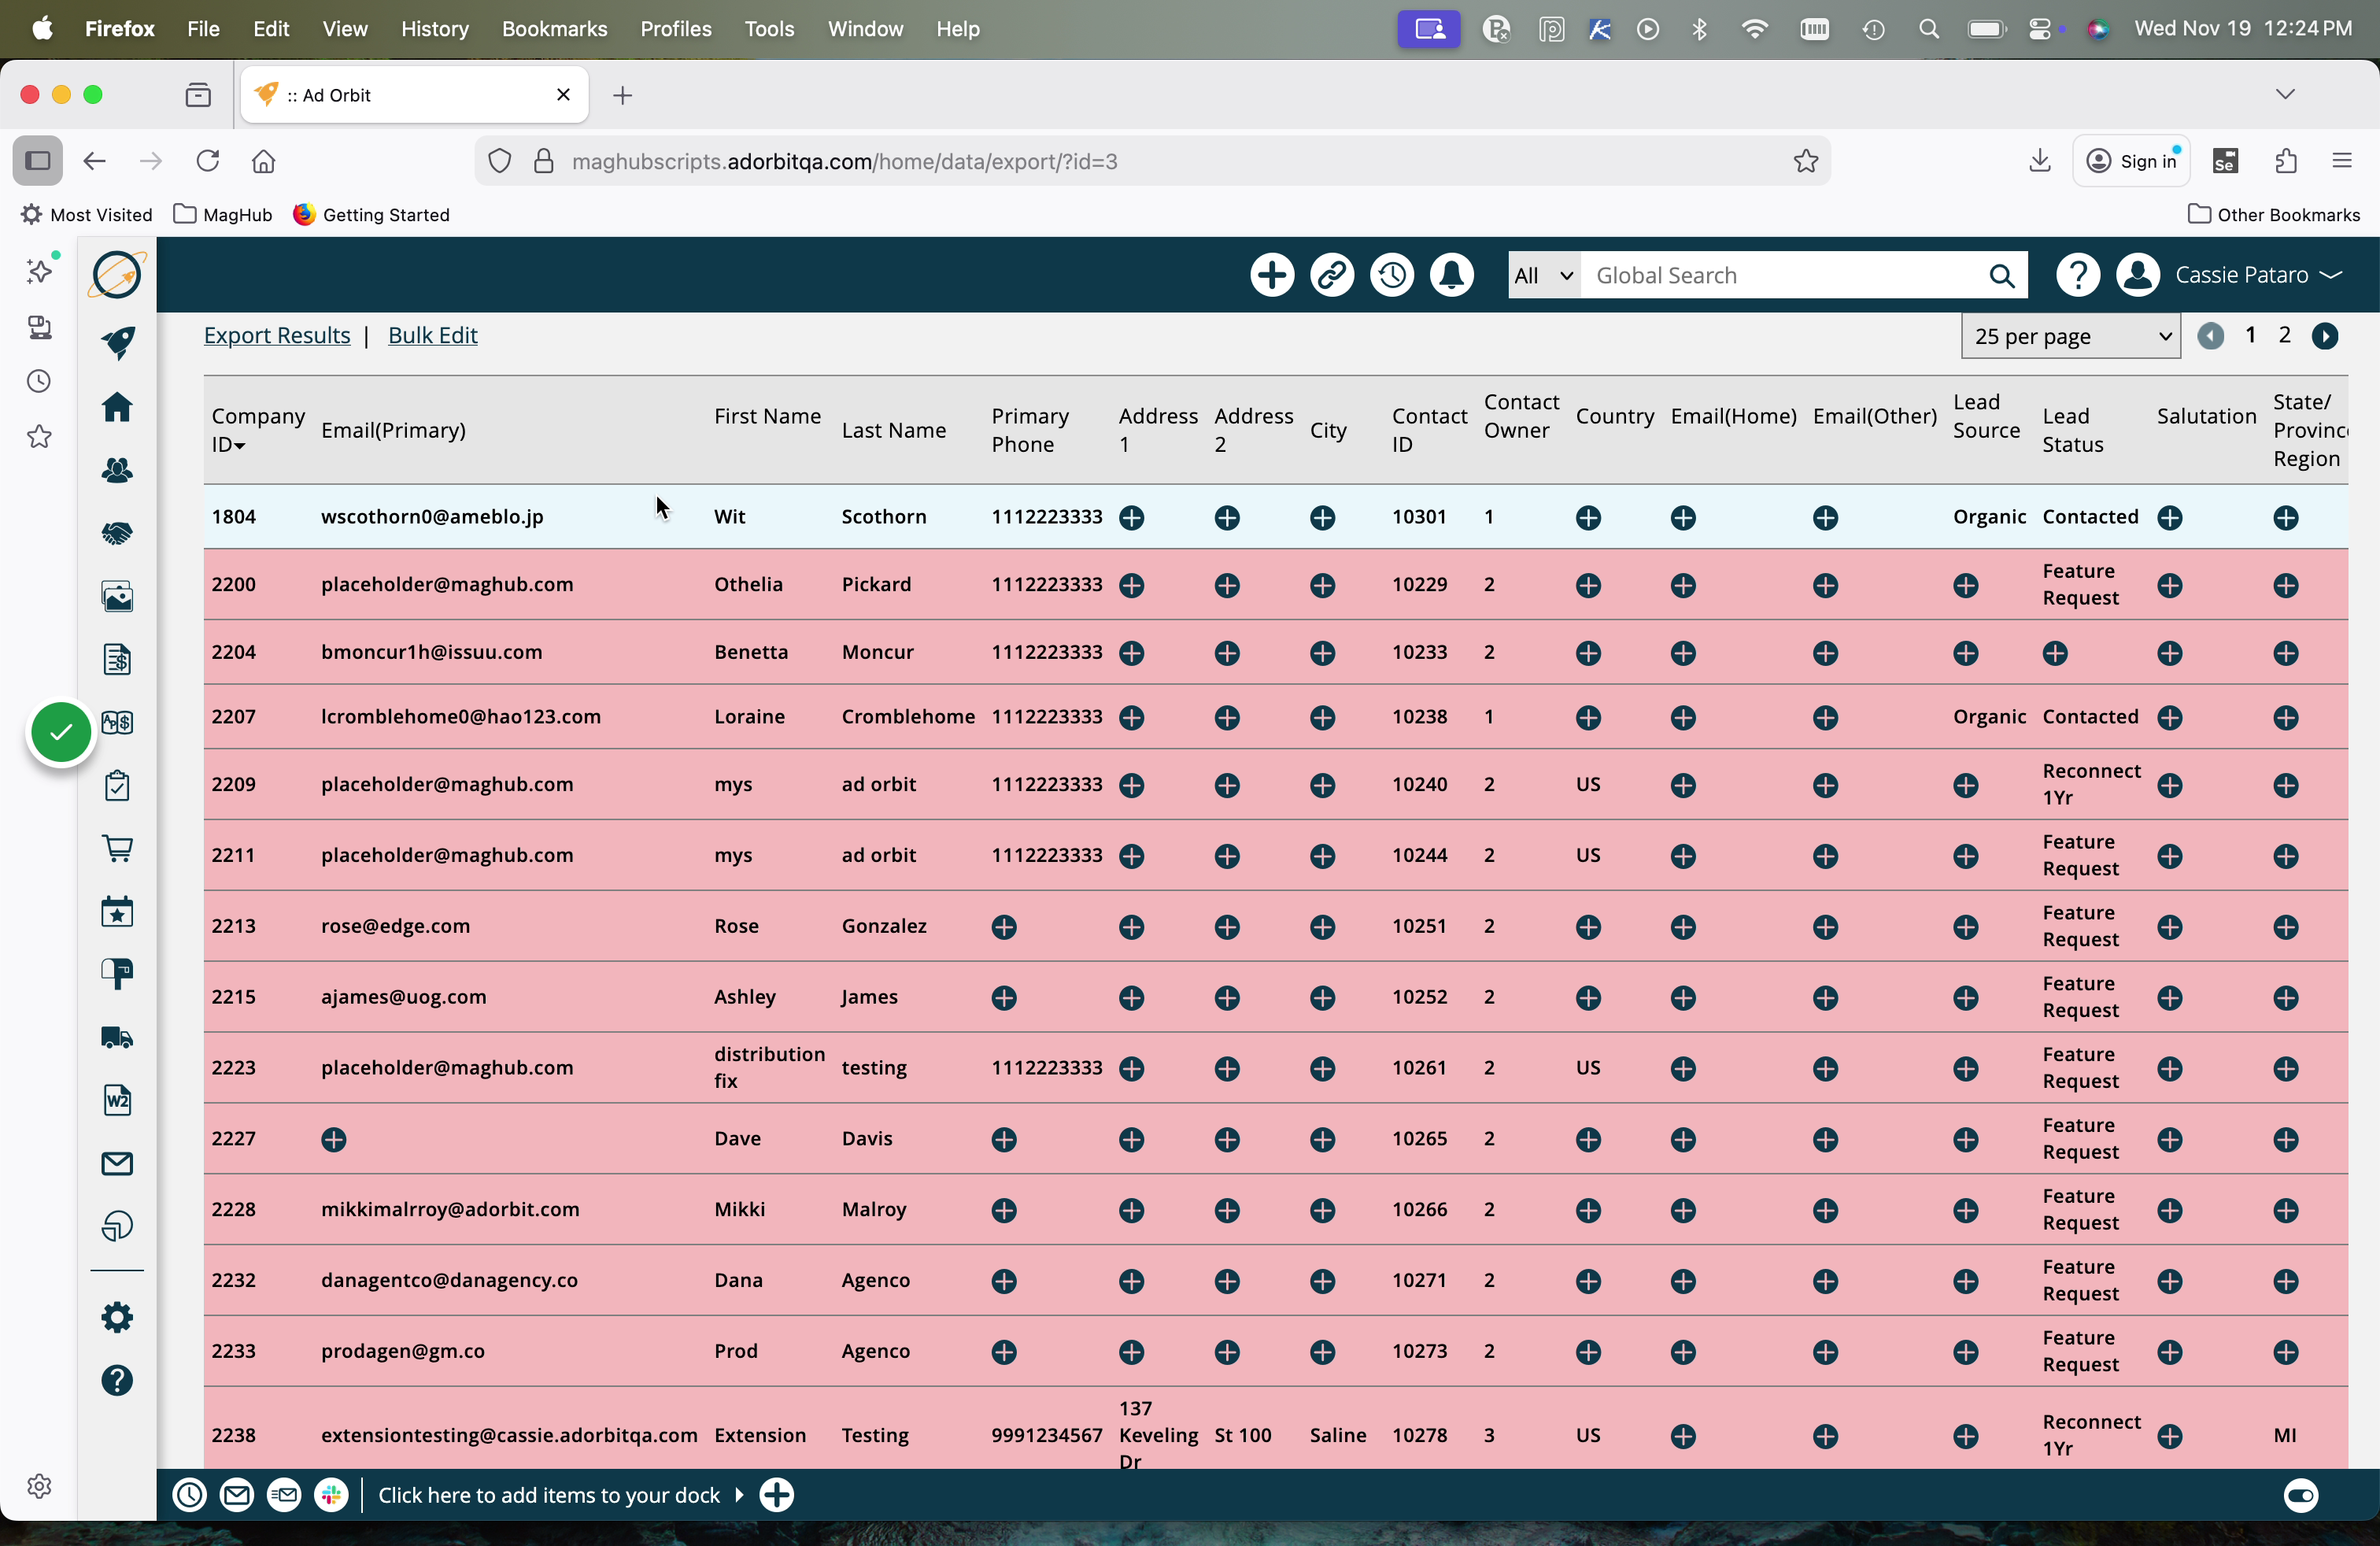
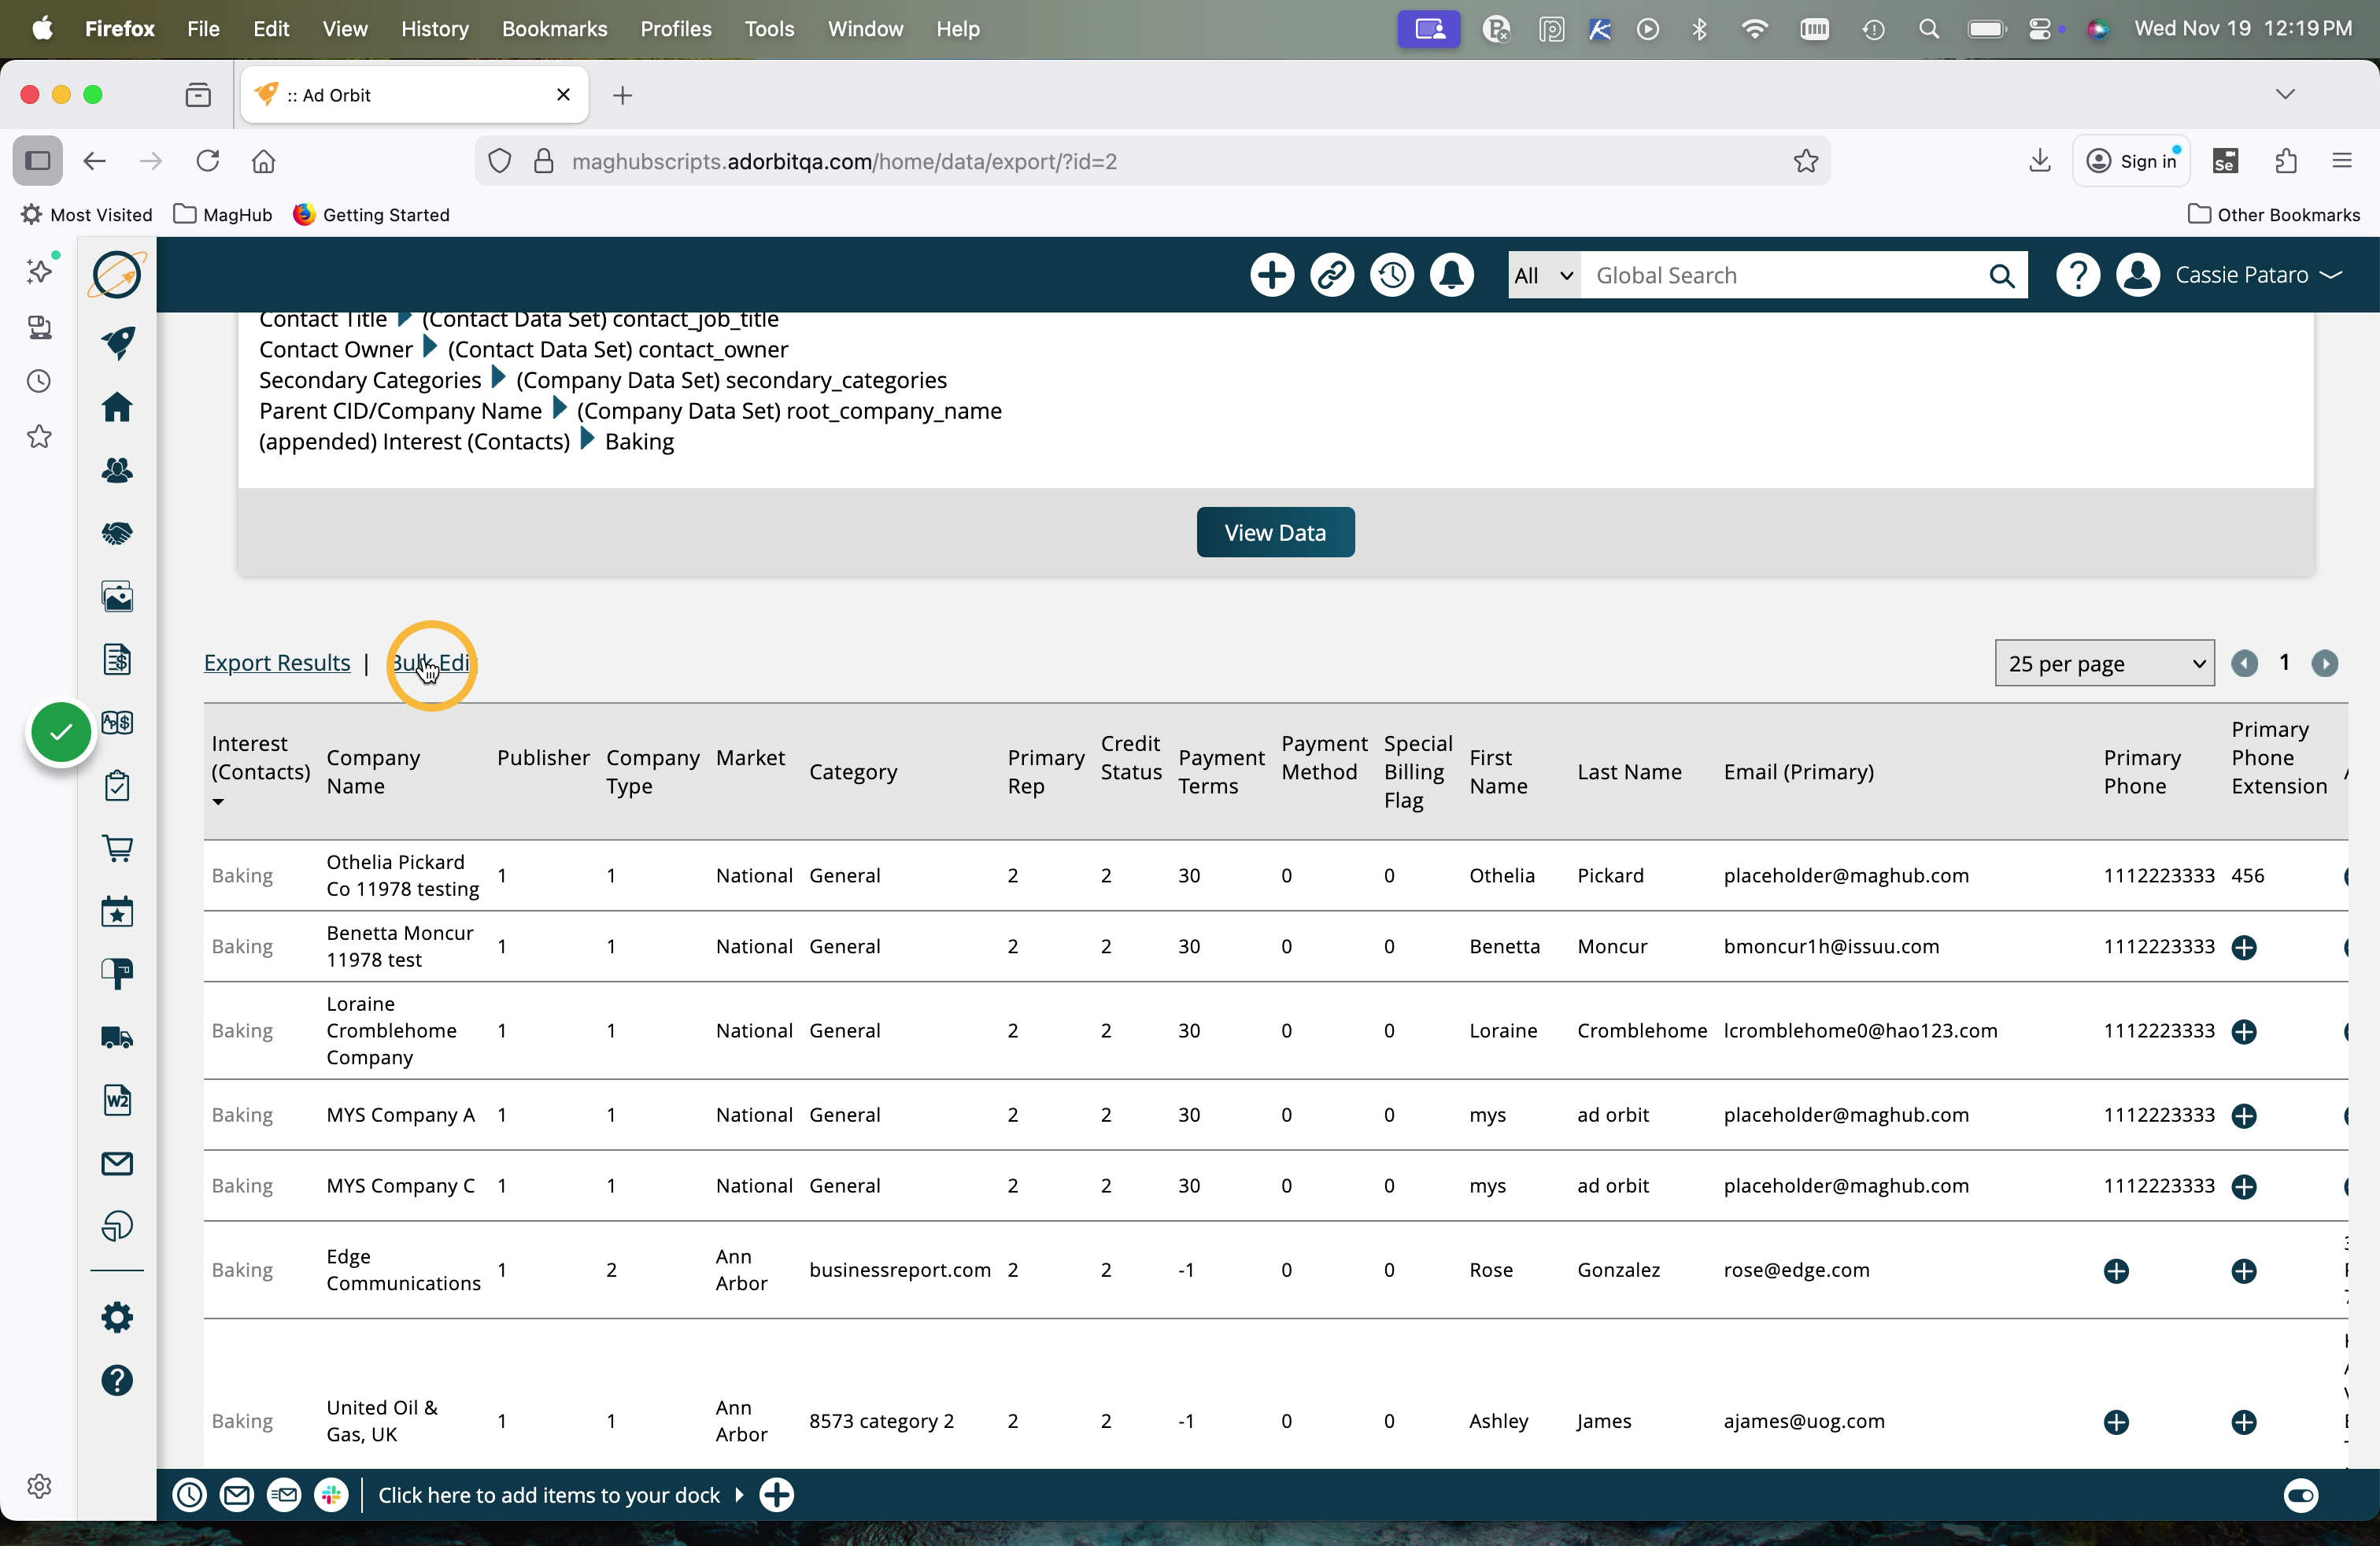
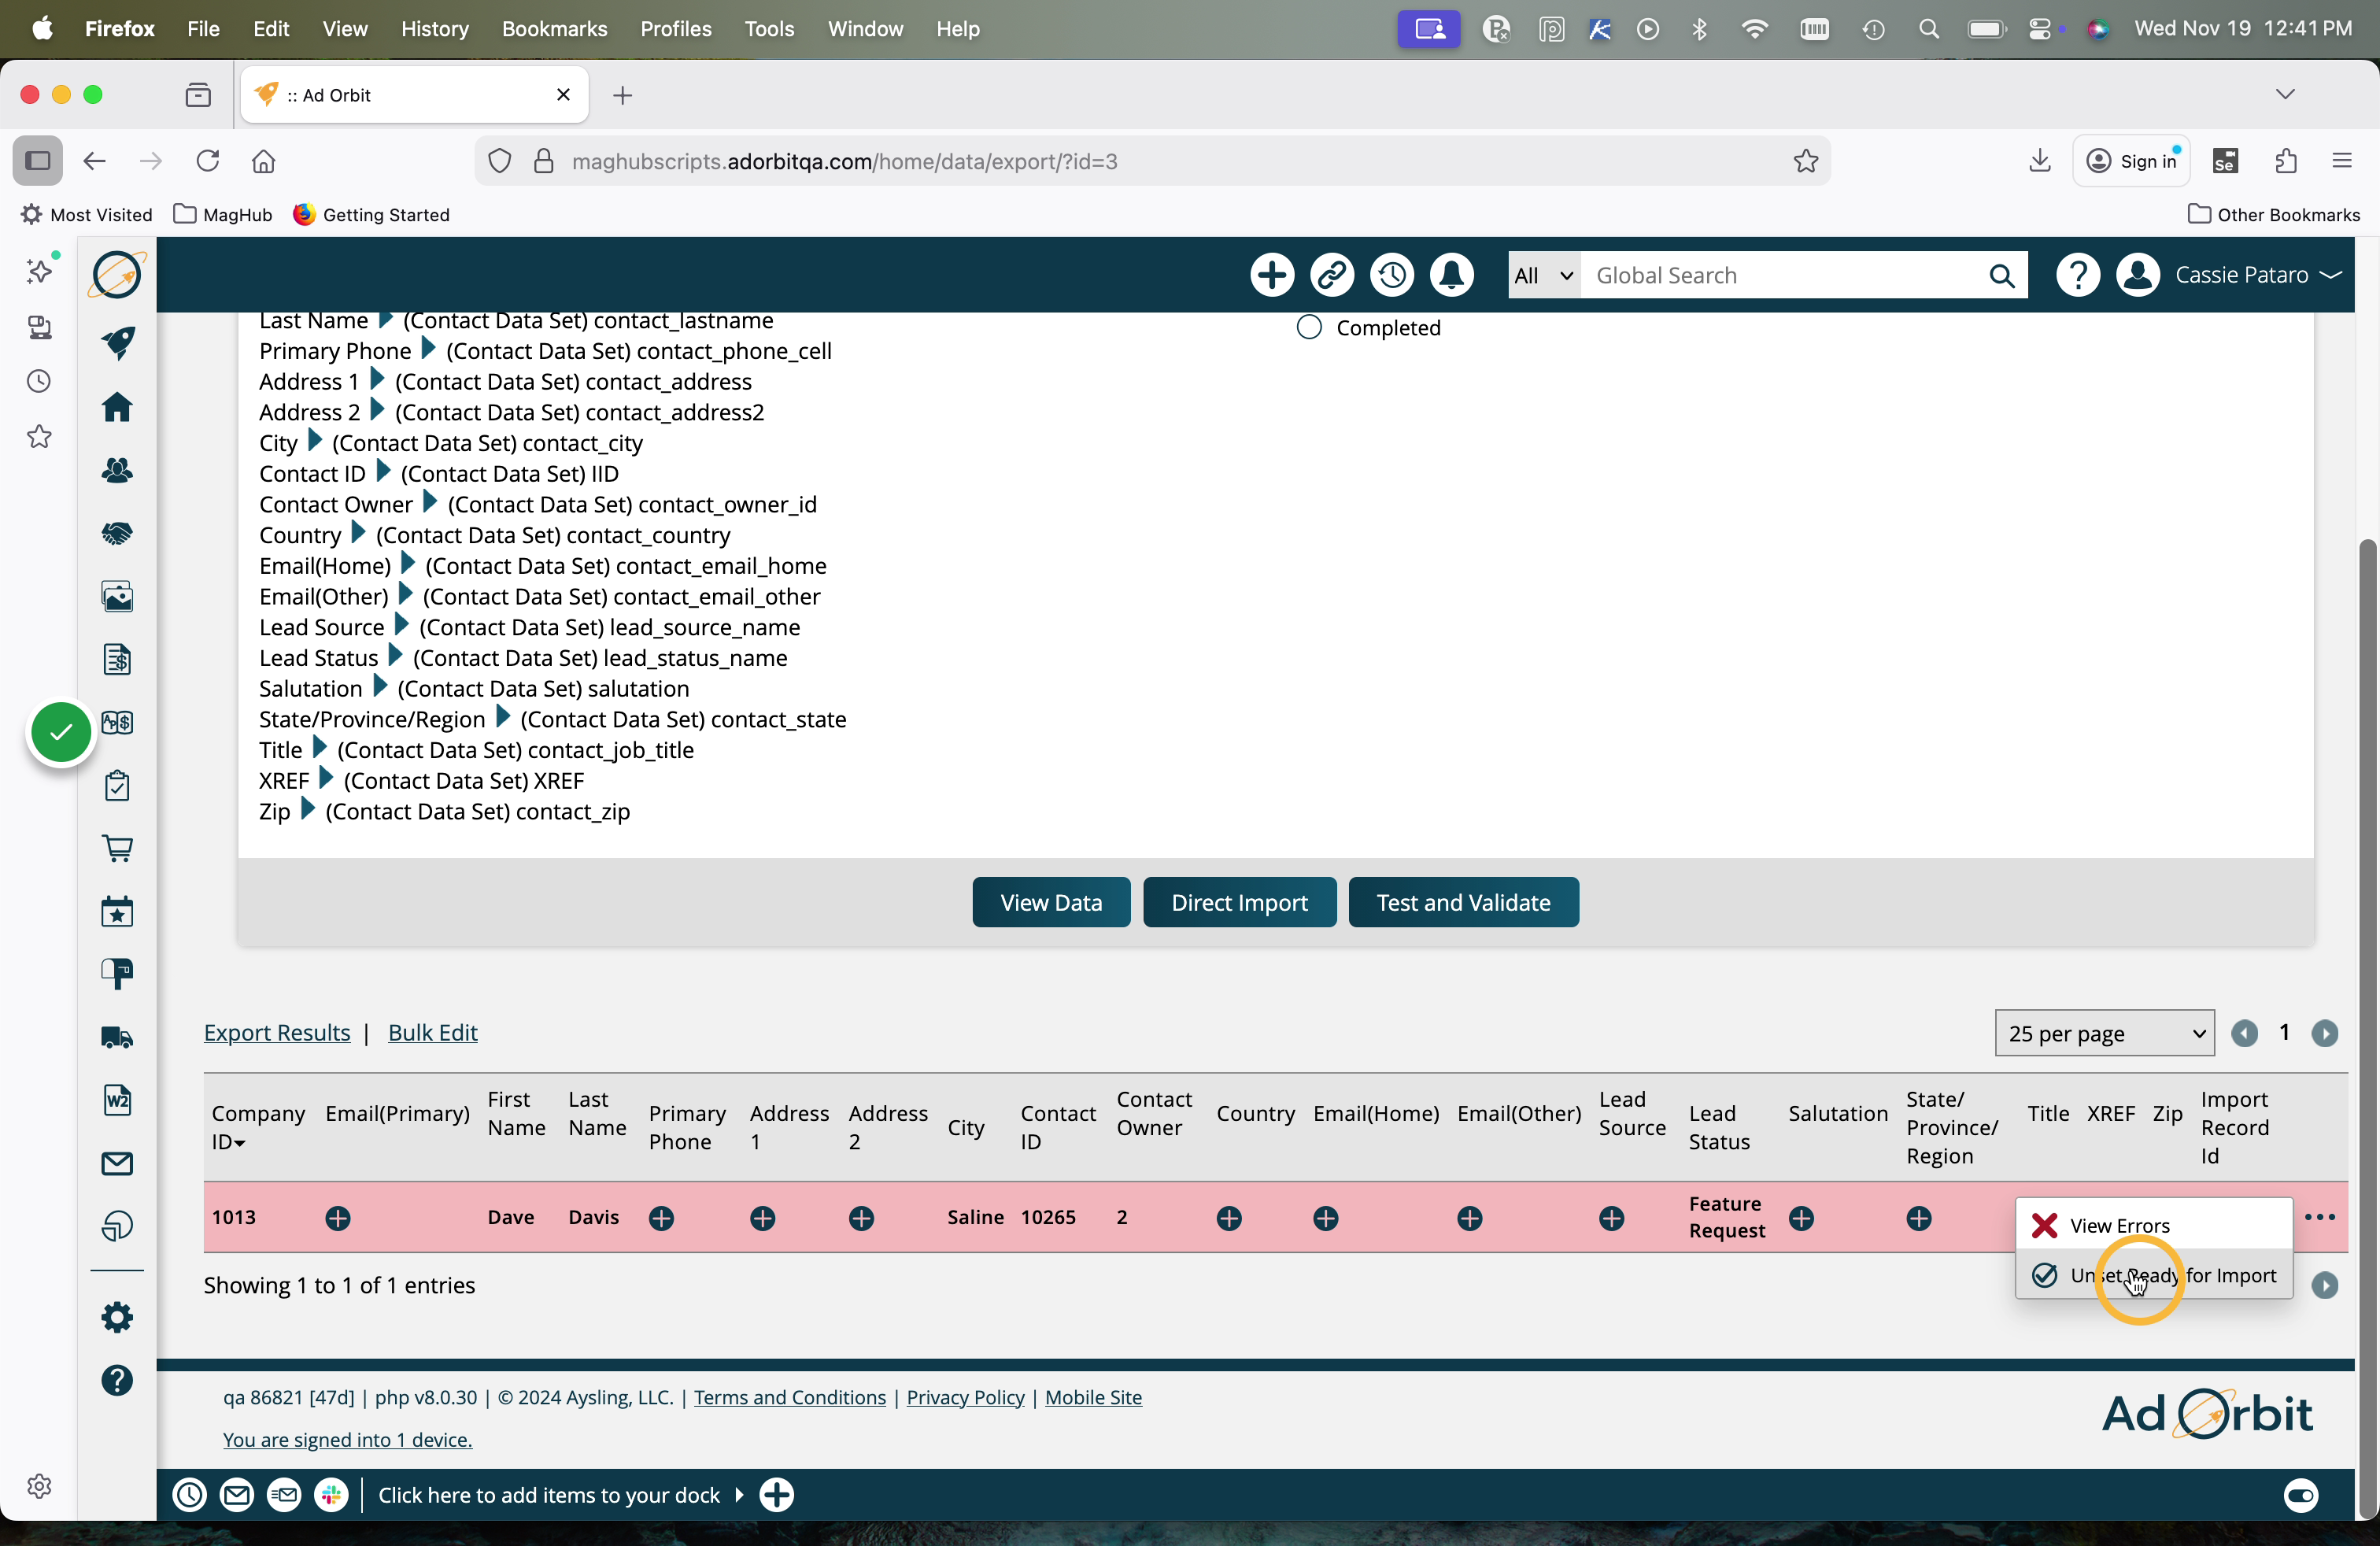
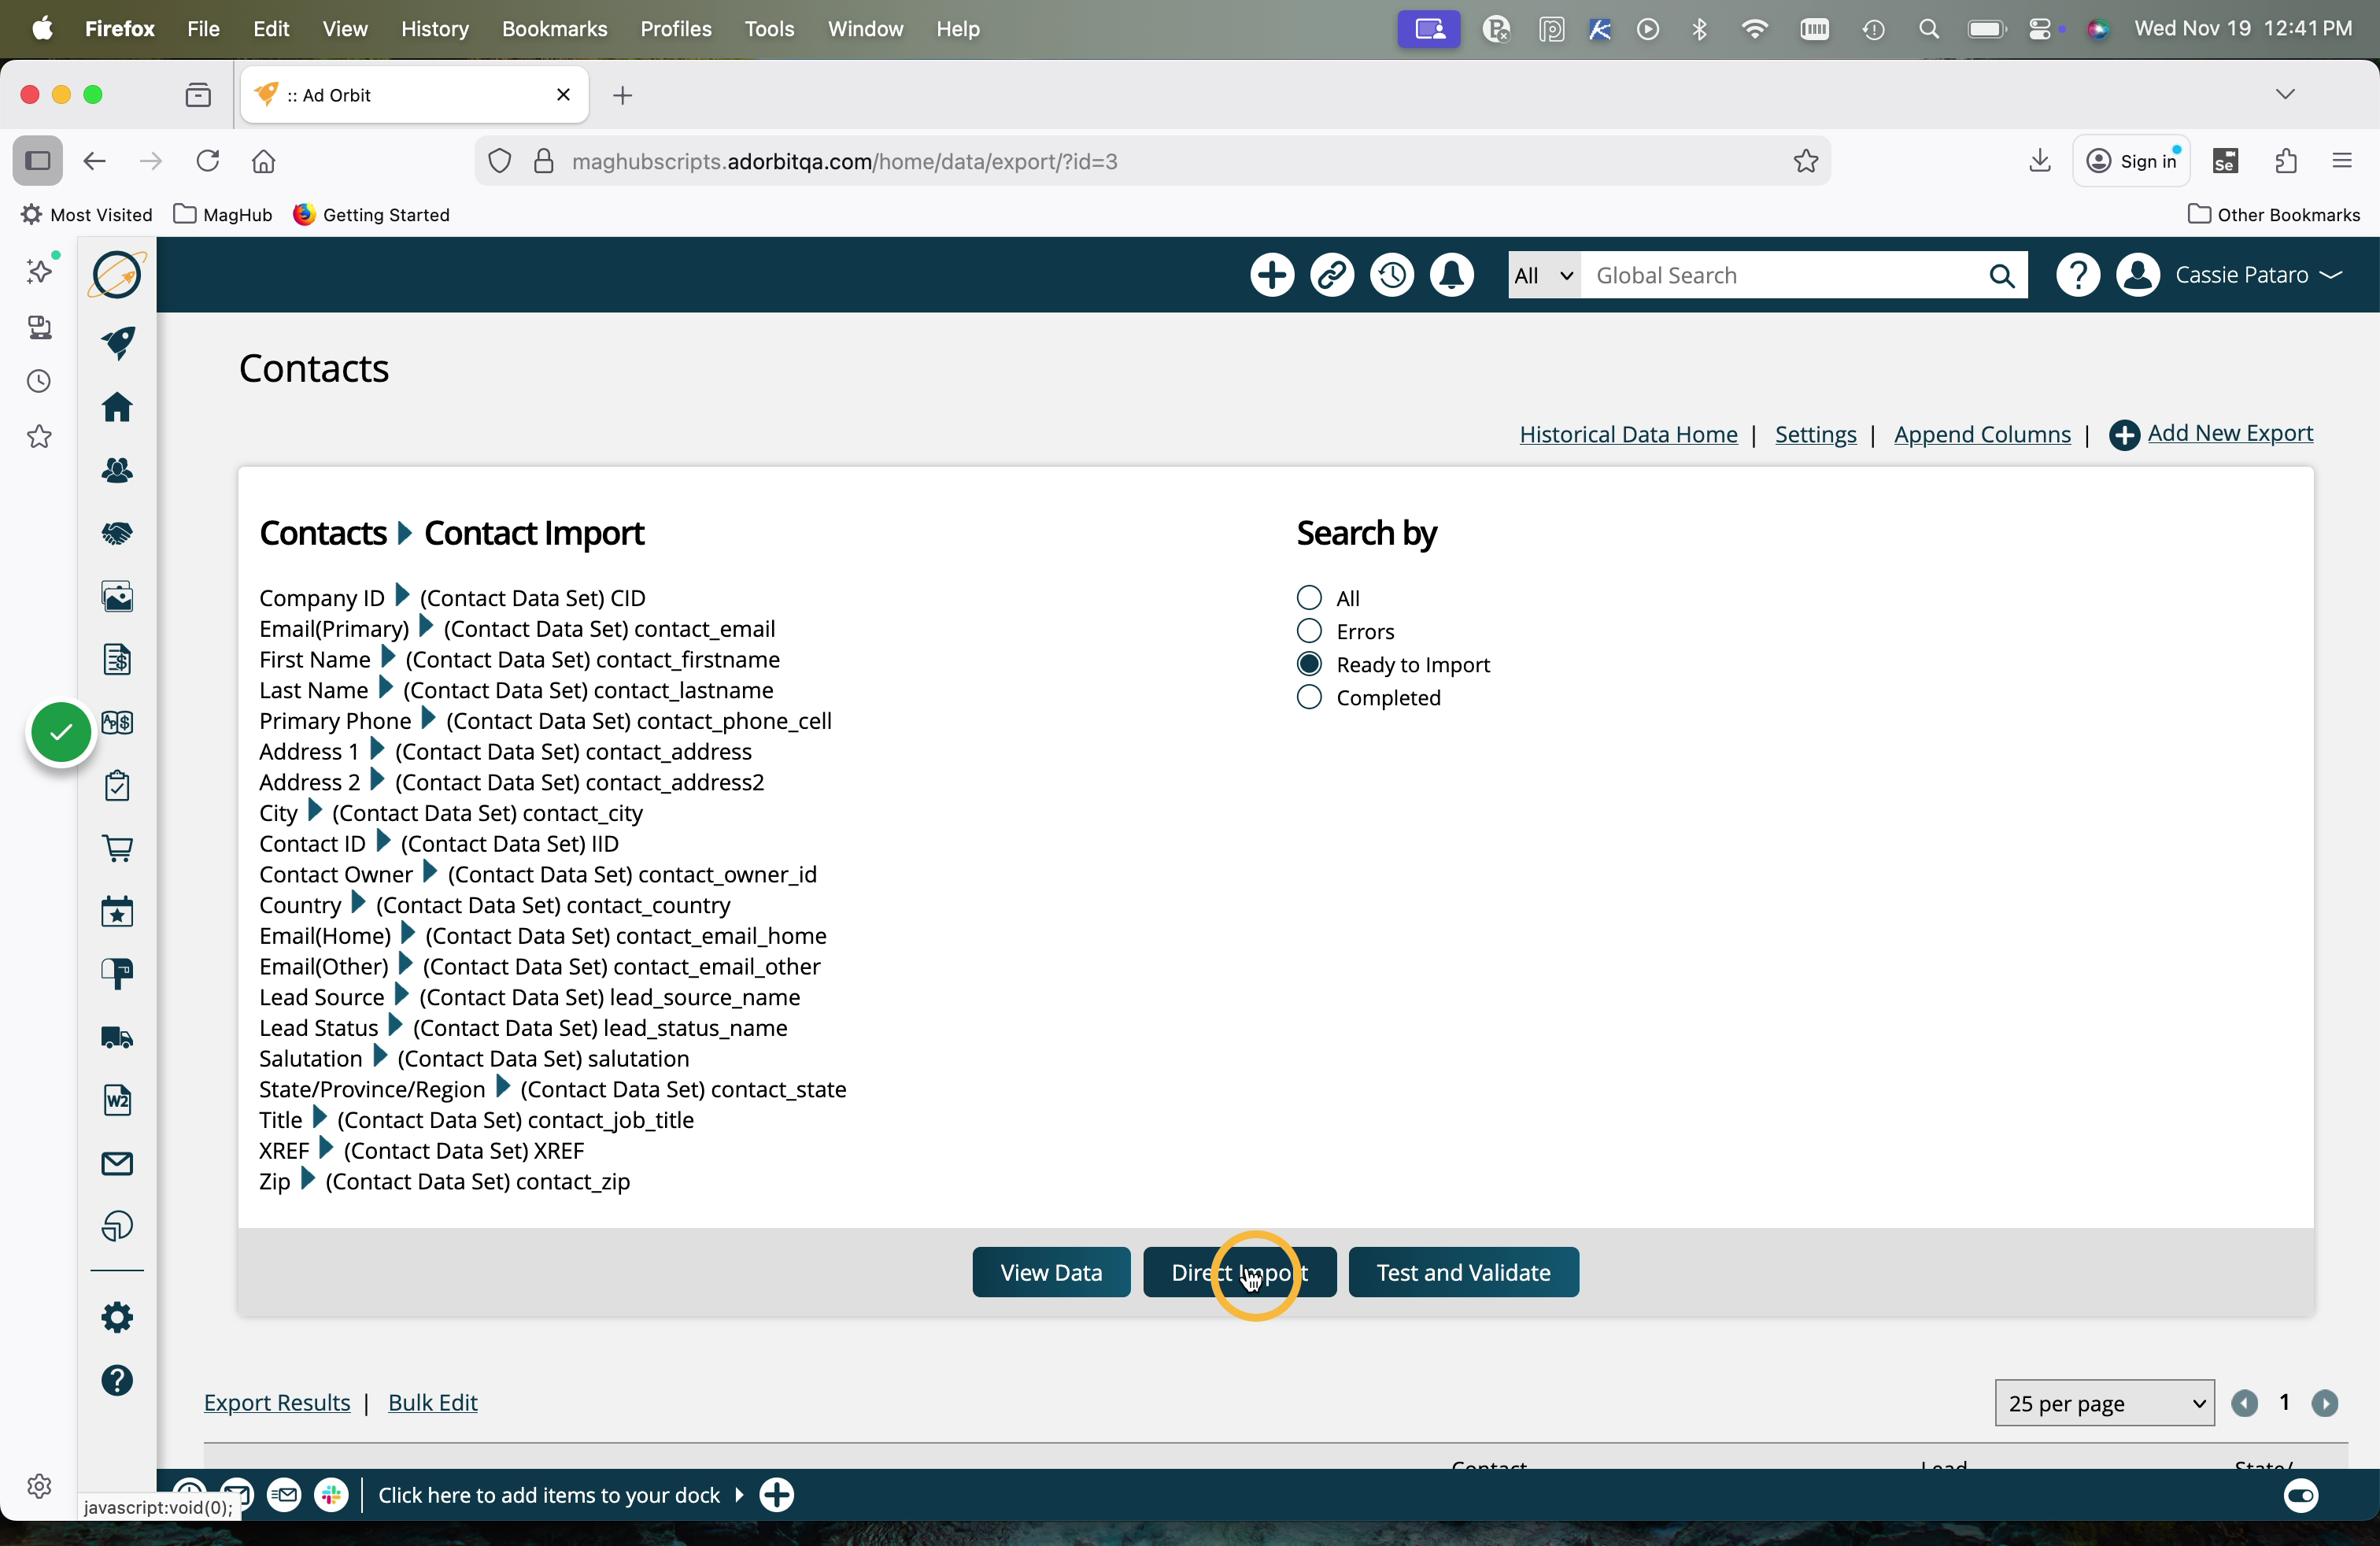
When you are done mapping your columns, you can view your data by clicking on the name in the Exports table. There are multiple actions you can take from this page prior to fully importing the data into your system.
Always run a 'test and validate' before doing a direct import. You will see what records will be successful and which will fail. You can view errors to see exactly why a record can't get imported into the system.
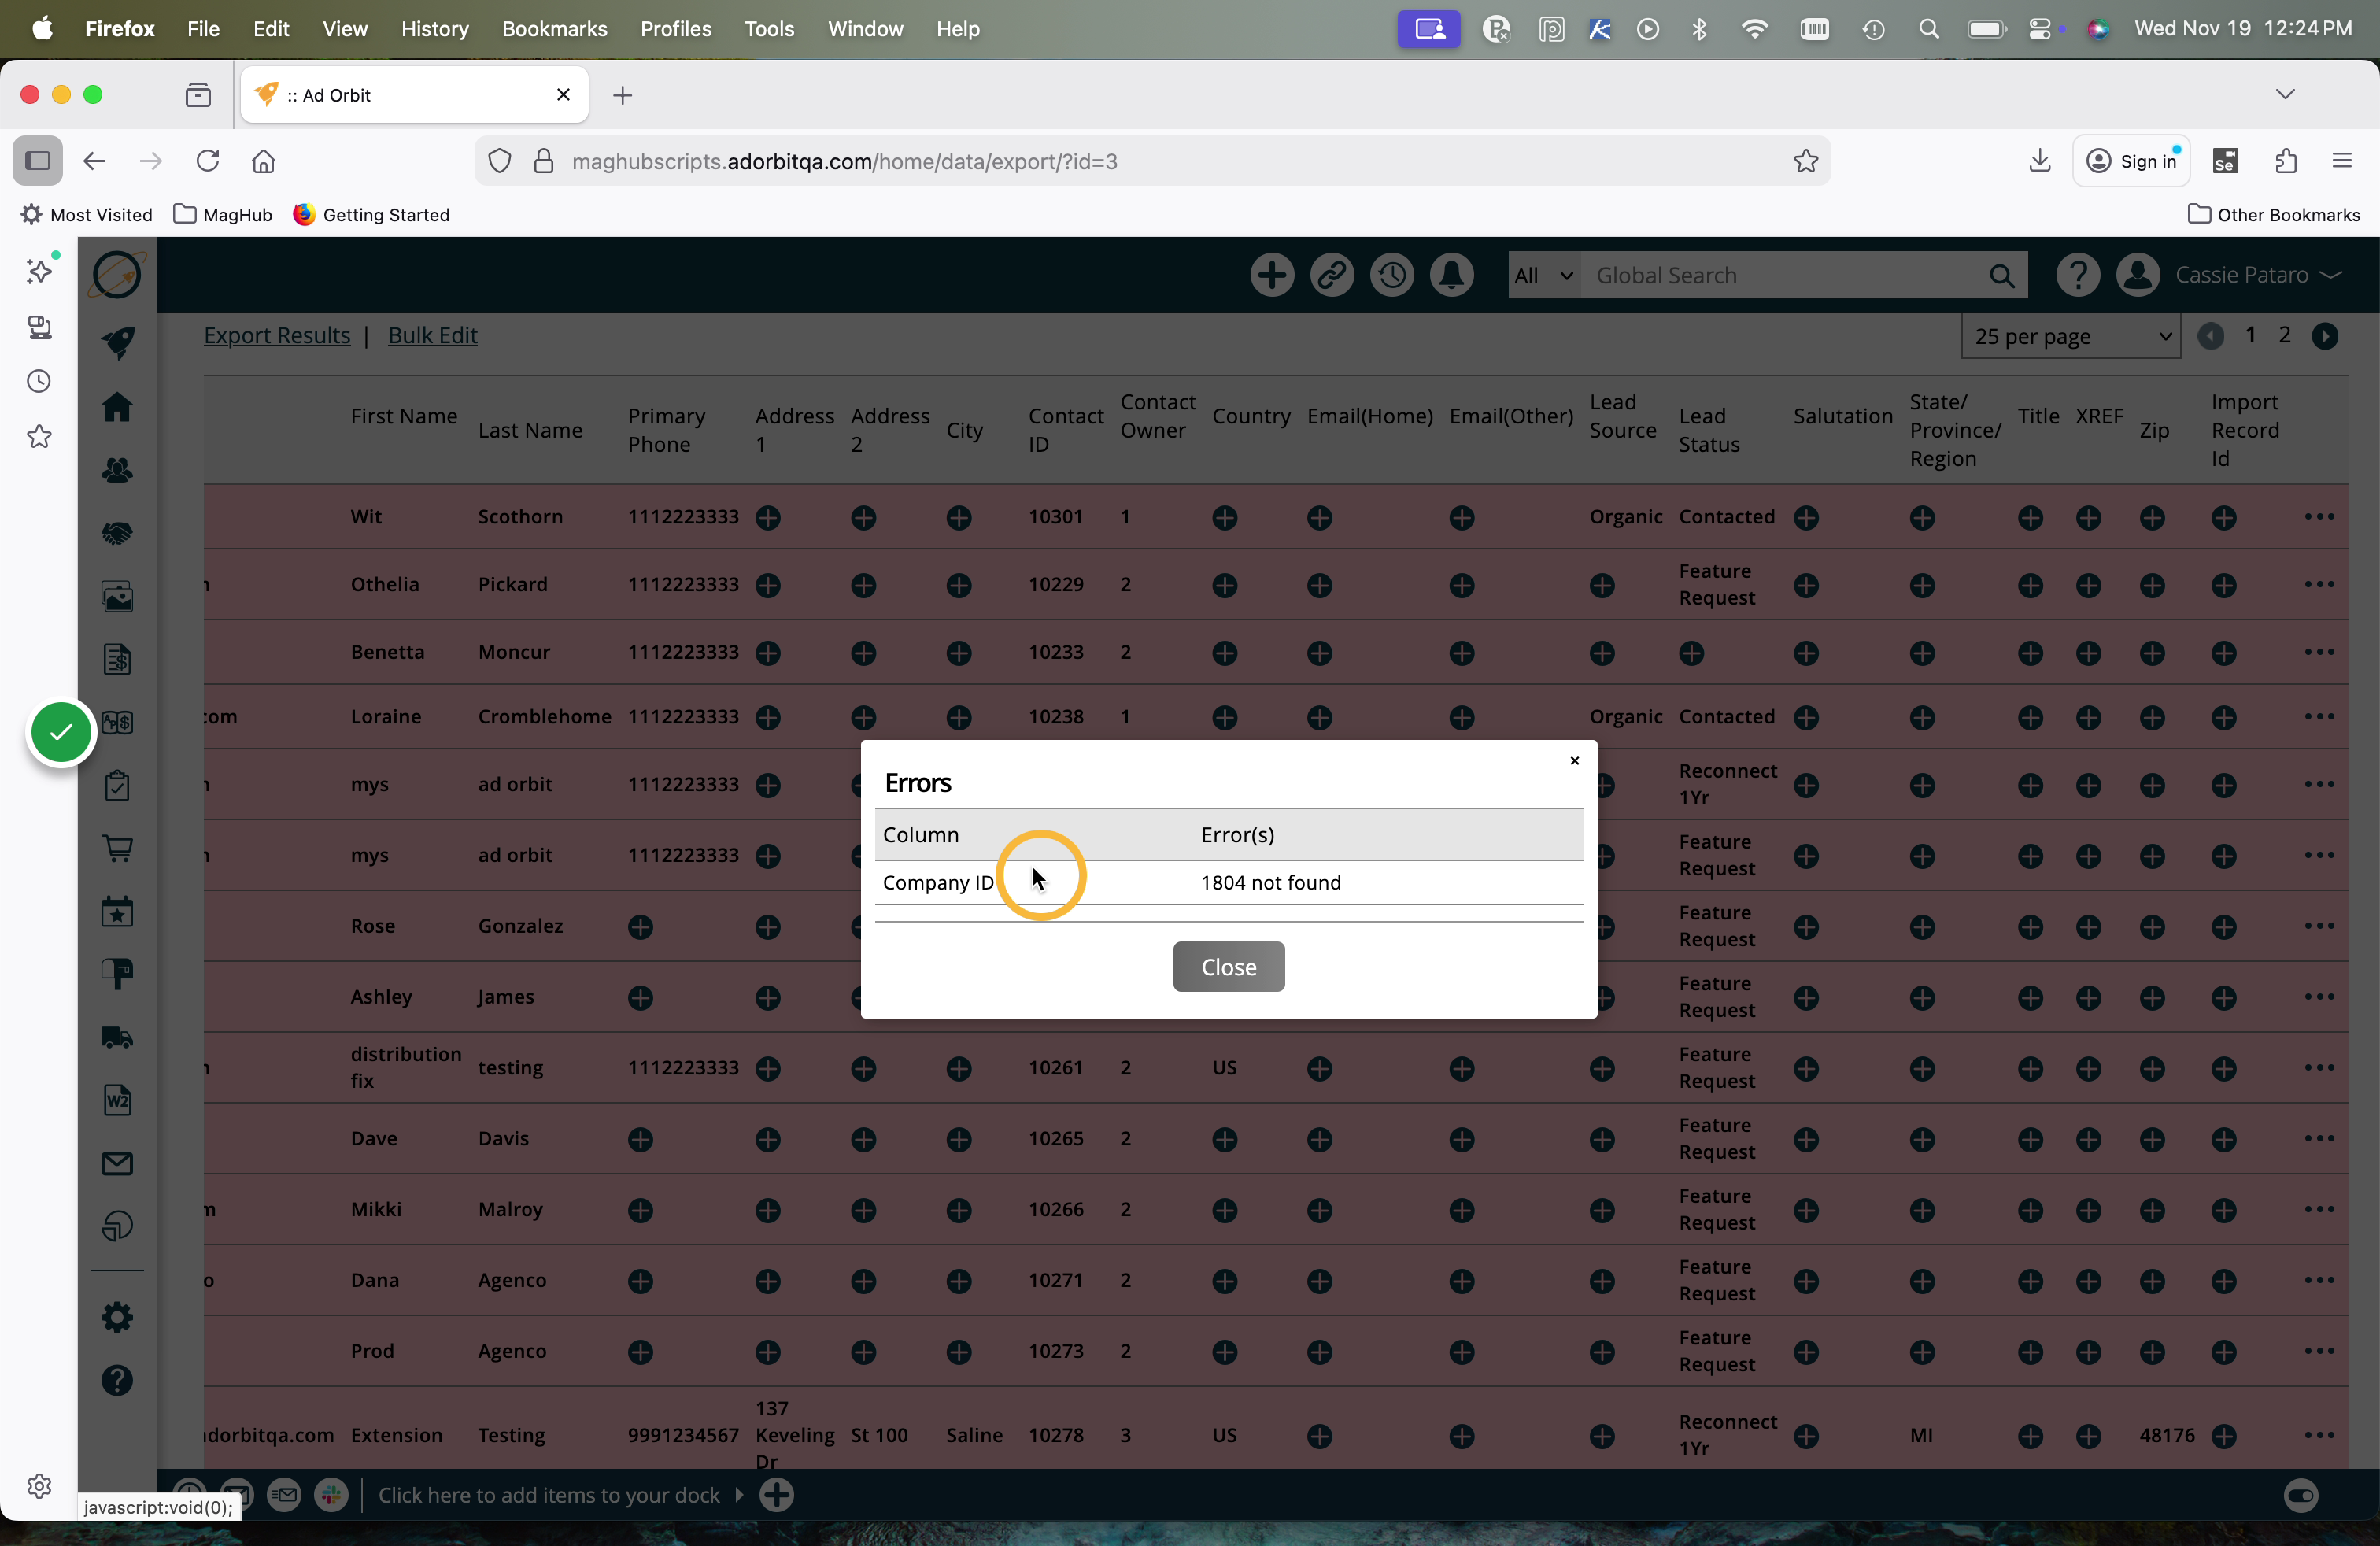
Any records with errors will be highlighted in red. You can view errors to see exactly why a record can't get imported into the system.
On a record with an error, click the ellipses icon, then click 'View Errors'.
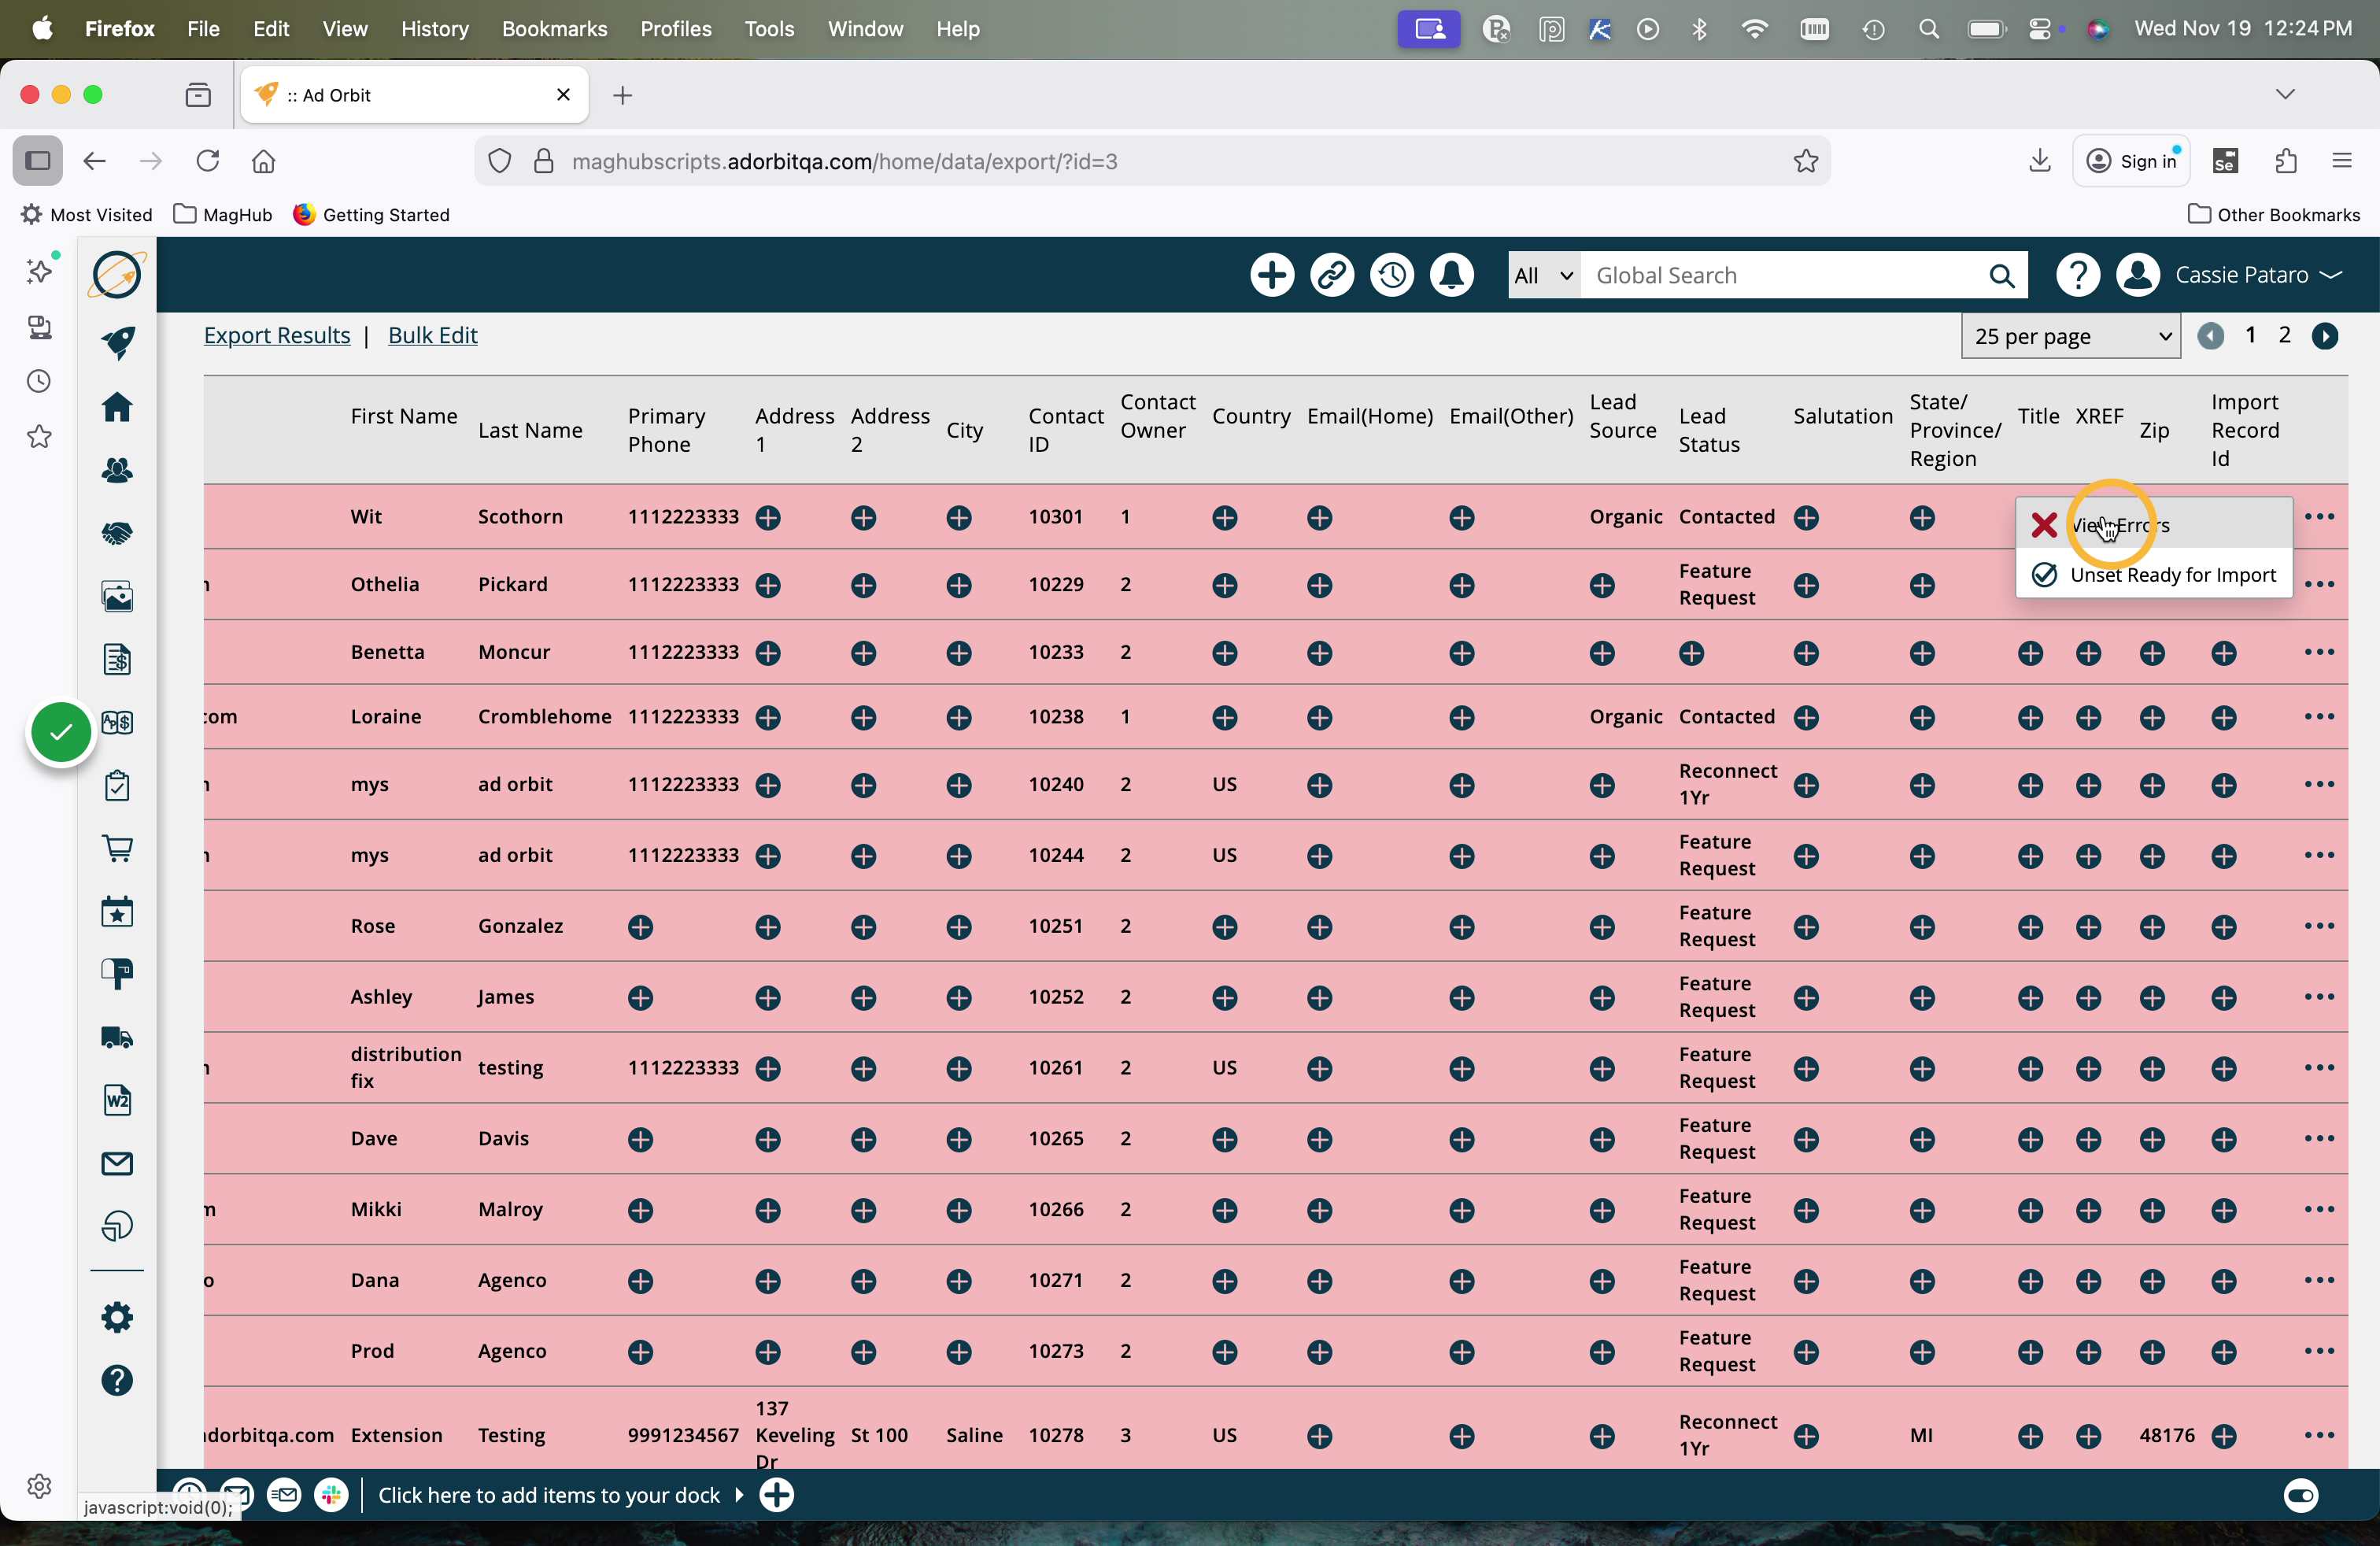
In the popup, you will see any errors on that record.
There are a few ways to make changes or fix errors prior to doing your direct import.
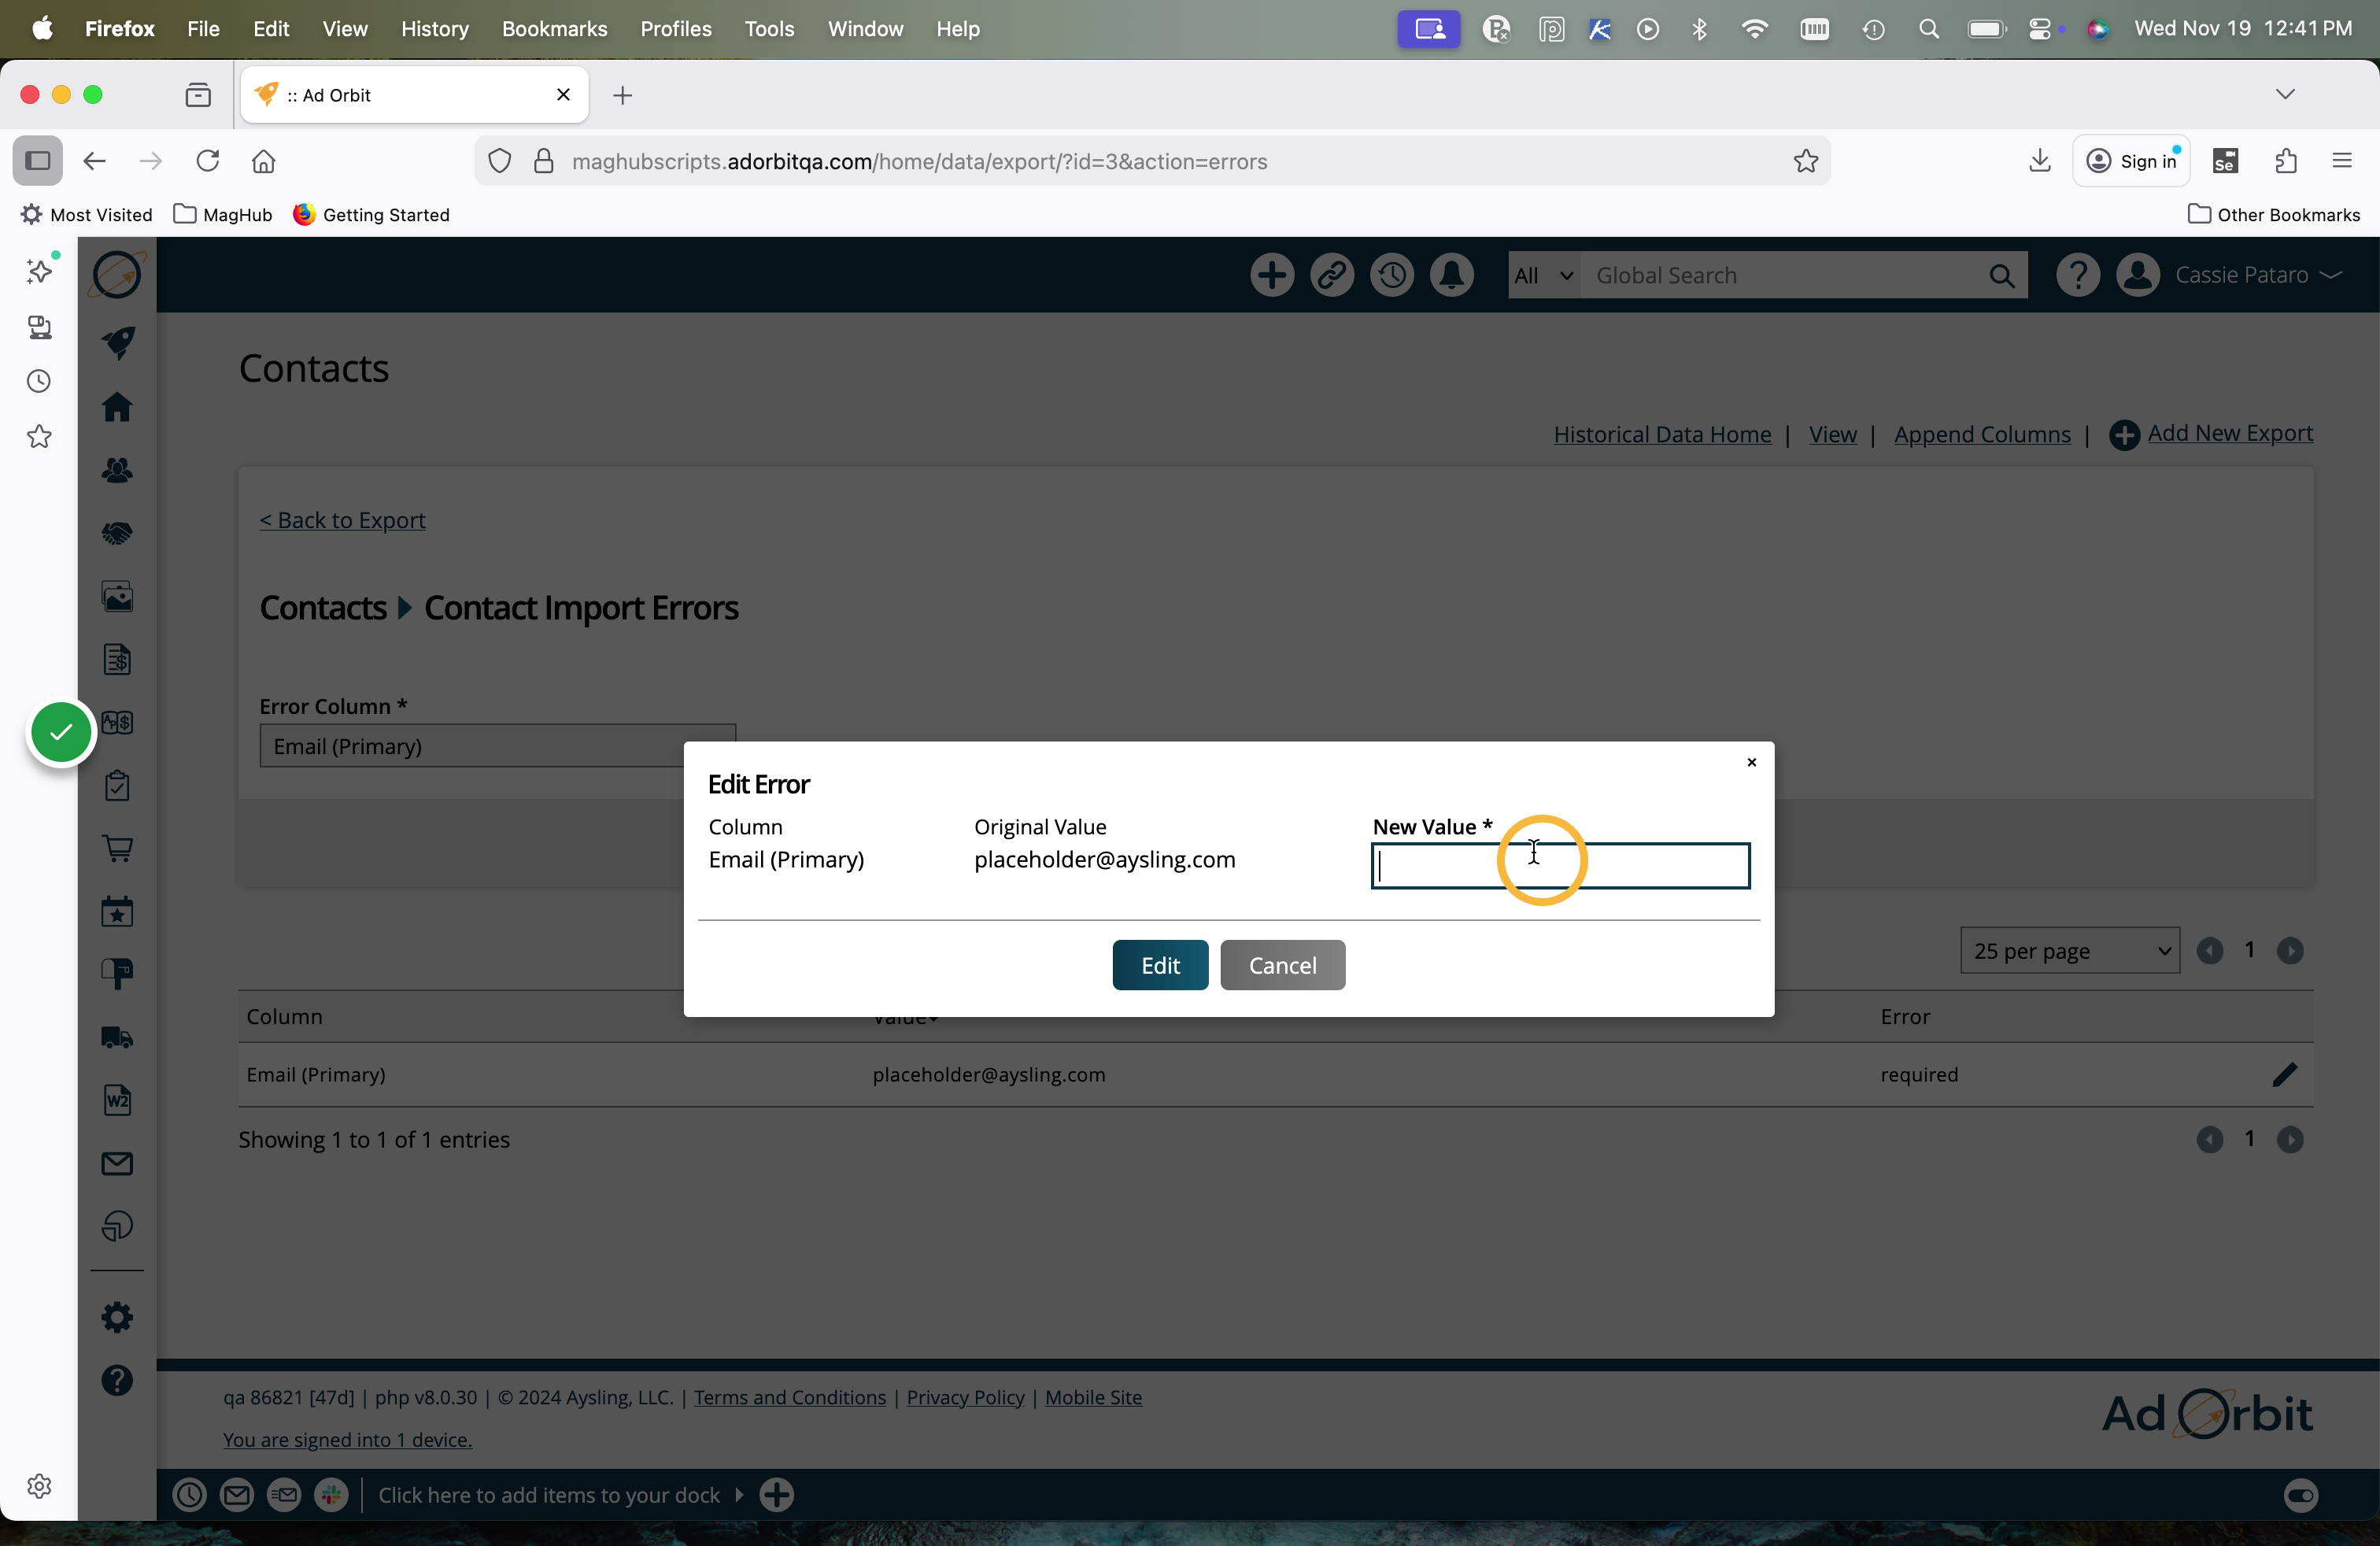
You can have the option of in-line editing each field. To do so, click on the value in the column or the + icon if there is no current value.

This will allow you to edit that specific value. Click the check mark to make the change, or the x icon to cancel the change.
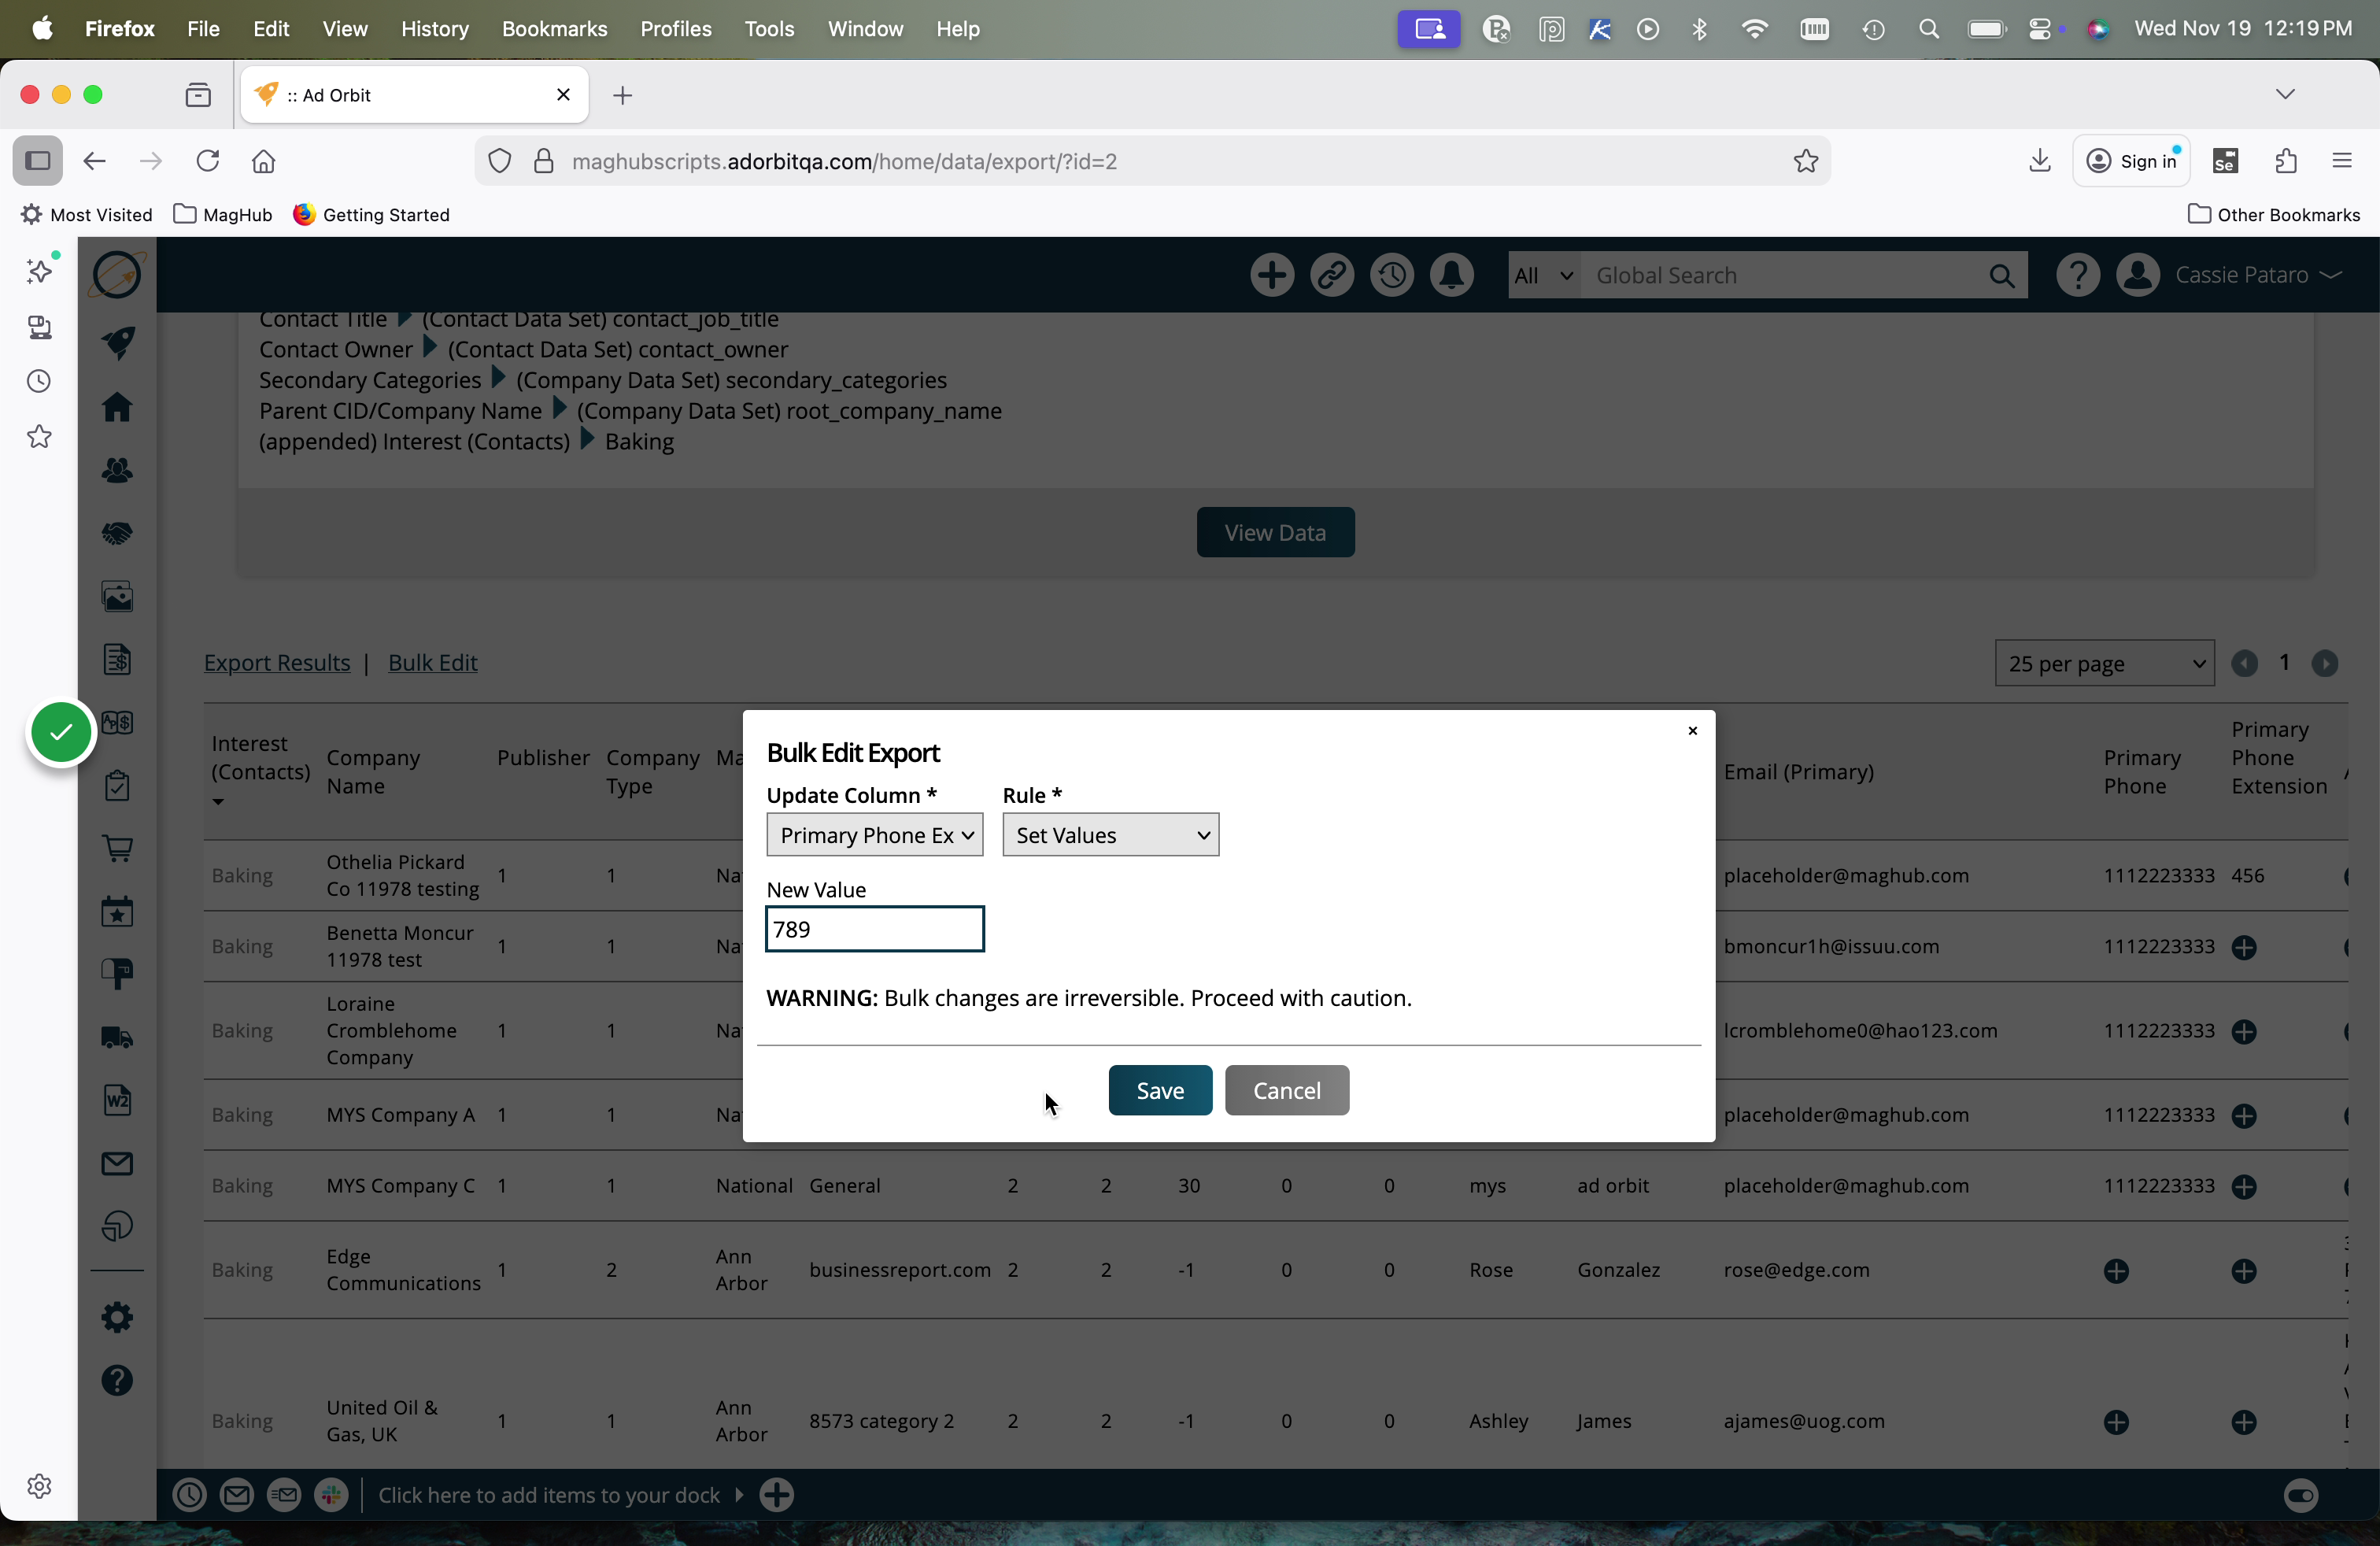
There is also the option to bulk edit an entire column. To do so, click the Bulk Edit action.
In the popup, select which column you want to update, and choose how to apply the change in the Rule dropdown.
Then, enter your new value. This new value will be applied using the rule you specified to every value in that column.
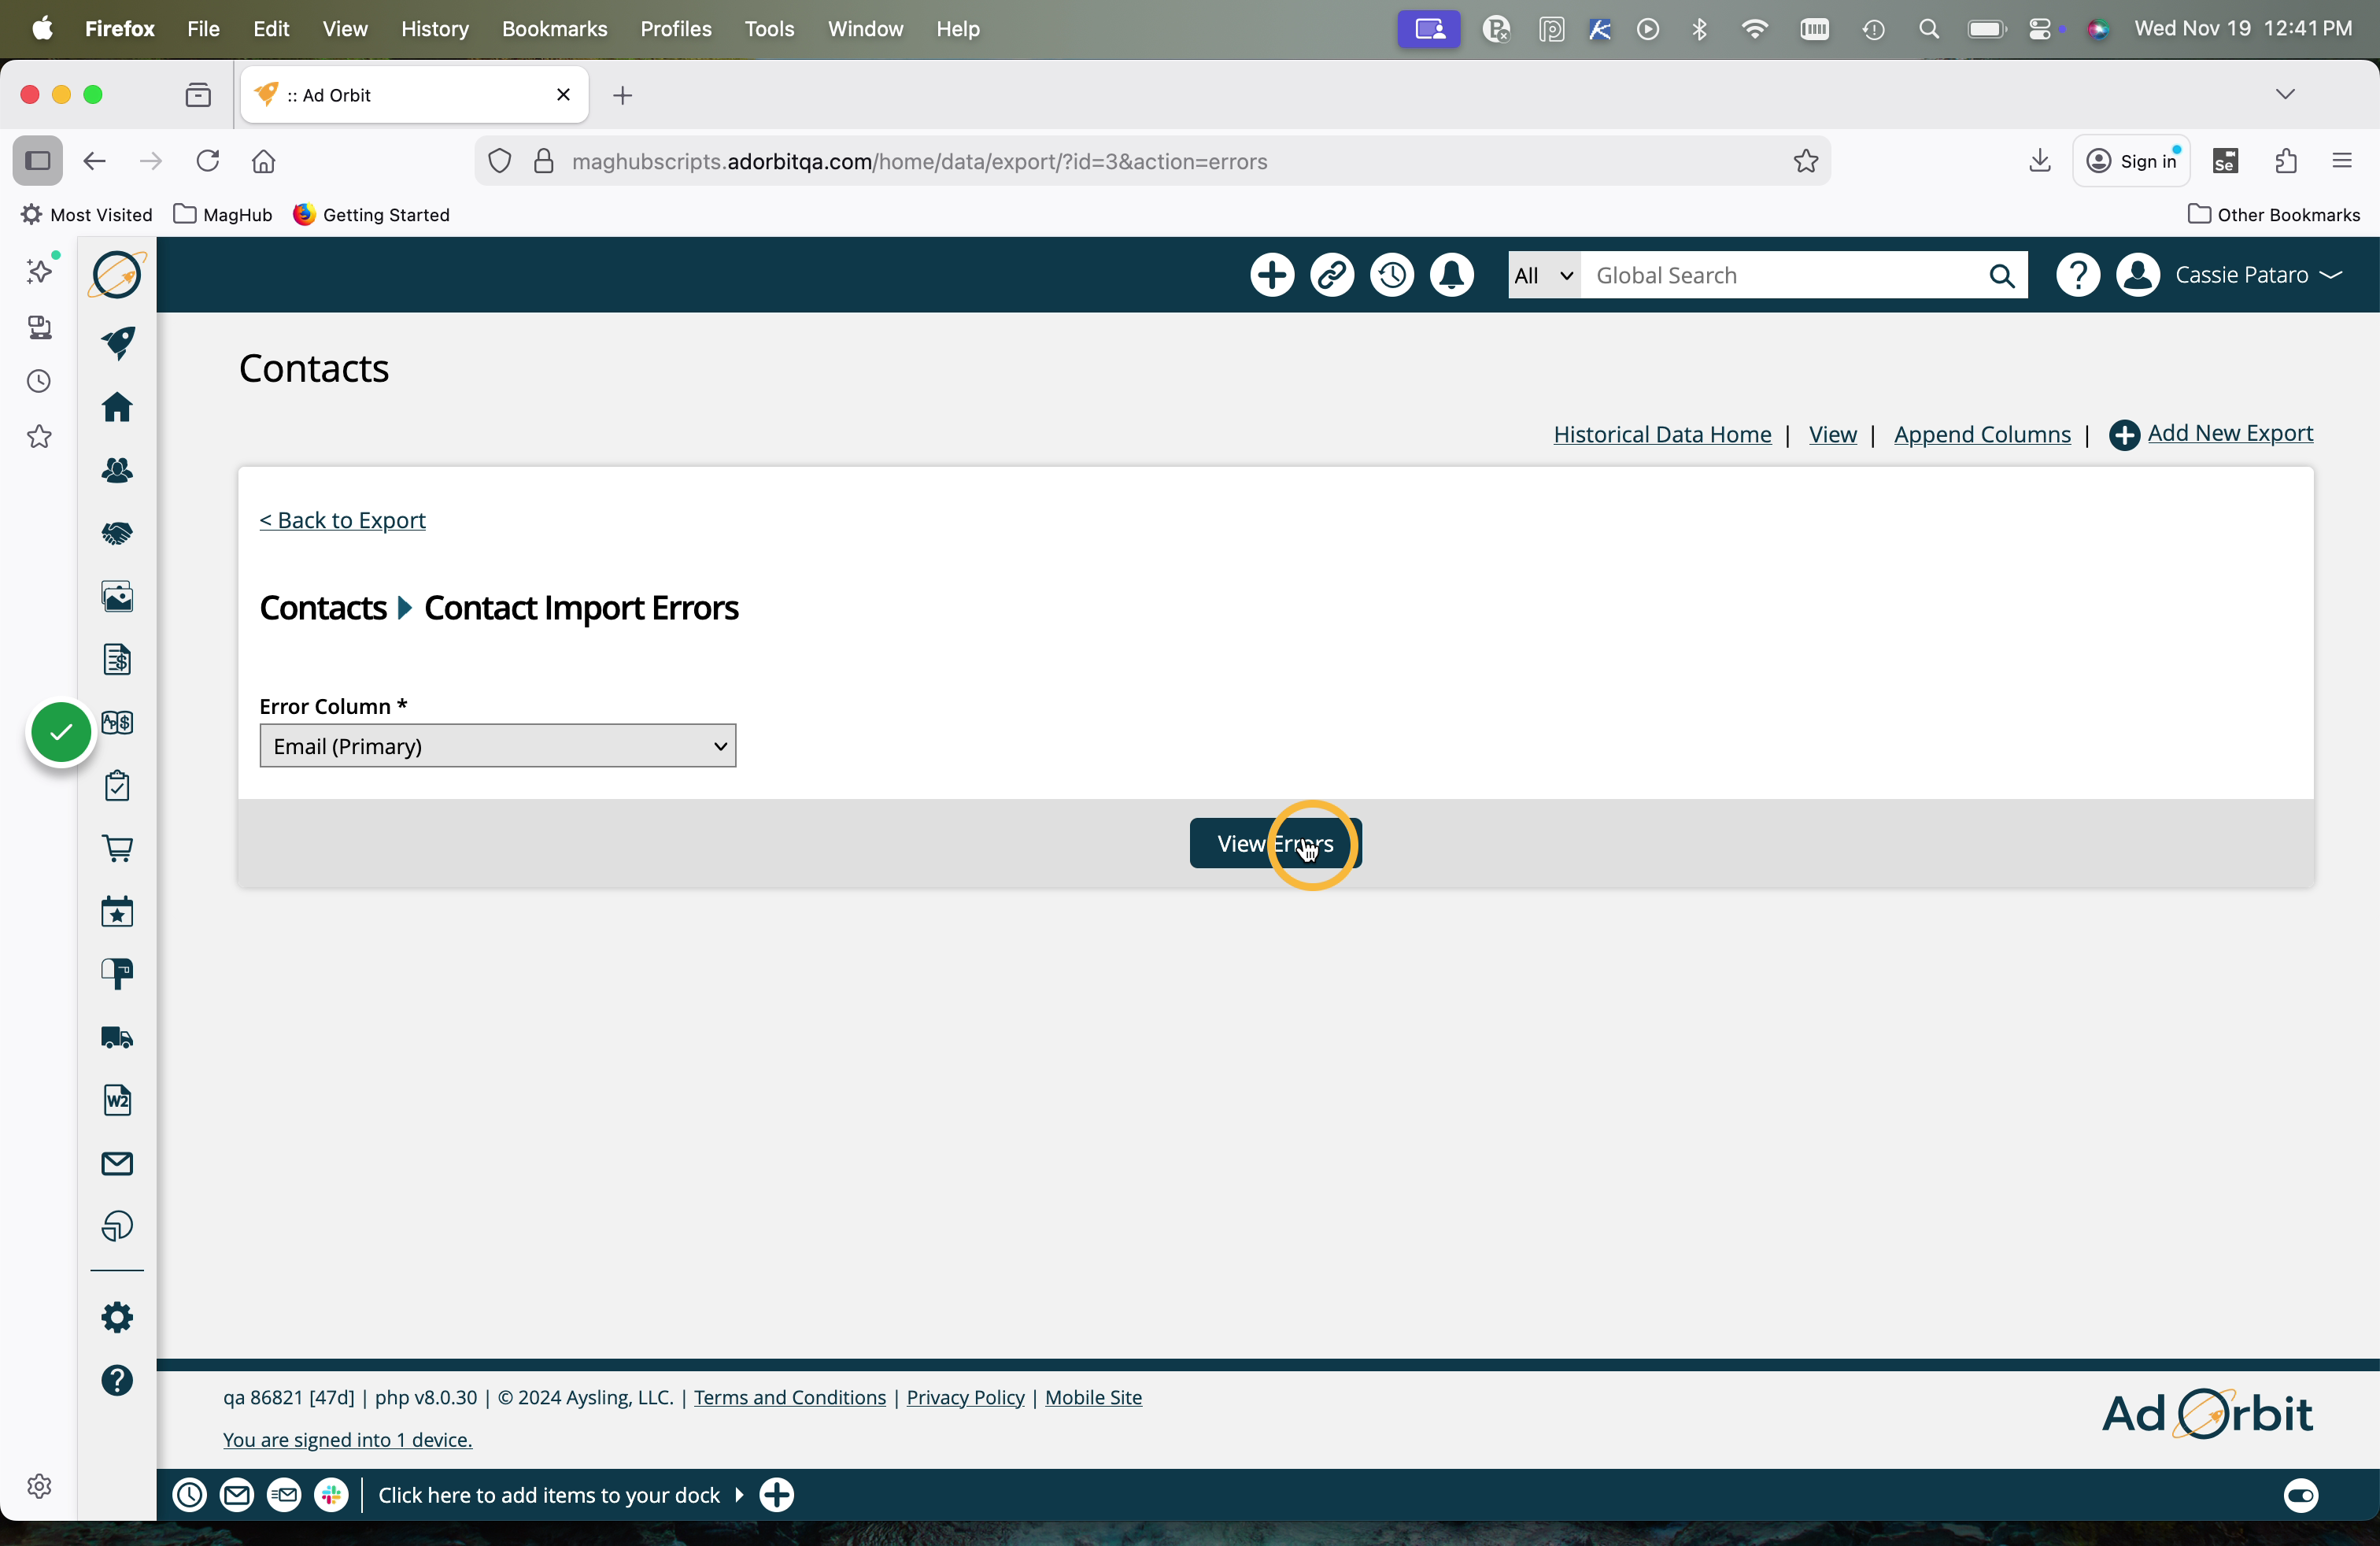
When viewing the data by only 'Errors', there's also an option to 'edit errors by column'.
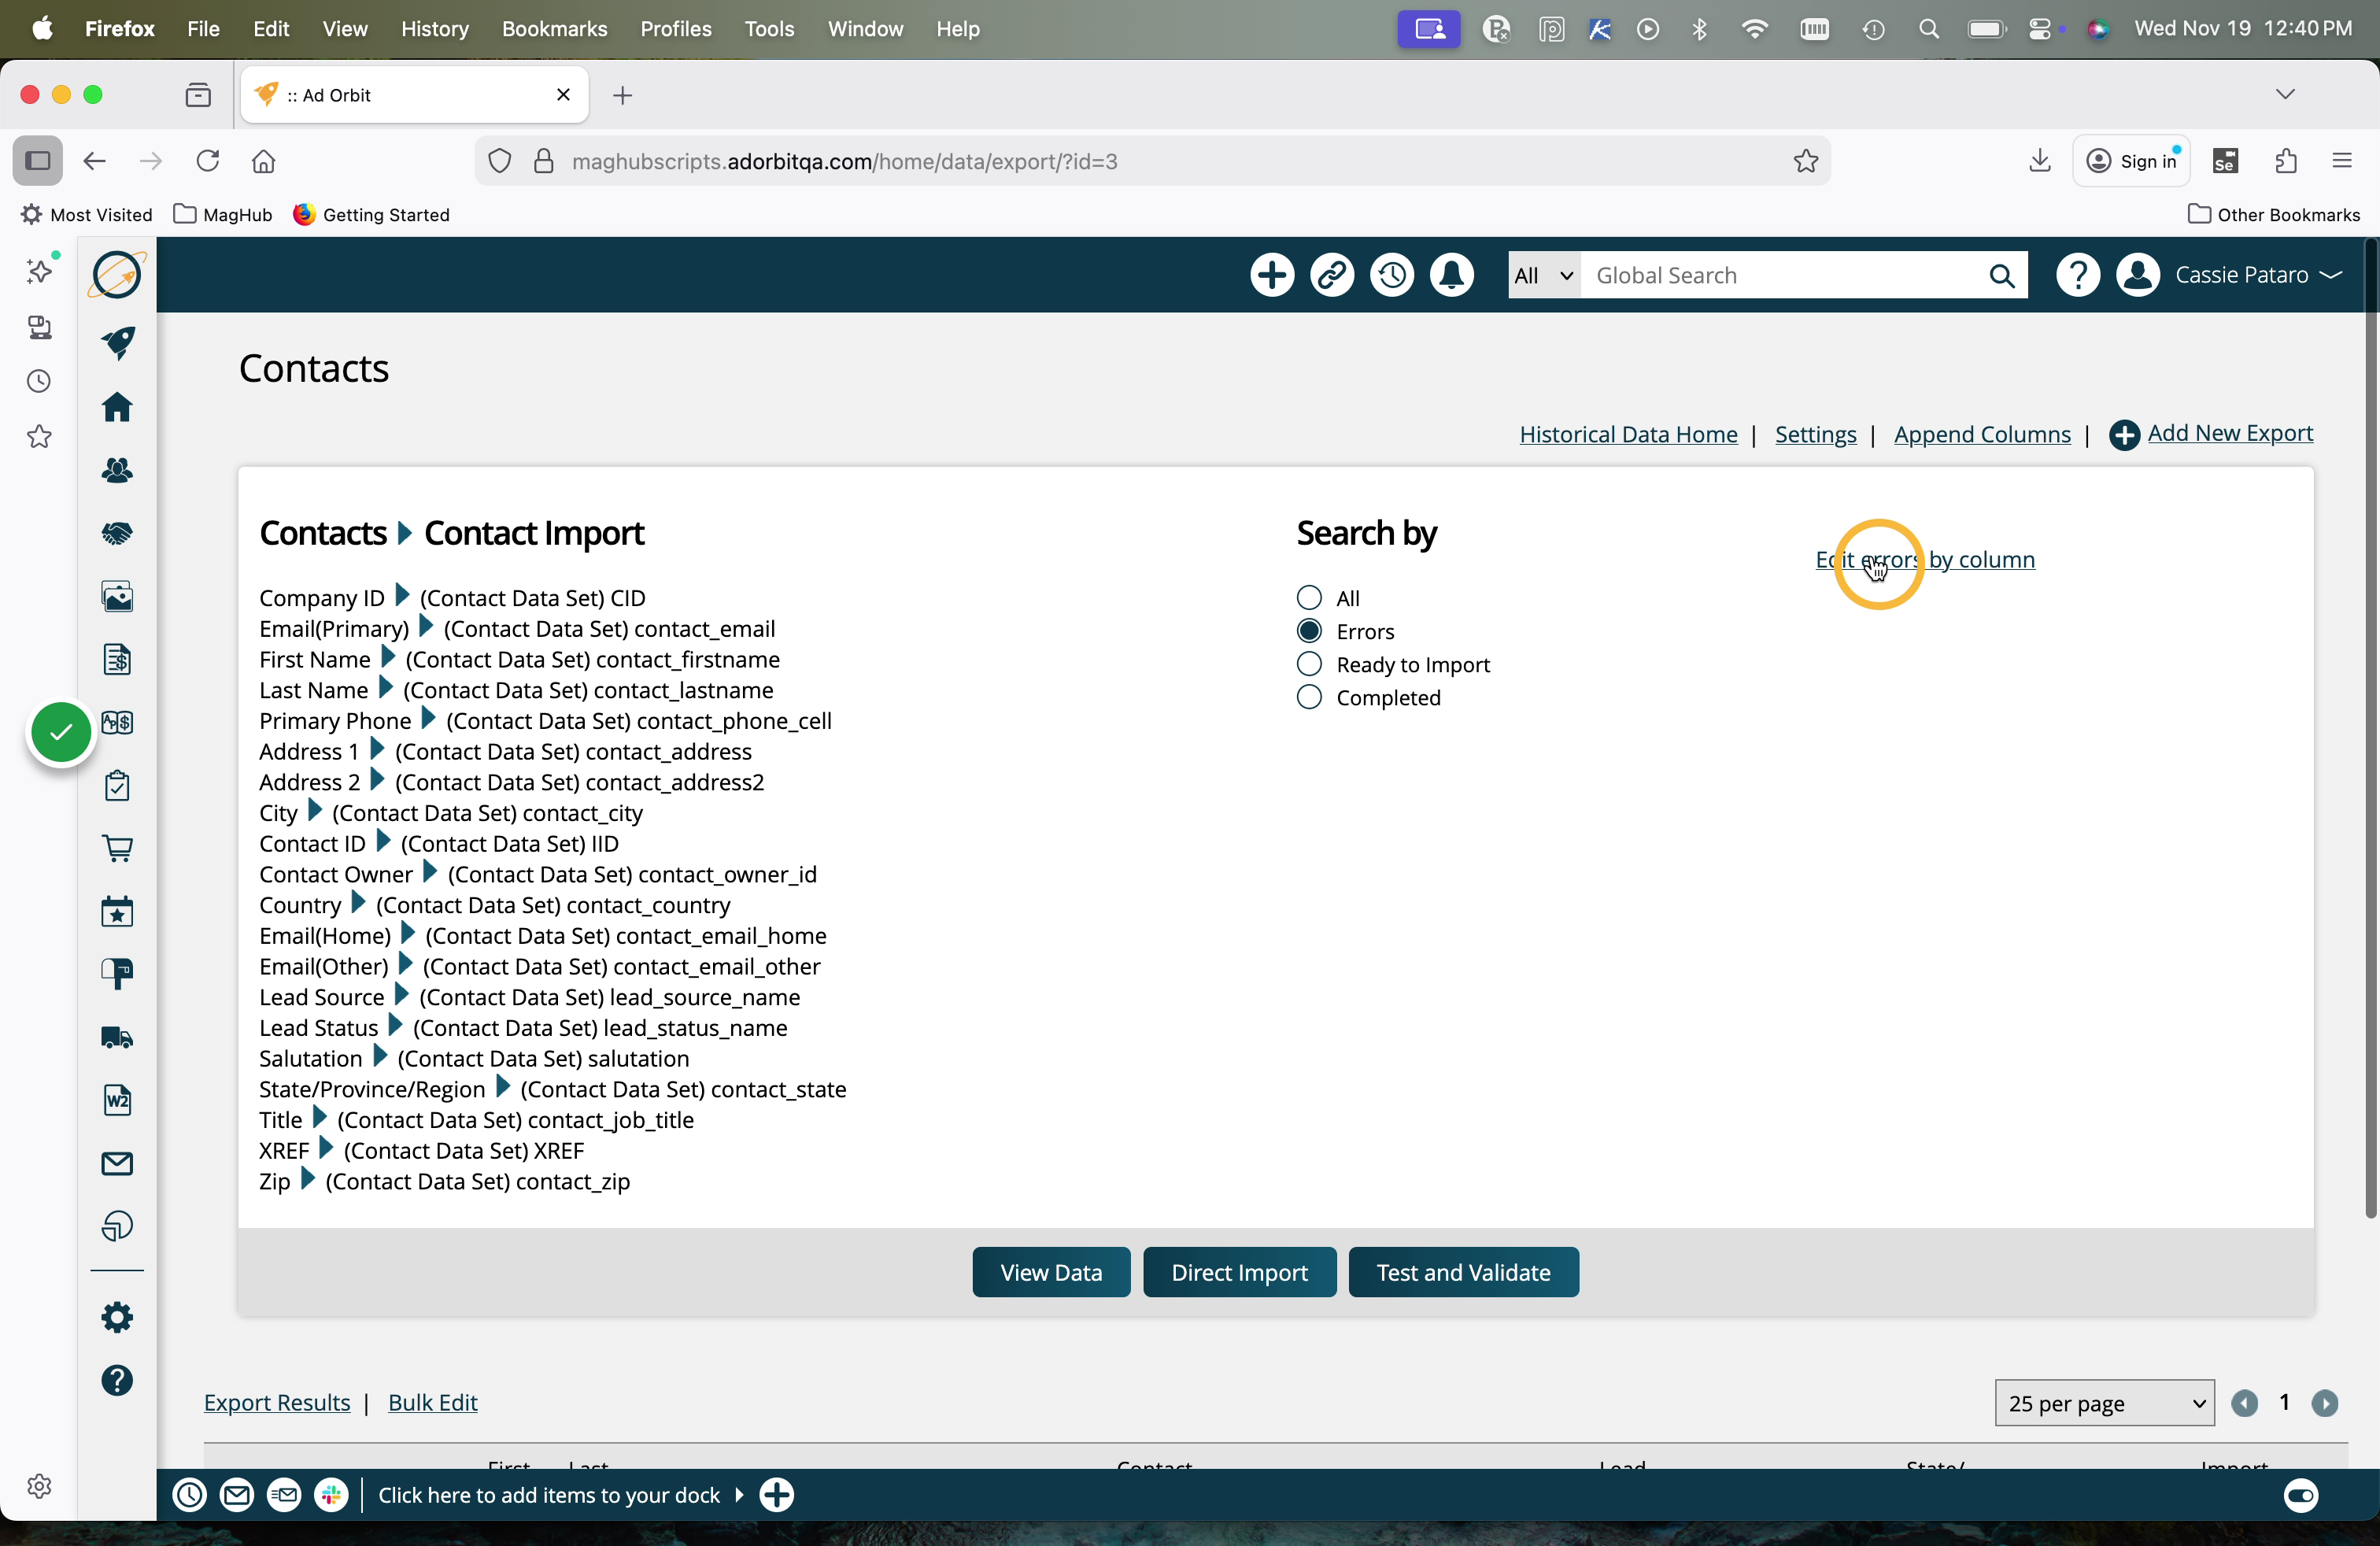
This will direct you to a new page where you can select a specific column of data that is returning errors.
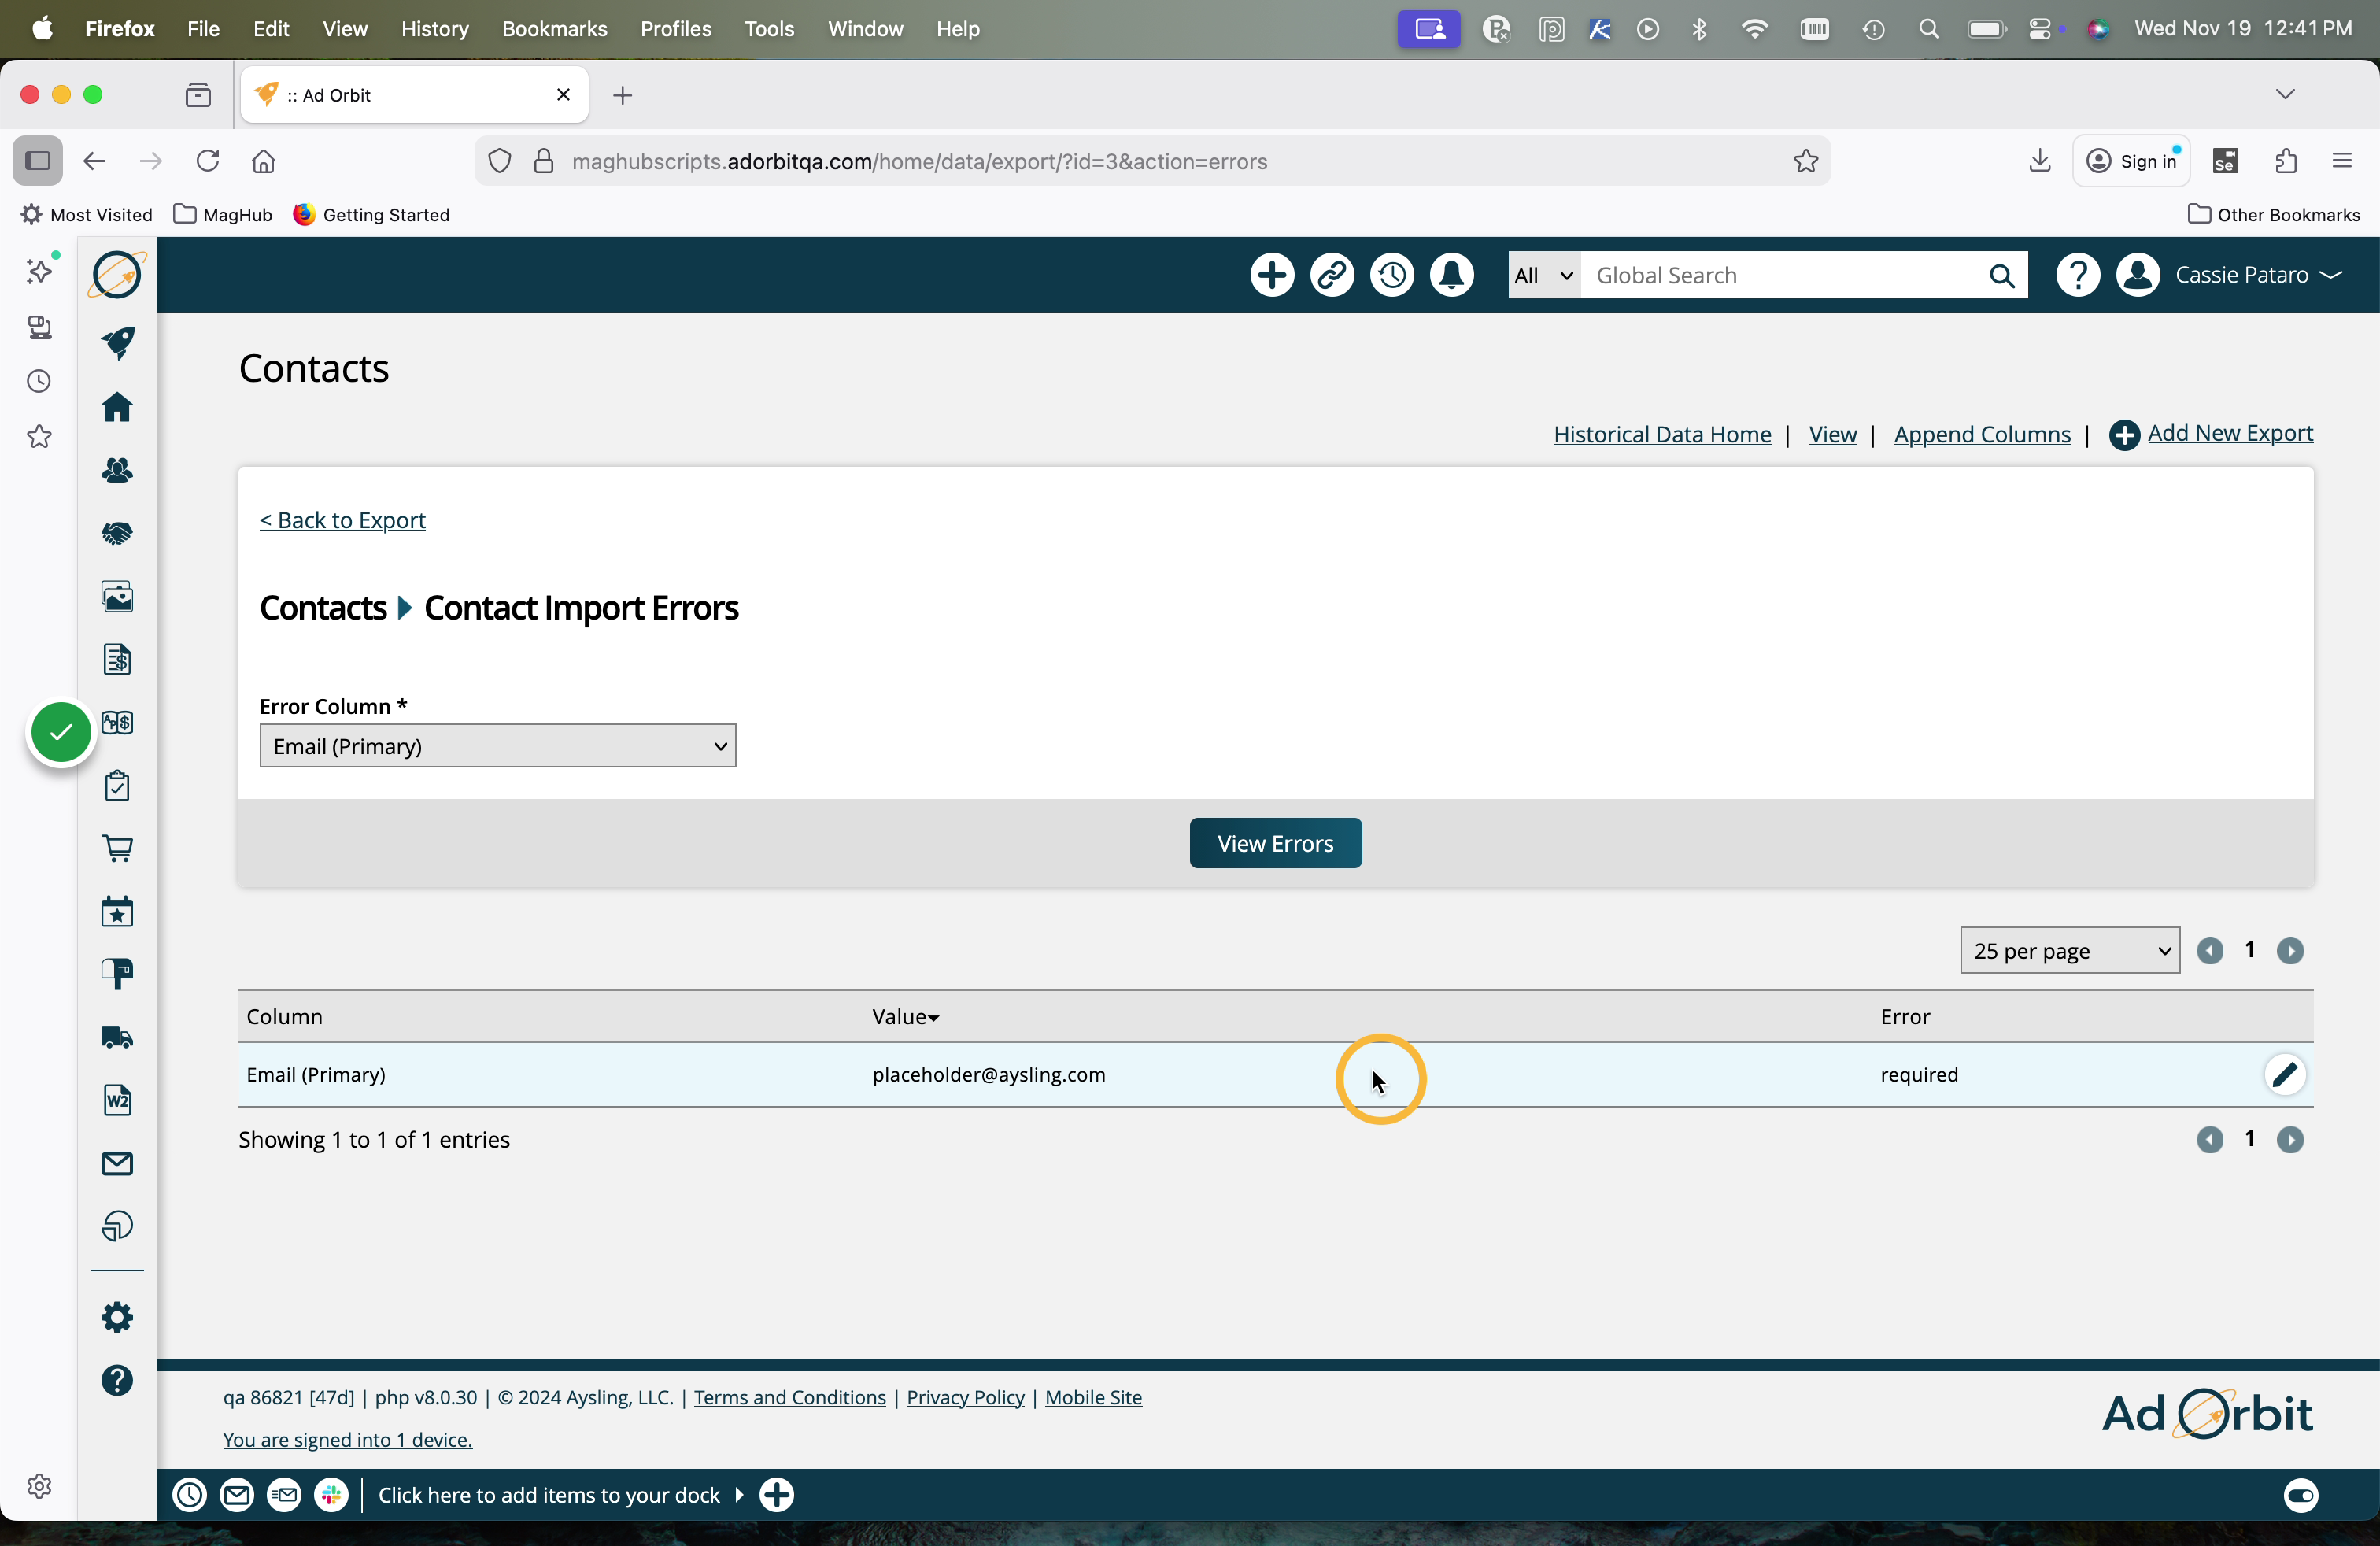
In the table, you'll see one row for every error on that column.
For example, if some of the data is missing a required field in that column, you'll see the column name, any values if applicable, and the error of 'required'.If some of the data has an invalid value for that same column, you'll see a second row that shows the same column name, the invalid value, as well as the error.
You can make changes to fix those errors as needed.
After you've fixed your errors, it's recommended to re-run the Test and Validate action. This will allow you to see if there are any remaining records with errors that you may have missed.

If there are remaining items with errors, those can either be resolved, or you have the option to unset the item from import. This means the record will not attempt to import when the Direct Import is done. The record will be skipped over.
When importing company records, you may also want to run a similarity check, which can be done from this same page.
Run the similarity check to find out what companies closely match other accounts in your system. After the similarity check occurs, you can filter to find companies that are similar to companies in your system; then you can decide to either import the companies, remove them, or merge them with the current company.
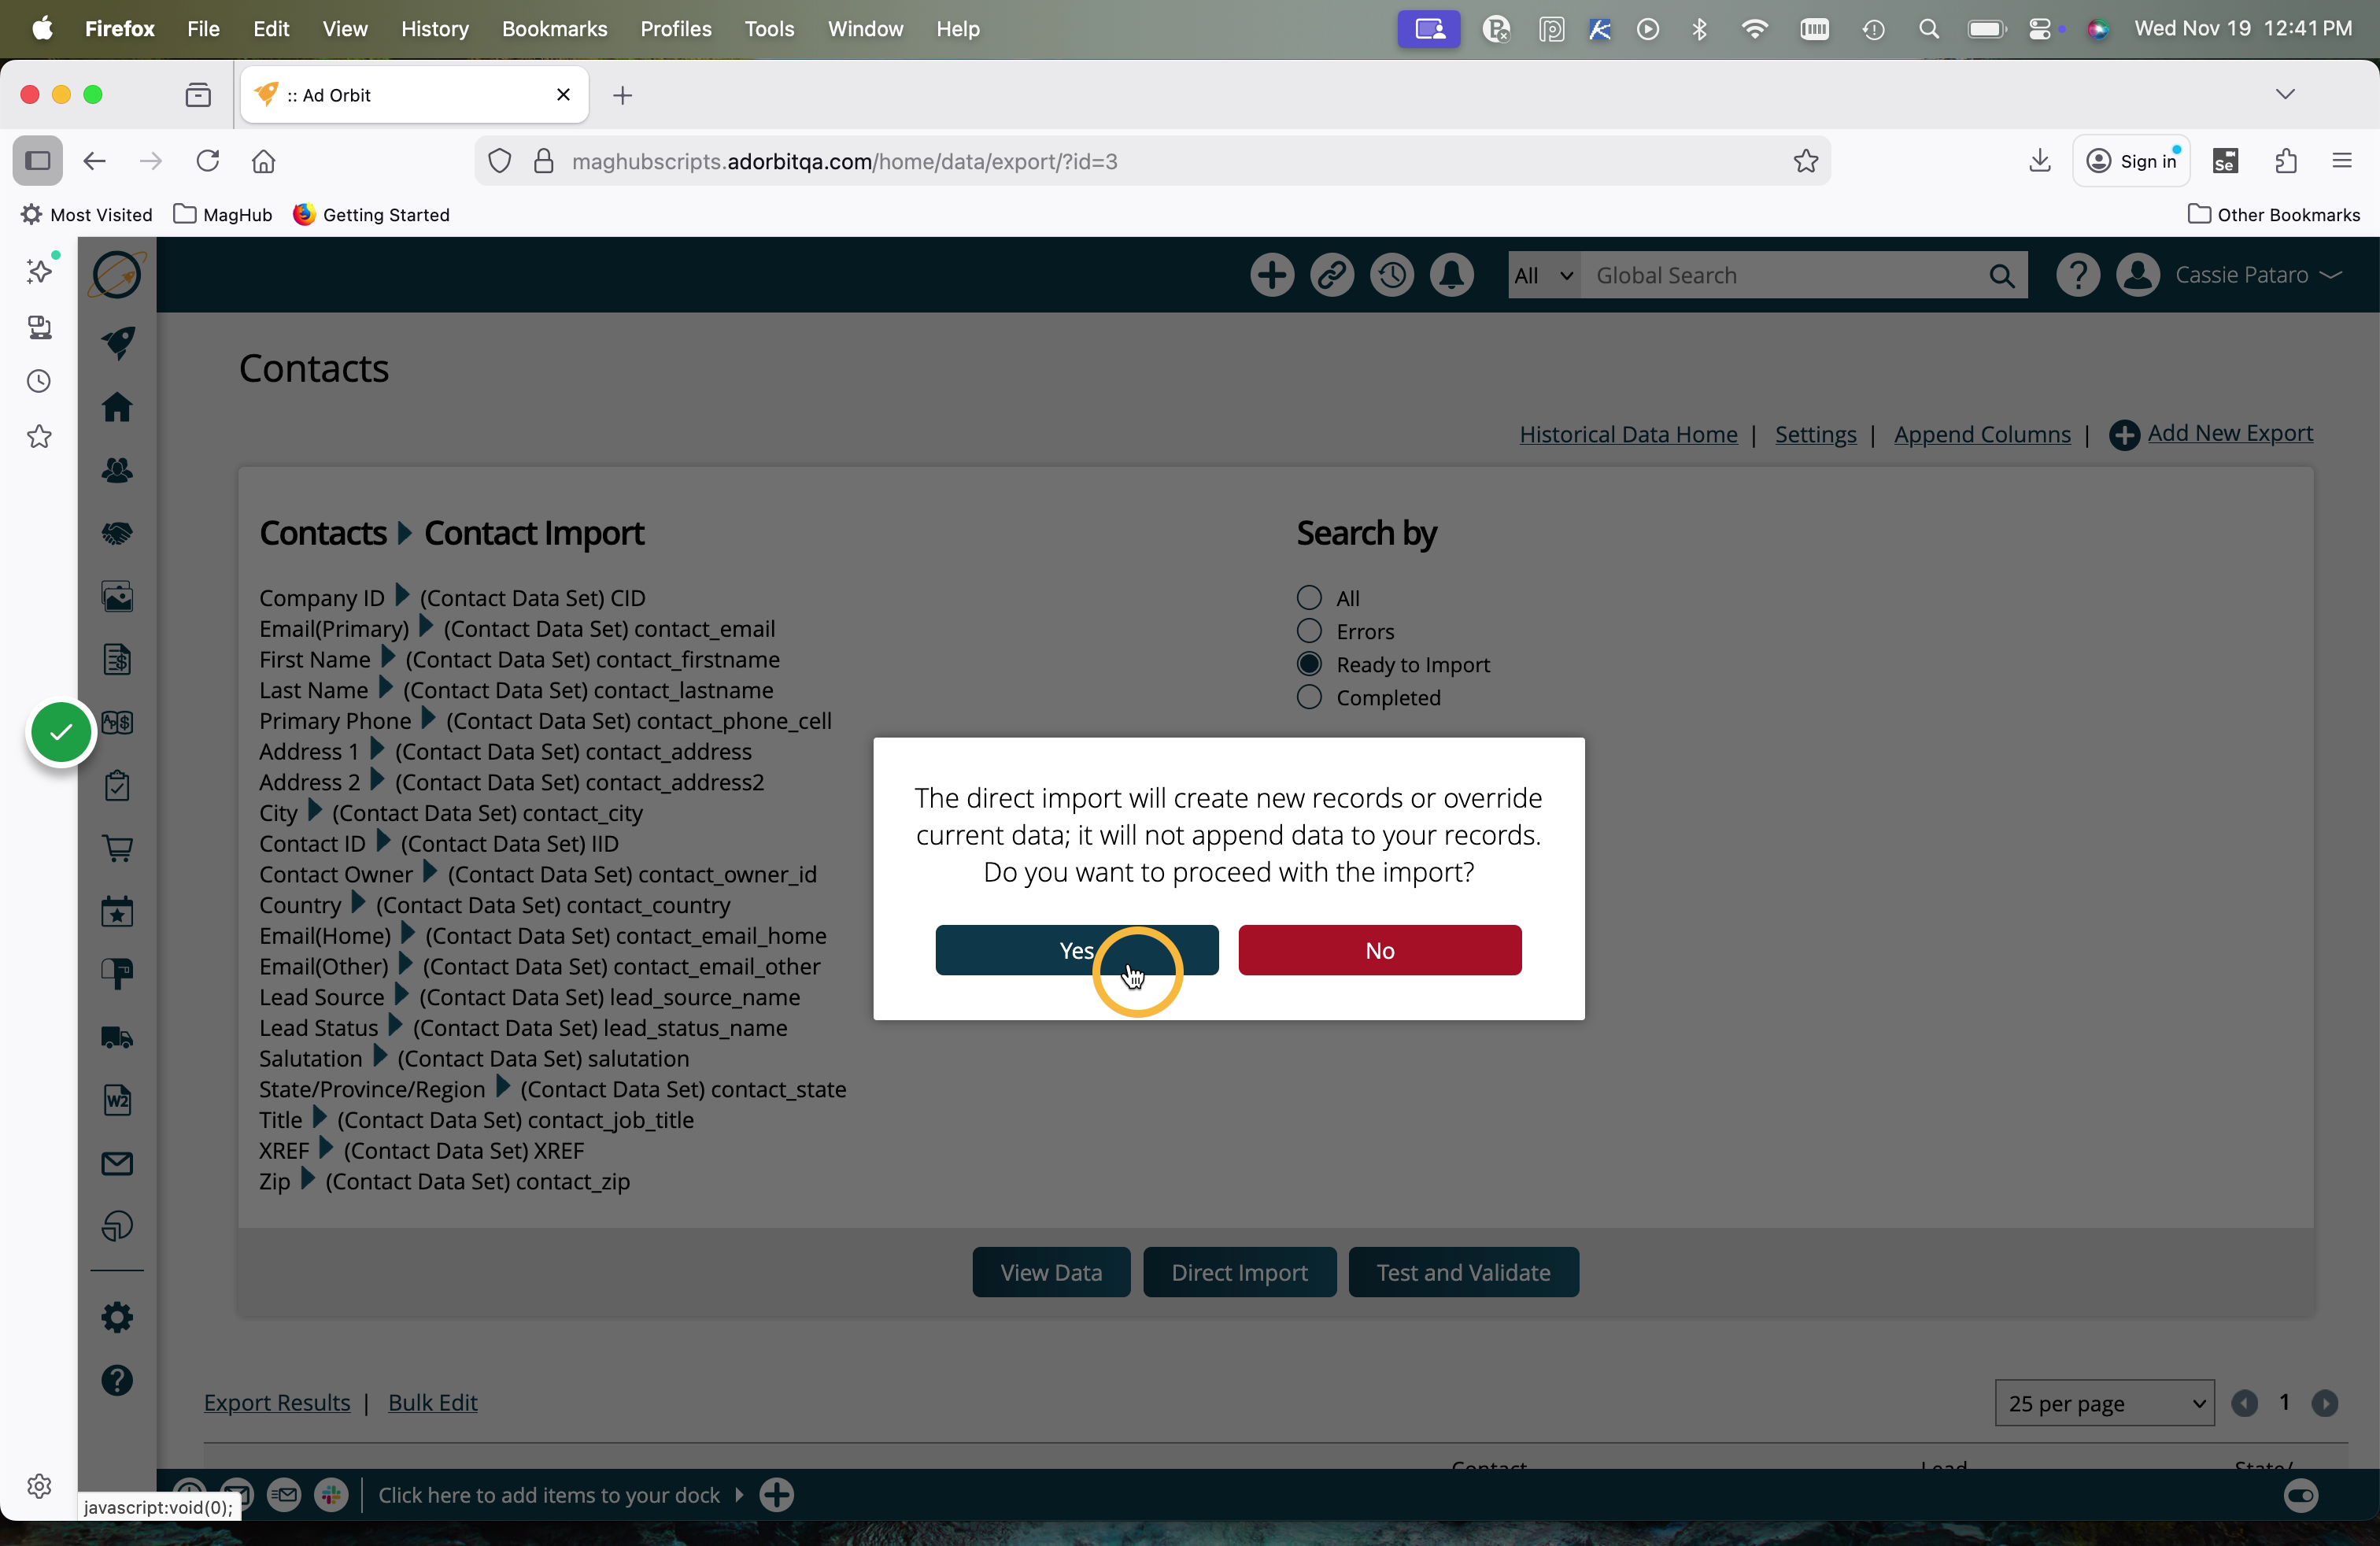
The last step in the process is to perform the Direct Import.
Important
The direct import will create new records or override existing data, it will not append data to your records.
Click Yes in the popup to confirm you want to perform the direct import.
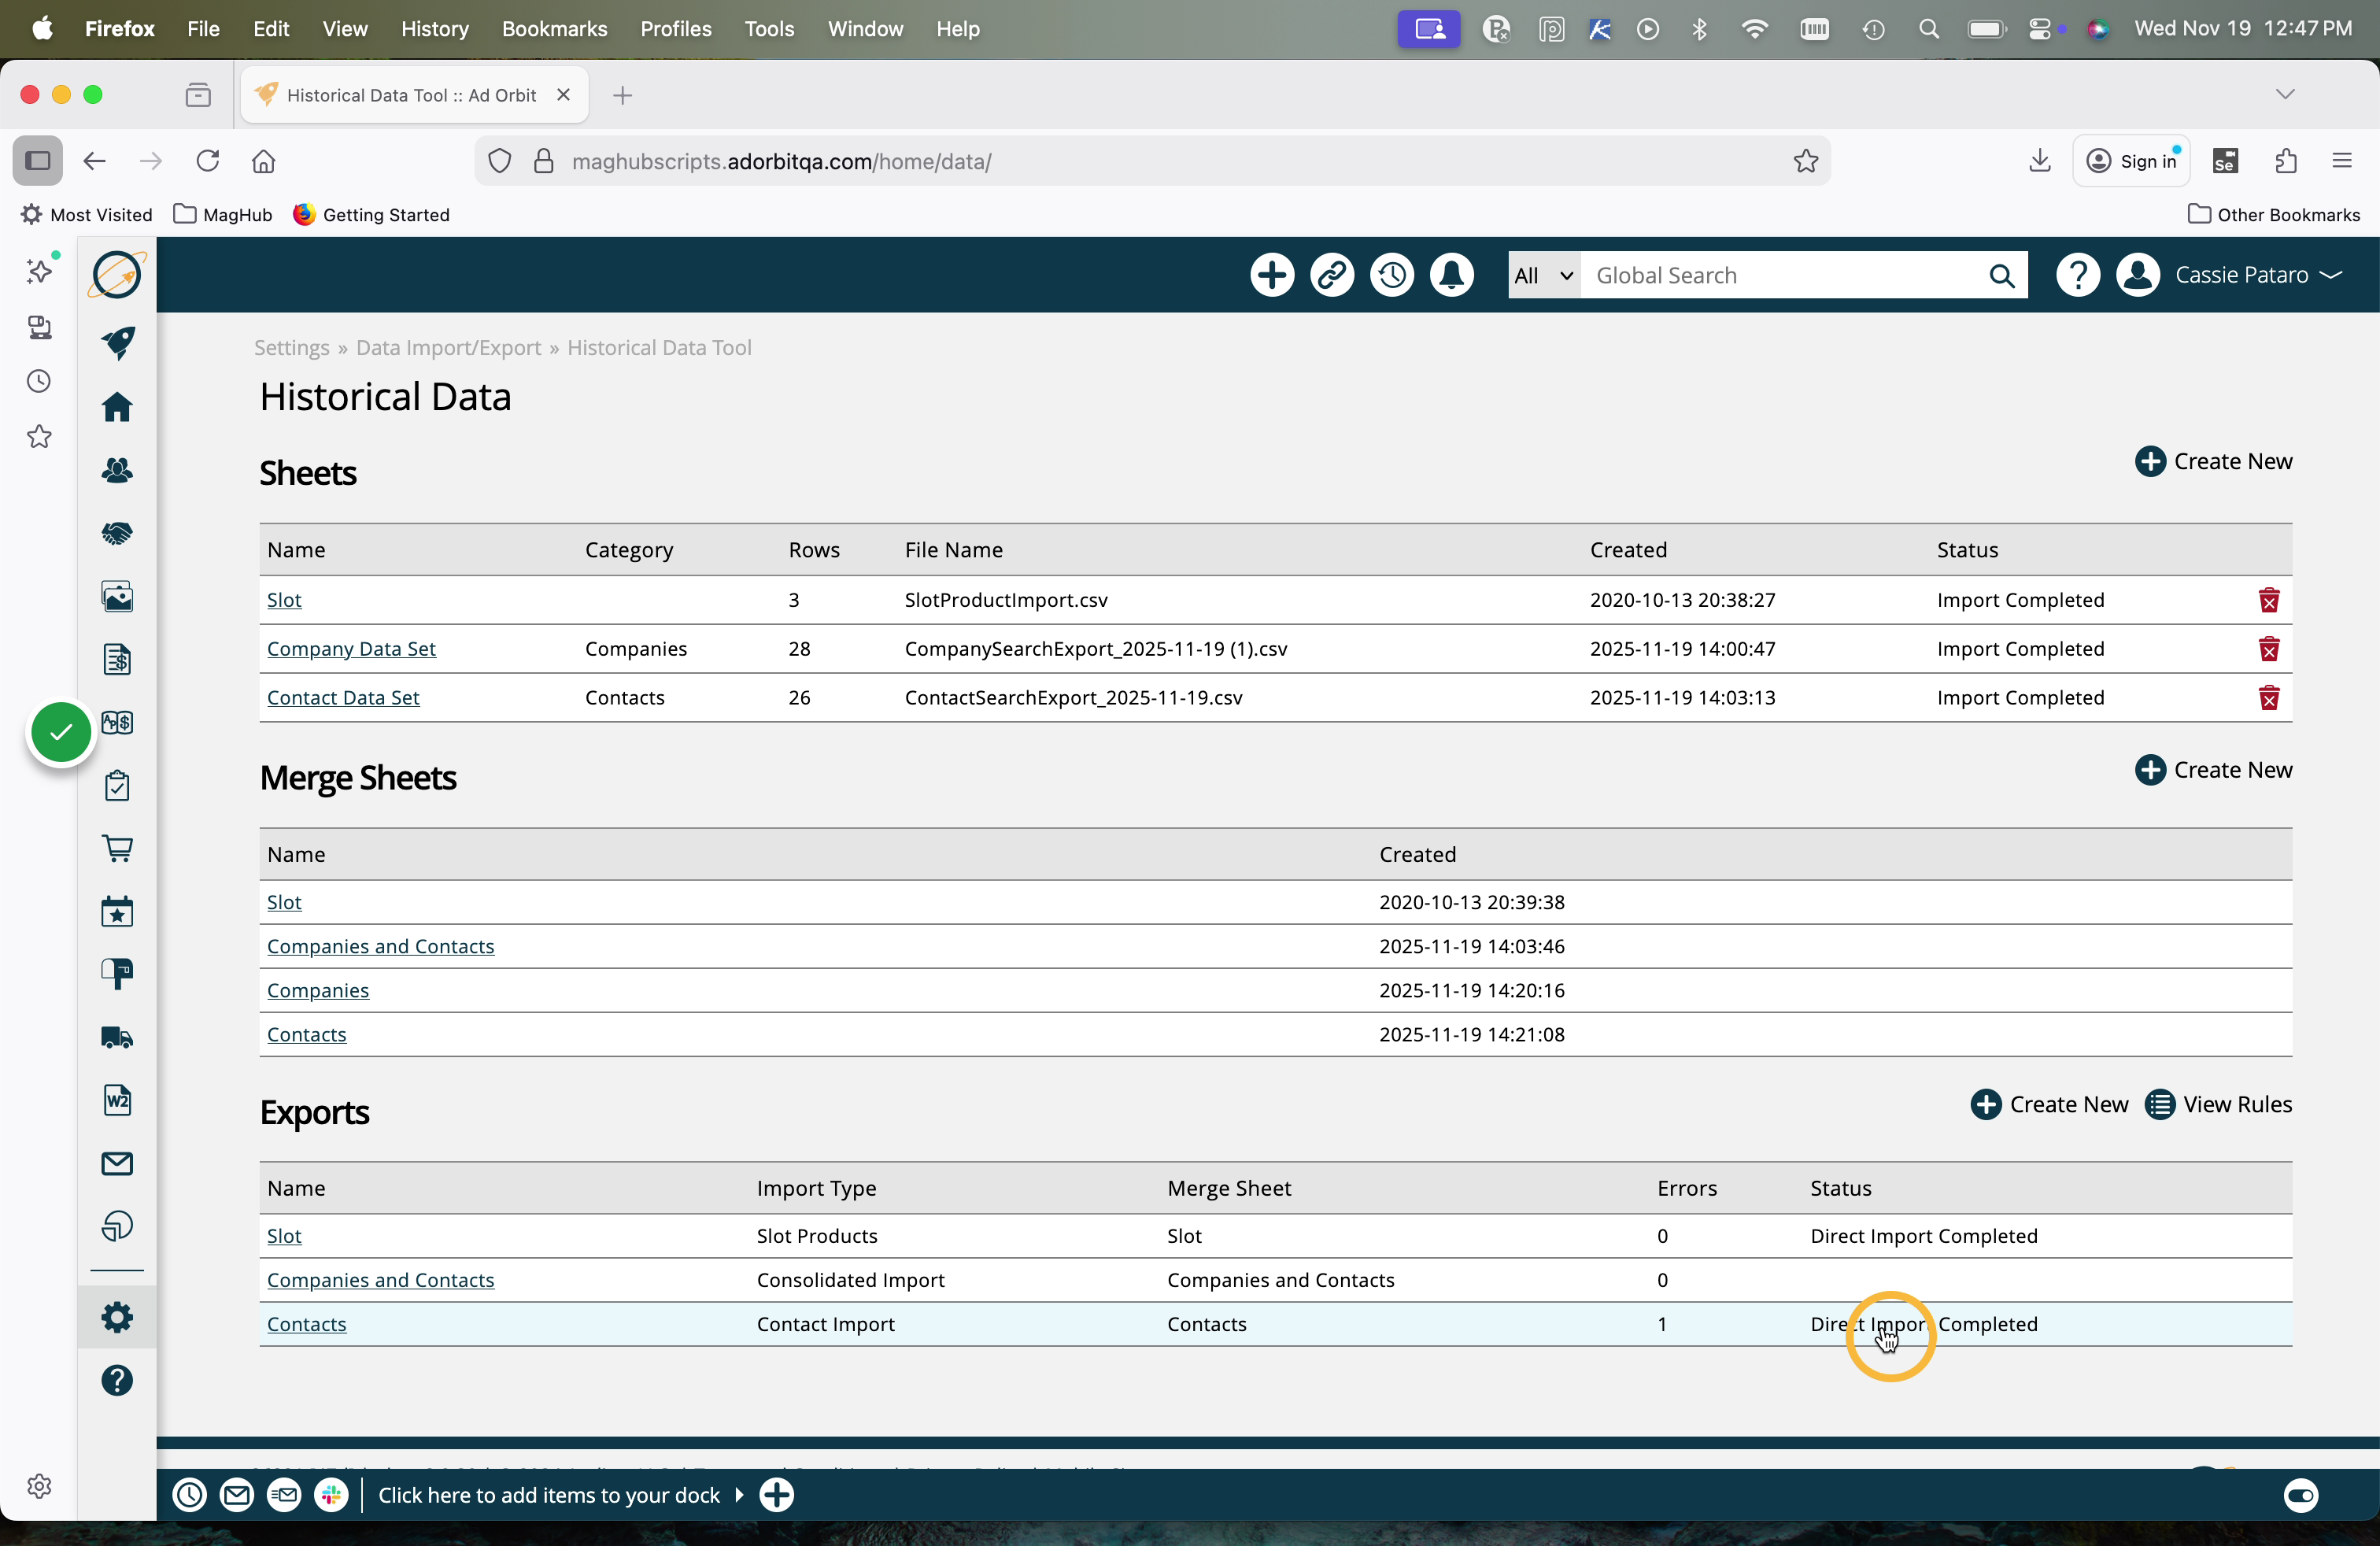
Once the status of your Export is showing 'Direct Import Completed', your data will be fully in the system.
Tip
You can always click on the name in the Exports table to view your data and see all completed imports.
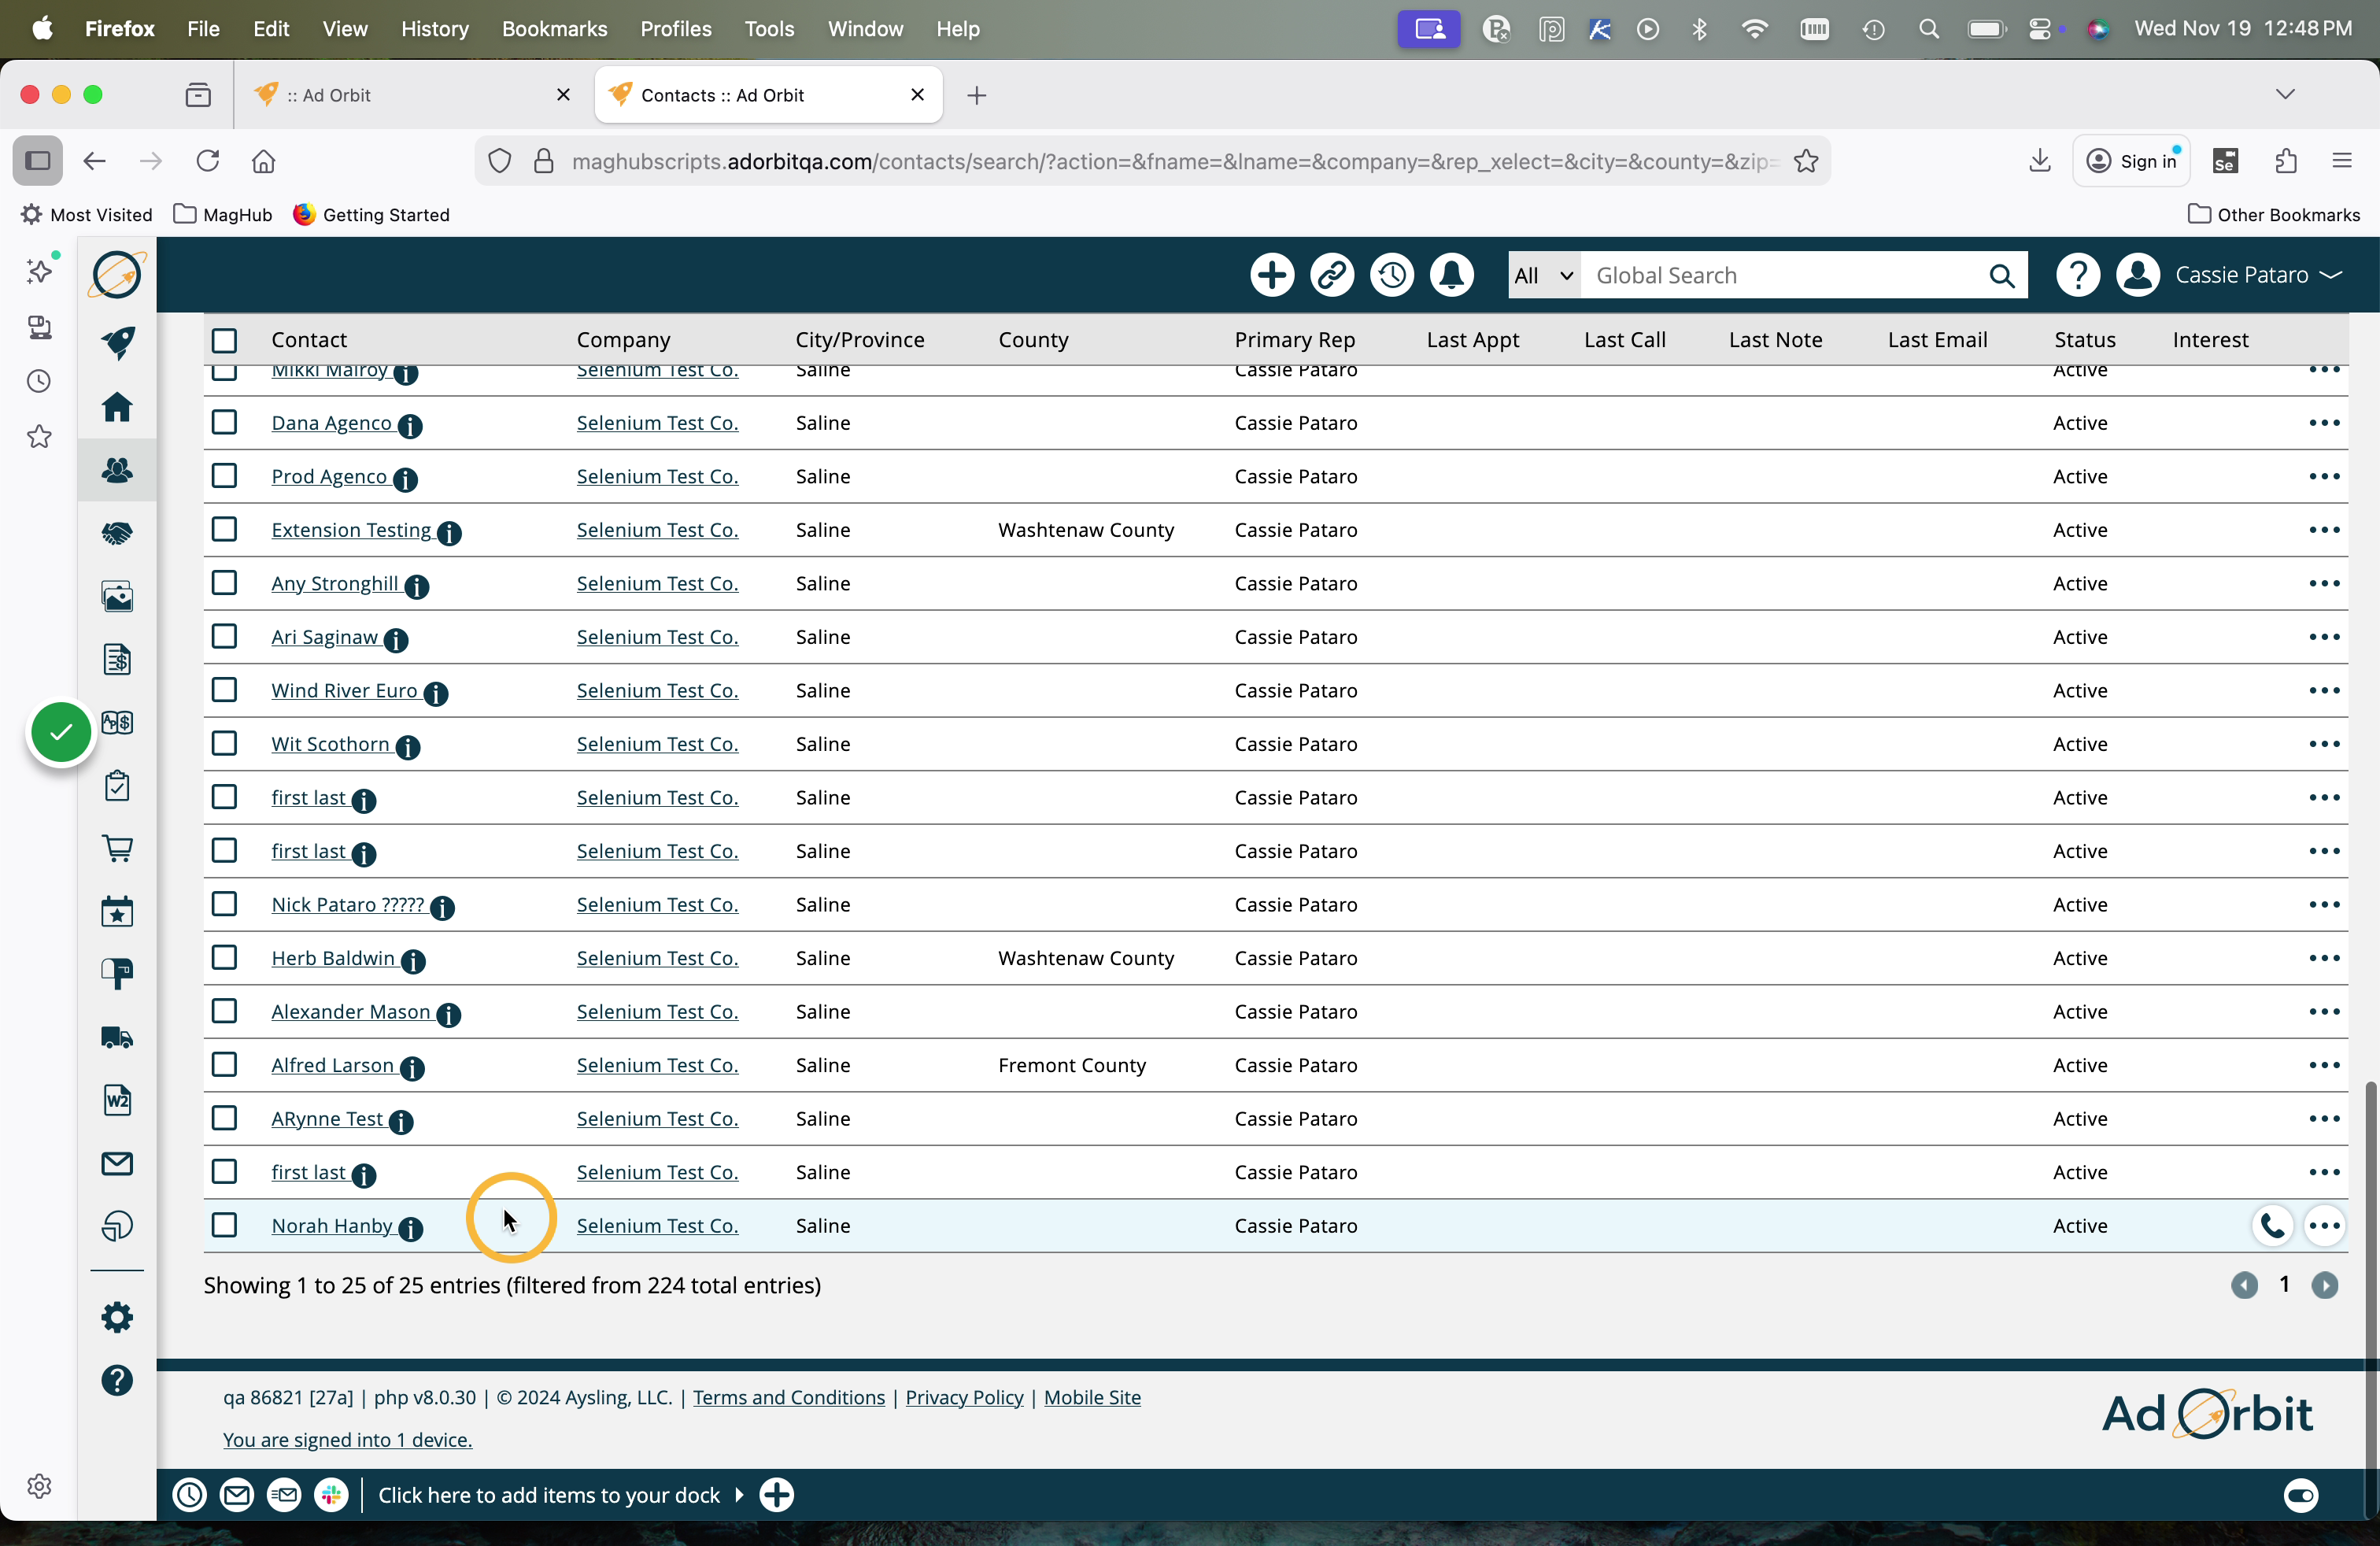
Once the direct import is finished, the data will appear in your Ad Orbit account.
New 11/19/2025