Sending and Managing Proof Requests from all Tickets Types
When you need to get approval from a customer on an asset on a service ticket, you need to first make sure the service ticket is assigned to a user and is marked for brand approval. A user must have permission to mark a ticket as brand approval. If you don't have permission, you can request brand approval and wait for an approver to update your ticket before sending the proof.
You can send a proof on any service ticket with an asset. Once you have an asset uploaded to a ticket, mark the ticket to request brand approval.
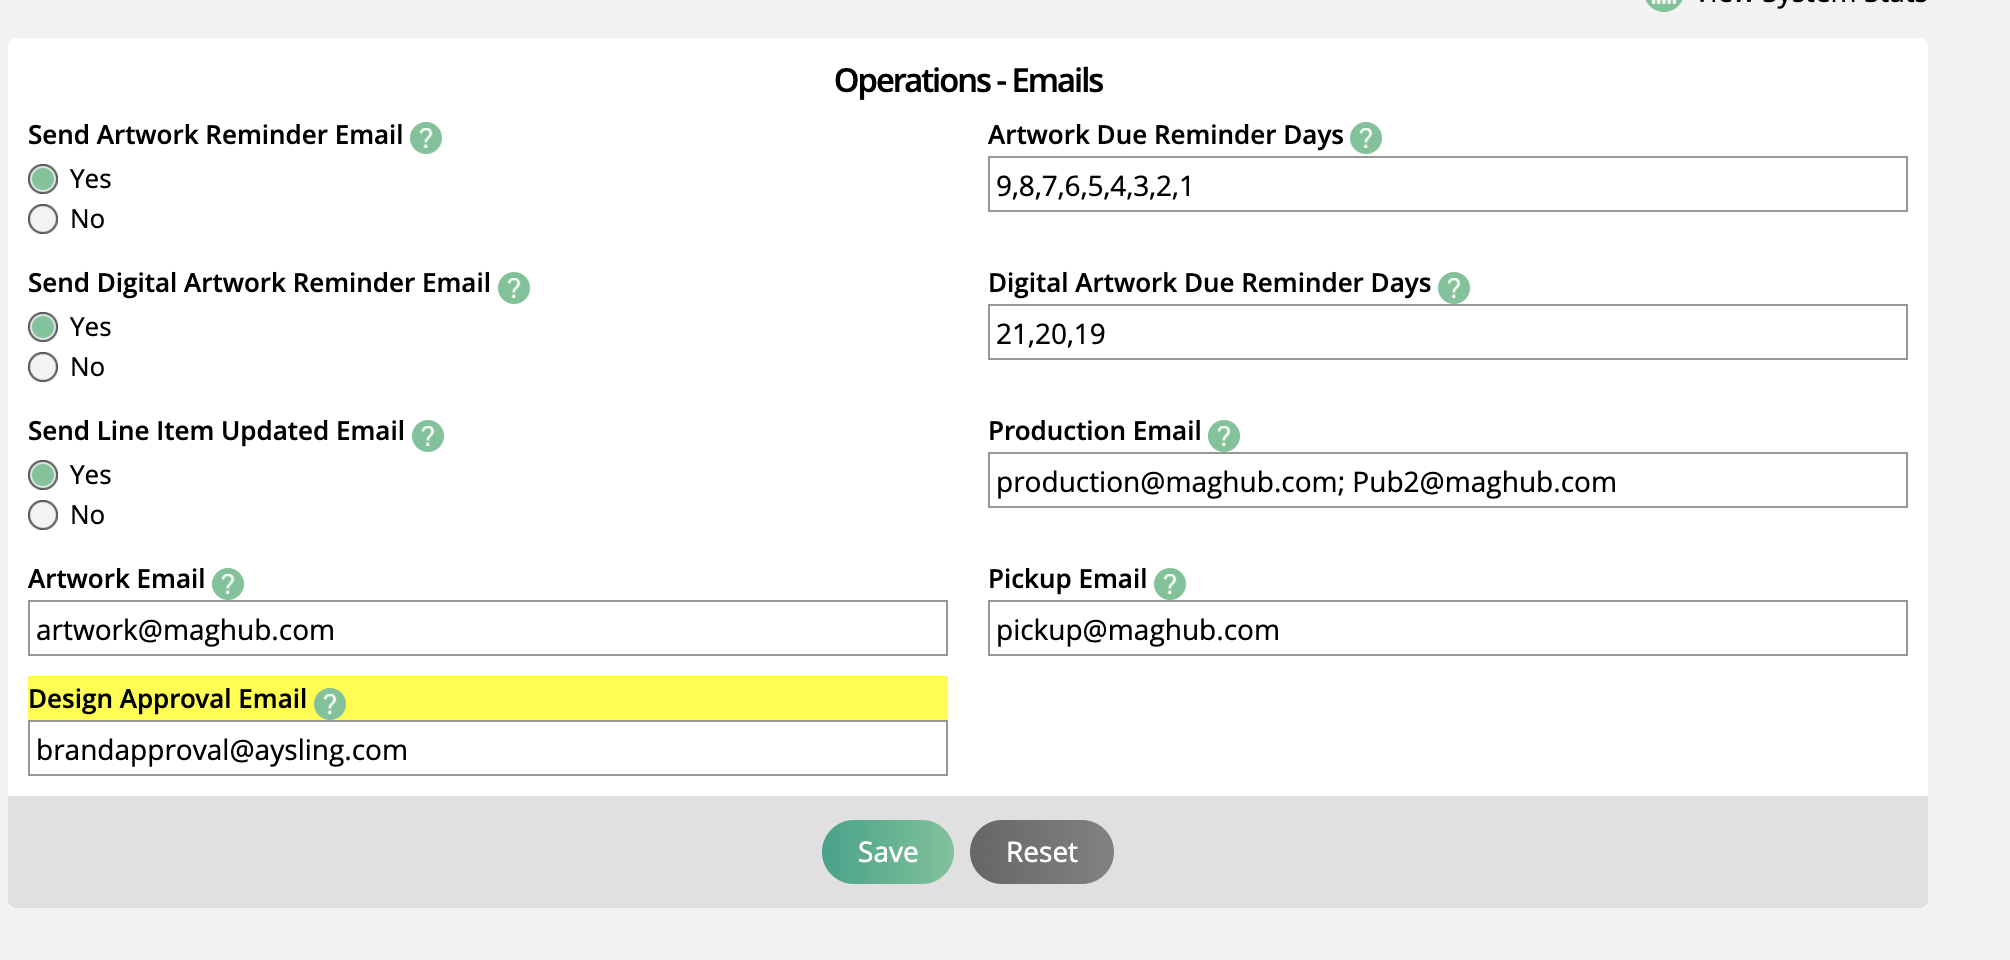
The brand approval will go out from the Design Approval Email in the configuration setting, to any user with the permission to do brand approval and update the ticket.
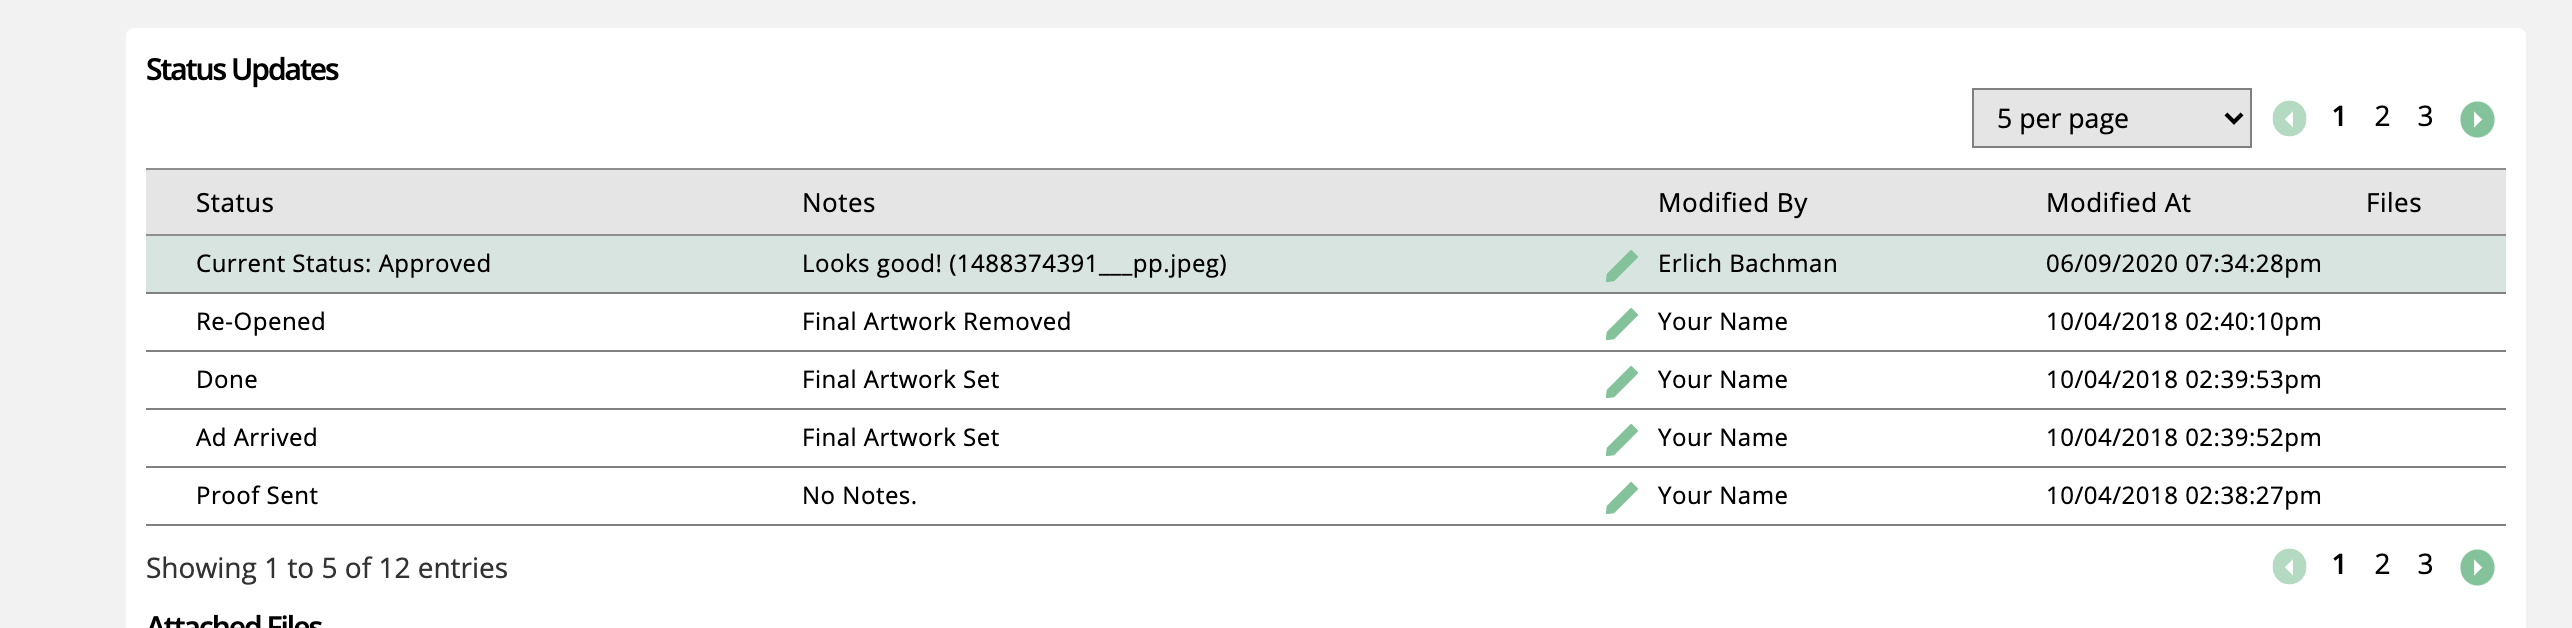
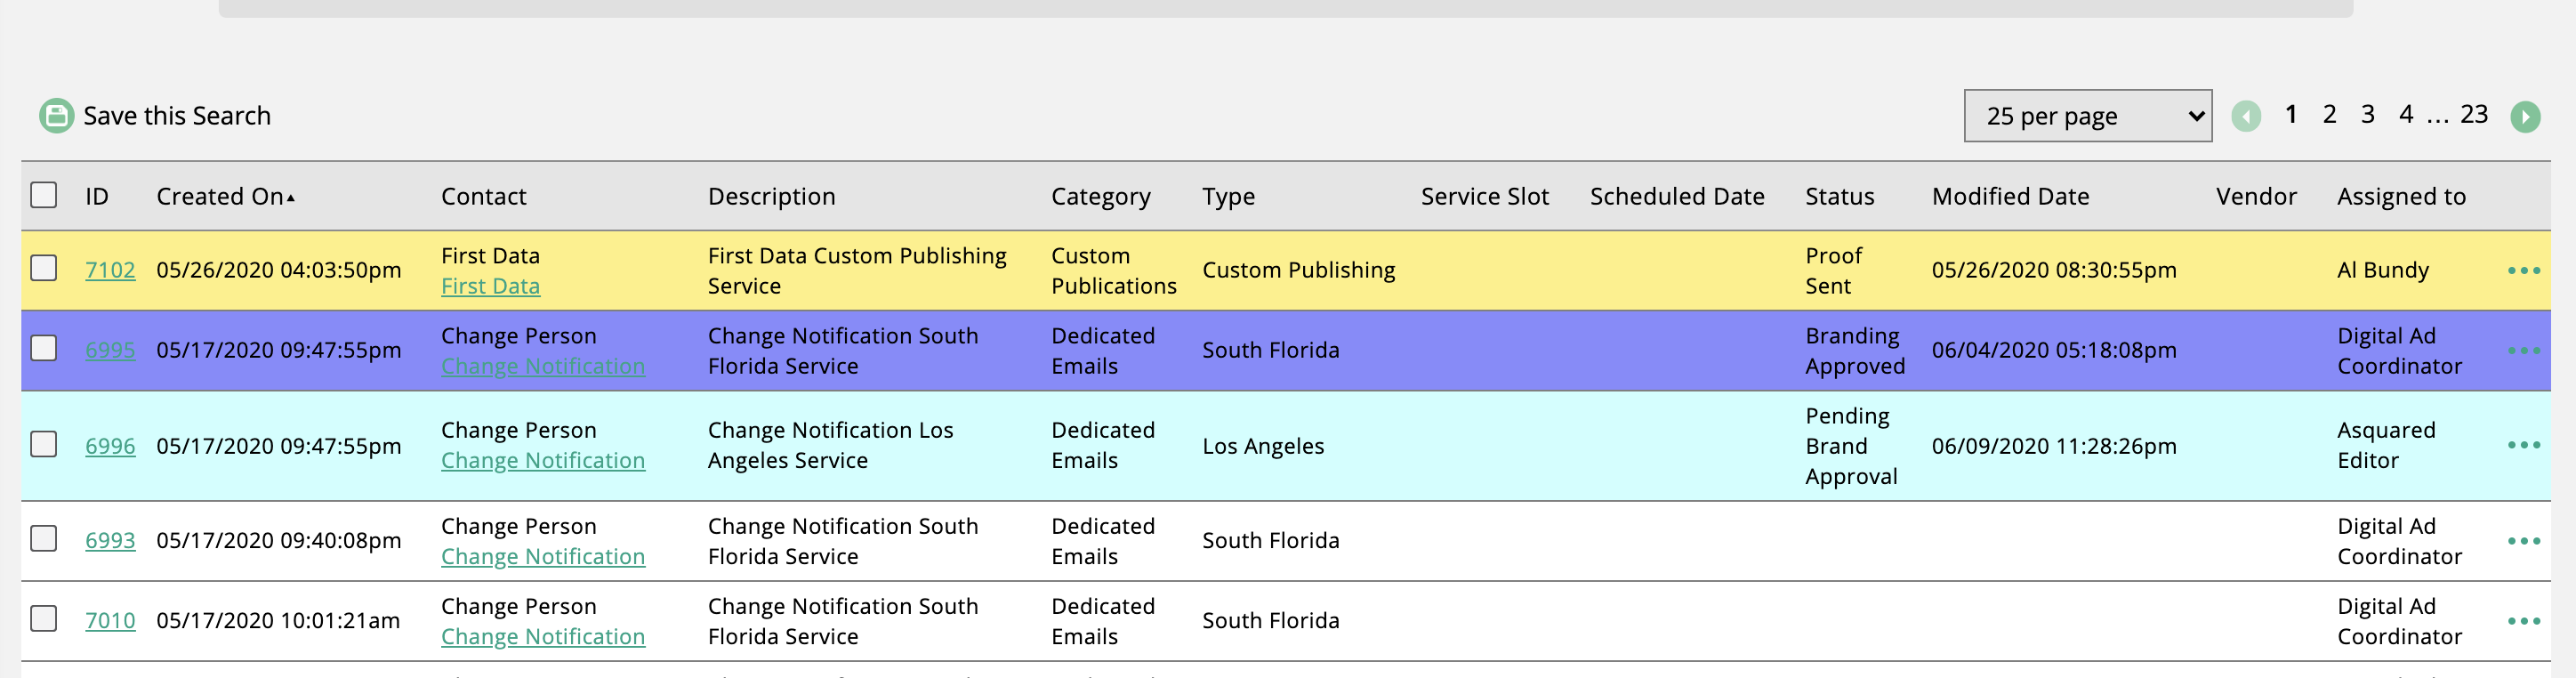
Users can also find all tickets requesting Brand Approval on the service ticket page by looking for any ticket with the status of Pending Brand Approval. And approved Tickets will have the Brand Approved status.
With a brand approved service, you can go to compose email on the ticket to send the proof with the asset to the customer.
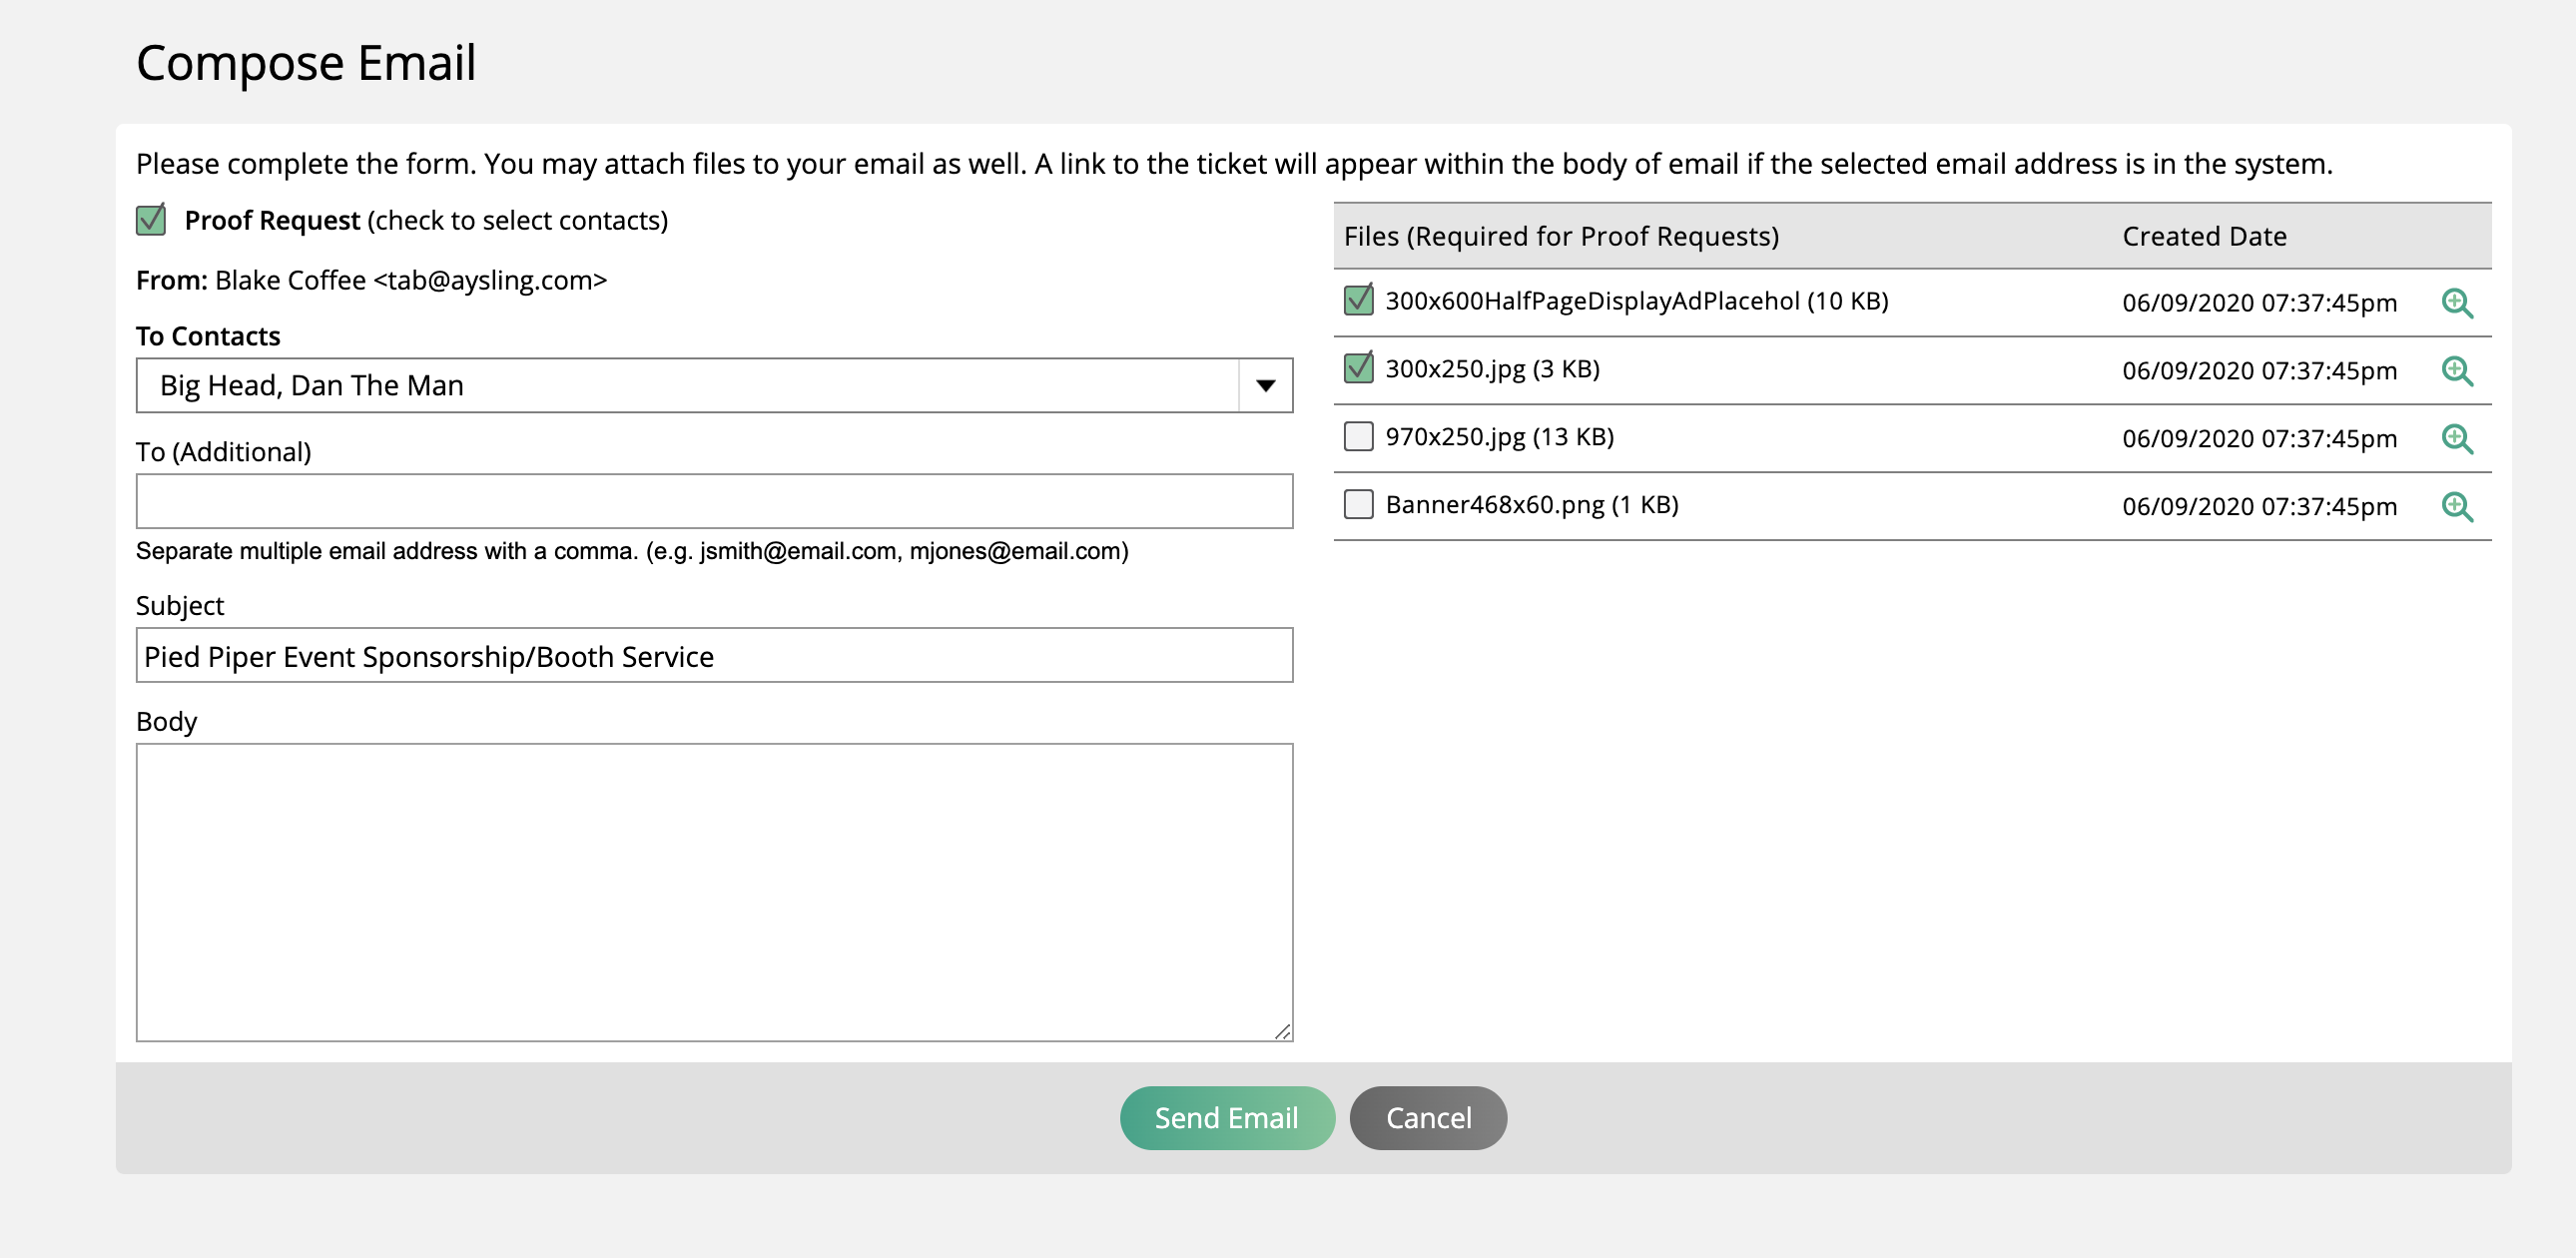
Select the assets you want to send to the customer and who you want to receive the email.
A customer can review proofs by logging into their client center account, or by using the link in your proof request email. No matter how the customer gets to the proof, they can add annotations to a file, approve the proof, or decline it, and add notes for design revisions.
The artwork contact and any contact set to receive artwork notifications will receive your proof email.
When they click.on the link from the proof email, they won't have to log in to approve or decline the proof, but they won't have the option to review other proofs and you won't have details of who viewed the proof; the approved will be anonymous.
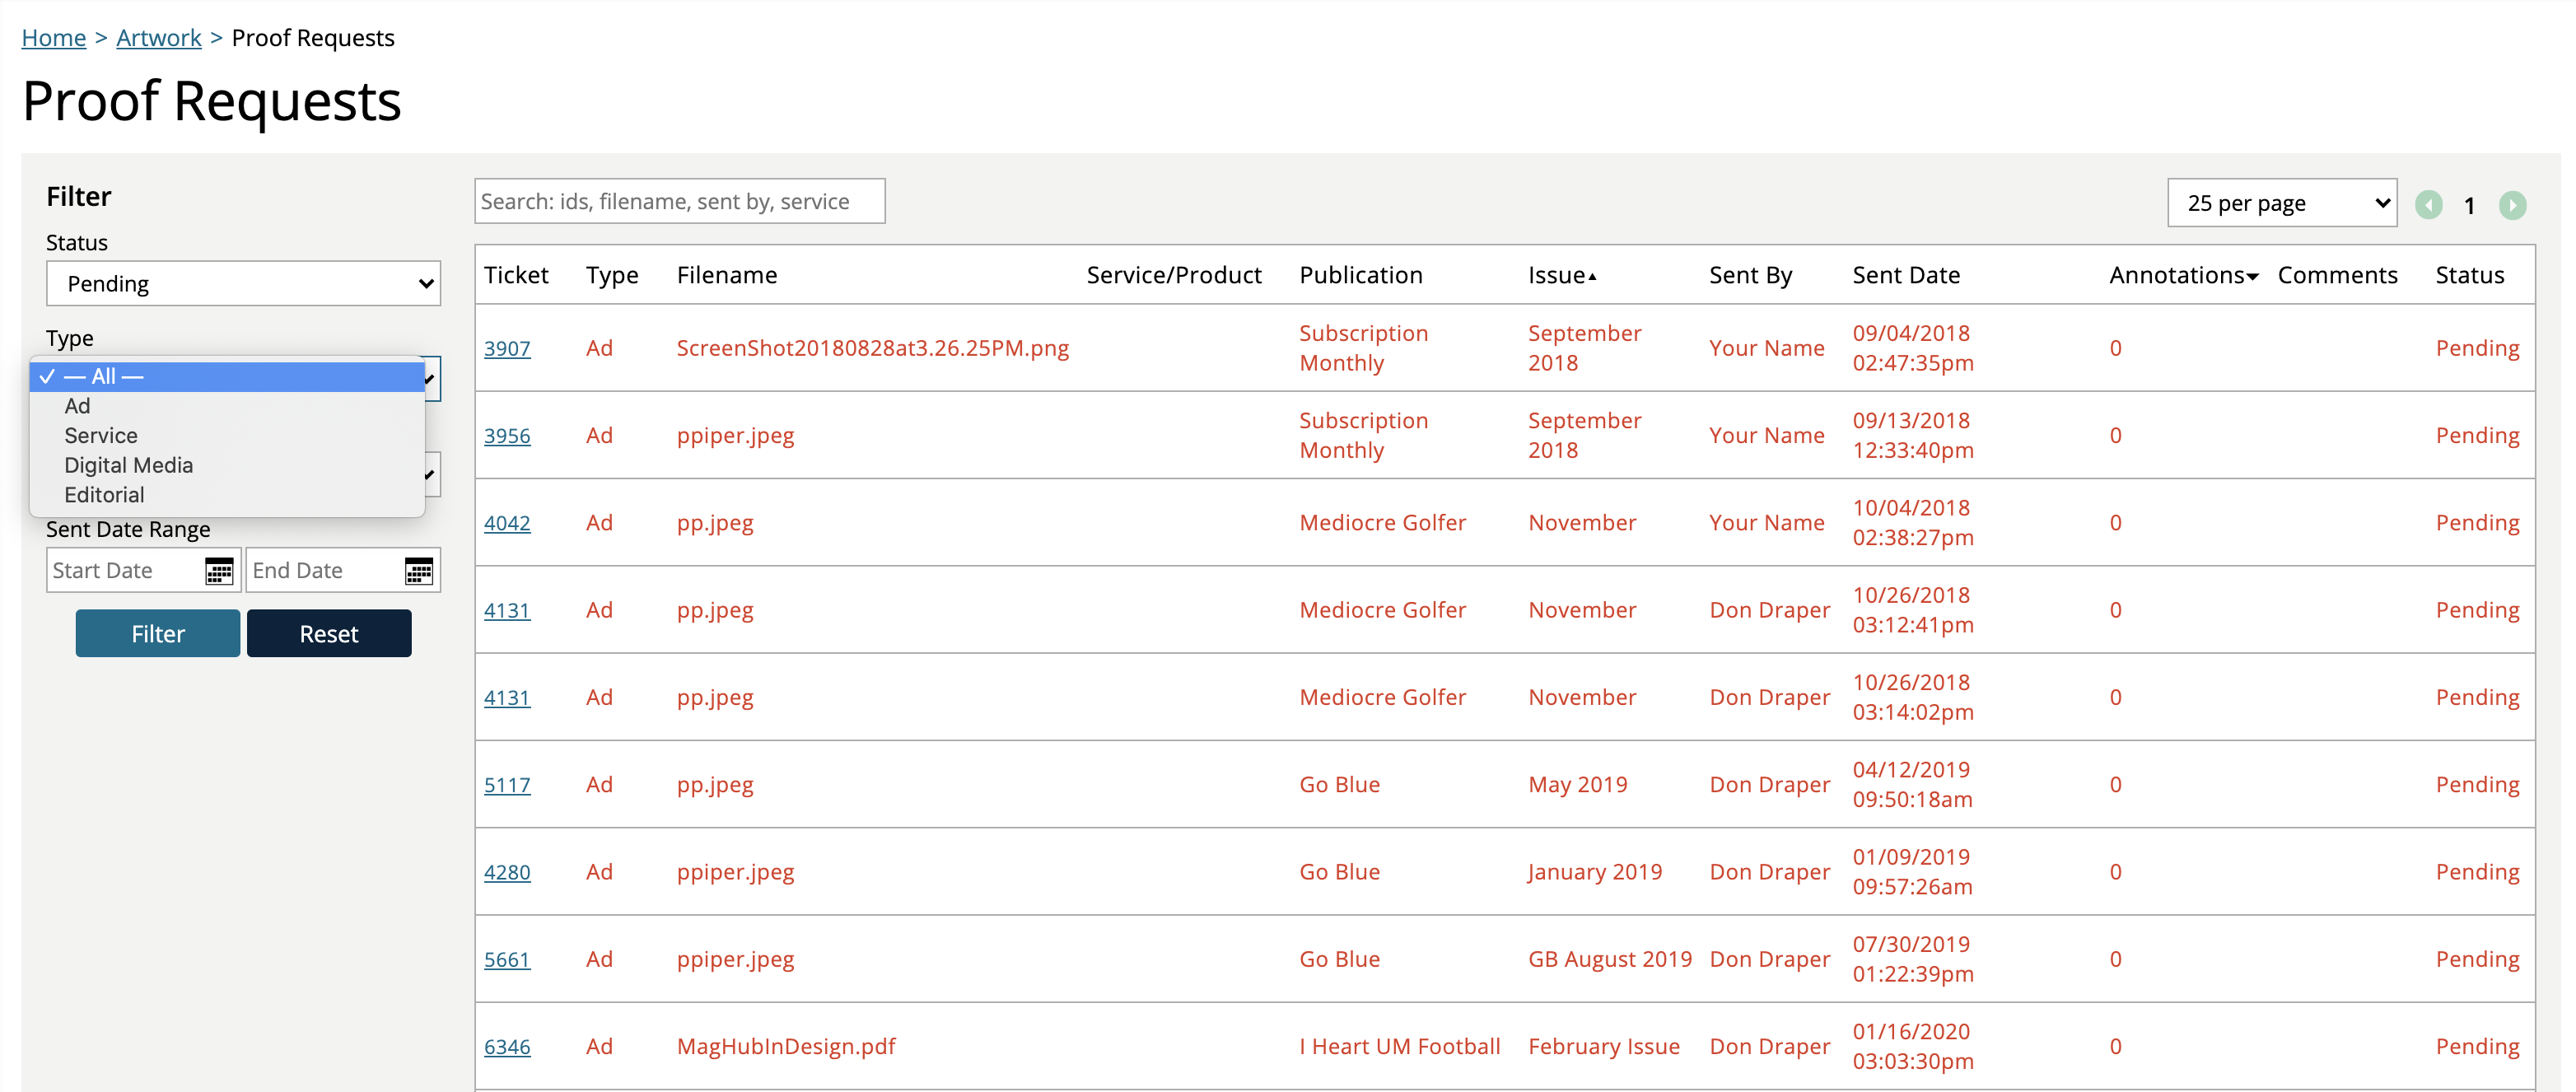
When logged into the client center, the contact can filter their pending proofs by status and type.
On the proof page, the contact can add annotations to the file, which will show up on the ticket in your system.
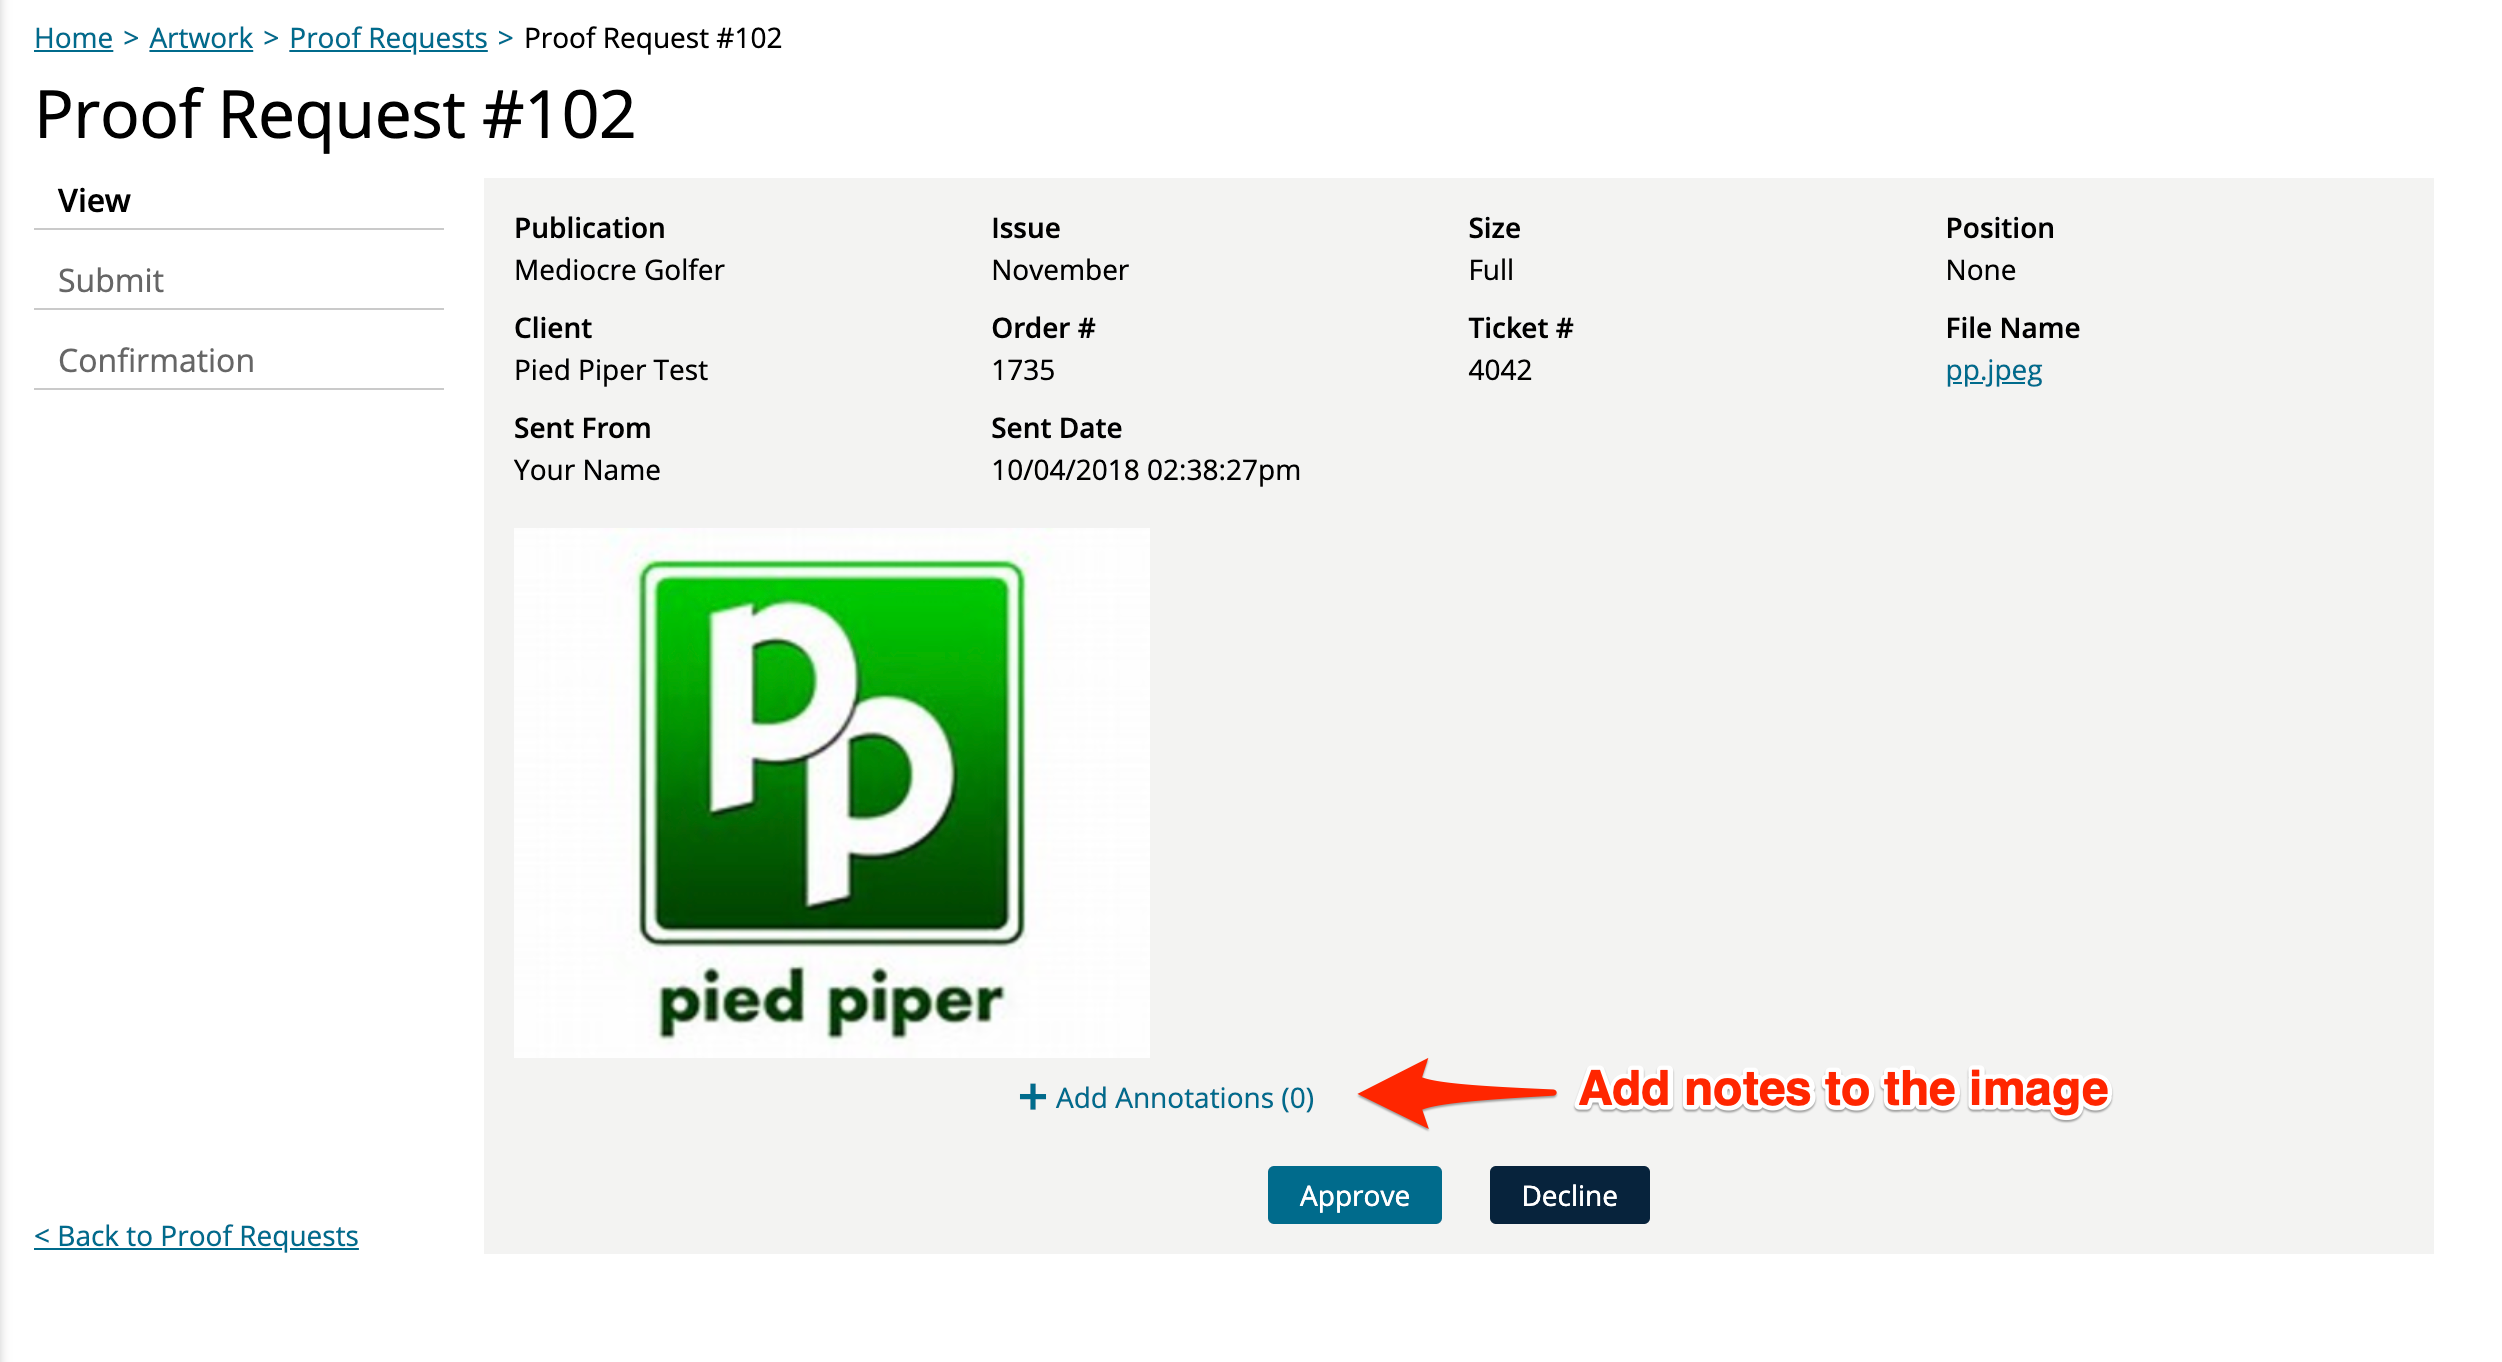
The contact can either approve or decline the proof; either option will update the status in your system