Project Widgets
It is important to track labor costs across all of your projects and make sure your team is spending time on profitable projects. The Billable Utilization widget makes this easy and accessible. The information in the widget is calculated by hours that your team submits in their timesheets for any billable projects. A simplified version of the Utilization Statistics page, this widget shows the billable hours and percentage utilization for each user over a certain time period. Access to this widget is determined by your permissions.
To add the widget to your dashboard, make sure you are in edit mode. Click Add Widget in the upper right corner. You will get a window that shows widget types. View the Projects type and select Billable Utilization.
By clicking on the gear icon in the upper right corner of the widget, you can name the widget and choose from various date ranges, including the current month, a selected time period, and a custom date range. You are also able to add this widget to your dock for easy access. Once you are done editing, click Save.
The widget will display the user’s name, their billable hours, and their utilization percentage for the selected time period. You can further sort your results by clicking on any of the table headers.
The data for this widget is pulled from the Utilization Statistics page, which you can navigate to by clicking on the ‘view details’ icon in the upper right corner of the widget.
The Project Widget shows you important project dates all in one place. You can see your upcoming tasks, milestones, and project due dates. The widget is configurable, so you can choose to only show tasks, milestones, and/or project dates.
Add the widget by going to the Dashboard, and while in edit mode, add a new widget and select the project widget. The widget can be set to view tasks weekly or monthly.
Important
Only projects that you are listed as a participant will show on the widget calendar.
After you have the widget you can choose to name it, select what project(s) you wish to show, and what project elements: tasks, sub-tasks, milestones, and projects. Clicking on the Project, from the calendar view, will open the details to the right, showing any Milestones and Tasks in which, you are a participant.
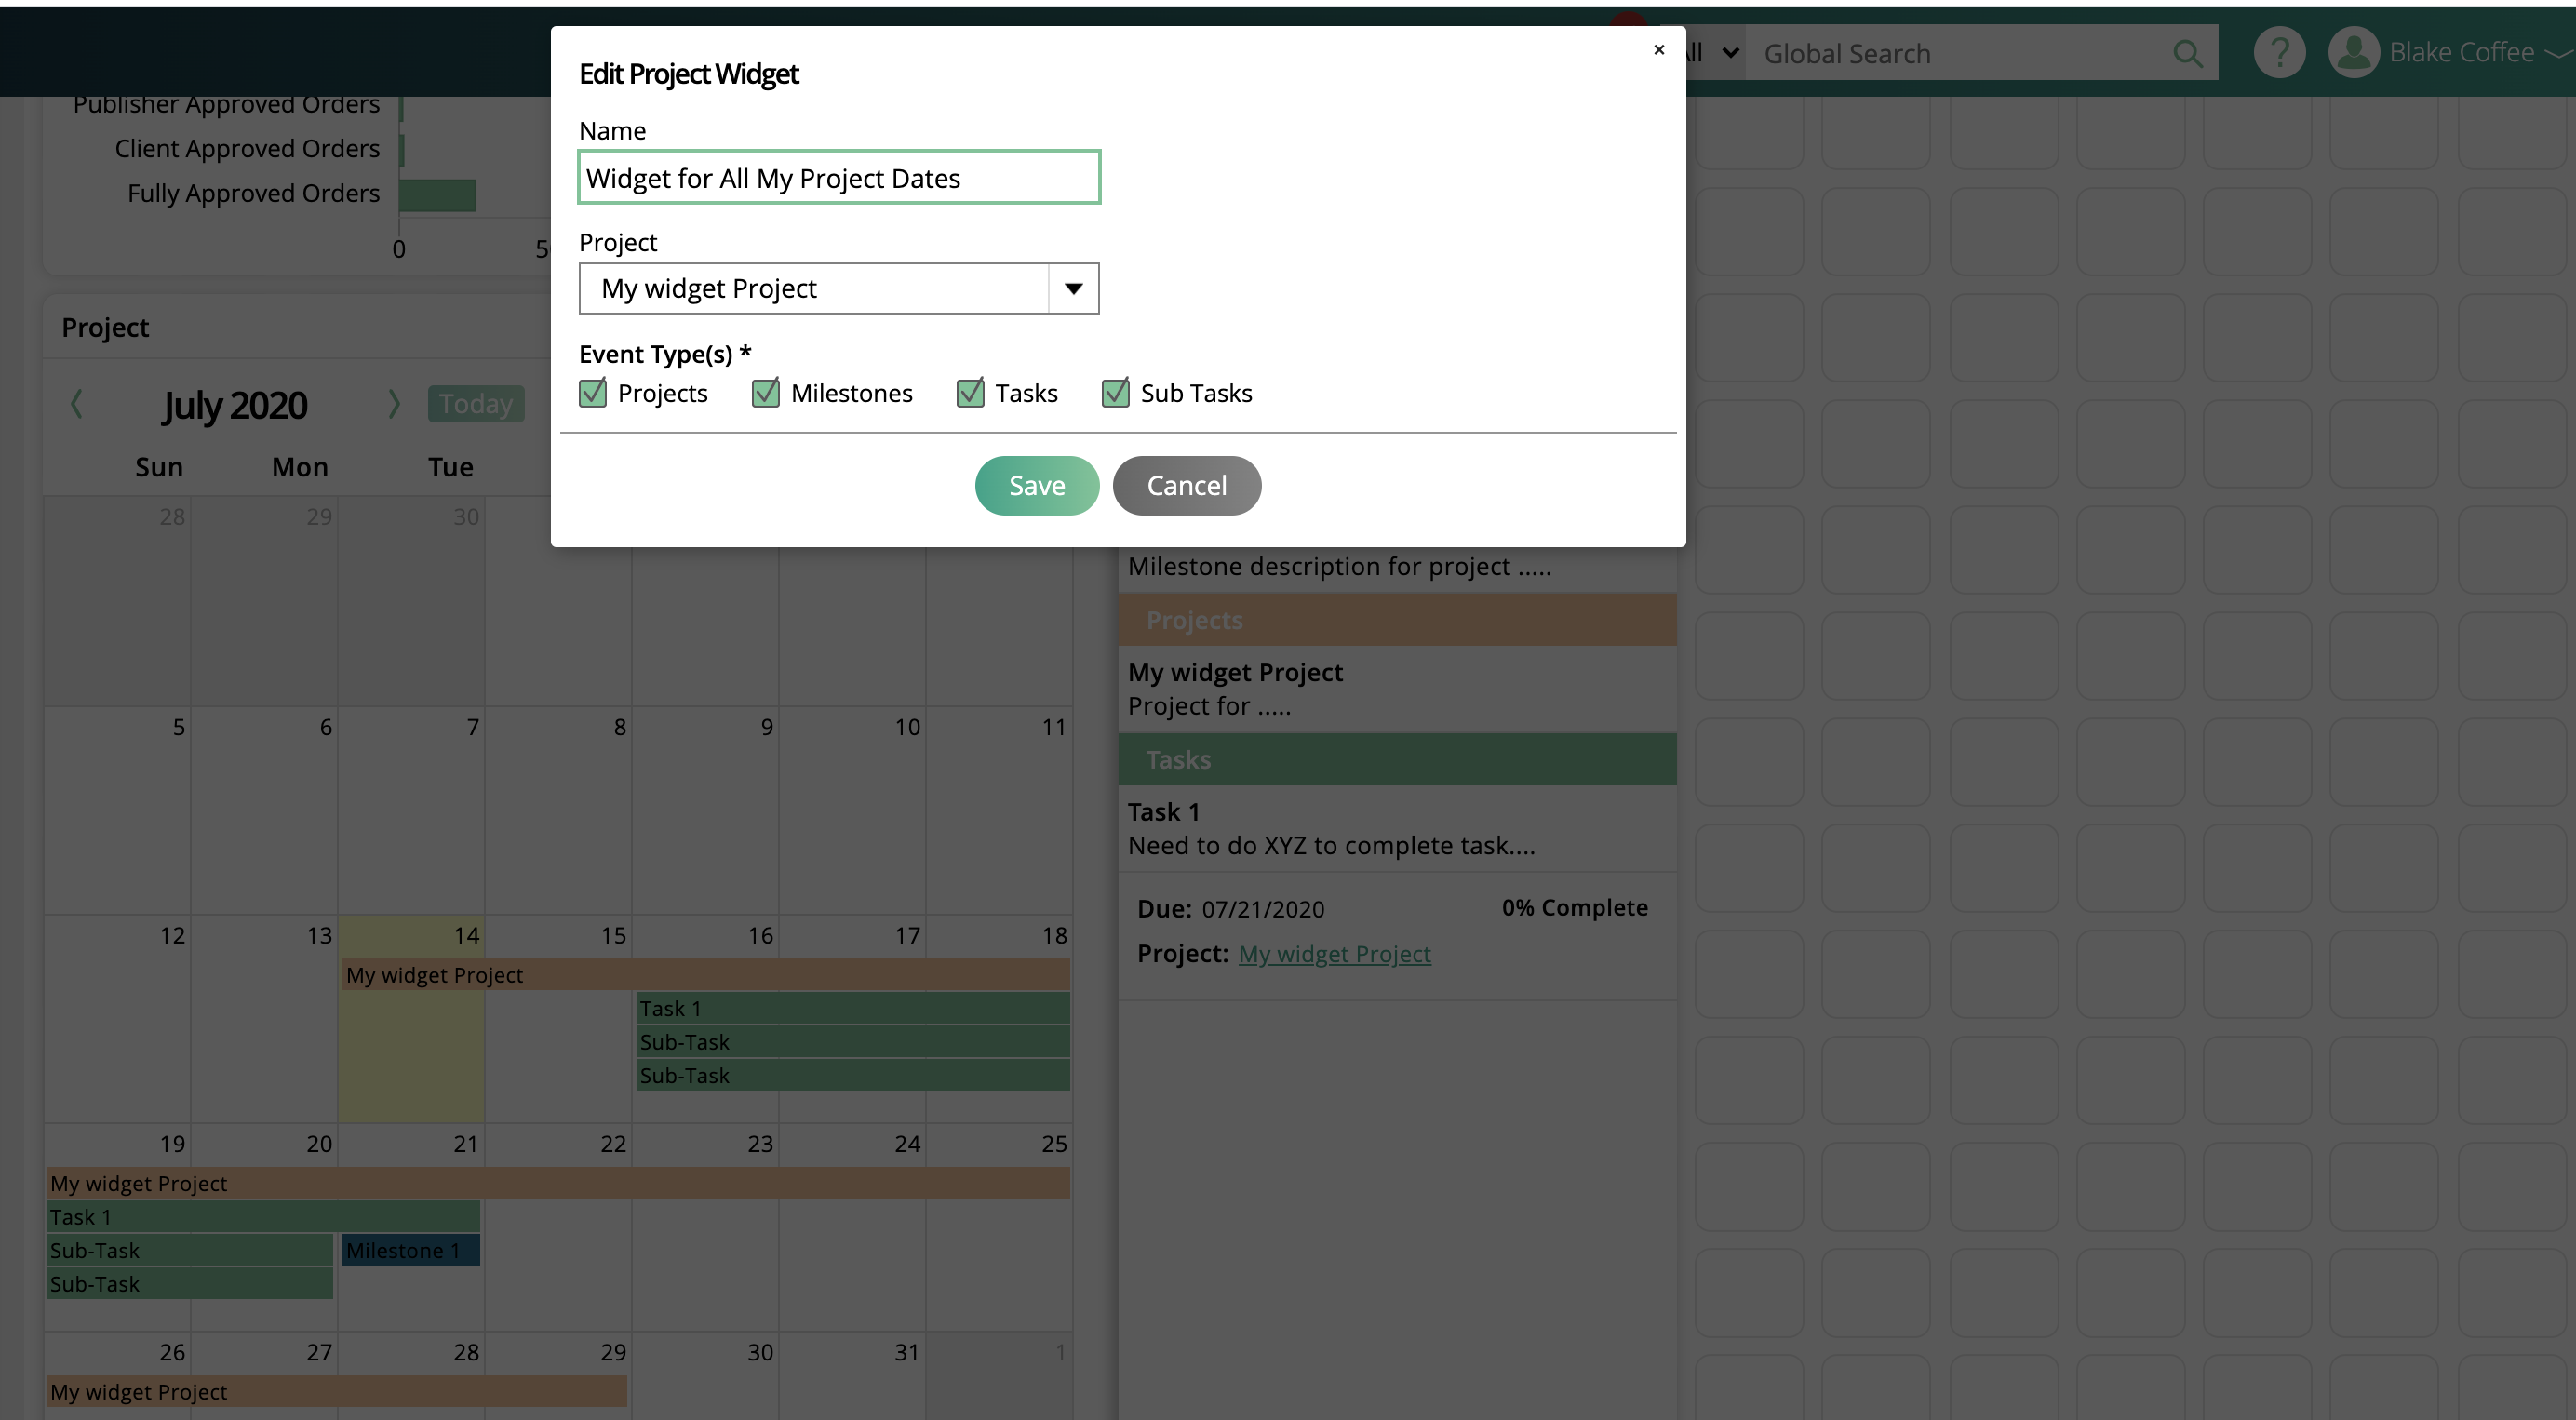
Tasks and sub-tasks show on the widget from the start to end date. You can click on the task to see the description as well as a link to go the task details on the project.
Milestones show up as a single date on the calendar. Click on a day to see details about the milestone as well as a link to go the milestone details.
Projects show up from the created date until the project due date.
Click on a day to see the project, milestones, and tasks for that day. You can see the descriptions, completion, and link to the project to see more details.
Click on the project name, this will take you directly to the project so you can add more tasks, sub-tasks, or milestones, descriptions, etc. Refresh the widget/dashboard to see the update.
Note
Adding a Project from the + Quick Add list has the same effect, you just need to refresh to view on your Dashboard.
The Project Participant Requests widget lists any pending requests from your team to become a participant of a project. As a project manager this can be extremely helpful, as you can see all of the requests in one location and approve or reject the request right from the widget.
To add the widget to your dashboard, make sure you are in edit mode. Click Add Widget in the upper right corner. You will get a window that shows widget types. View the Project type and select Project Participant Requests.
You can name the widget and add it to your dock by clicking on the gear icon in the upper right corner. Click Save when you are finished editing.
The widget shows the user who made the request and for what project. If you click on the request it will take you directly to the project page.
From the widget, you can either approve or deny the request by clicking on the checkmark or the x icon.
When approving a request, the ‘Accept Project Access’ pop-up will appear and display the tasks that the user requested to be assigned to. You can then choose which tasks the user is actually assigned to.
When denying a request, you will see a pop-up to confirm the action.
Access to this widget is determined by your permission. Users can only request access to a project if they have read access to all projects.
The Project Task widget provides you with a way to view and interact with tasks from all of your projects in one convenient location. You will be able to see the status and completion of your tasks, as well as edit them and link directly to your projects from the widget.
To add the widget to your dashboard, make sure you are in edit mode. Click Add Widget in the upper right corner. You will get a window that shows widget types. View the Projects type and select Project Task.
Click the gear icon in the widget’s upper right corner to configure it. In the edit popup, you can add it to your dock for easy access, give the widget a name, and choose which type of date range you would like to use. Click save when you are finished editing.
By default, the widget will show all tasks due on or after the current date, but you can use the date ranges to change which results display. The date range chosen will display at the top of the widget for easy reference.
Current Tasks will show all tasks for which the current date is somewhere between the task’s start and end date. It will also not include any completed tasks.
The Date Range filter will show all tasks where the due date of the task falls within the range.
The Date Period option shows all active tasks where the current day or week falls between the task’s start and end dates.
The tasks will show up in a table format. Each task will display the project name, task name, task status, due date, and completion percent. Use the arrow icon on the task to display a dropdown with more information, including company name (if set on the task), and task participants. The company, project, and task names are all quick links that bring you to the corresponding page in the system.
Like the normal project task display, the widget will sort tasks into overdue, in progress, and to-do task buckets depending on the task’s dates and completion. By default, the tasks will be sorted in the widget by due date.
You can easily update the task status or completion percent directly from the widget by using the dropdown menus.
Use the ellipsis icon on each task to edit or delete the task, and add or edit the task notes.